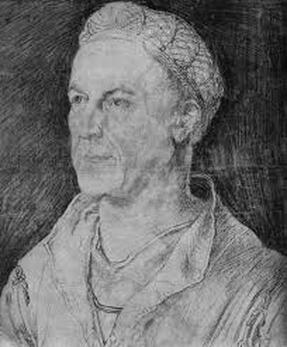
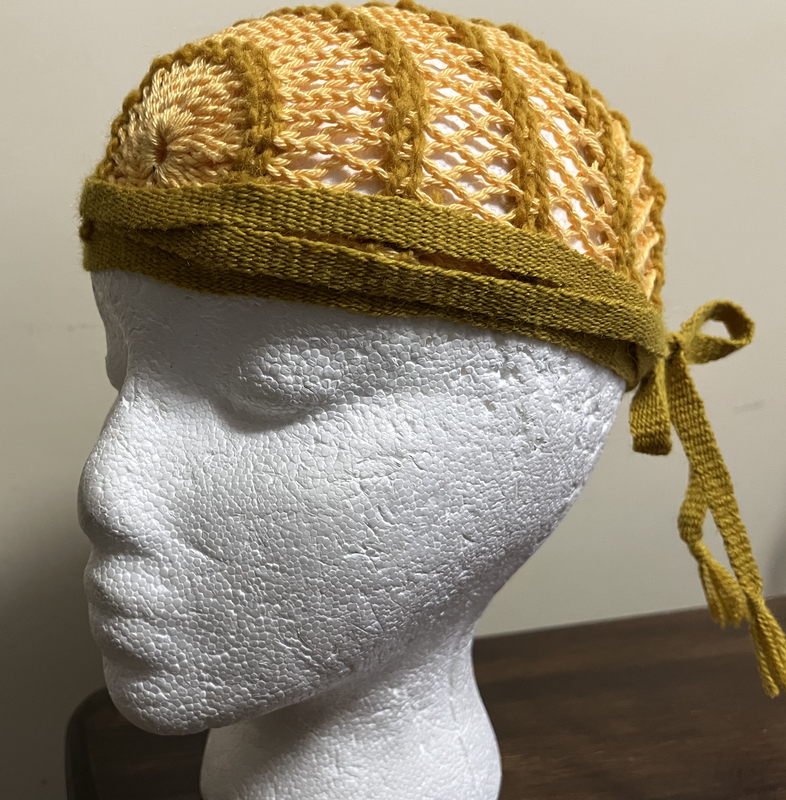
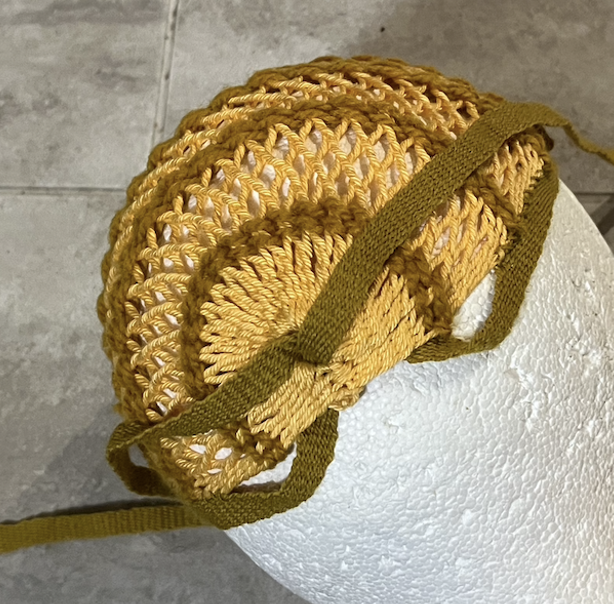
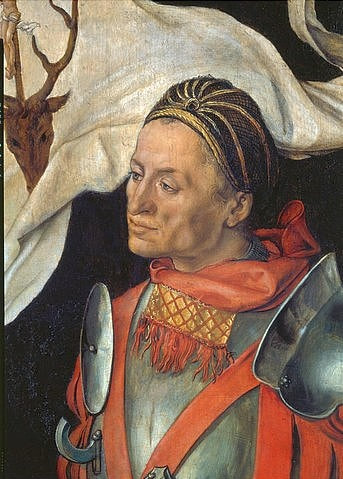
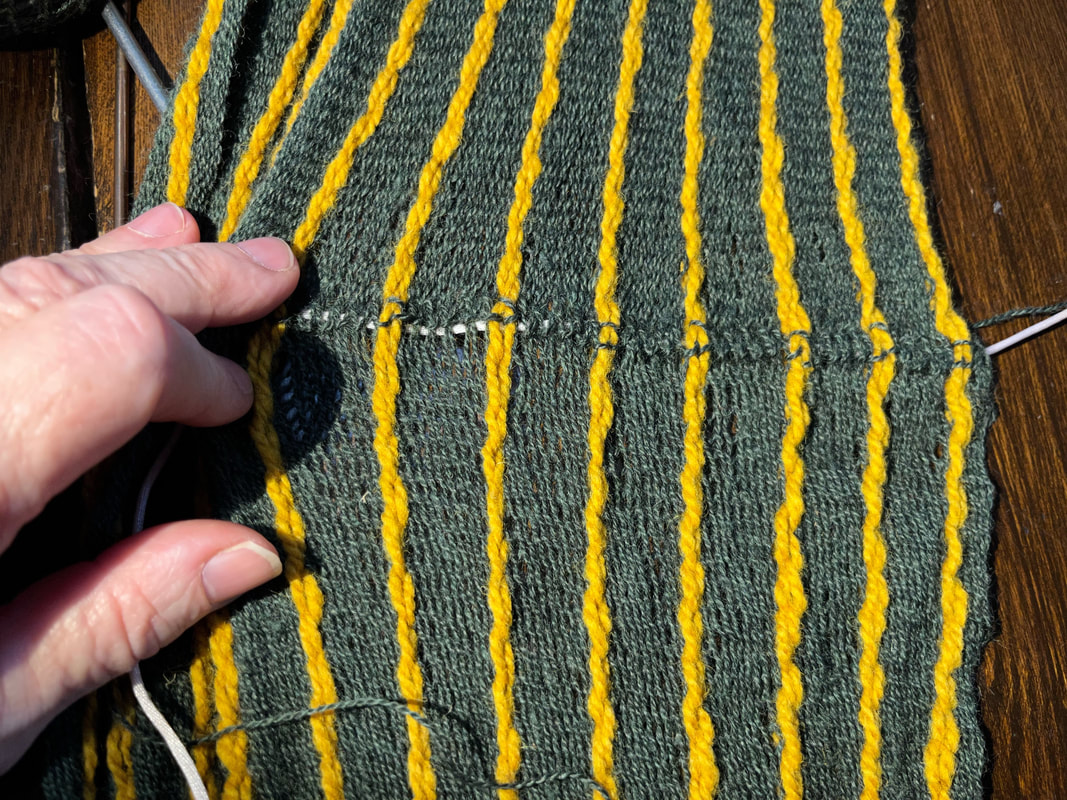
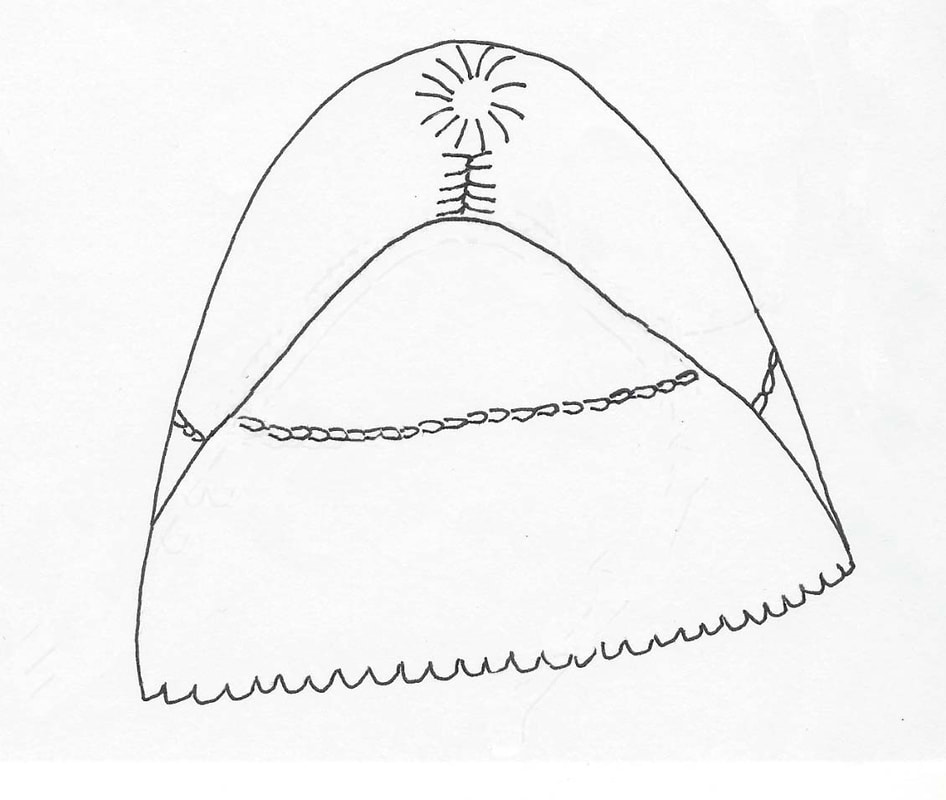
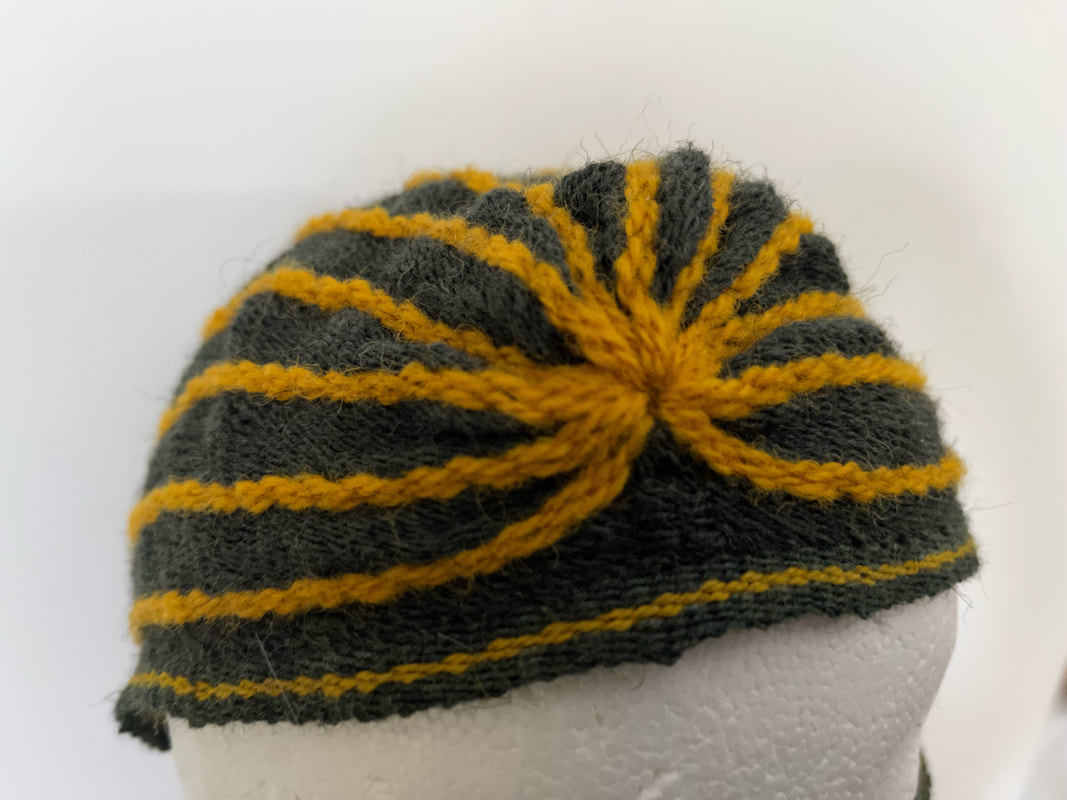
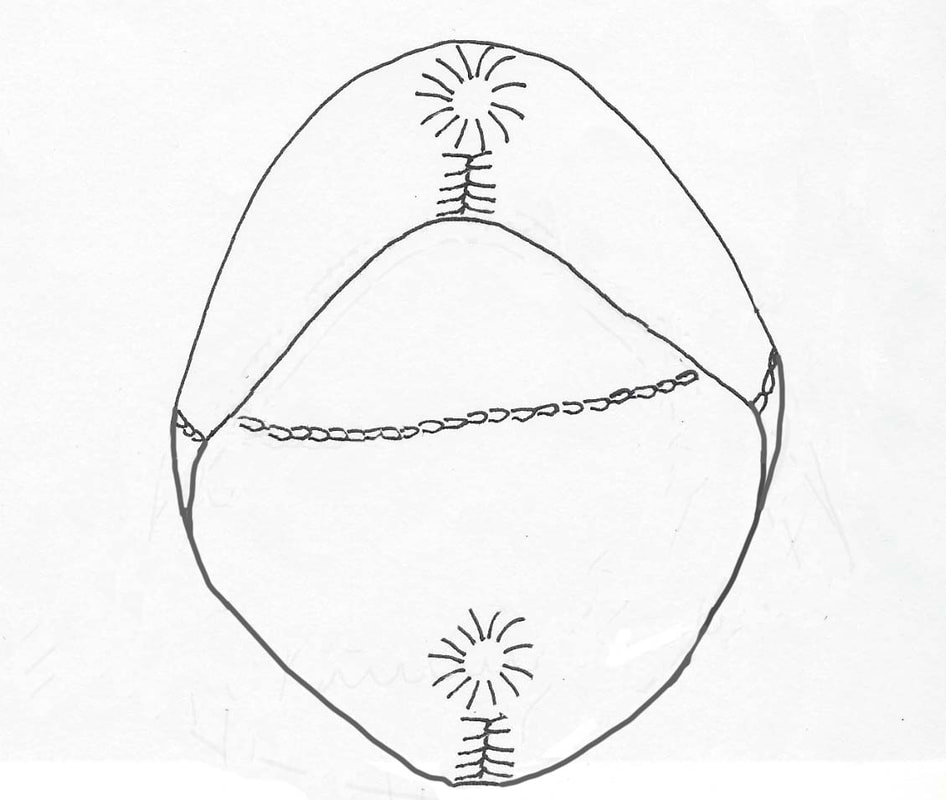
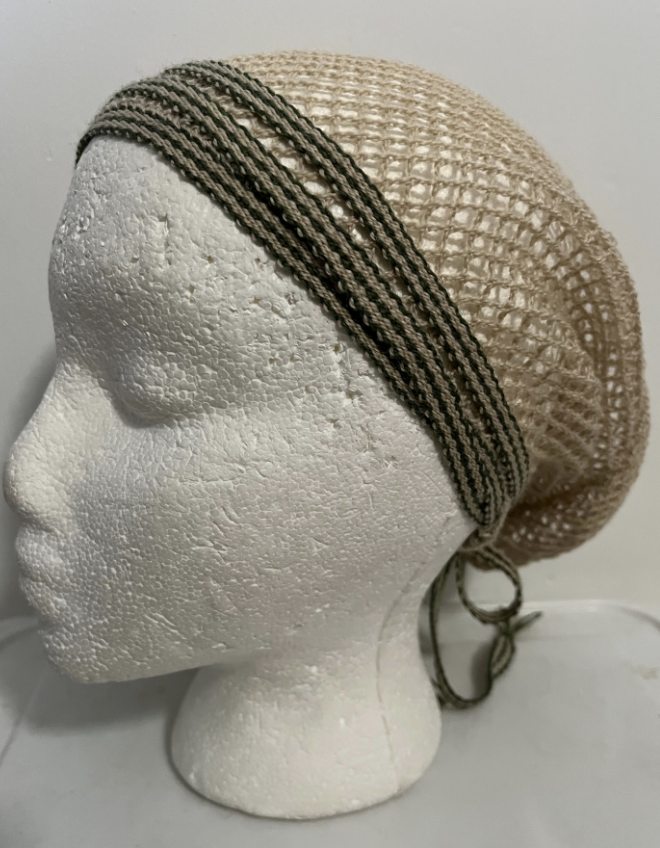
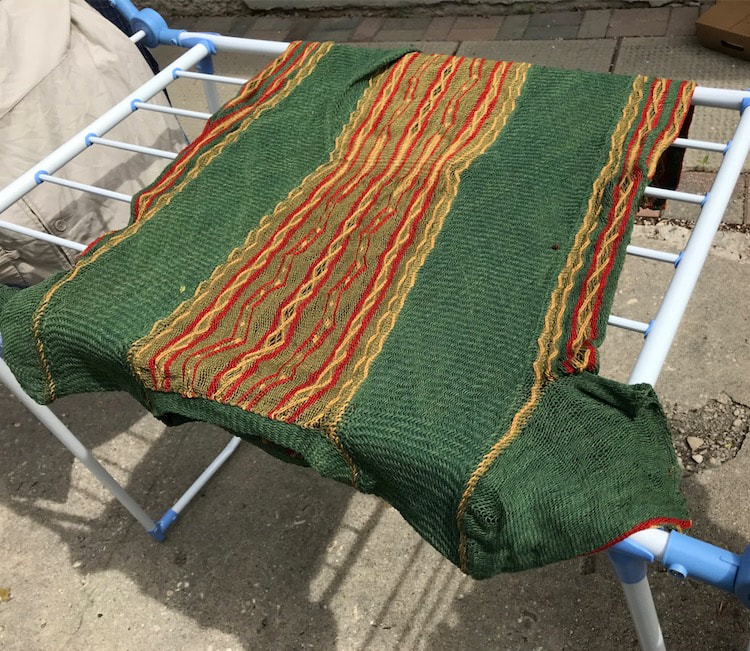
The portrayal of Jacob Fugger by Albrecht Drürer leads me to think that Mr Fugger wore a sprang bonnet. I tried to make a similar bonnet. I interpreted the heavy lines in the bonnet as lines of horizontal twining in a sprang bonnet. When I tried this myself I found that there may be a reason for the twining in the sprang bonnet, as you will see.
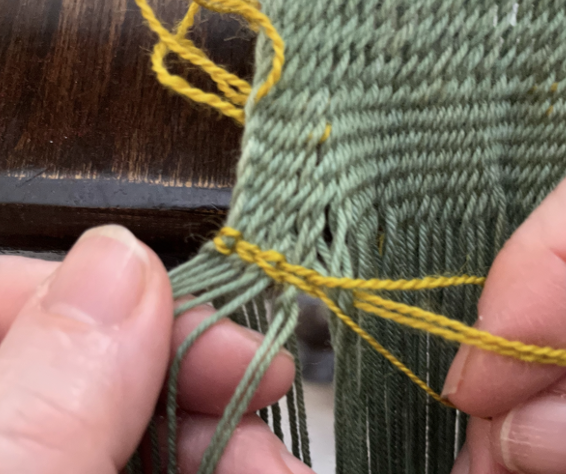
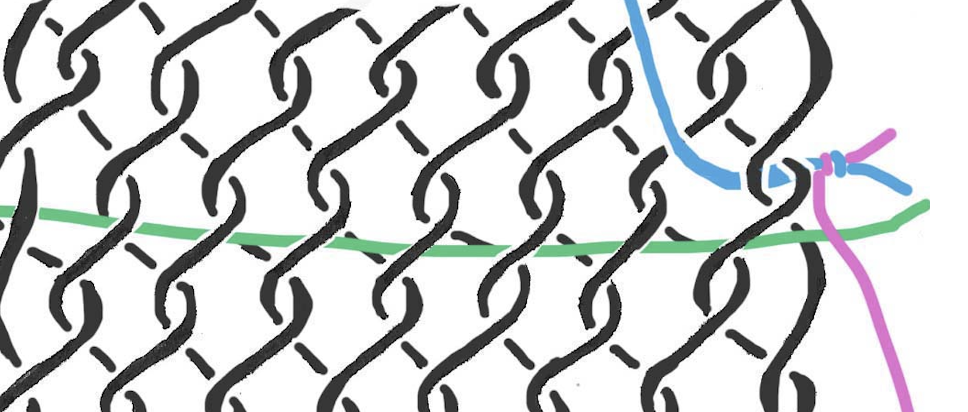
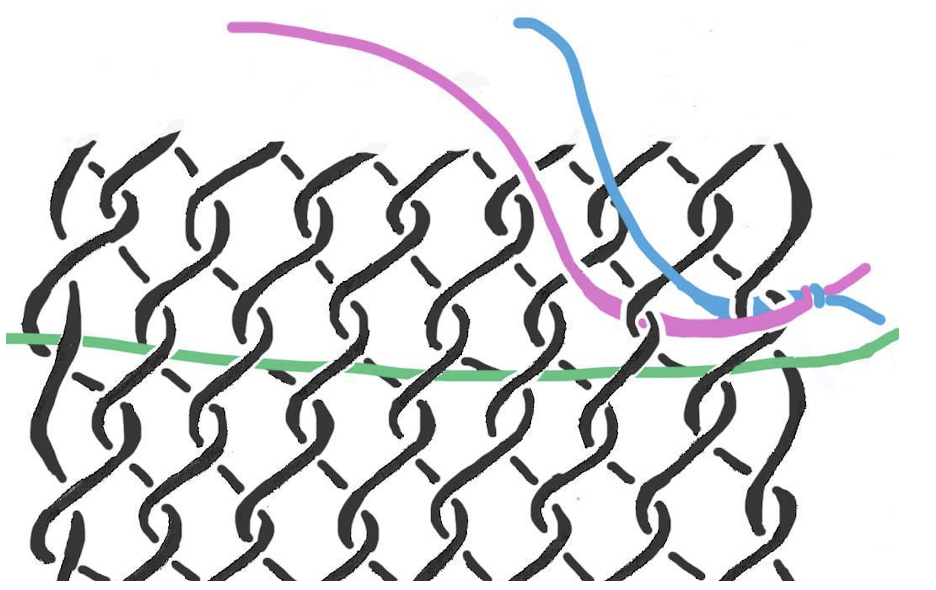
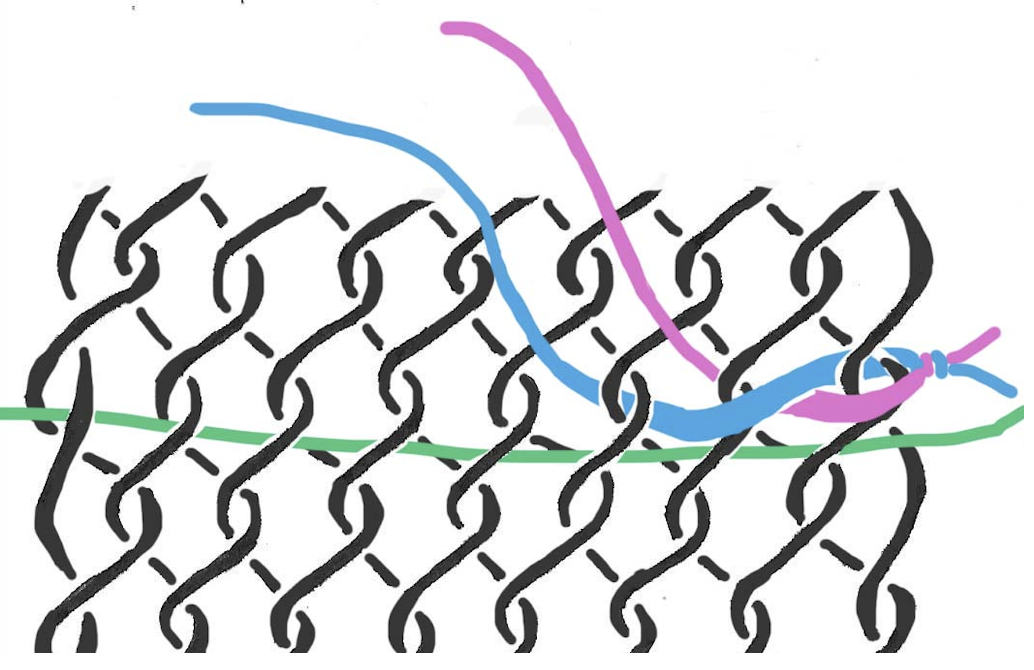
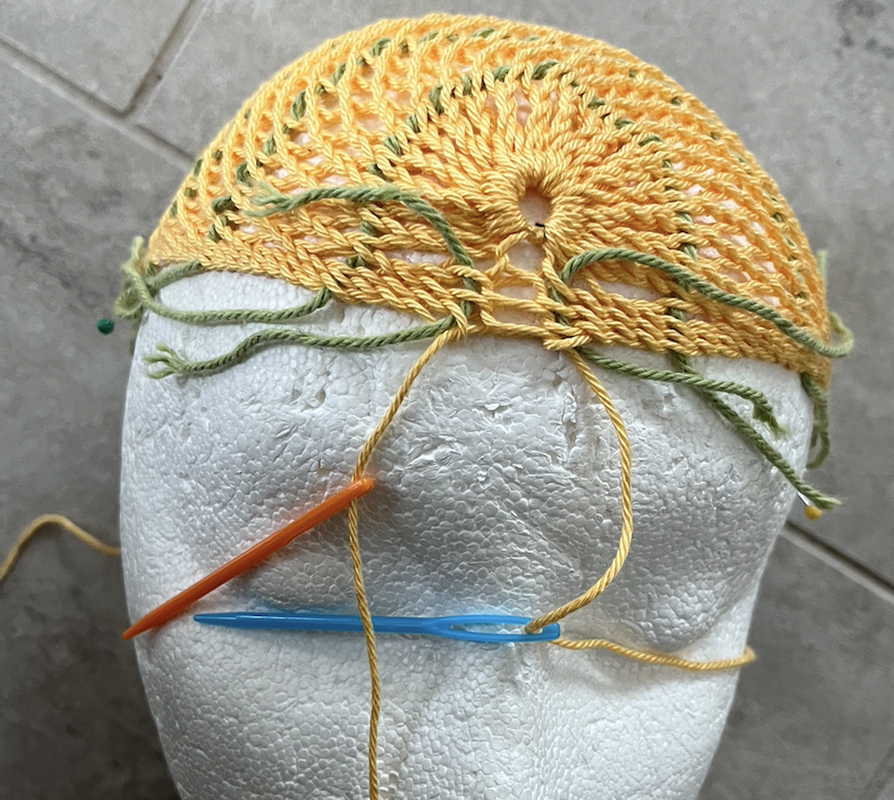
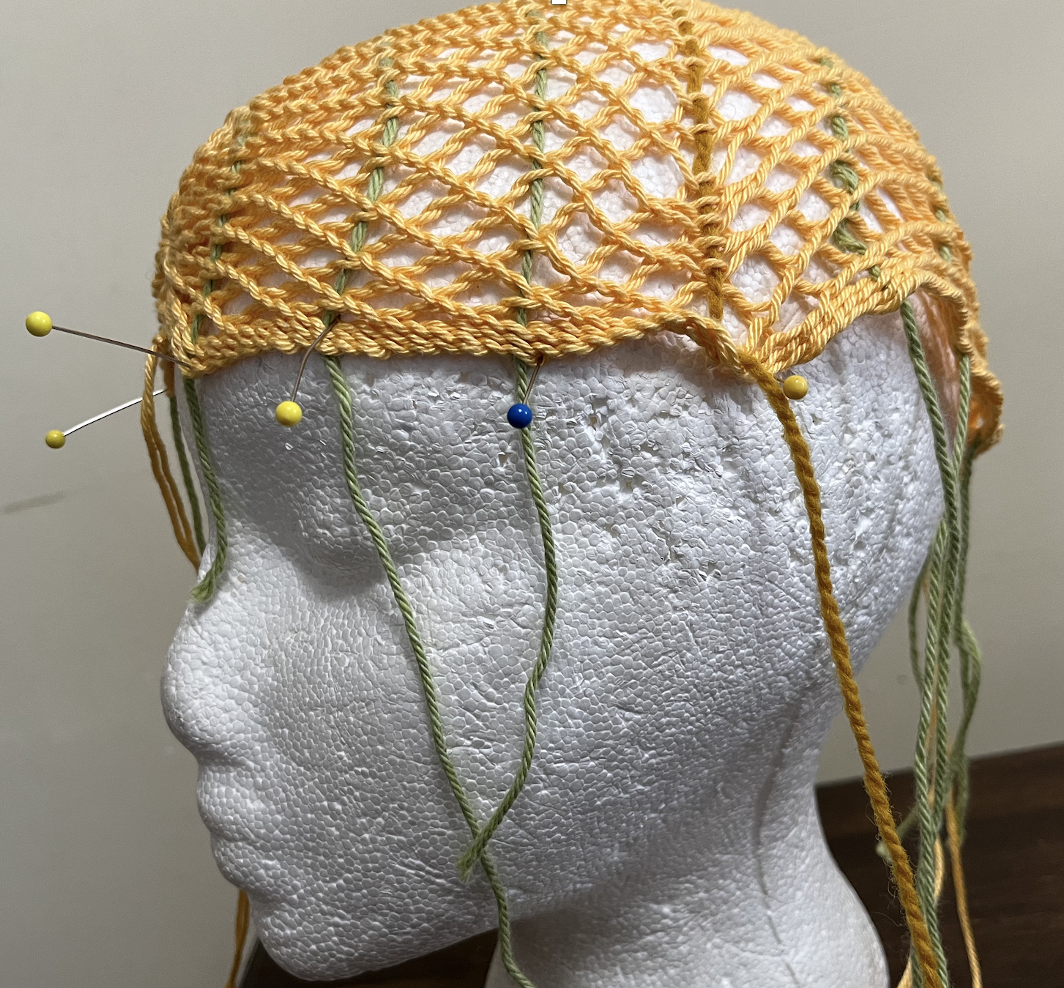
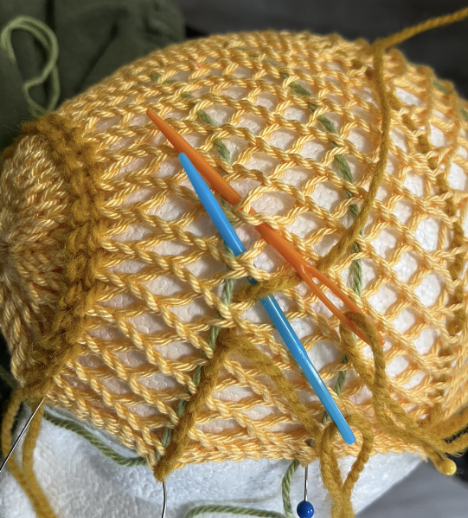
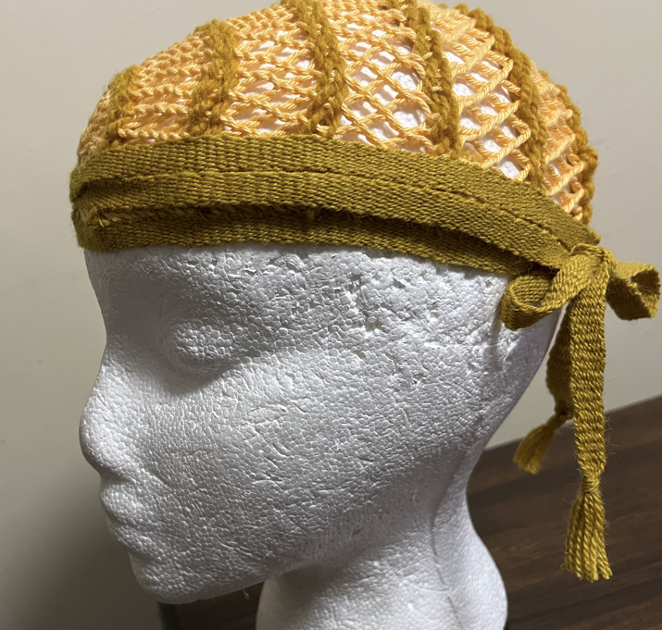
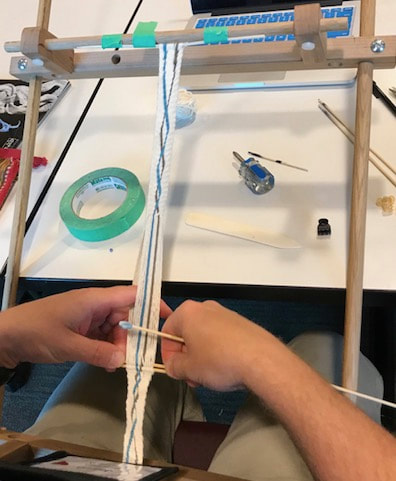
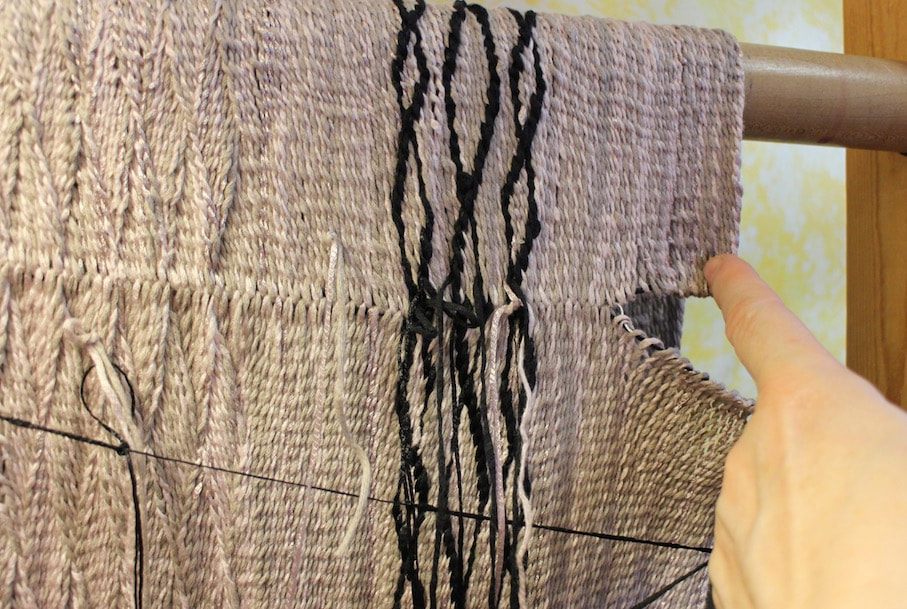
Thinking about approaches to incorporate horizontal twining into the sprang cloth, I thought of two ways to do this. One way (method #1) is to create a line of weft twining as I created the cloth. The other way (method #2) is to add the twining stitches after completing the sprang. The twining stitch does not have the stretch of the sprang cloth. Maybe, indeed, this was the whole idea of the twining line. This risk of method #1 is that the line of twining is too narrow for the desired width of the bonnet. I found method #2 to be more effective, in that I could place the sprang cloth on a head shape (styrofoam head) and then work the twining stitch at the desired tension, creating the desired width of the cloth, fitting the bonnet to the head. How did I work the twining stitch?
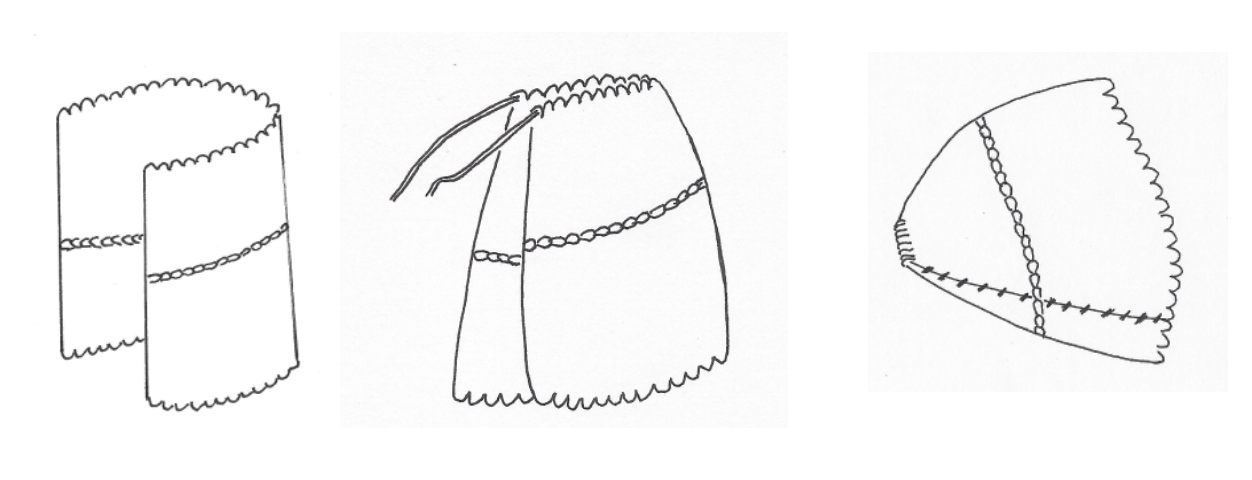
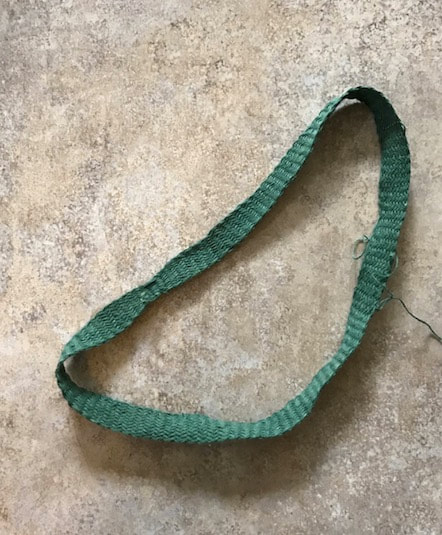
How do you tie the bonnet on the head? Two approaches come to my mind.
If you want the ends of the band to pass all the way around the head, then I would pass both ends through the circle at the back of the head.
0 Comments
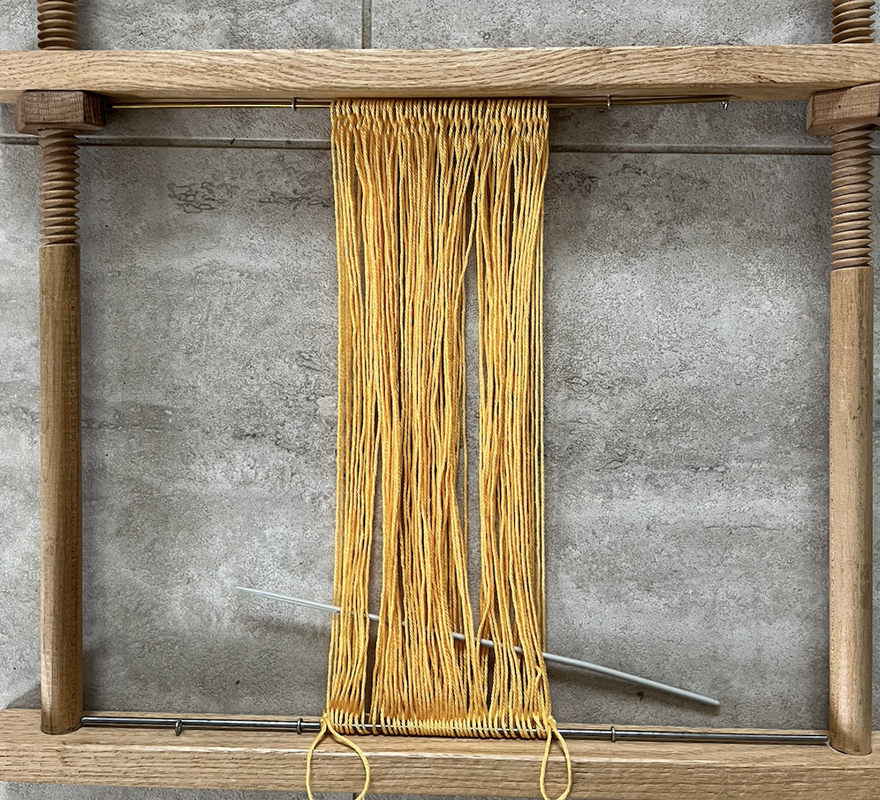
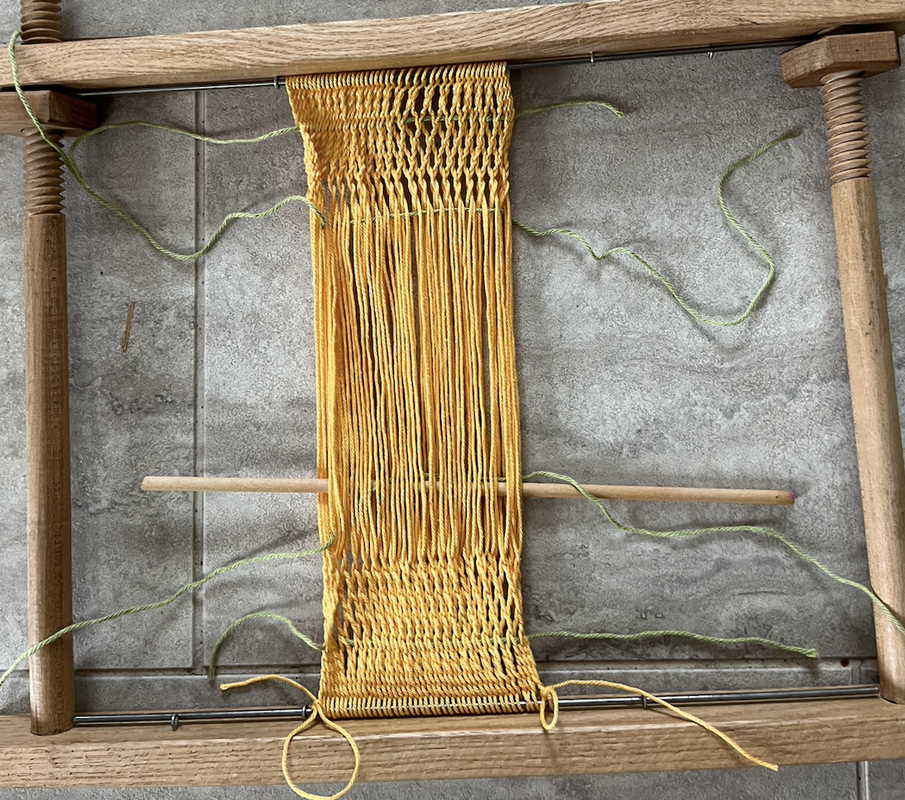
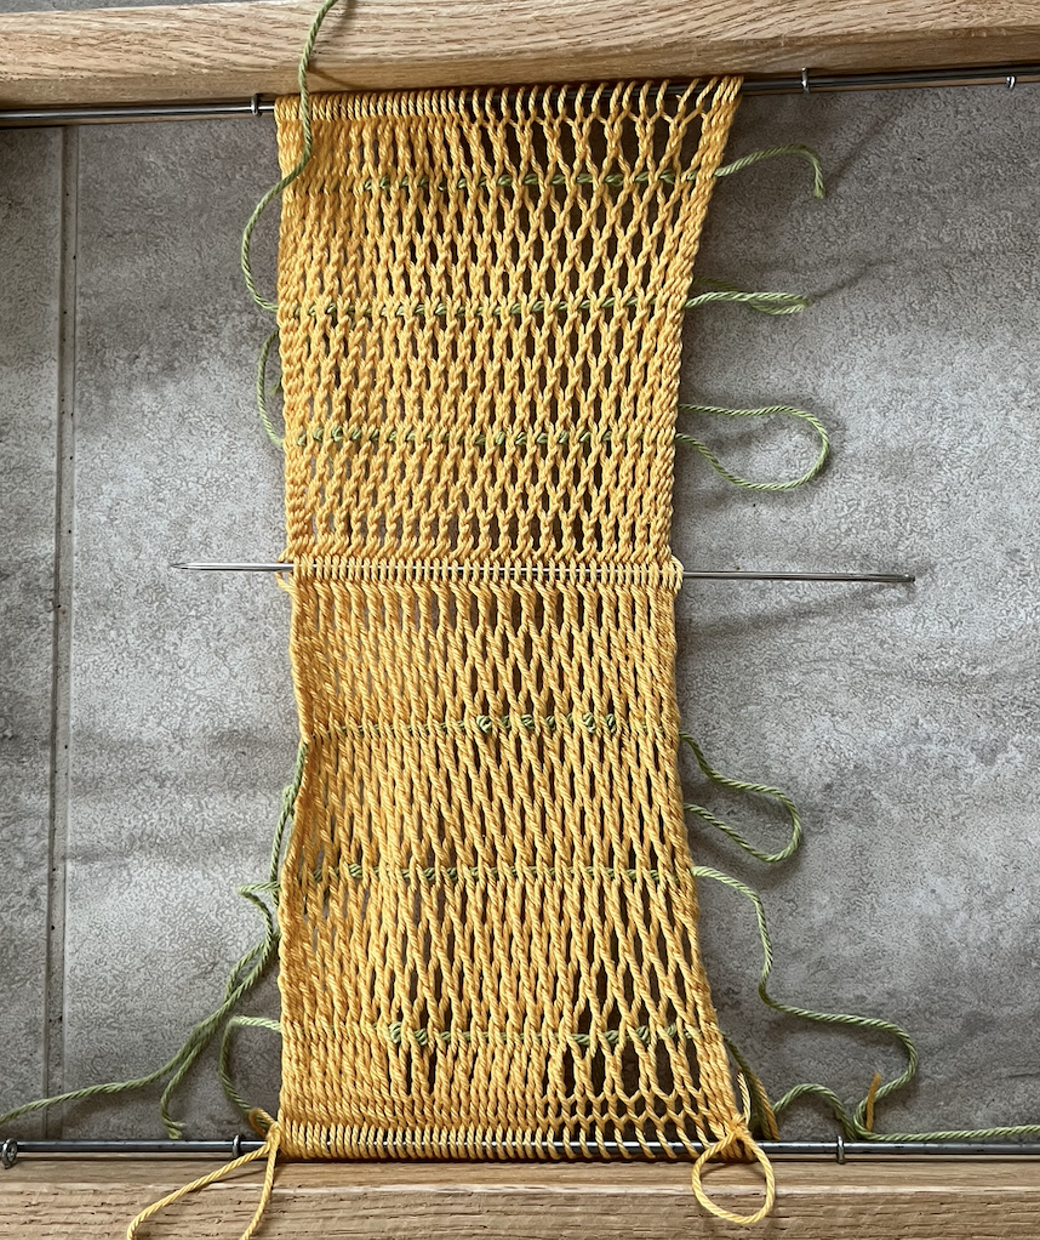
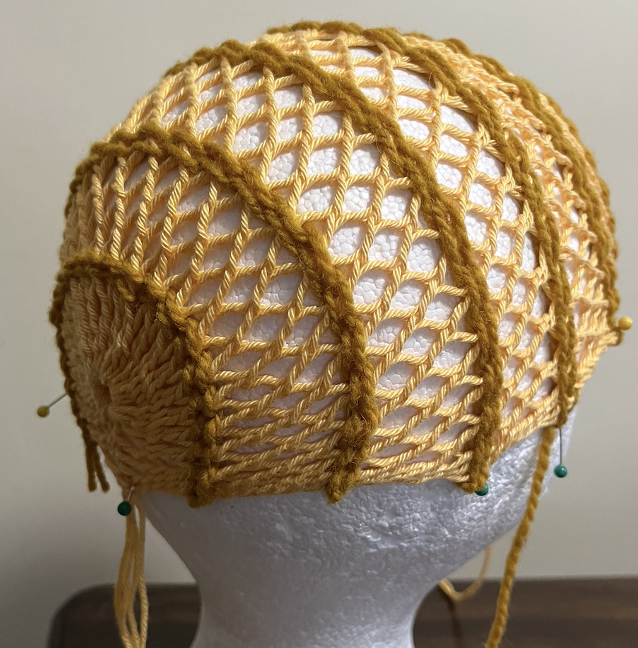
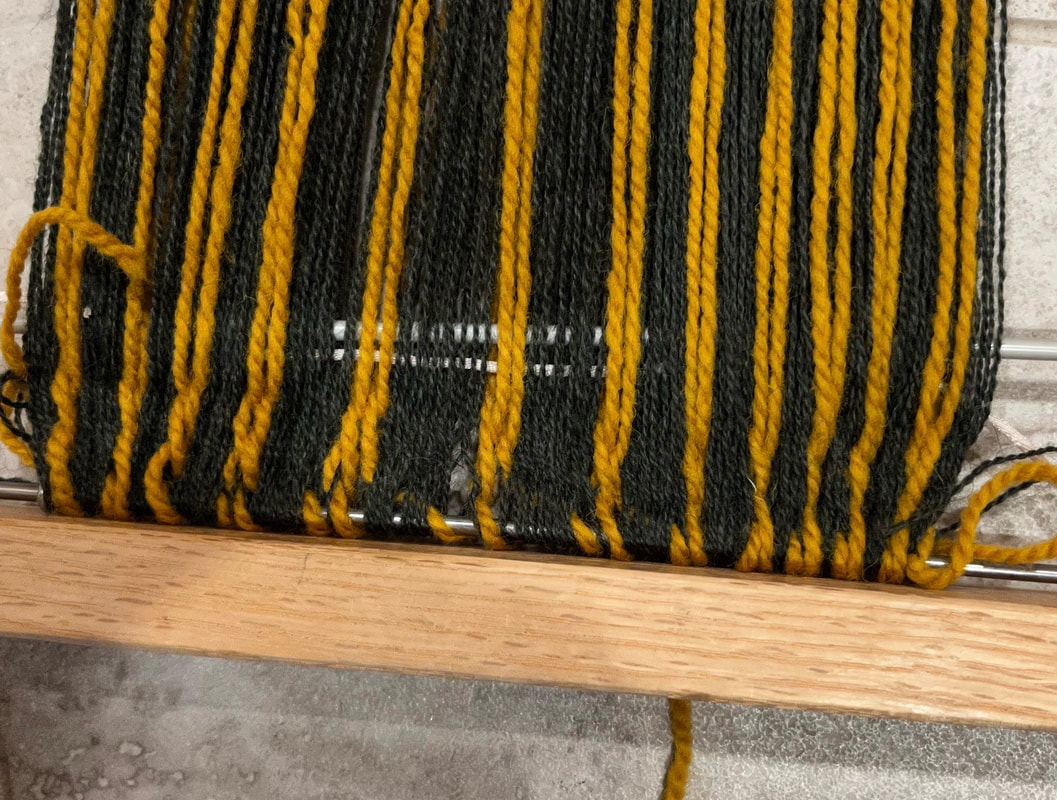
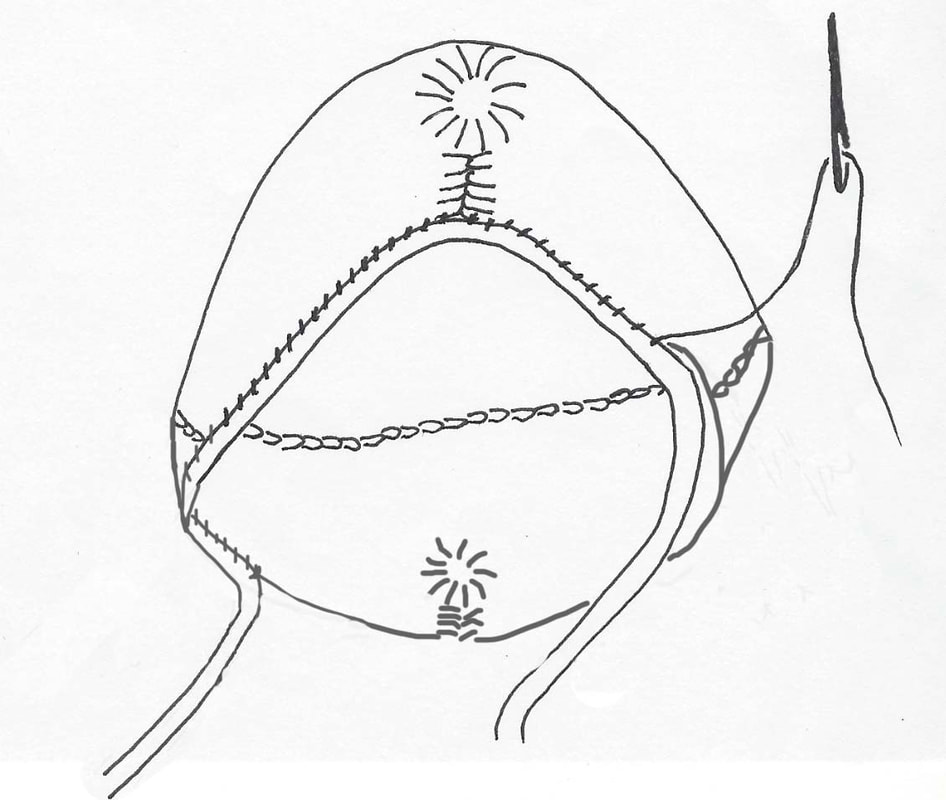
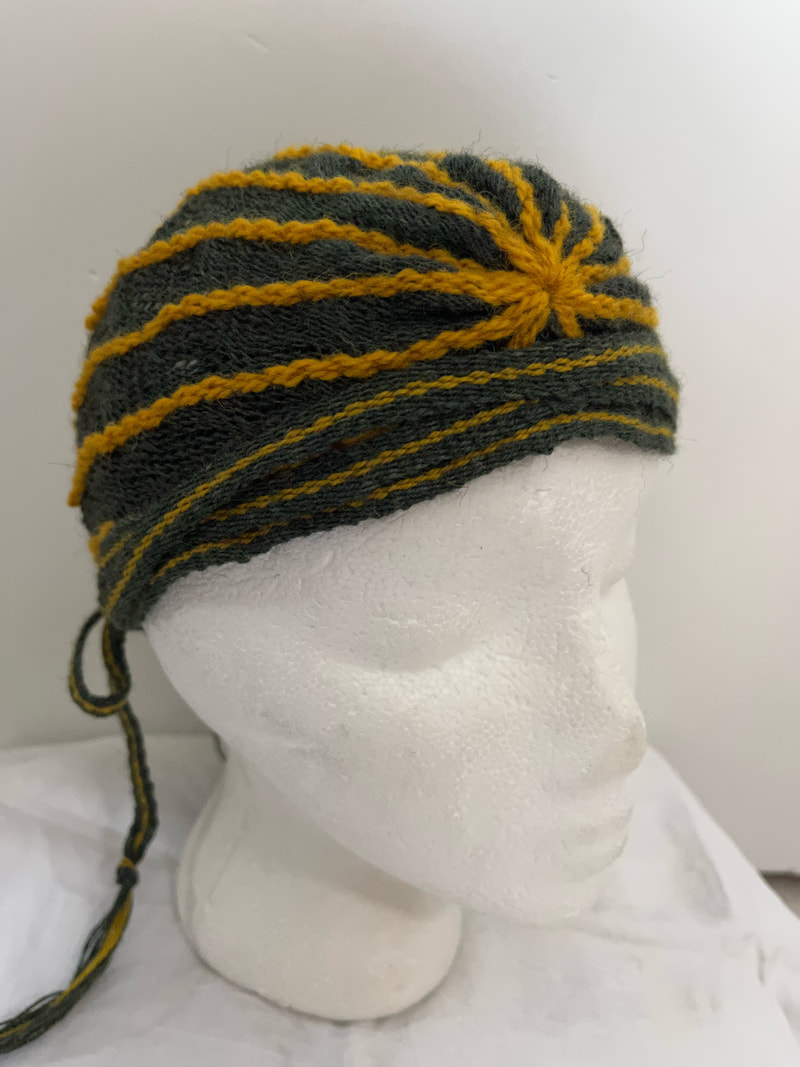
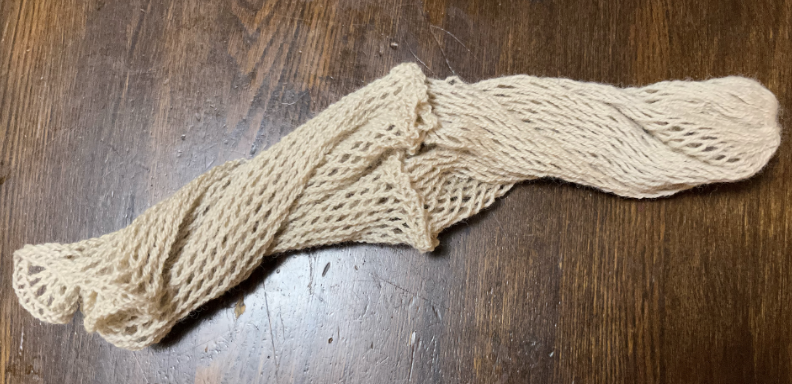
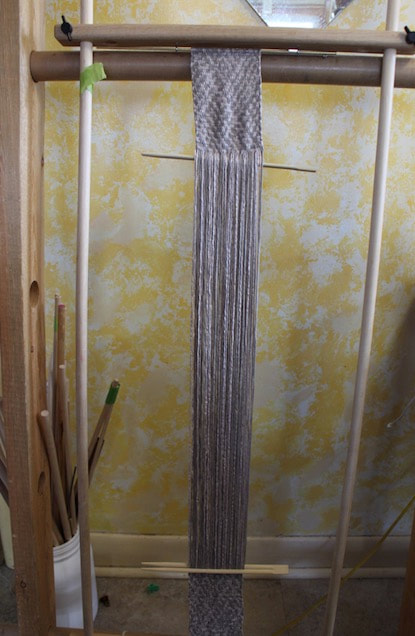
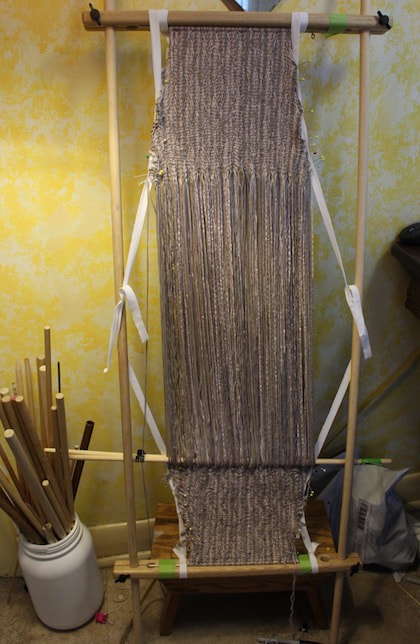
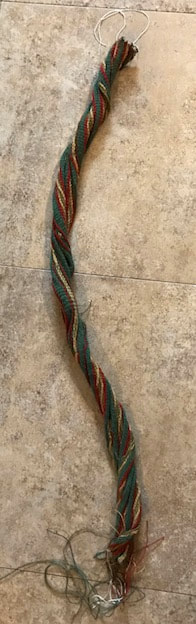
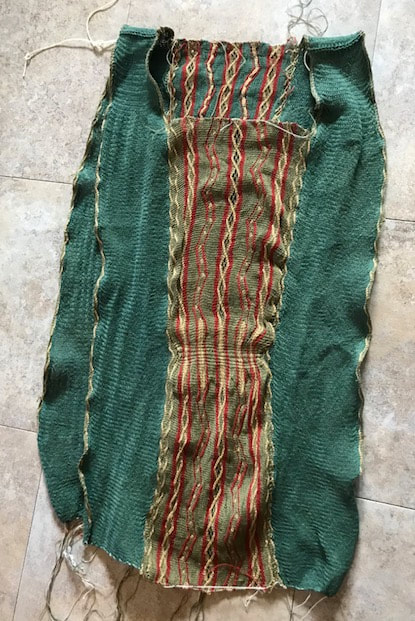
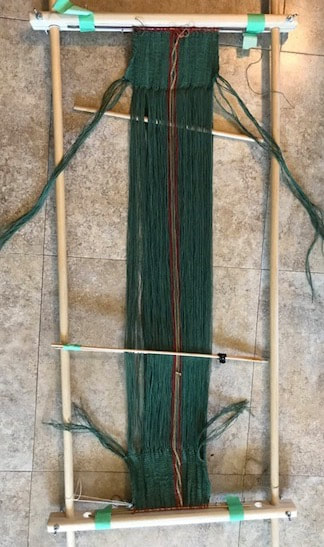
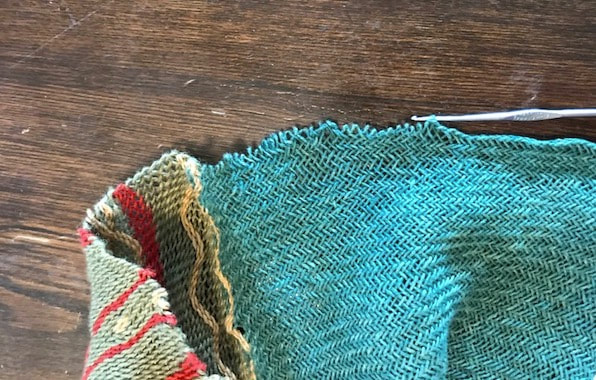
To make such a bonnet, I set up a 16 inch long (41cm) warp of a dark green 2/8 wool and a worsted weight yellow, alternating 10 green and 2 yellow, ending with 10 green.
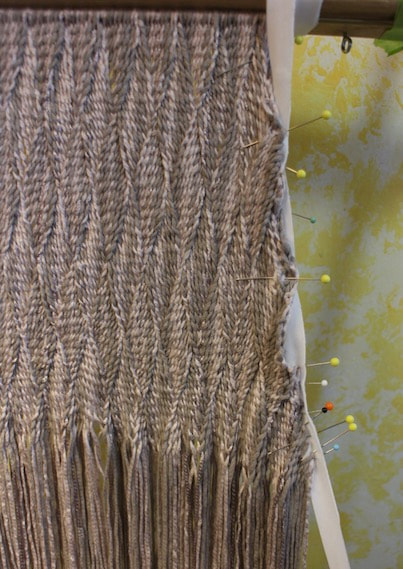
I worked the green threads in an interlinking stitch, and the yellow threads in a vertical twining stitch. I described the vertical twining in my post of Feb 2, 2023.
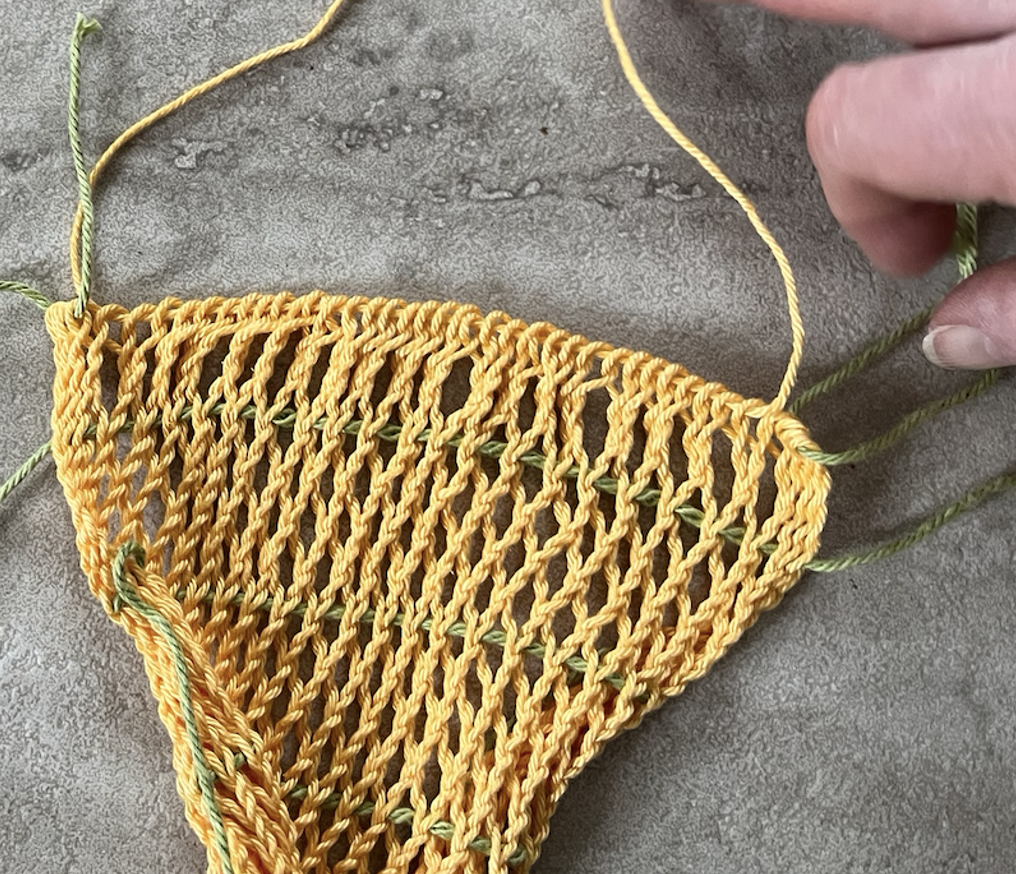
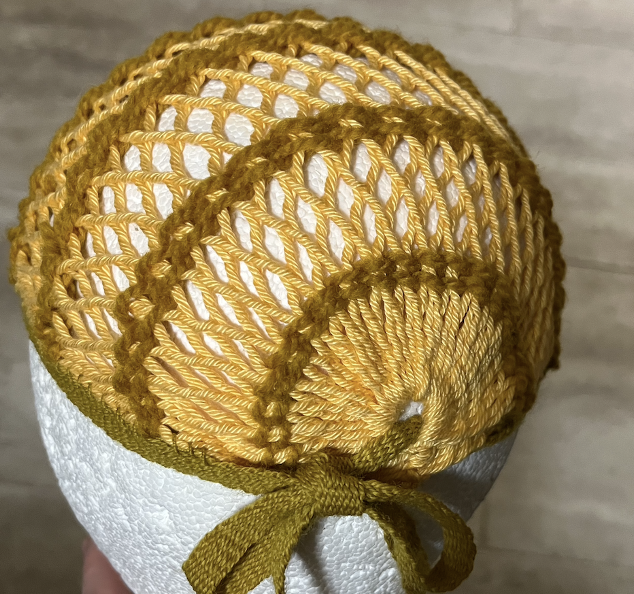
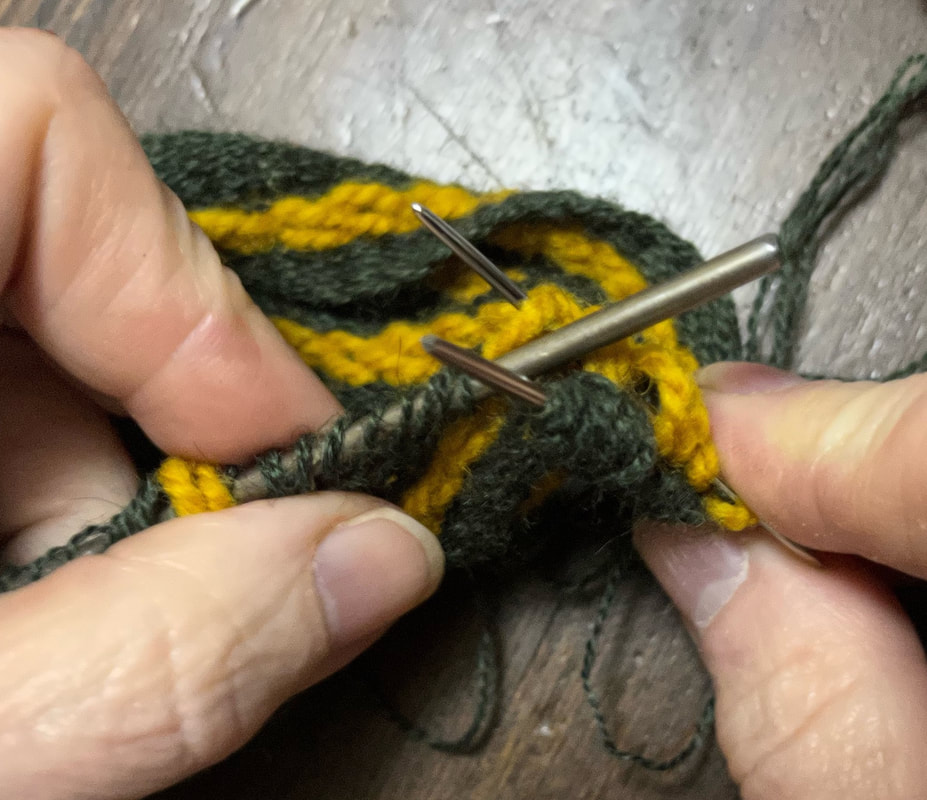
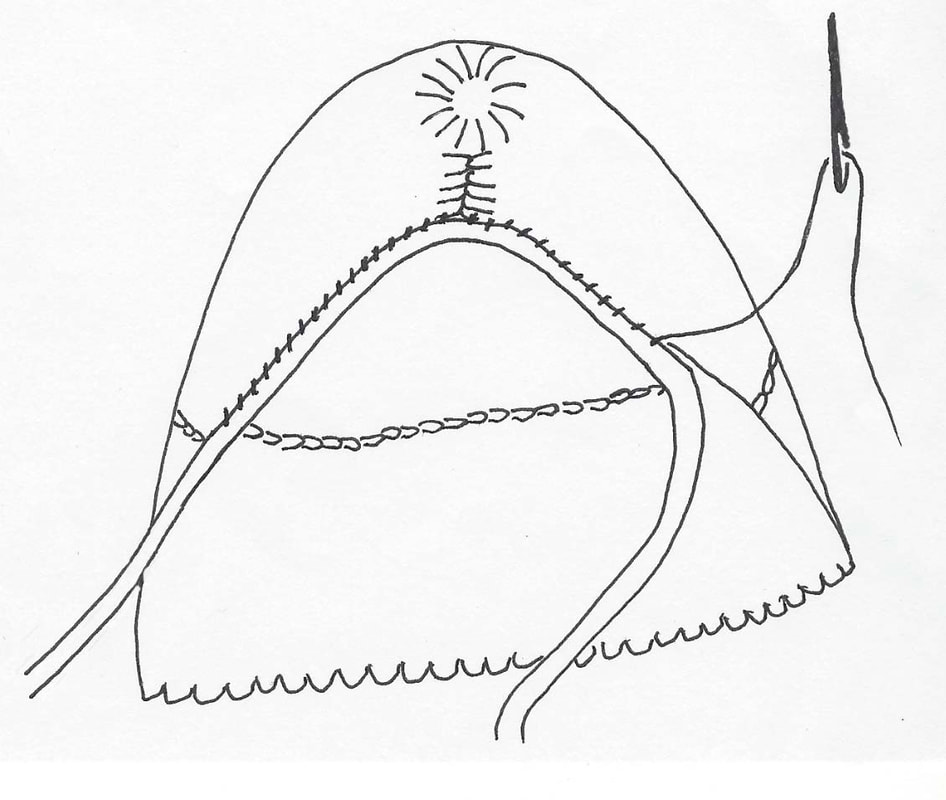
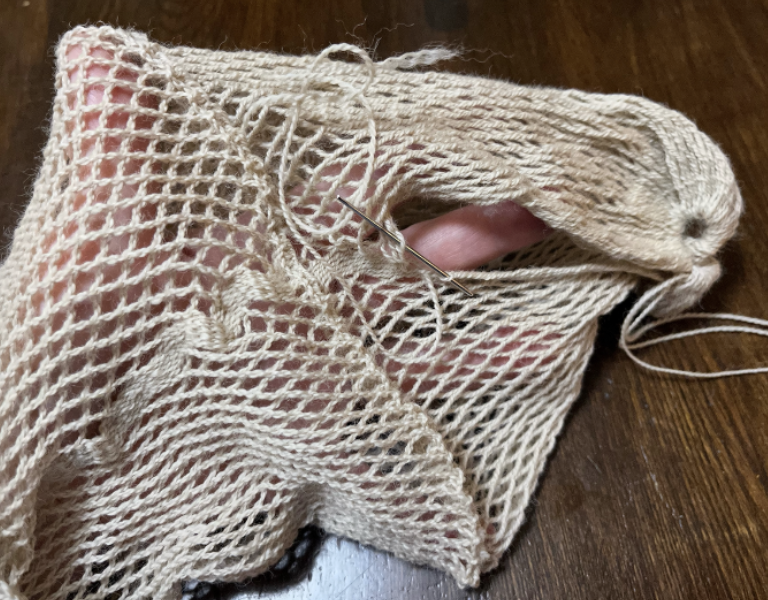
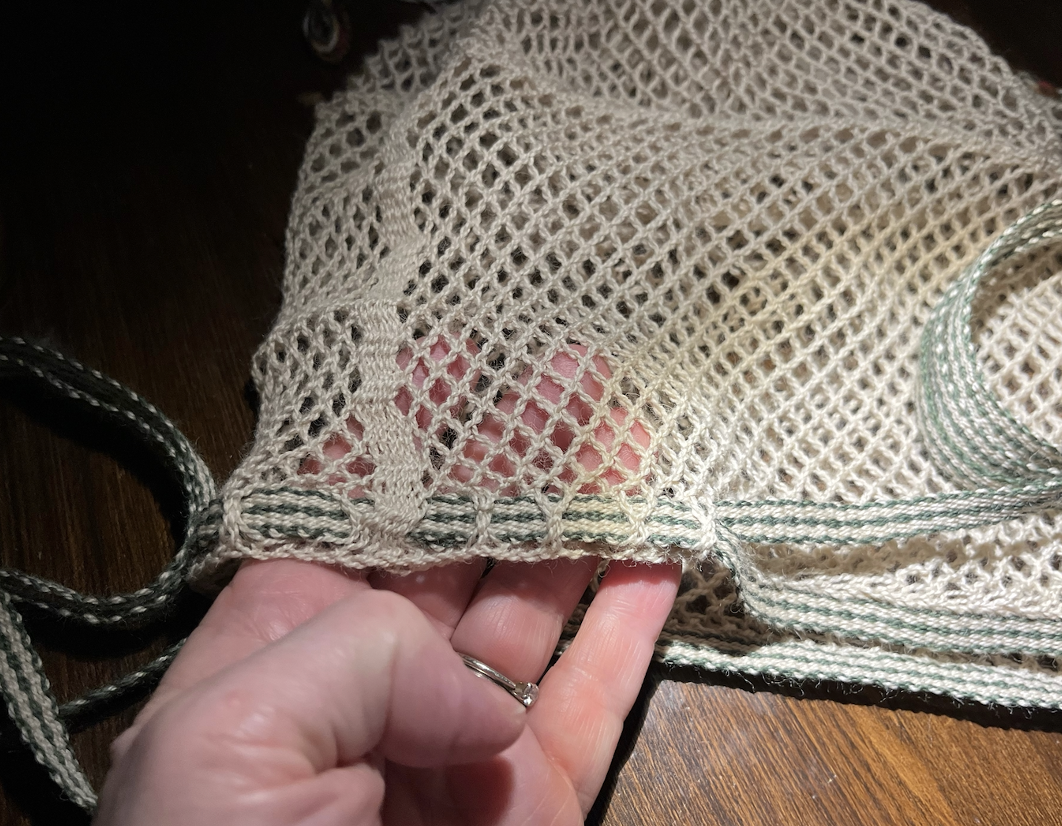
To gather the end loops, I divided the end loops into two groups, separated by color. I slid one color of loops on one blunt sewing needle, and the other color of loops onto the other blunt sewing needle.
Dividing the loops in this manner allows me to snug the loops into a far smaller circle.
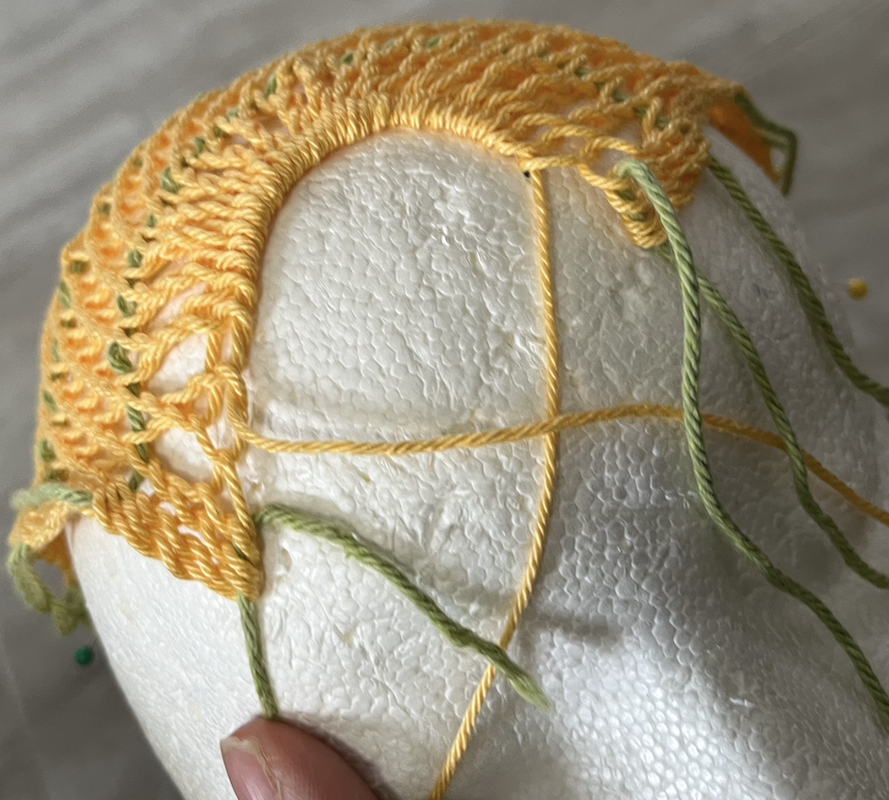
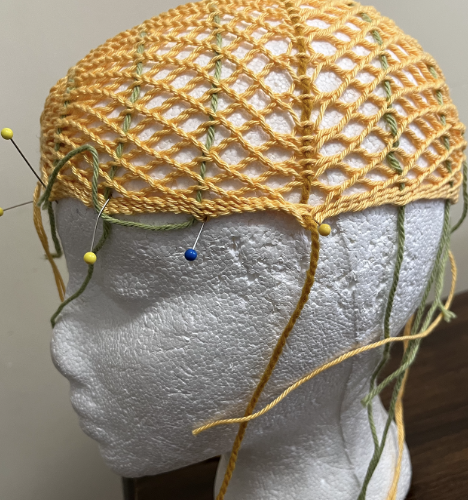
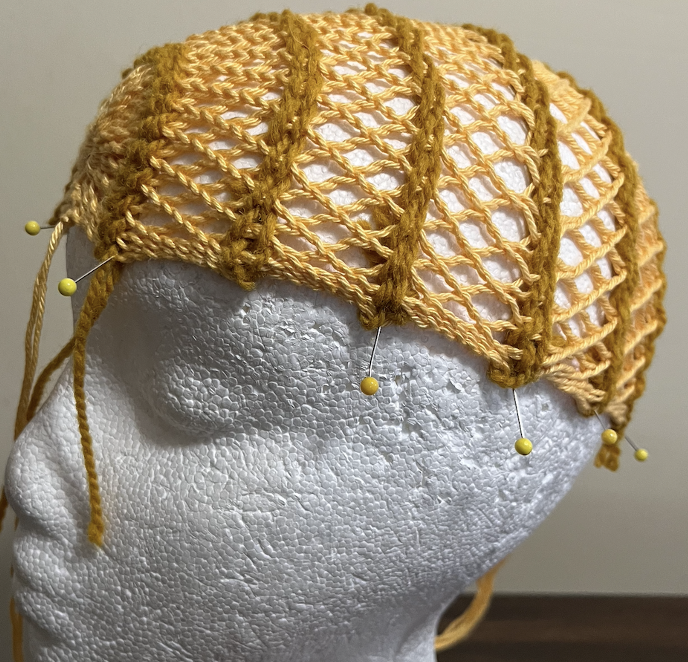
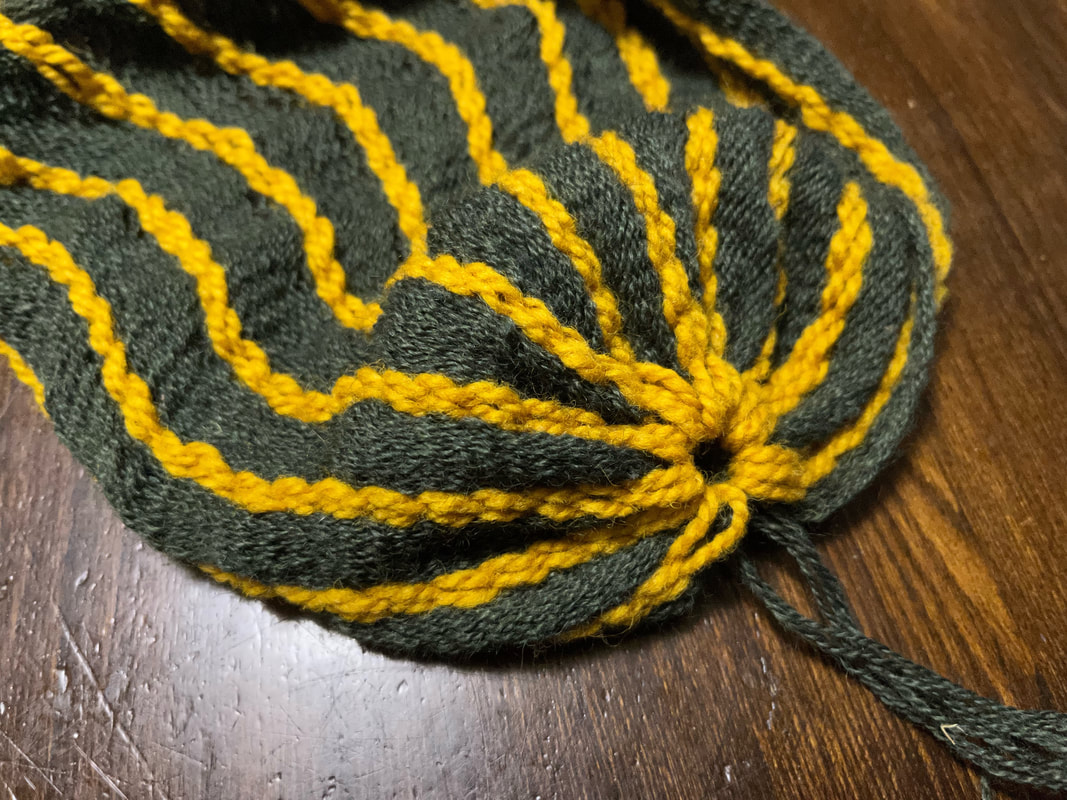
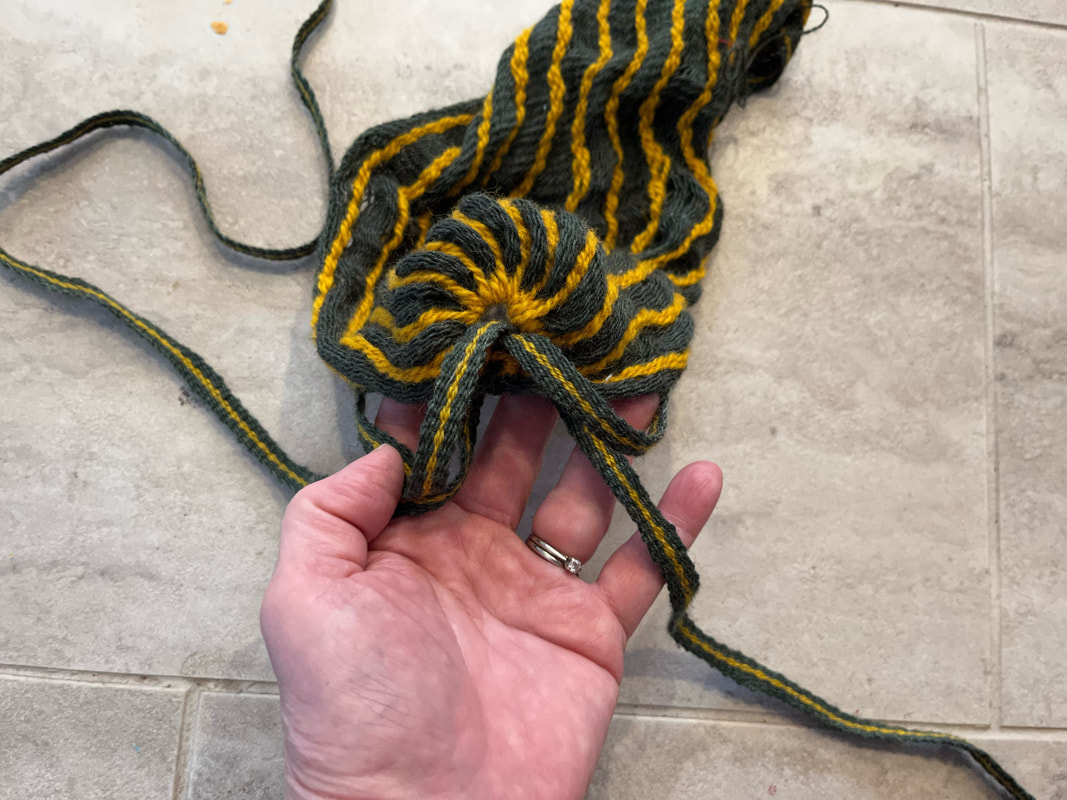
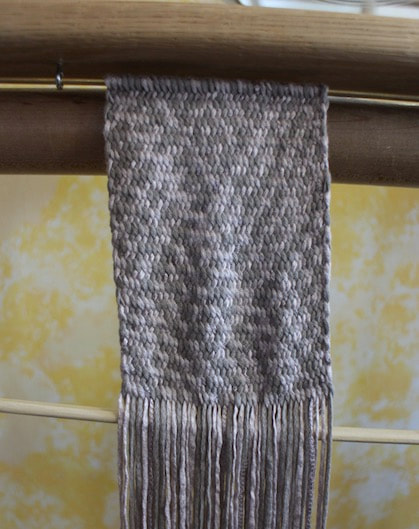
When the loops are tightly gathered there is a reverse-widow's-peak in the centre of the forehead. To avoid this reverse widow's peak, I reserved the dark loops at either edge, did not include them in the gathering. Instead I stitched them together in a tight seam at the centre front of the bonnet.
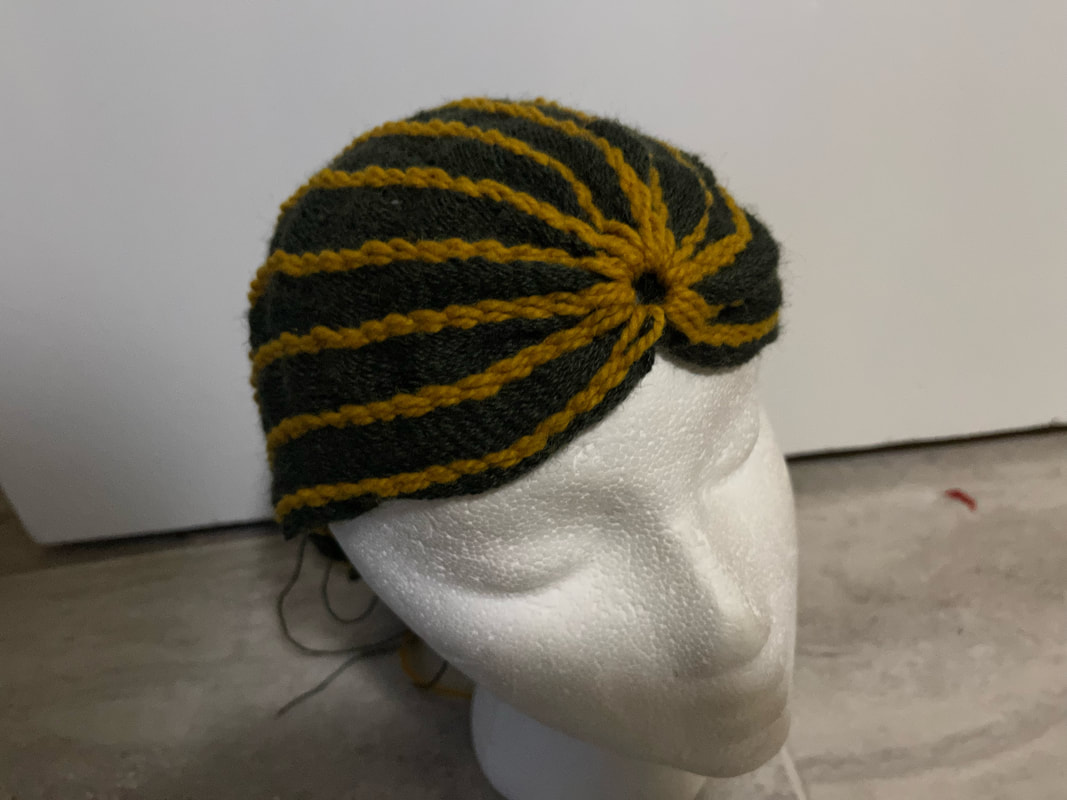
The reserved dark loops, sewn together at the forehead, make for a smoother line to which I could attach a brow band. The brow band is a length of weaving, made on a tape loom. I gathered the loops at the back of the bonnet in a fashion similar to the treatment of the loops at the front of the bonnet..
I stitched the brow band to the front 3/4 of the bonnet, leaving the band free at the very back of the bonnet.
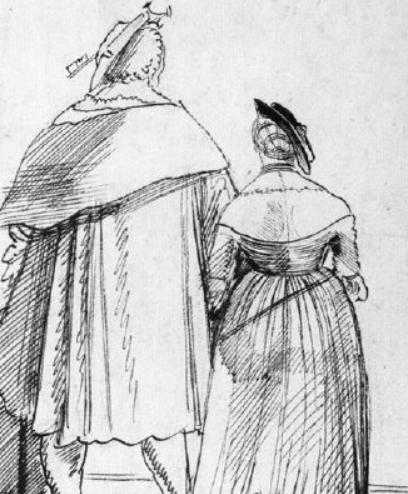
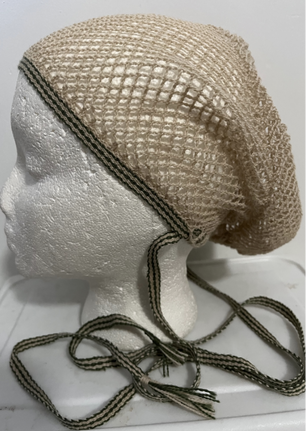
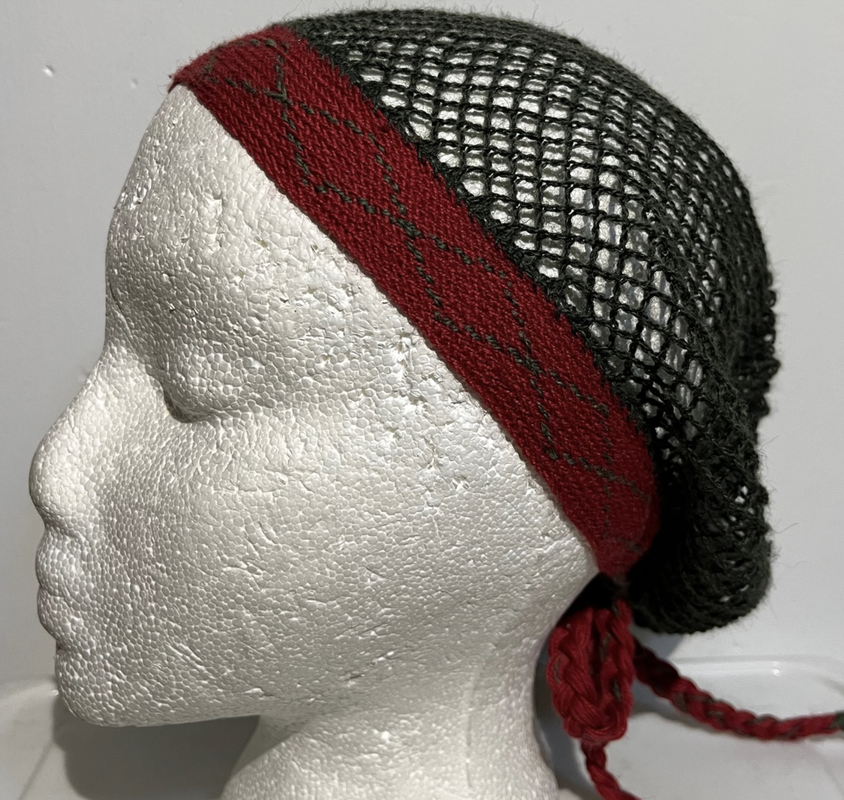
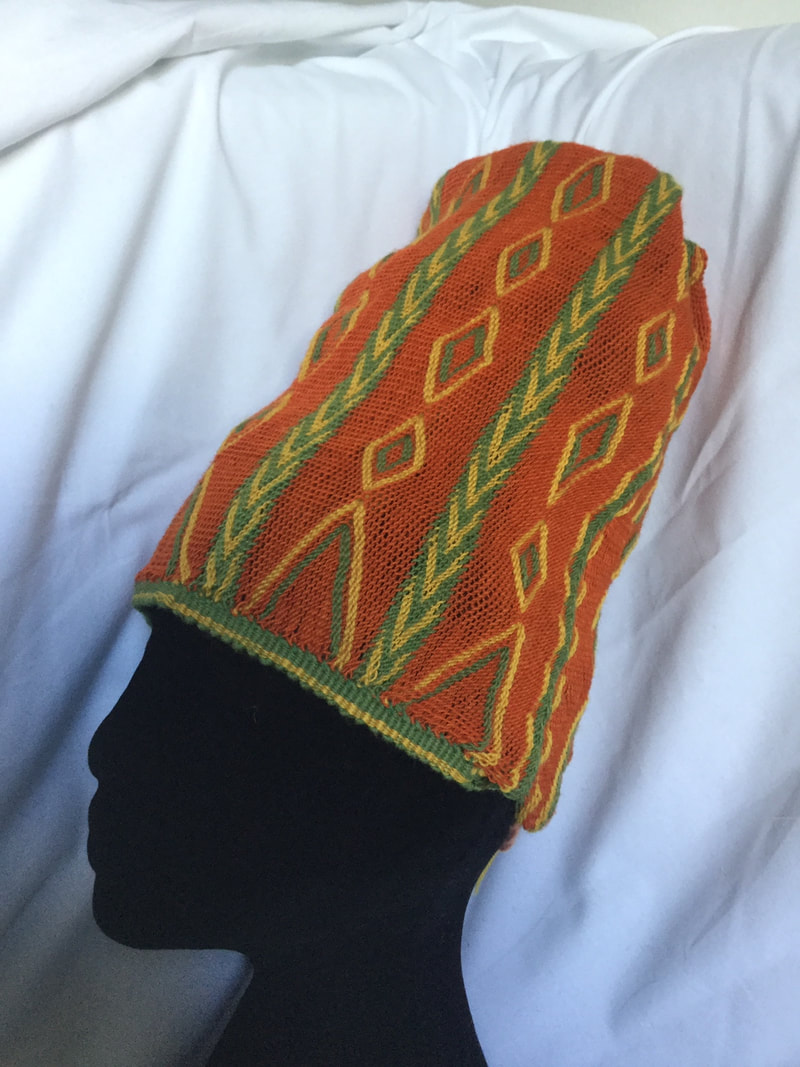
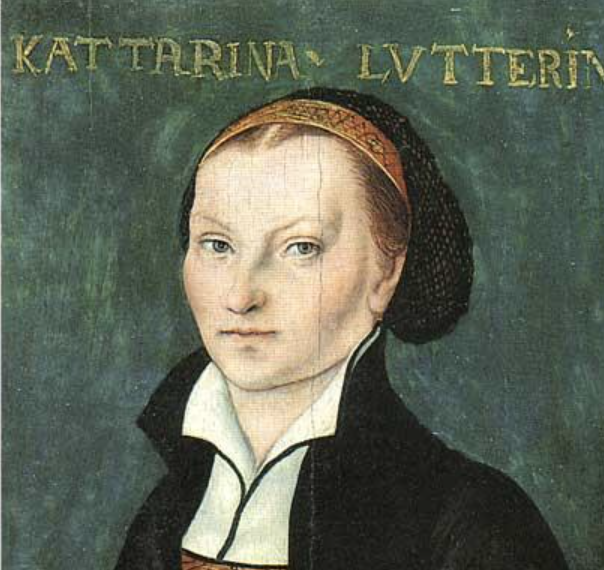 The portrait by Lucas Cranach, painted in 1526, of Katharina Luther, wife of the famous Martin Luther, depicts a woman wearing a hairnet. It was Dagmar Drinkler of the Bavarian National Museum who showed me this image some years ago. It is her opinion that Mrs. Martin Luther is wearing a sprang bonnet. I interpret this as possibly an interlinking structure, what I call a doubles grid.

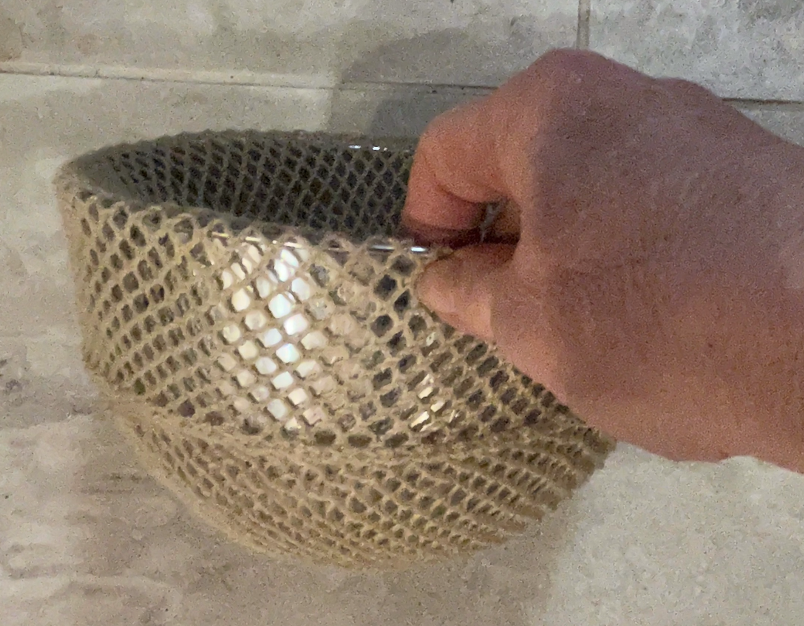
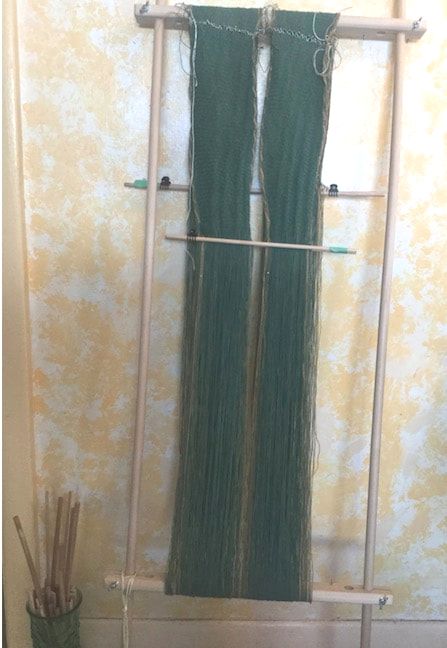
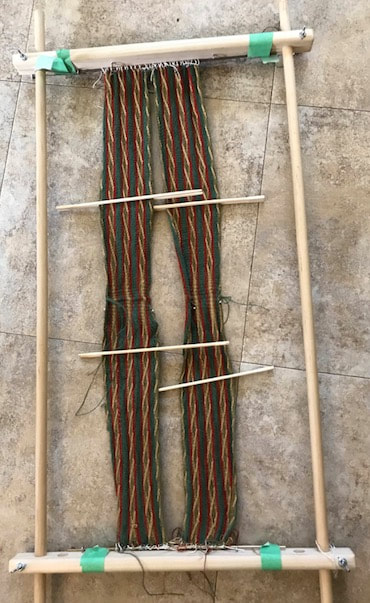
Arriving at the centre, I chained across to secure the cloth. I chained threads one at a time. 
Then I blocked it. I got it soaking wet, and then selected the right sized mixing bowl from my kitchen.
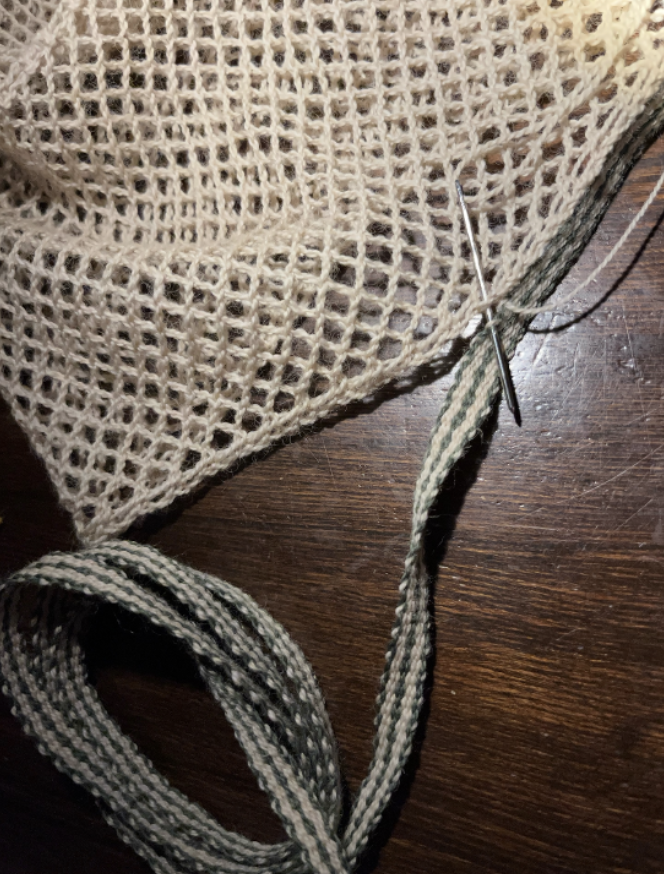
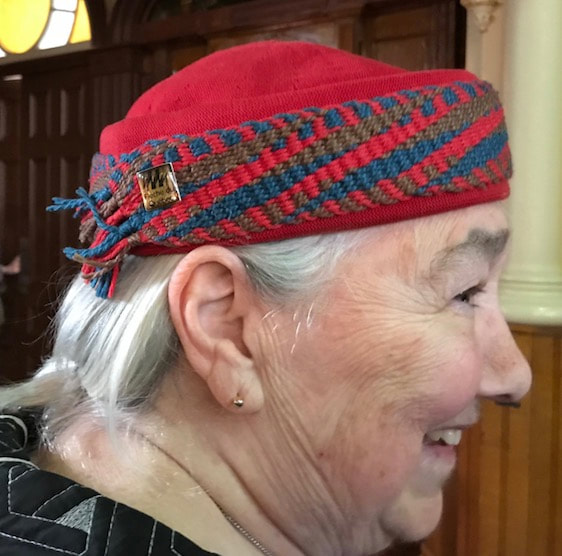
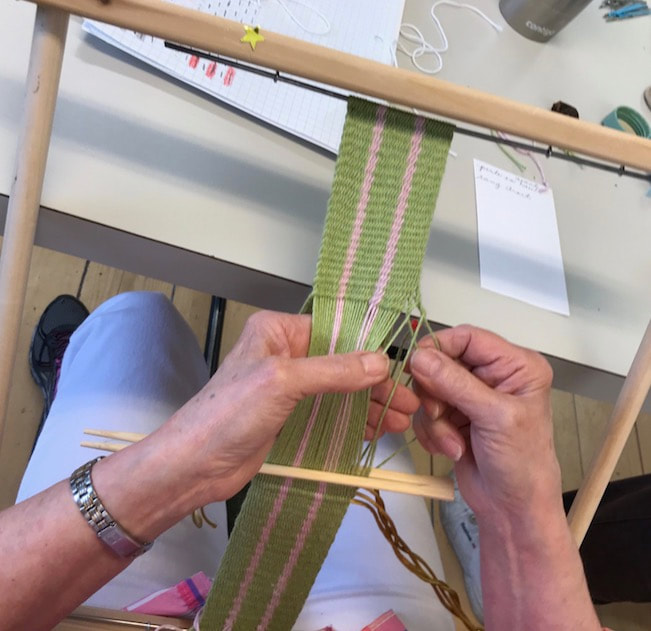
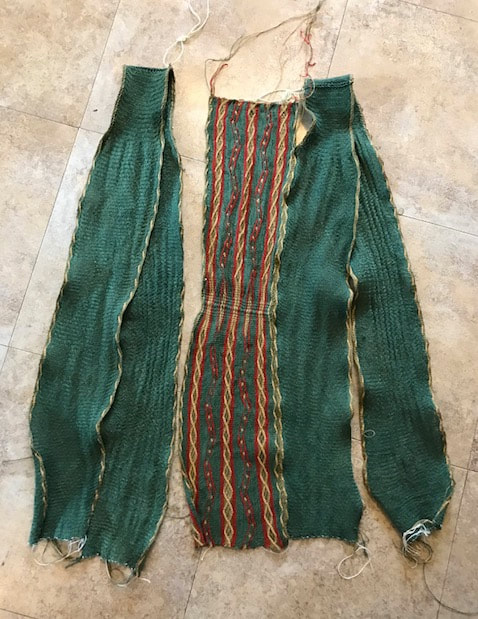
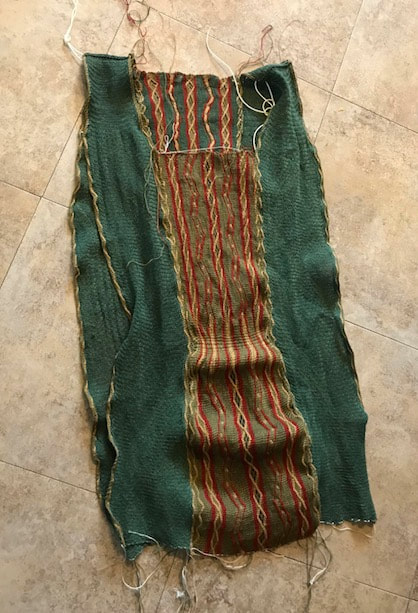
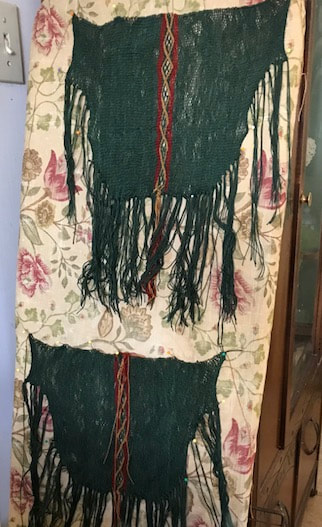
Mrs Luther's bonnet seems to have a band around the rim. I made a band using my tape loom. I measured out threads of sufficient length to make a band that will go around my head three times, plus a bit extra to tie a knot.
I made this first bonnet using a pale wool, hoping you would be better able to see the details of construction. Mrs Luther is wearing a dark colored bonnet. You will also note that the band around the head is rather wide, far wider than the band I made for this pale-coloured bonnet.
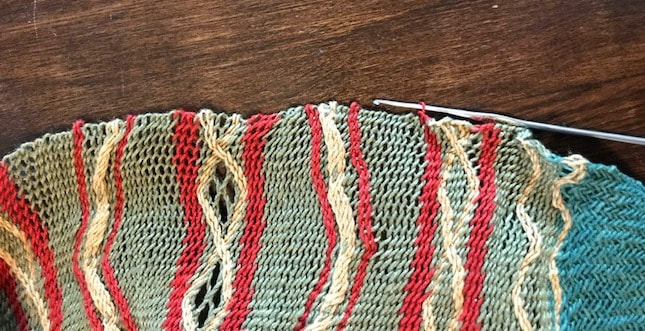
I worked a band in a 2-2 interlace stitch, with vertical ribs, and a 4 contrasting colored threads. OK, the red yarn I selected is rather close in color value to the dark green, and the green design does not stand out well on my band. I was also disappointed to note that the design in my band is far more elongated that the design in Mrs. Luther's bonnet. OK. Maybe I should stick to my field of expertise, the sprang, and leave the band to someone else. Perhaps it is another technique, perhaps an embroidered design.
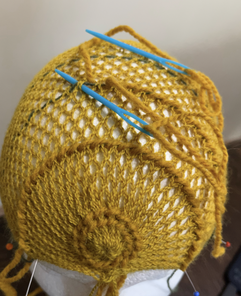
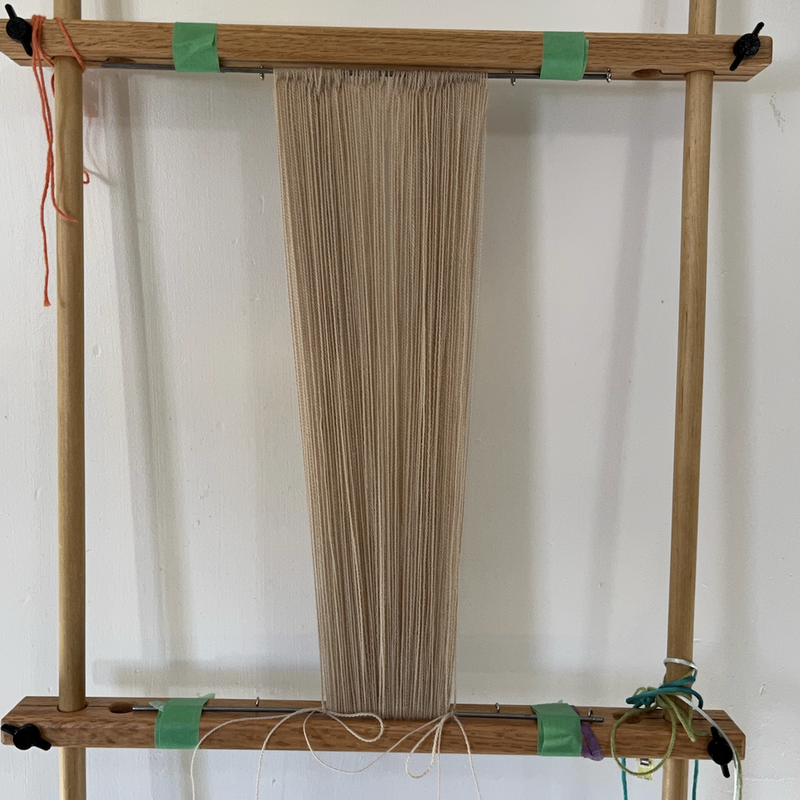
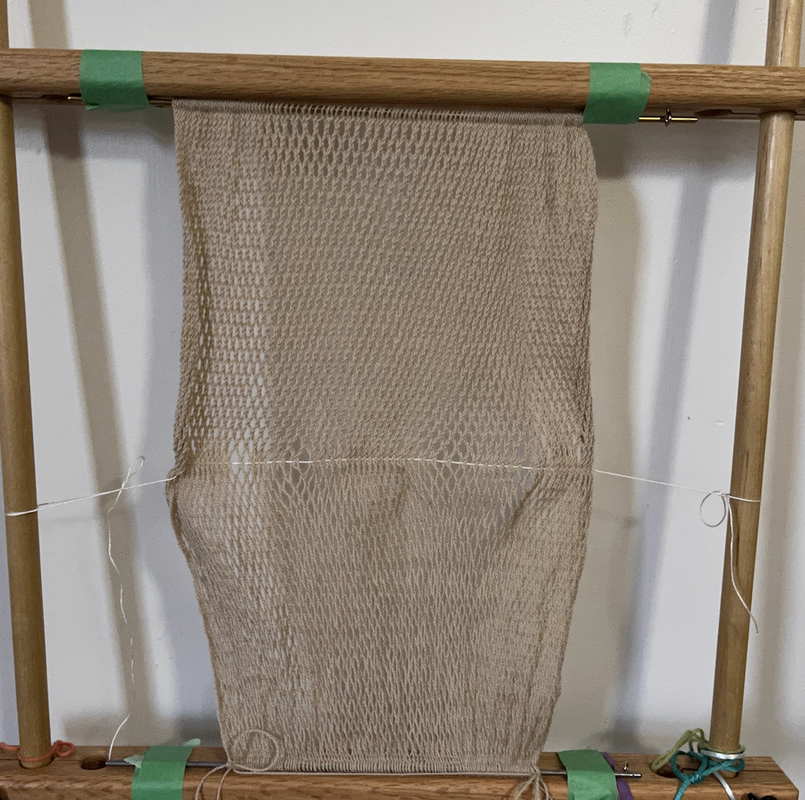
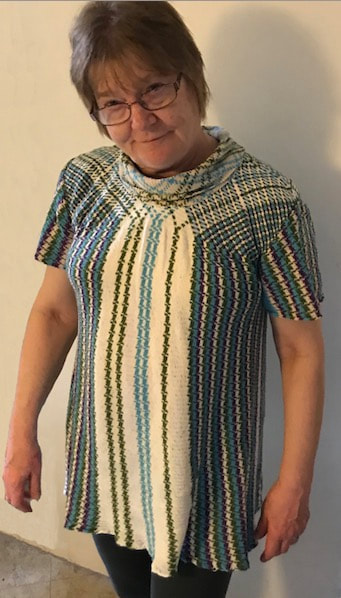
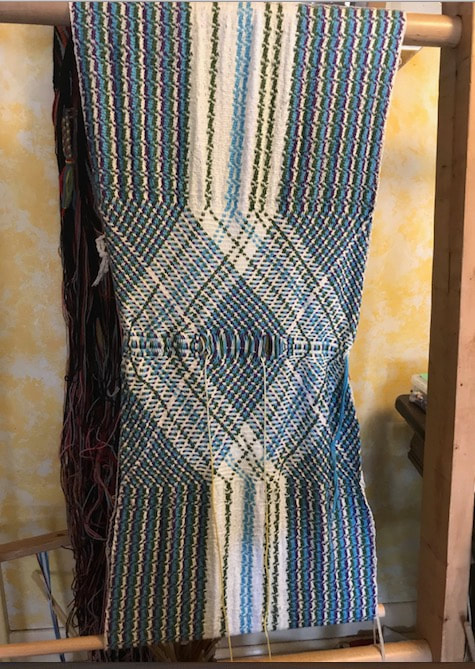
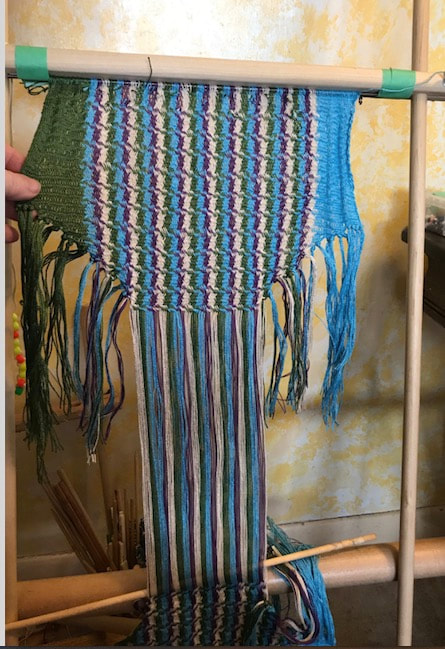
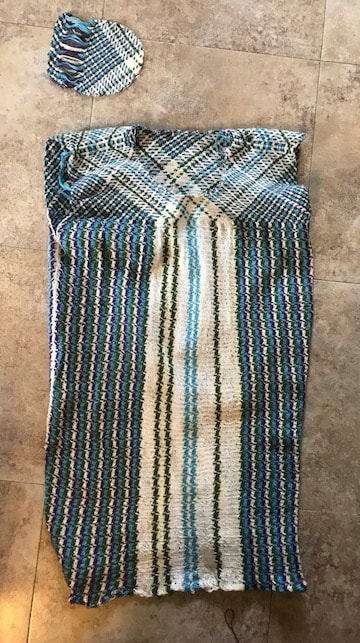
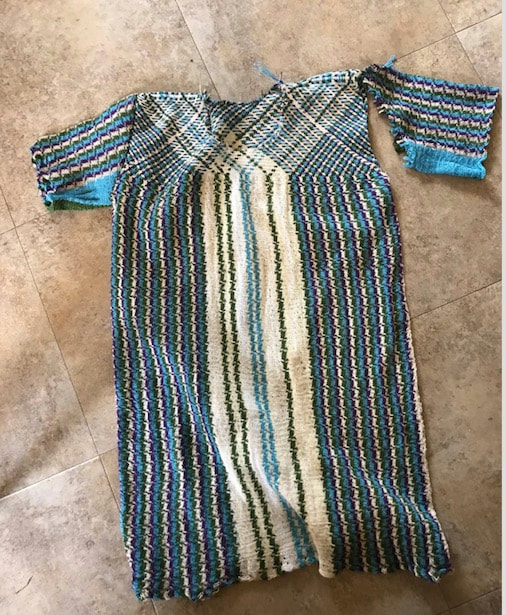
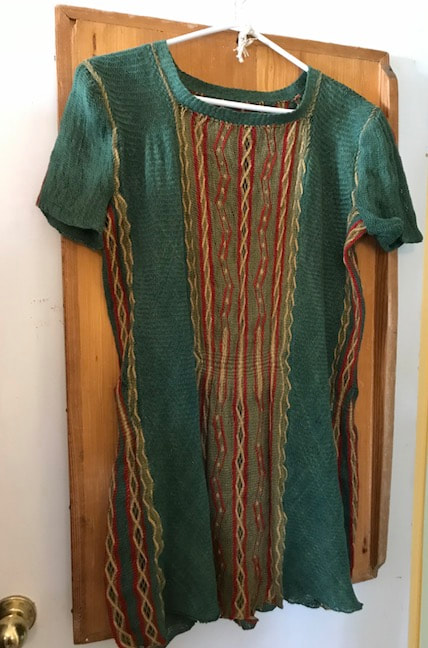
I made myself a new sprang shirt, using a 5/2 mercerized cotton from Lunatic Fringe, leftovers from other projects. Inspired by the stitch pattern in a Ukranian belt, I made vertical stripes in the body. In essence the pattern is two rows of interlinking and one of interlacing ... that means, for example, two rows of Z, and one row of S, then another 2 rows of Z, and one row of S.
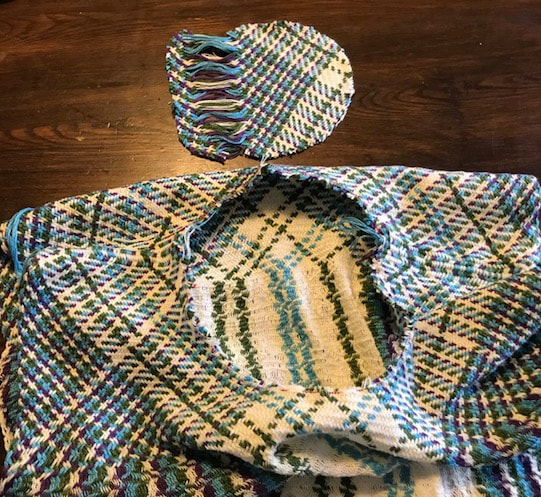
The body began as a 7 ft warp, some 300 loops (600 threads). I set it up as a false-circular warp, working from hem towards the shoulders. Just beyond the armpit level, I switched to 2/2 interlacing. The interlacing is less stretchy, quite appropriate to the yoke of the shirt. Because I also doubled the threads, it created a slight gathering, meaning the yoke is narrower than the body of the shirt. I made the two sleeves at the same time, cutting threads to create the desired shape.
The collar is a piece of circular-warp sprang. I calculated that I needed some 24 inches of collar, and started with a 32 inch long circular warp.
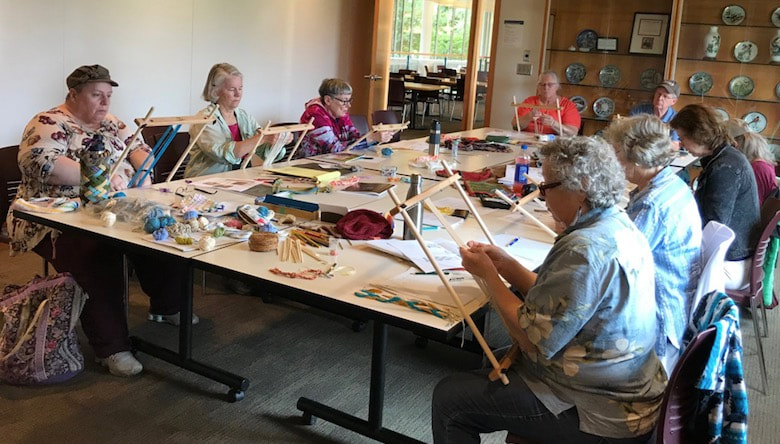
.I've been travelling, teaching in Quebec and Iowa. It's lovely to meet people, share what I know, and learn from so many talented people. As a consequence I've updated the contents of the twining patterns on my website, tweaking the directions, hopefully making them easier to understand.
The Midwest Handweavers Conference took place in Grinnell, Iowa recently, and I had the privilege of sharing with several very talented people. One of them, Jason, made it all the way through my twining patterns, and gave me some excellent suggestions. I've now edited those twining patterns on my website. Anyone who has already downloaded them, and who wants an update ... please contact me and I'll send you the new-and-improved version.
I taught sprang at the assembly of Quebec Handweavers in St George, Quebec. There I met some extraordinary fingerweavers.
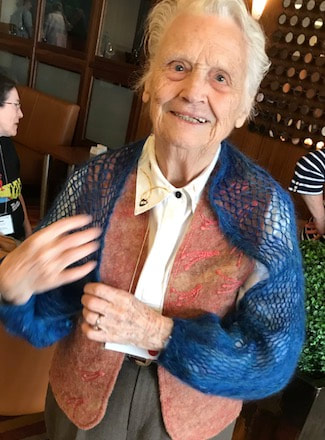
I also met Monique Dumas, who had taken a sprang class from Peter Collingwood years ago (her first encounter with someone speaking with a British accent), and who went on to be the very first to teach sprang at the Maison Routhier. She showed me her lovely sprang shrug.
My students at my class at Maison Routhier did me proud.
Lovely meeting every one of you. I wish you many happy hours of sprang.
I was talking today with members of a Colorado-based sprang study group. They had some questions, and I was wanting to refer them to a blog post of mine ... and then I realized that I never posted those pictures, never told that story on my blog. So here it is, the making of that shirt that was on display at HGA's Convergence last summer.
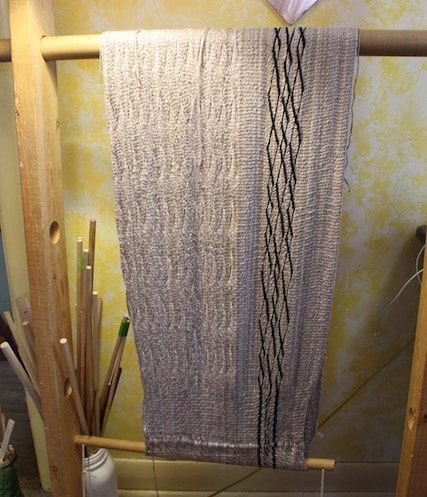
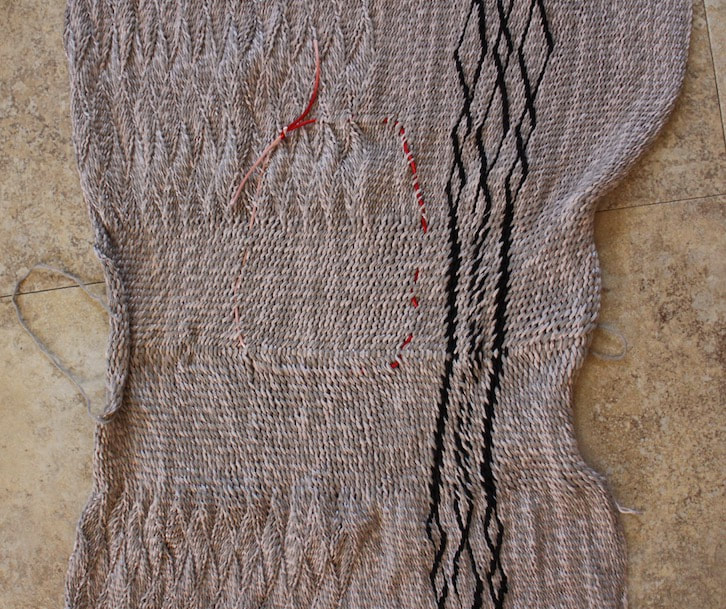
I have been exploring different ways to create a sprang shirt. The obvious way to create the neckline is to make a slit for a V-neckline. When I did this, I found that there is stress on the stitch at the bottom of that V, and it does not look nice. Because of this, I have begun to look for other ways to create that neckline. This pullover began with a false-circular warp to create a large rectangle for the front and back. The loops will sit near the hem of the garment. There is a chain line at the shoulders.
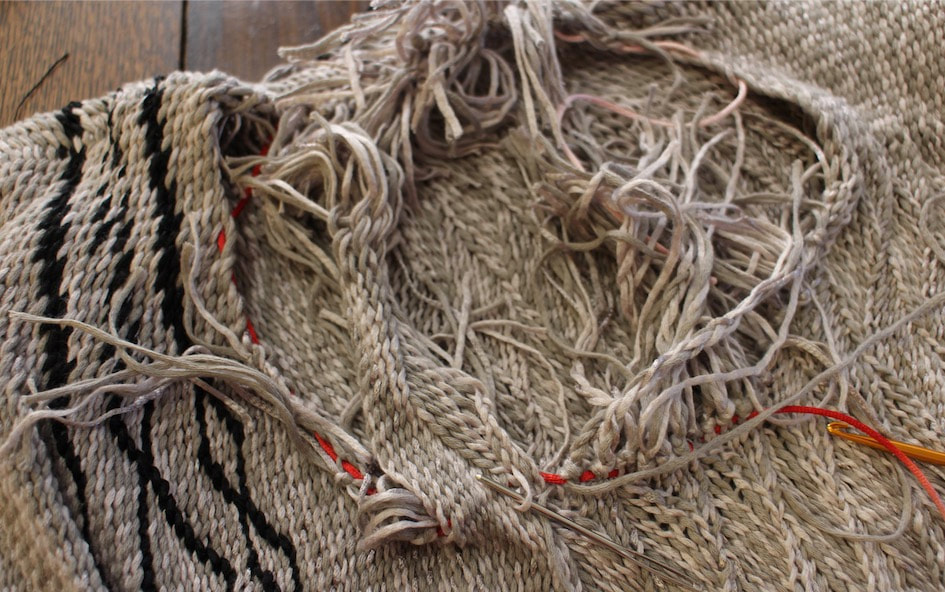
I laid the piece out flat, and traced a circle (basting stitch) with a red thread at the place that I thought should be the hole for the neck. The hole must be as large as the circumference of my head. I then cut across the stitches inside this hole, being careful to leave threads long enough to tie knots. I unravelled the stitches to the place of the red thread, and tied knots. This gave me a neck opening, with unsightly knots all around. I covered the knots with a collar.
The collar started out as a long flat warp. I chose a 2-2 interlacing stitch for the collar. For the sleeves, I wanted to try making them narrower at the wrist, wider at the shoulder. To make the cloth wider, you must add threads.
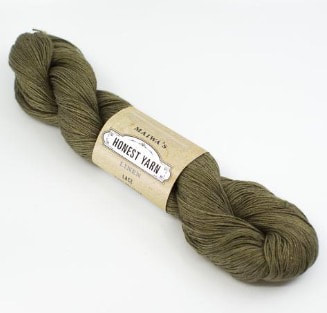
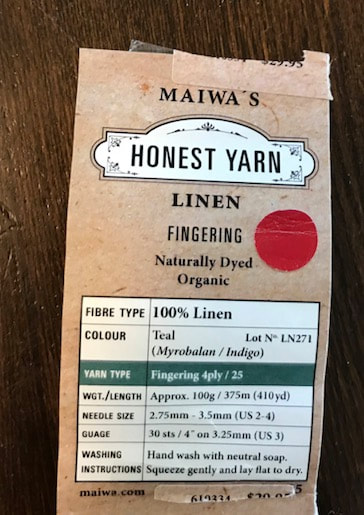
I added a loop of yarn every second row. This gave me two sleeves, that are wider at the shoulder, narrower at the wrist. I cut the sleeves apart, and tied knots. The knots are hidden on the inside of the garment. The finished pullover was judged worthy of the fashion show at the Handweavers Guild of America conference Convergence in 2018 in Reno, Nevada. 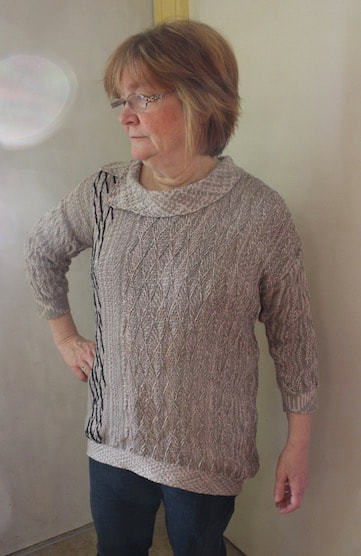 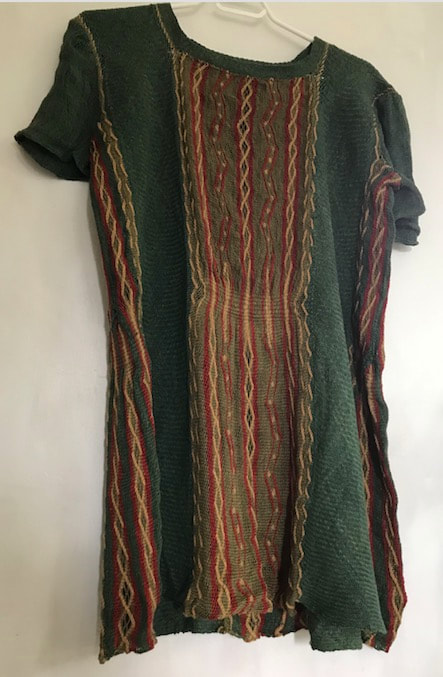 While in Vancouver earlier this year, I stopped in at Maiwa on Granville Island. I will be teaching a sprang class there next year. I wanted to have a look at their yarns, to evaluate their use for my students. I saw some lovely linen yarn.
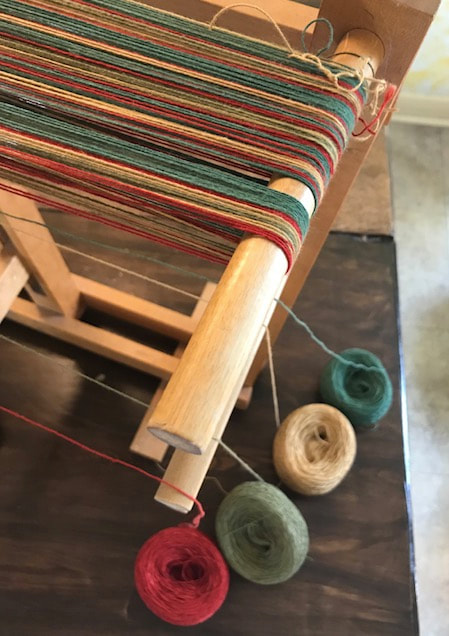
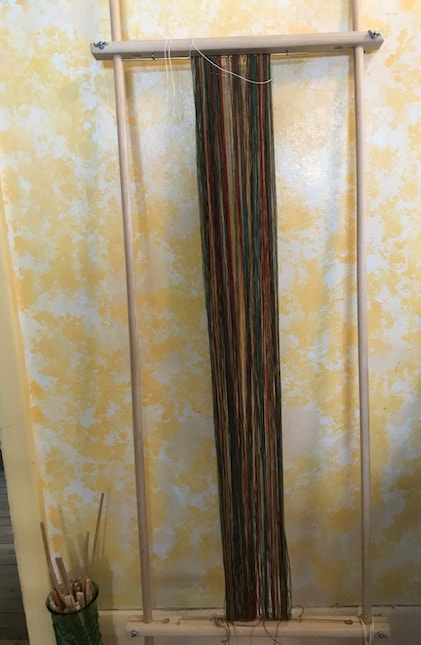
I decided to try to make yet another sprang shirt, using this linen yarn. OK, I purchased seven skeins. Wanting to use some of those colorful motifs from Coptic bonnets, I set up a multicolored warp.
This piece will be the center back of the shirt.
Now for two pieces to go on either side of the center back. These pieces will go over the shoulder, starting and ending at the hem of the shirt.
Now for the front of the shirt. I decided to use the lighter green as the background for the front of the shirt. The first time I sewed the front into the shirt, there was a clear difference in tension (rows per inch) between the lower part of the front, and the side pieces. I re-sewed it a couple of times before getting it right.
Now for two narrow pieces to go under the arms.
And lastly, sleeves. I shaped the sleeves as I went along.
I chained around the hem, to give a firmer edge to the shirt.
I finished assembling the shirt, and washed it.
Look for me this summer, sporting my new sprang shirt.
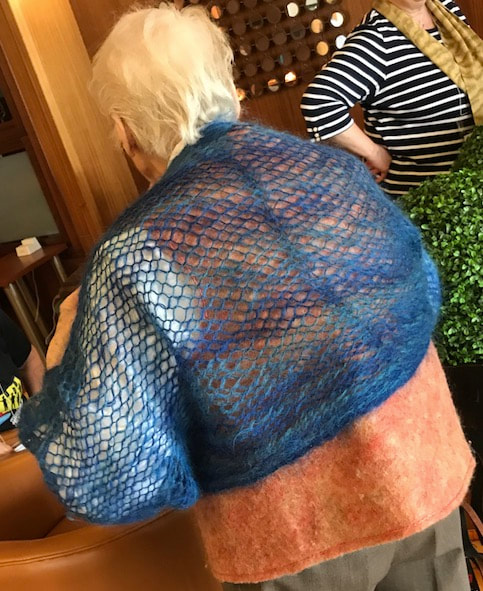
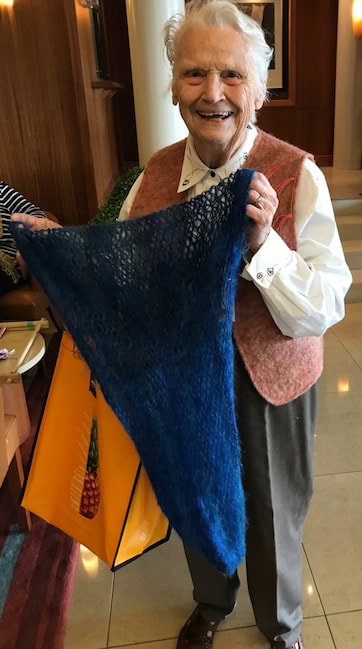
And here's a better image of that shawl I made last month, demonstrating perhaps some of the drape and flexibility of the fabric  Photo by Chris Black
I visited the Kelsey Museum collection in the spring of 2016, went home and worked out the pattern for this hat, and then came back in the summer of 2017. At the occasion of my second visit, I took a photo of my replica beside the original. Actually I took two photos. In one of them, my replica is inside-out. 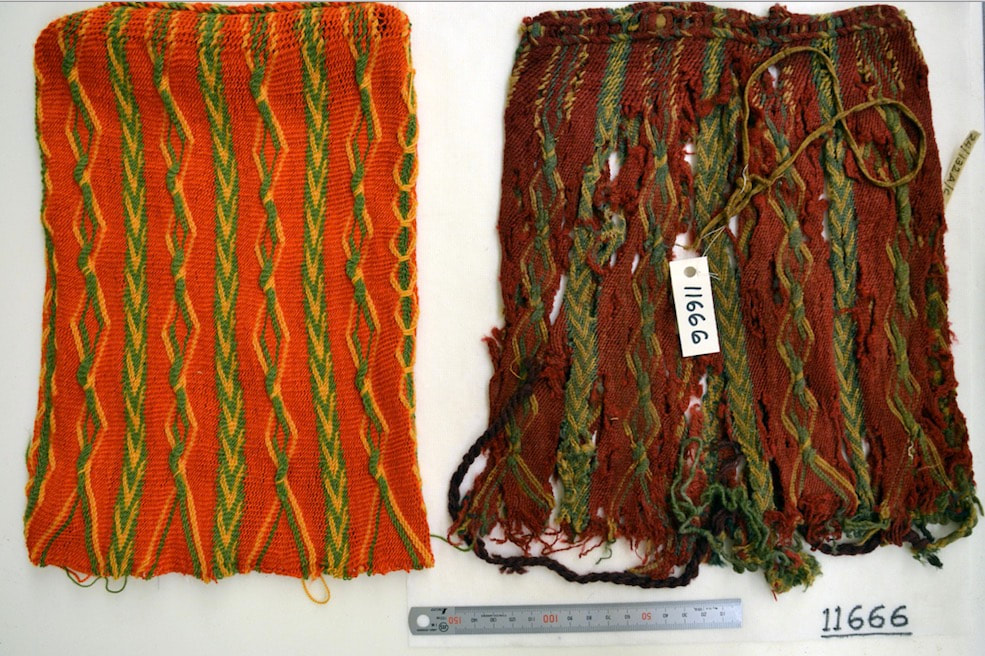 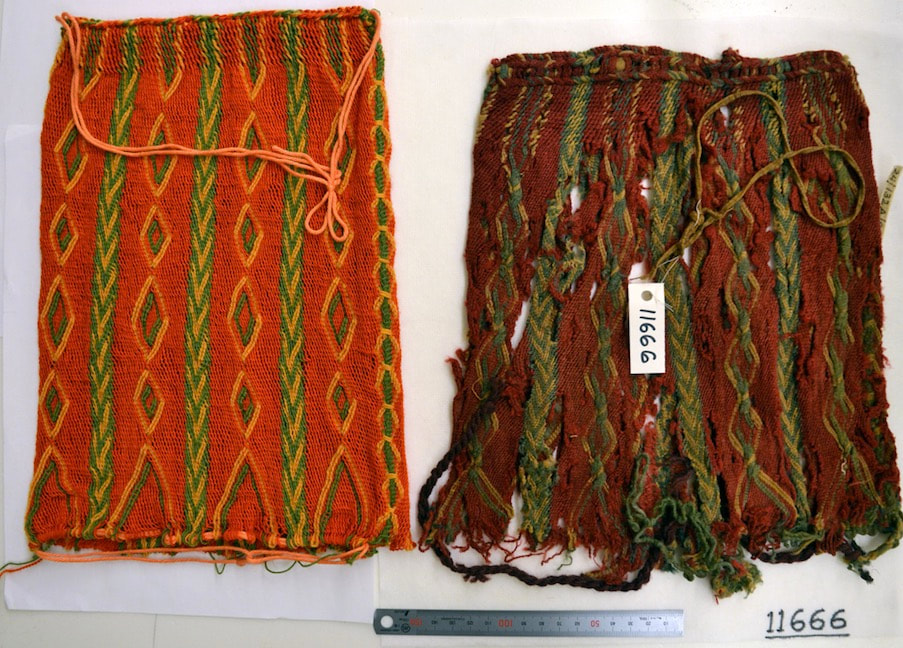 If anyone is interested, my SprangLady website contains three tutorials that take you step-by-step, showing you how to do this twining technique on a background of interlinking. And I do still have the specific pattern for this bonnet.
I set out to make a new sprang top. In the past I'd say the choices are a V-neck, a boat-neck, or you cut out a hole for the neck. Last spring I made a shirt comprised of ten separate pieces of sprang. I was using 'estate yarn' (yarn of an unknown age and unknown fibre content). 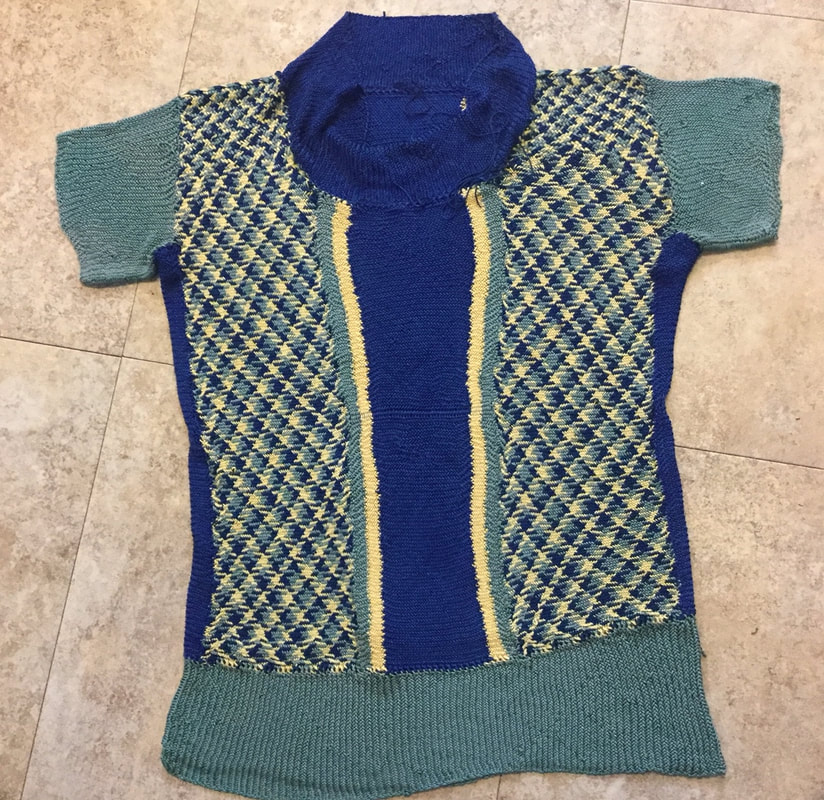 While I like the shirt, some of the threads are shattering ... the shirt is not standing up to wear. So I need another one. I purchased new yarn, nine skeins of Berroco Mixer, and made up nine pieces for this new shirt. 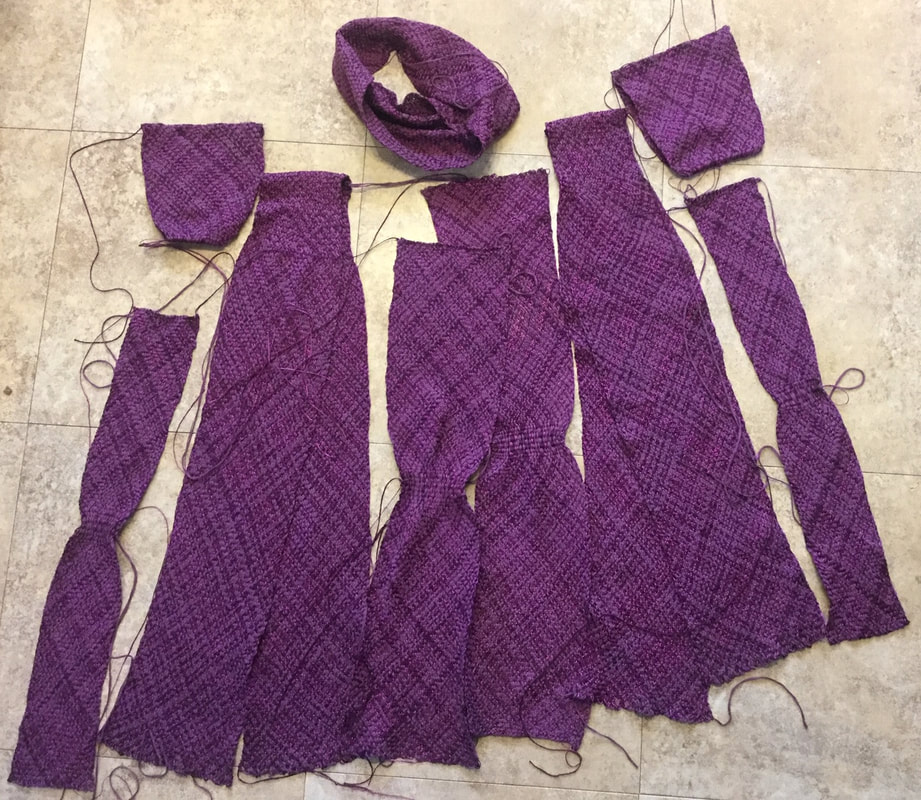 Although it might seem overwhelming to set out to make nine pieces, it's no worse than knitting a sweater. I made a center-front piece and a center-back piece. These pieces start at neckline and hem, and work to a place somewhere near the waist. There are two pieces that go over the shoulder, working from hem to hem, and meeting at the shoulder. I also made two pieces, one to go under each armpit ... worked from armpit and hem towards the waist. These pieces were all flat warp. There are three circular warp pieces, two sleeves and a collar. Assembled together, they make a shirt. 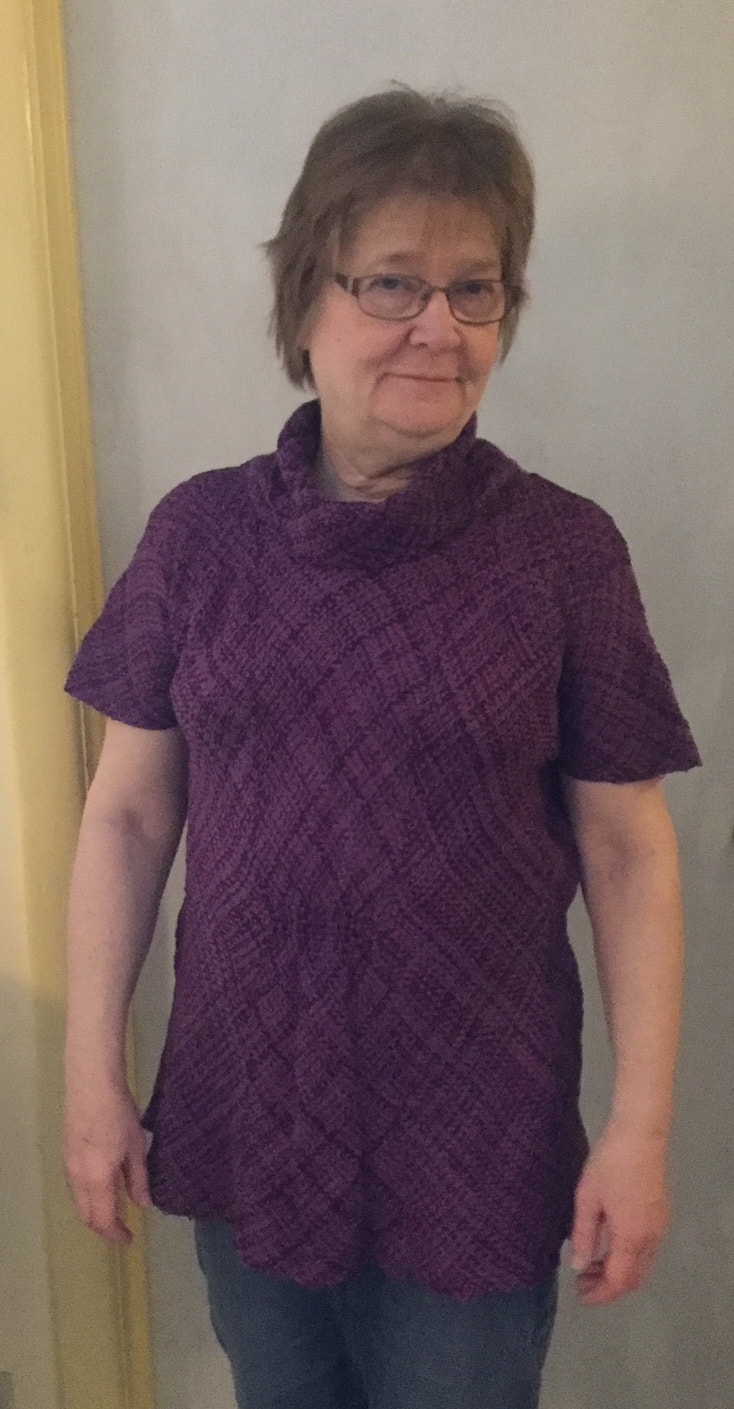 The basic stitch is a 2-2 twill, it has a comfortable amount of stretch. The Berroco is a mix of cotton, polyester, viscose and nylon, so I'm hoping it will stand up to washing and wearing. 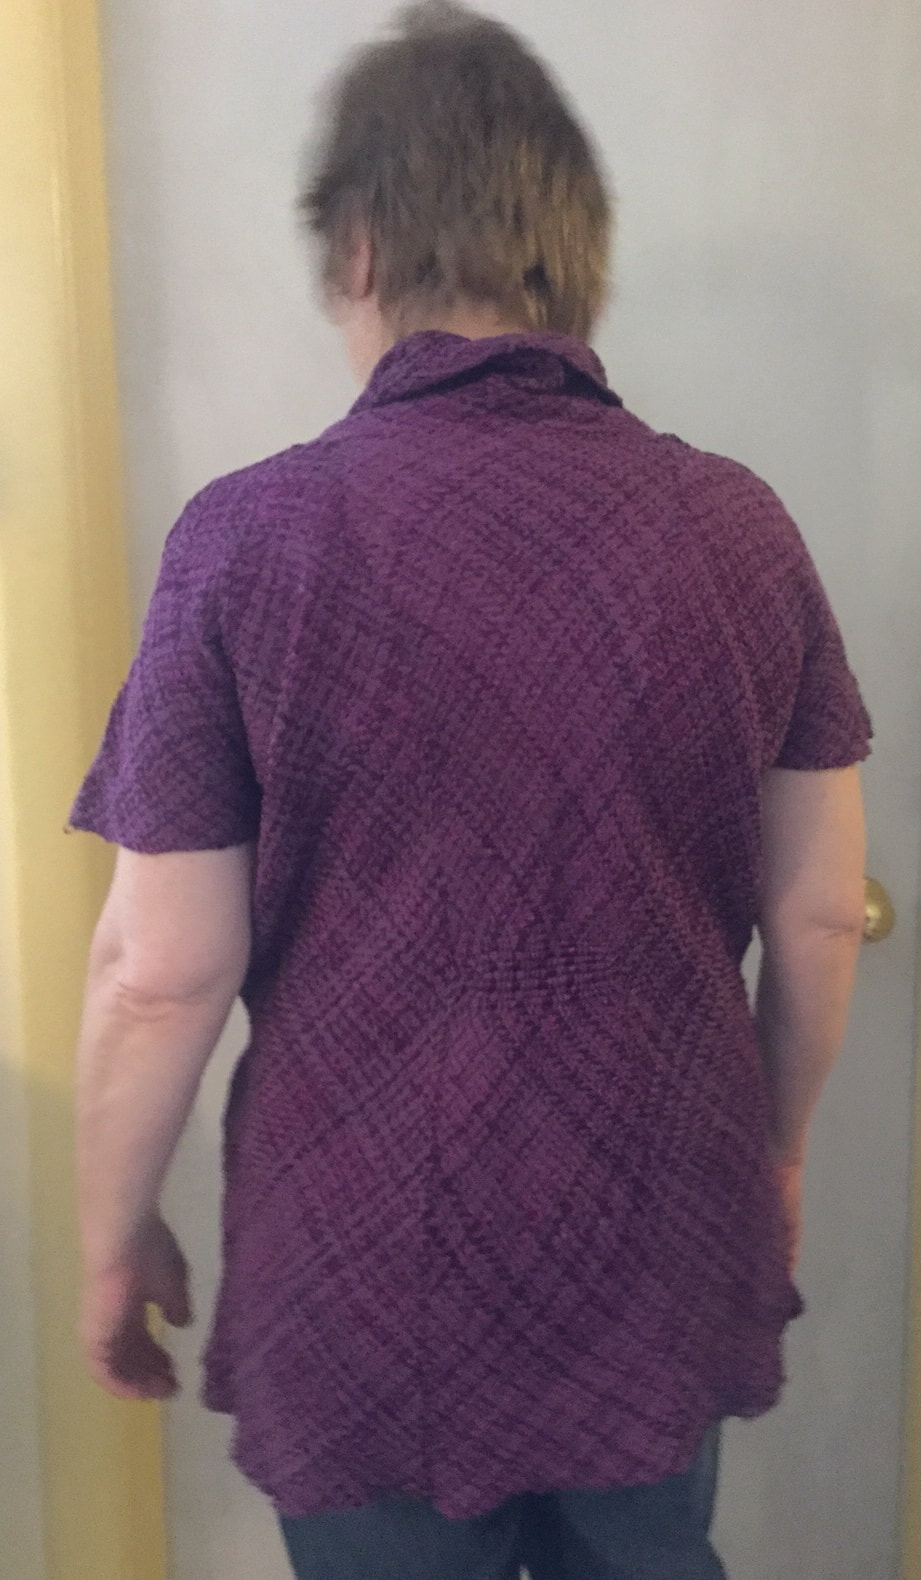 No need to hem this material. The pieces have selvedges all around.
|
Categories
All
Archives
May 2023
Categories
All
|


 RSS Feed