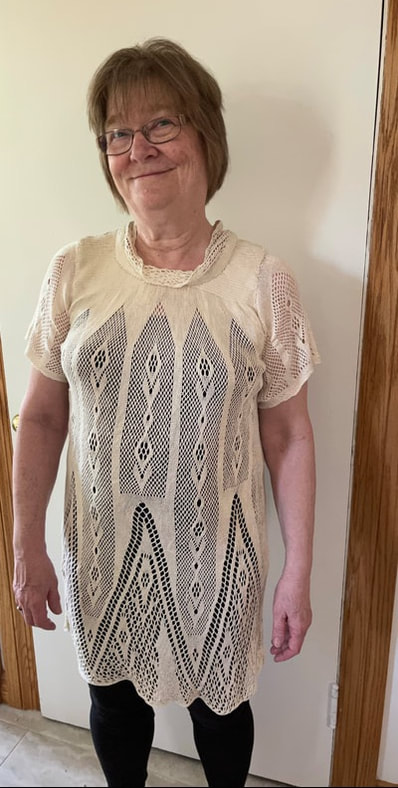
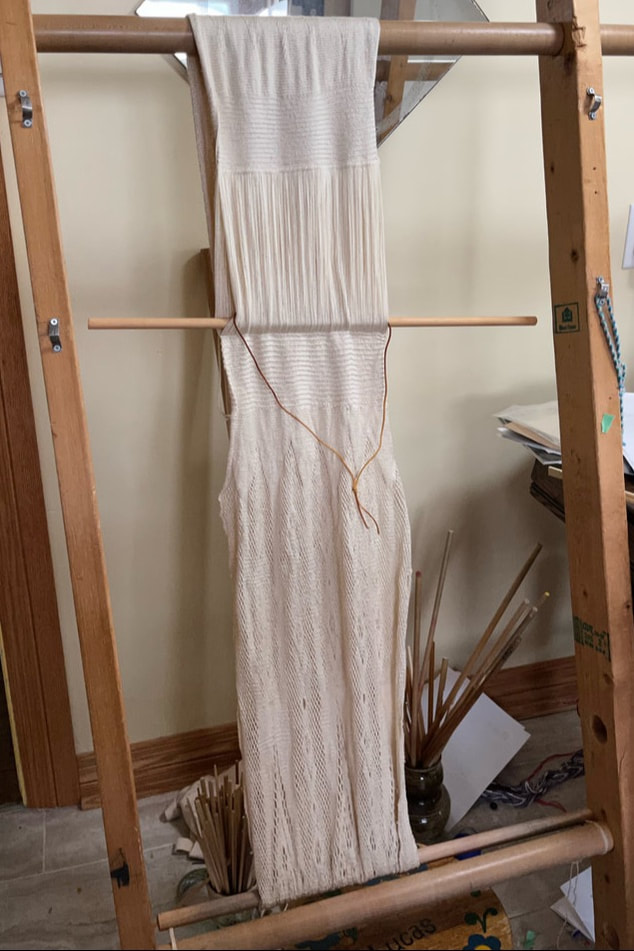
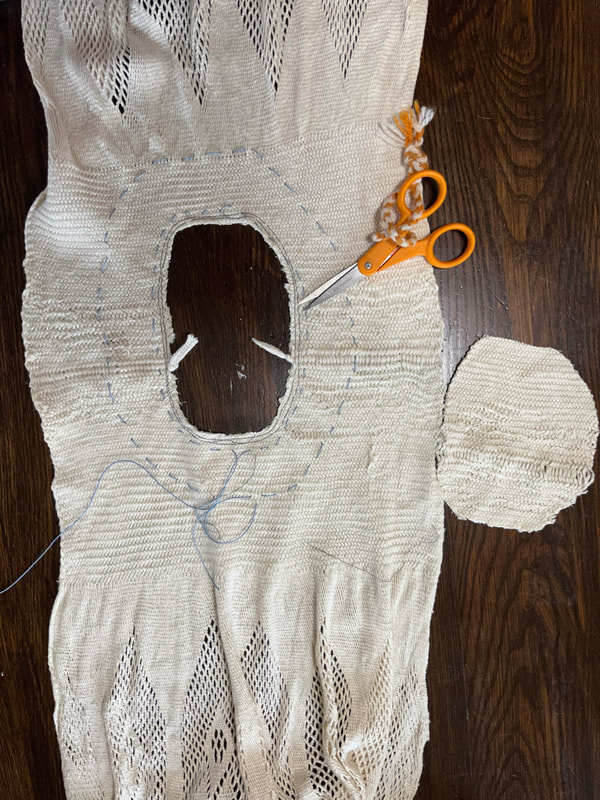
 My most recent sprang shirt. The lace pattern was inspired by one of the pieces of lace in the Art and History Museum in Brussels, Belgium ... the source of lace which inspired my latest book of sprang lace patterns. The body of the shirt began as a long false-circular warp. I began work at the hem and ended at the shoulders.
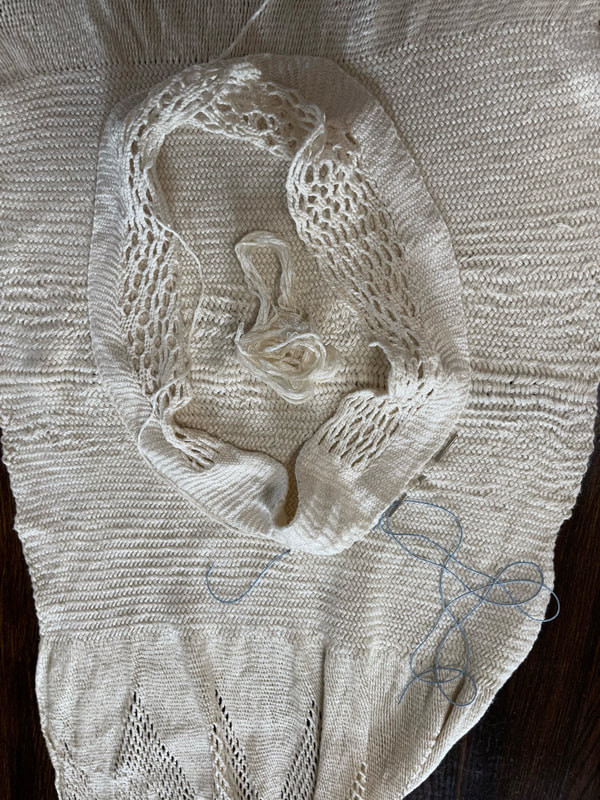
When the body was complete, I made a piece of circular warp, of a size to pass over my head, for the collar. I traced around the collar piece to decide where to cut to open the neck hole.
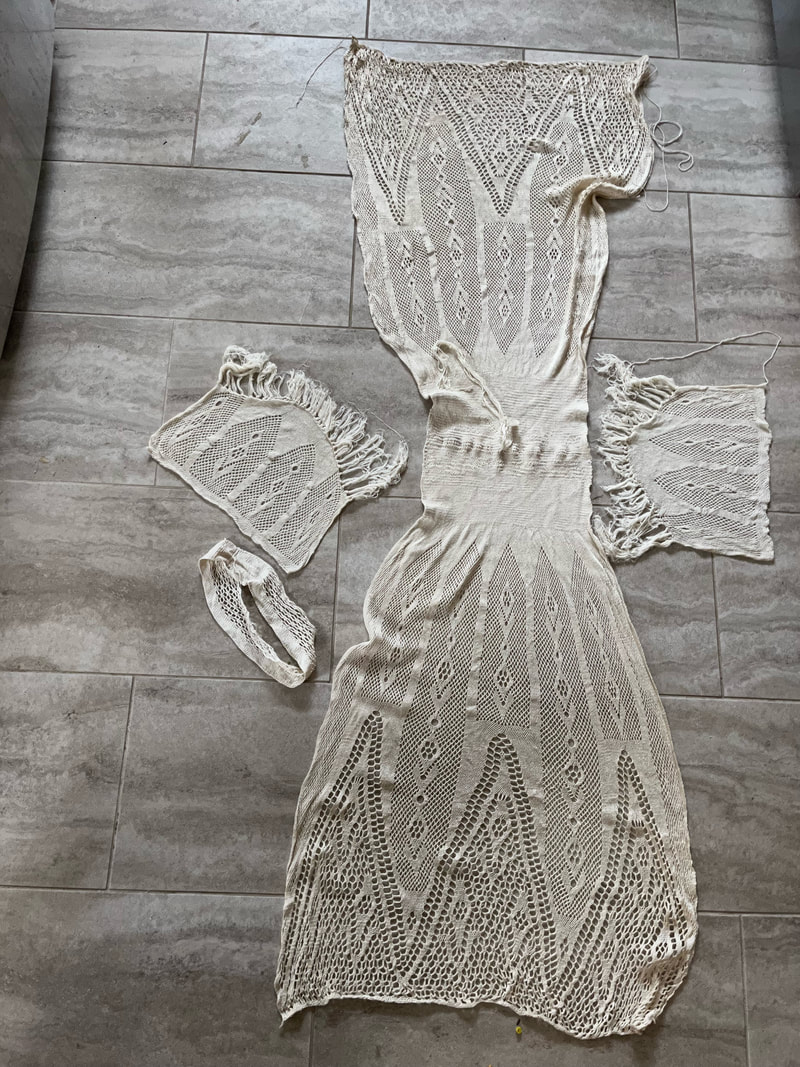
After deciding the location of my stitching line, and where to cut, basting around those places, I made a double row of machine stitching to secure the cloth. Then it was a matter of attaching the collar, sleeves, and sewing up the side seams. Voila a new sprang shirt!
1 Comment
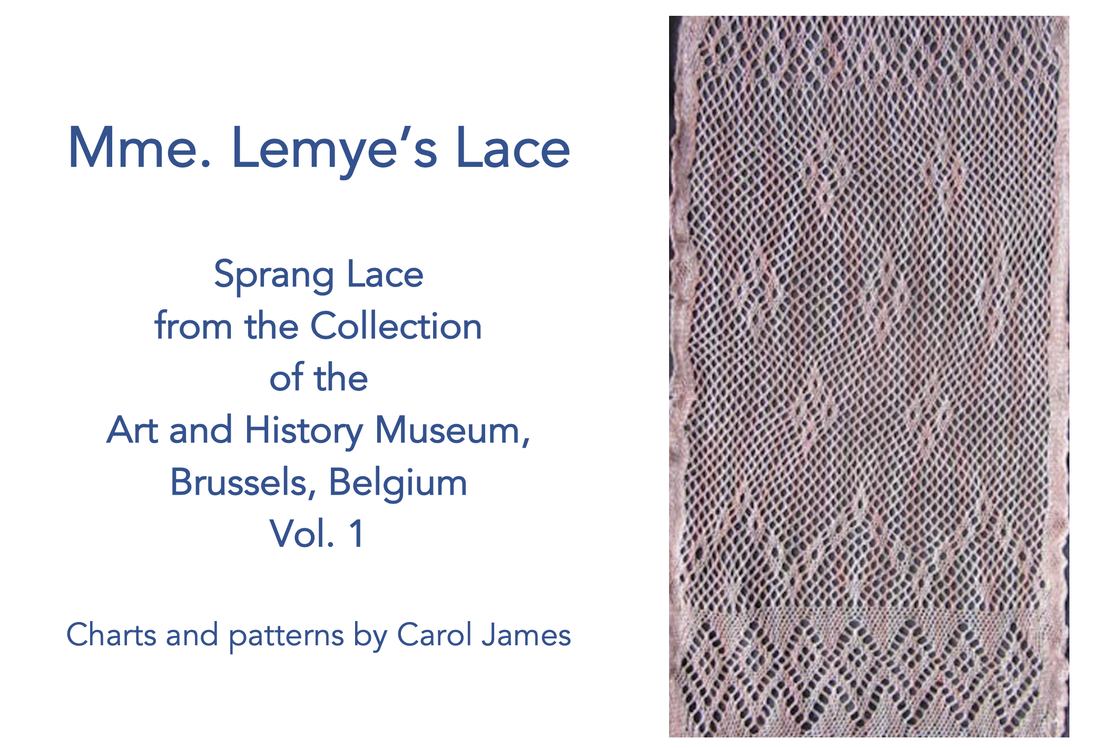
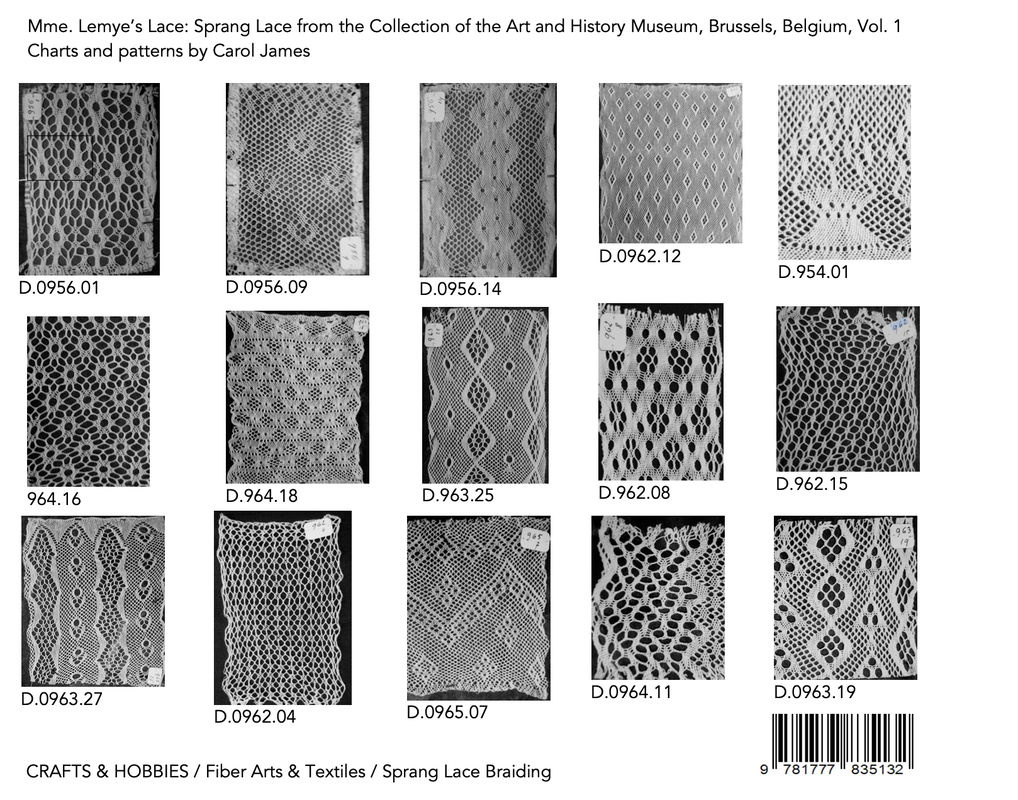
After much work, a new book of sprang lace patterns is almost ready for print.
It was back in 2013 that I visited the Art and History Museum, the visit arranged by Frieda Sorber. The plan was to view a collection of sprang lace. I was amazed by the variety and complexity of pieces in this collection. It is an ideal set of study pieces should a person want to explore sprang lace. I promised myself to find the time to work my way through these pieces, writing up charts and patterns, so that others in the future would more easily enter into the world of sprang lace. But first I needed to perfect my method of charting sprang lace. Peter Collingwood writes in Techniques of Sprang, "It seems impossible to find a system by which every size and spacing of holes can be drafted easily..." I took this for a challenge and developed my own method for charting sprang. In 2016 I composed a set of instructions for sprang lace, and sent it to some of my students. That was my trial run at writing a sprang lace pattern book. The charts and instructions were so happily received, and so praised, that I printed more copies and offer it as the book Sprang Lace Patterns. Those who are familiar with this book will know that many of the charts and patterns are simplified versions of the lace in some of the photos. In this new book readers will find the charts and instructions that are true to the complexity of the pieces in this most excellent collection of sprang lace. My followers will report that I have been talking about writing up charts and instructions for this collection for some time. When you finally see the various pieces in this collection you will understand why it has taken so long. I am grateful to people who have tested my patterns for me, Ria Hoogheimstra and Debbie McClelland. I am also grateful to my apprentice Sharon Wichman for her proof-reading skills, and to Ruth Temple for putting all of this work into a book-shaped object. I am very pleased to announce that publication of Volume I of those patterns is about to happen. Yes, Volume I means that there will be a Volume II. Actually there are so many pieces, and so many different motifs that, honestly, I am planning for probably 5 volumes before I exhaust this collection. Volume I contains more than 40 motifs. It tries to introduce the reader to the "staples" of sprang lace, containing several different grids (used as background in many pieces) as well as basic shapes: triangles, diamonds, flowers, zig-zags. There is minimal overlap between patterns in this book and patterns from my other sprang lace books ... there are so many possibilities with sprang. Ria Cooremans, current curator of textiles at the Art and History Museum contributed an excellent forward to the book. Readers will be delighted with the information she shares from museum records on the origin of this collection, as well as the history of sprang. Who was Mme. Lemye? Why is the title "Mme. Lemye's Lace"? The forward reveals all. Publication is now immanent, and I therefore open up pre-sales. The price of the book (120 pages), once it is printed in June will be $25. Those who pre-order the book can do so for the very favourable price of $20 + shipping.
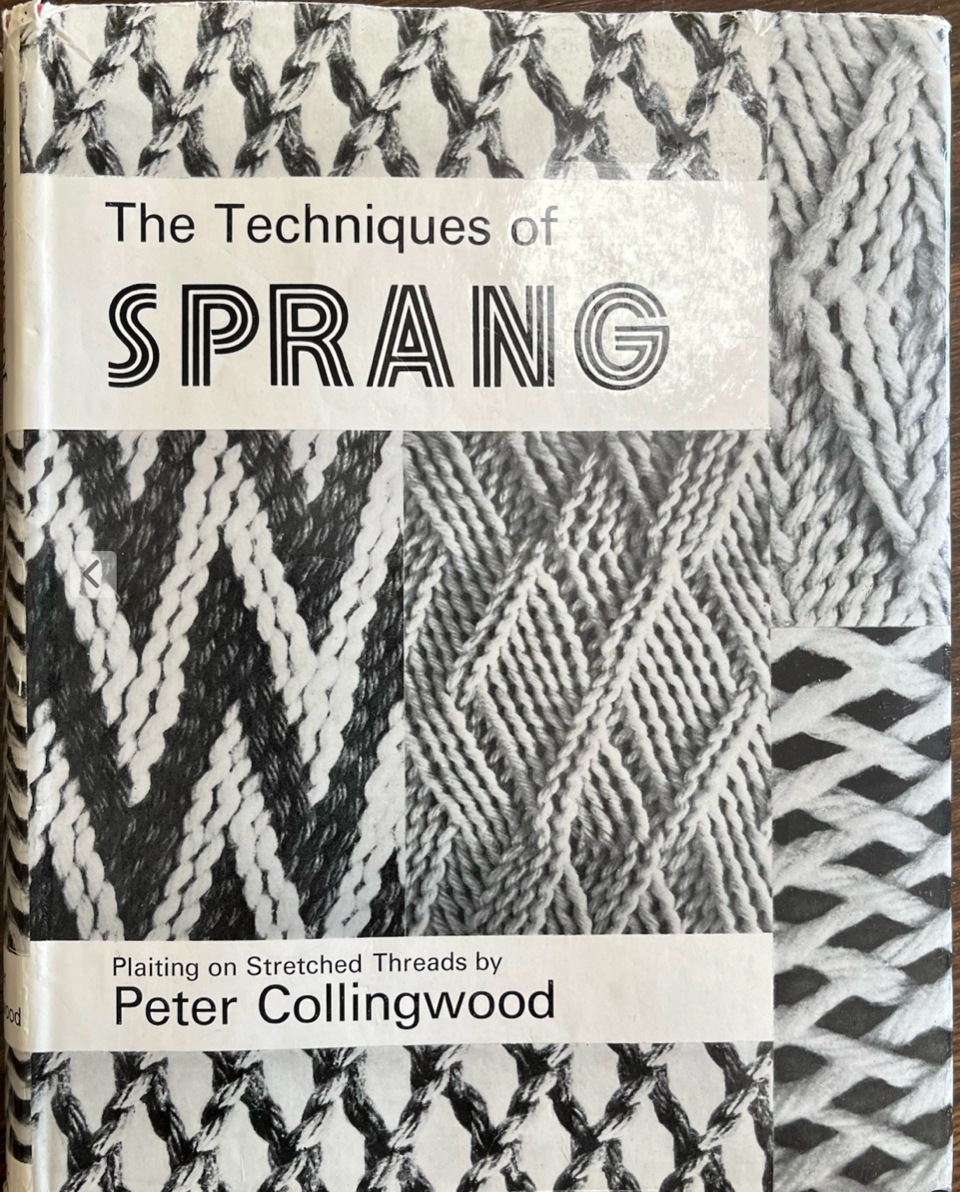
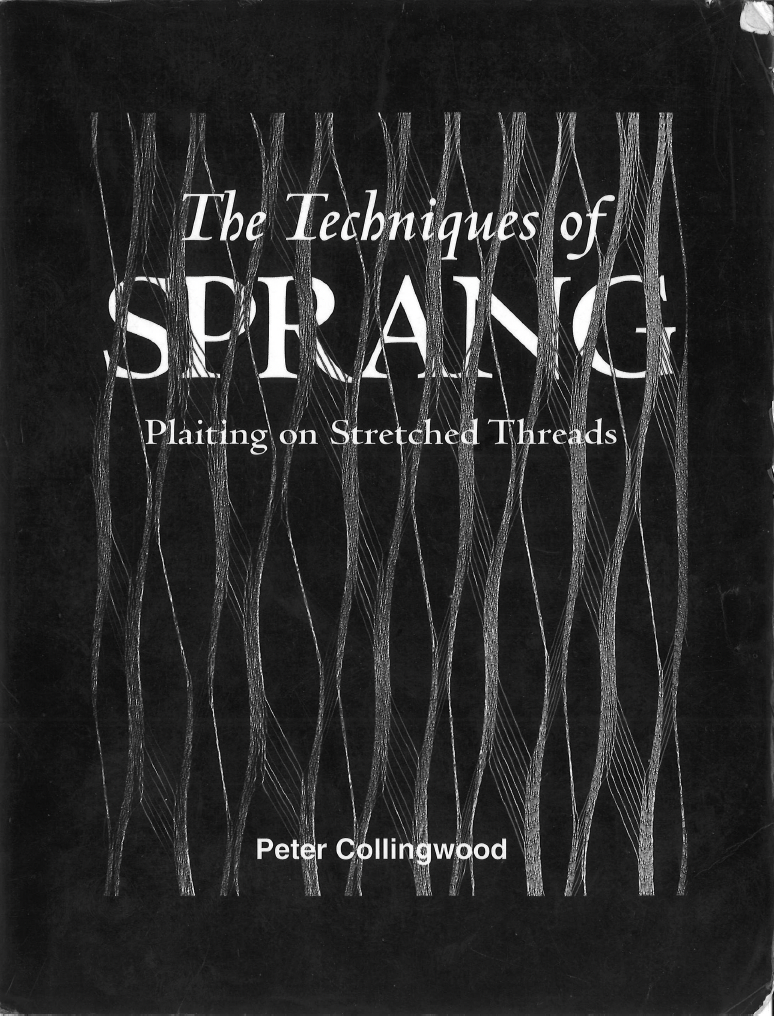
At long last, Peter Collingwood’s book Techniques of Sprang Plaiting on Stretched Threads is once again available to the public!!!
An agreement between Collingwood’s son Jason and Taprootvideo was reached earlier this year. That agreement resulted in the scanning of Carol James’s paperback copy of the book, and that scan mounted onto the Taprootvideo site. You can download the book (the file is quite large, so it down-loads in five separate files) to your computer for $35 USD. Because it has been scanned it is searchable. This book is a must-have for anyone who wants to explore sprang. It is encyclopedic in scope, and an excellent example of the saying "the simple is revealed when the complex is exhausted”. The book was originally published in 1974 as a hard back book. That cover features a number of different sprang structures. The book was later re-published as a paperback with an addition to the forward. The cover of that book is mostly black. It is the later edition that was scanned by Taprootvideo. Get your copy of the book at https://taprootvideo.com/instructorClasses.jsf?iid=14 https://taprootvideo.com/preview_class.jsf?iid=14&cid=1
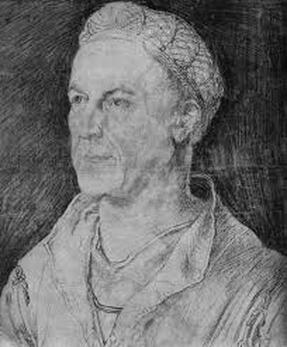
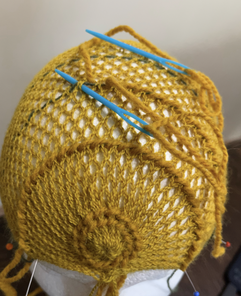
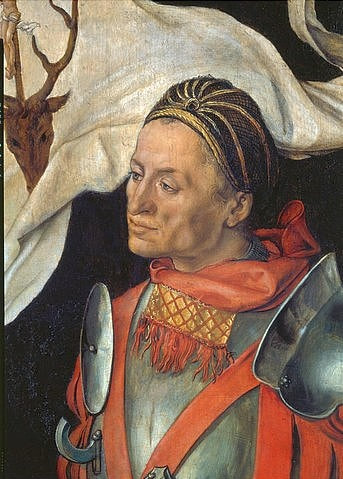
The portrayal of Jacob Fugger by Albrecht Drürer leads me to think that Mr Fugger wore a sprang bonnet. I tried to make a similar bonnet. I interpreted the heavy lines in the bonnet as lines of horizontal twining in a sprang bonnet. When I tried this myself I found that there may be a reason for the twining in the sprang bonnet, as you will see.
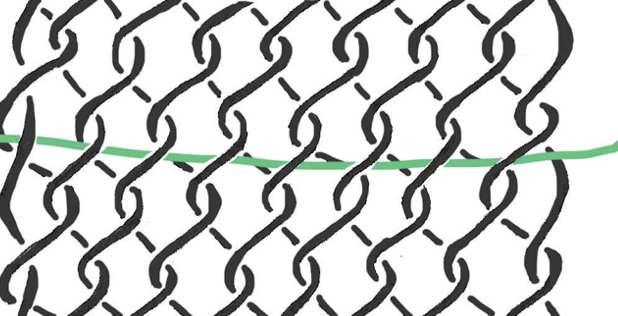
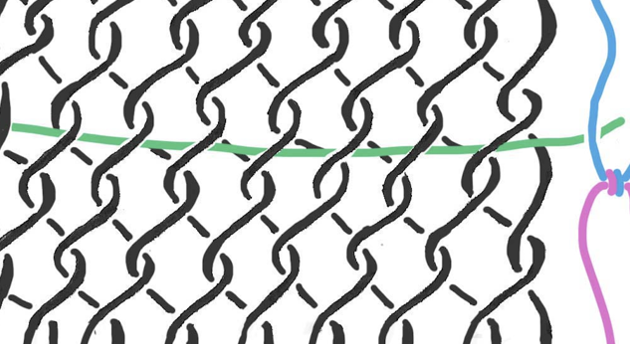
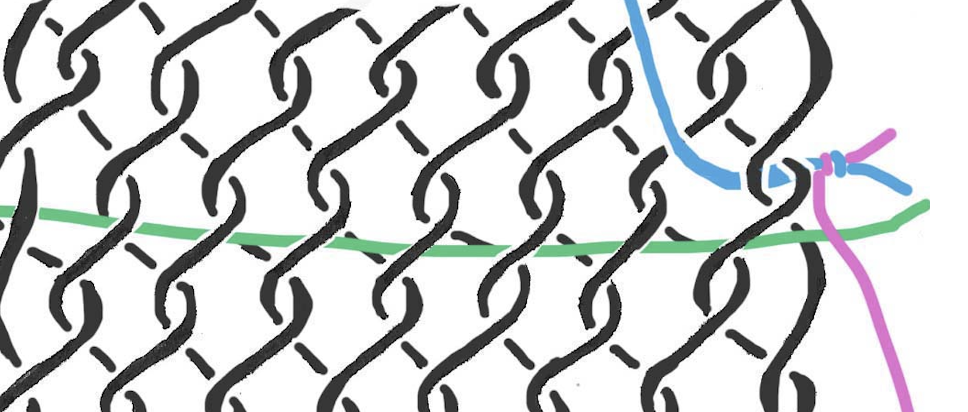
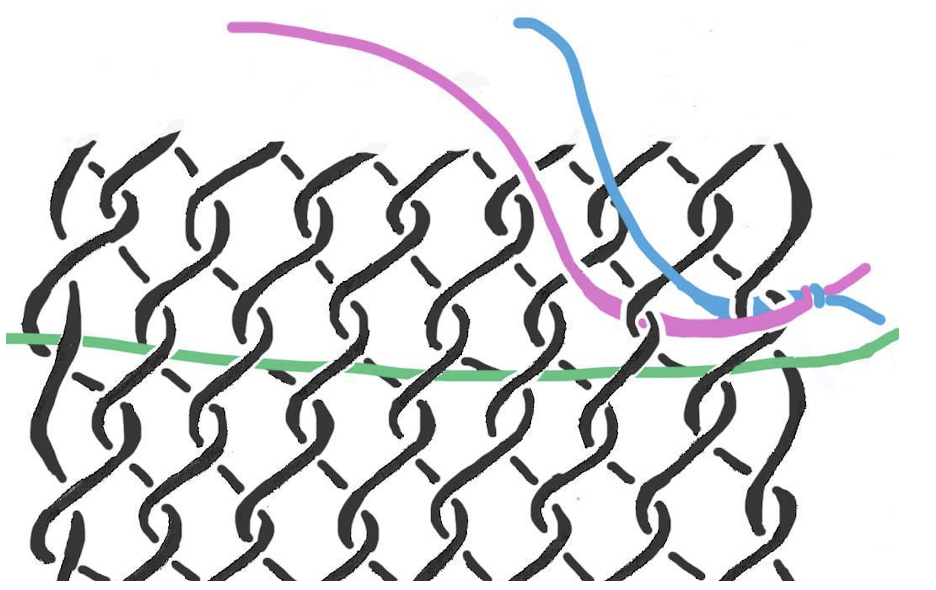
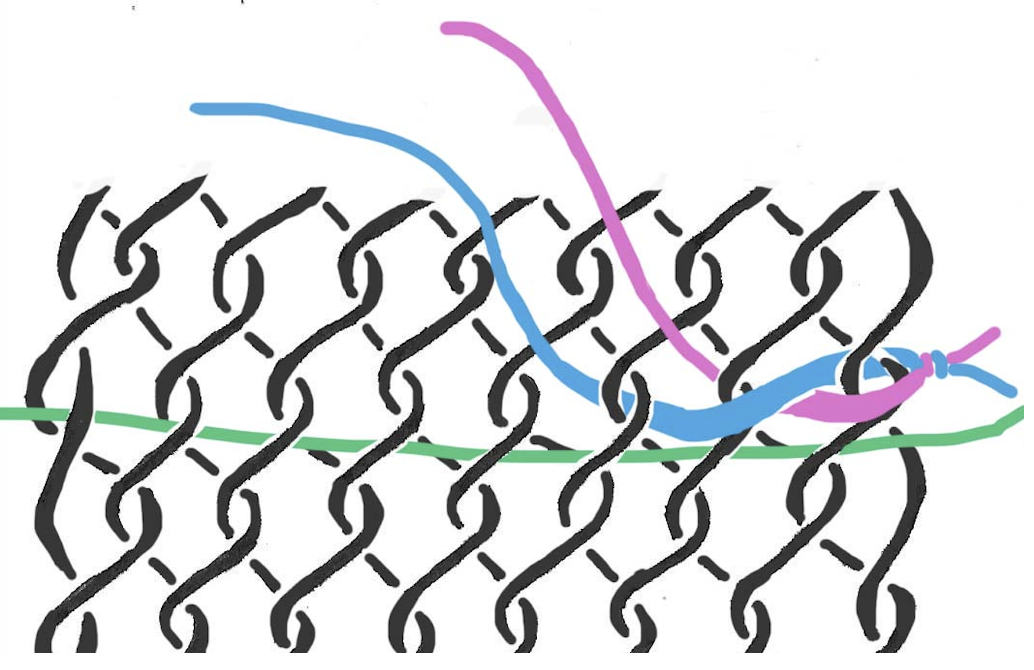
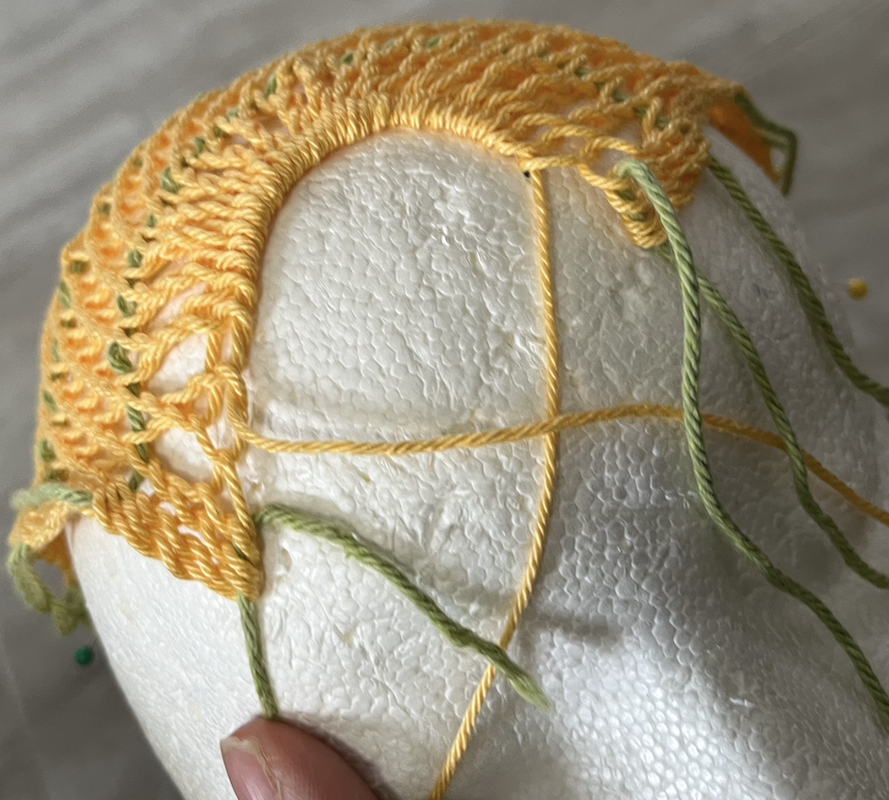
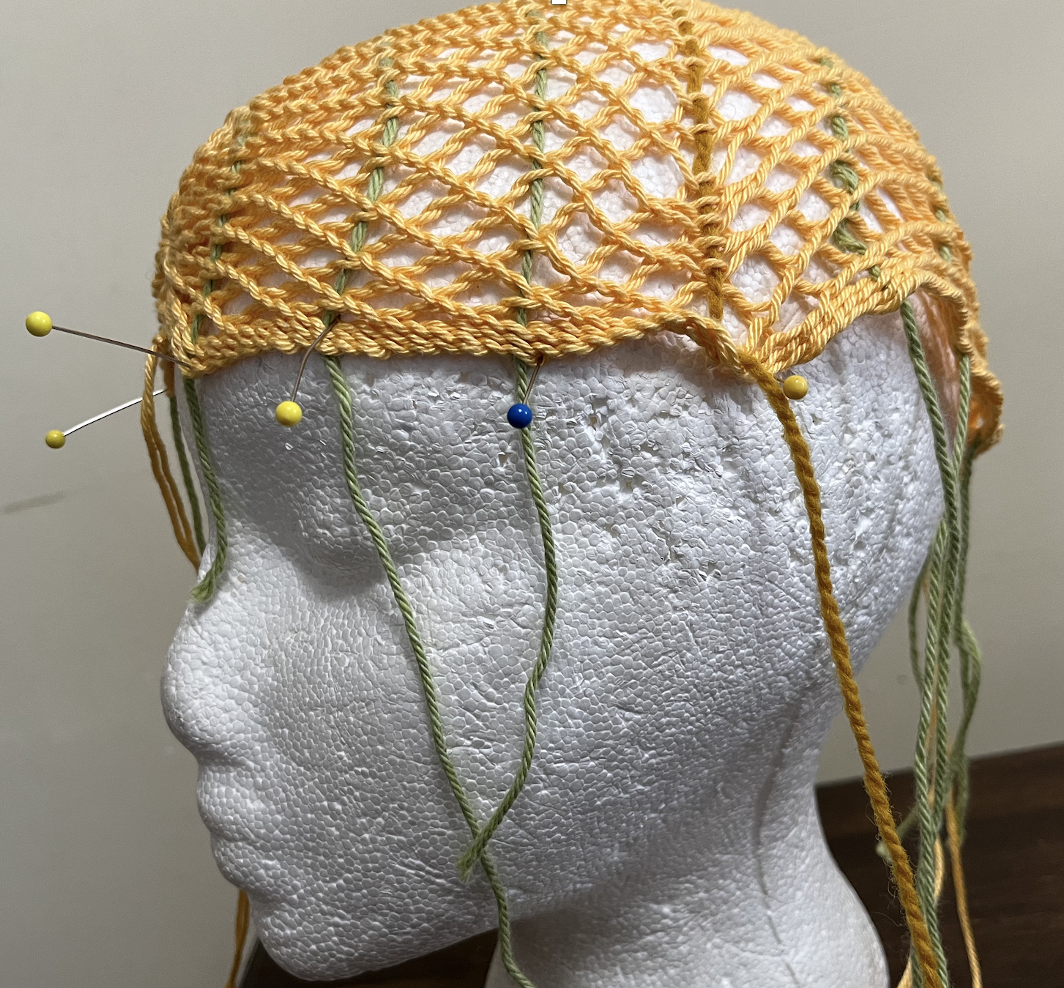
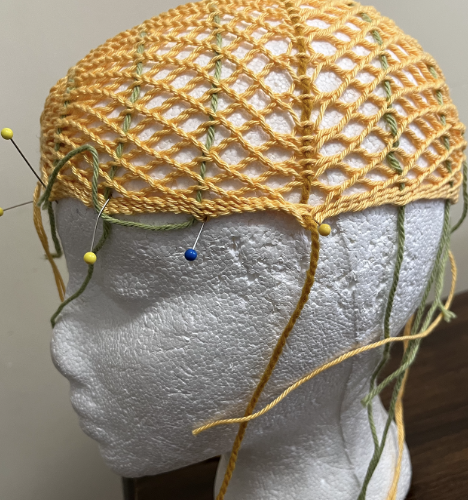
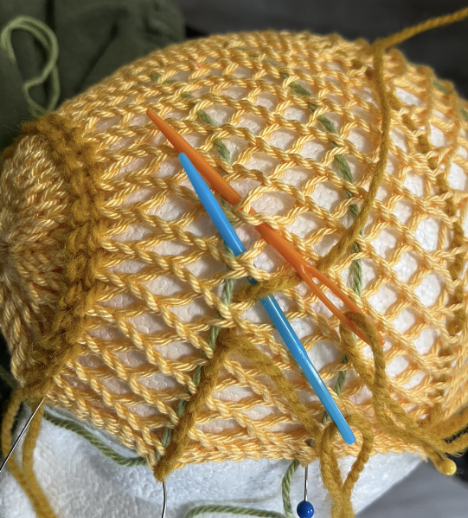
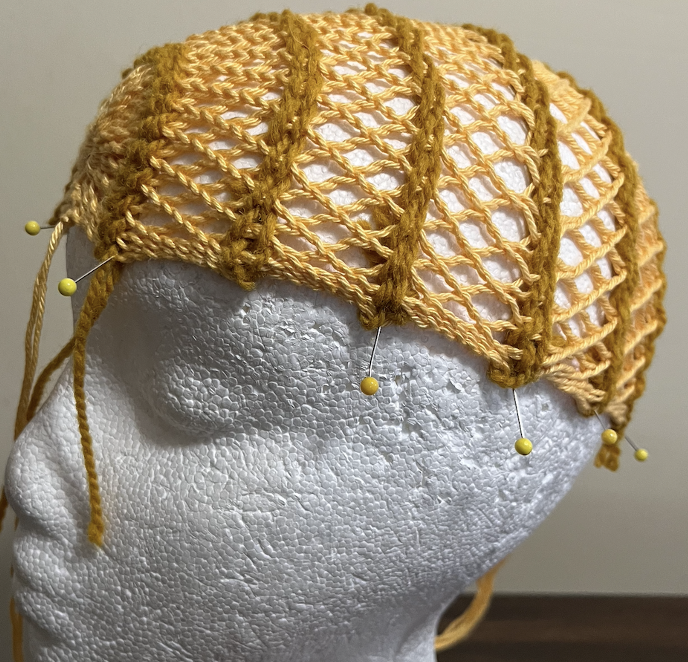
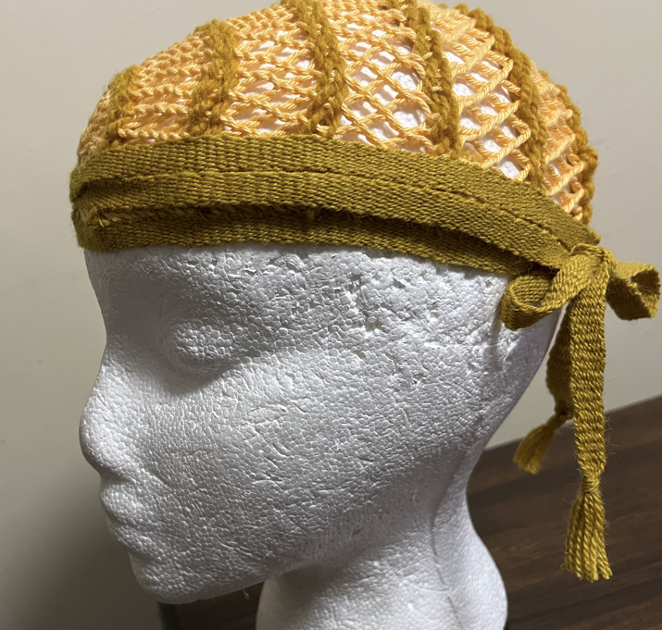
Thinking about approaches to incorporate horizontal twining into the sprang cloth, I thought of two ways to do this. One way (method #1) is to create a line of weft twining as I created the cloth. The other way (method #2) is to add the twining stitches after completing the sprang. The twining stitch does not have the stretch of the sprang cloth. Maybe, indeed, this was the whole idea of the twining line. This risk of method #1 is that the line of twining is too narrow for the desired width of the bonnet. I found method #2 to be more effective, in that I could place the sprang cloth on a head shape (styrofoam head) and then work the twining stitch at the desired tension, creating the desired width of the cloth, fitting the bonnet to the head. How did I work the twining stitch?
How do you tie the bonnet on the head? Two approaches come to my mind.
If you want the ends of the band to pass all the way around the head, then I would pass both ends through the circle at the back of the head.
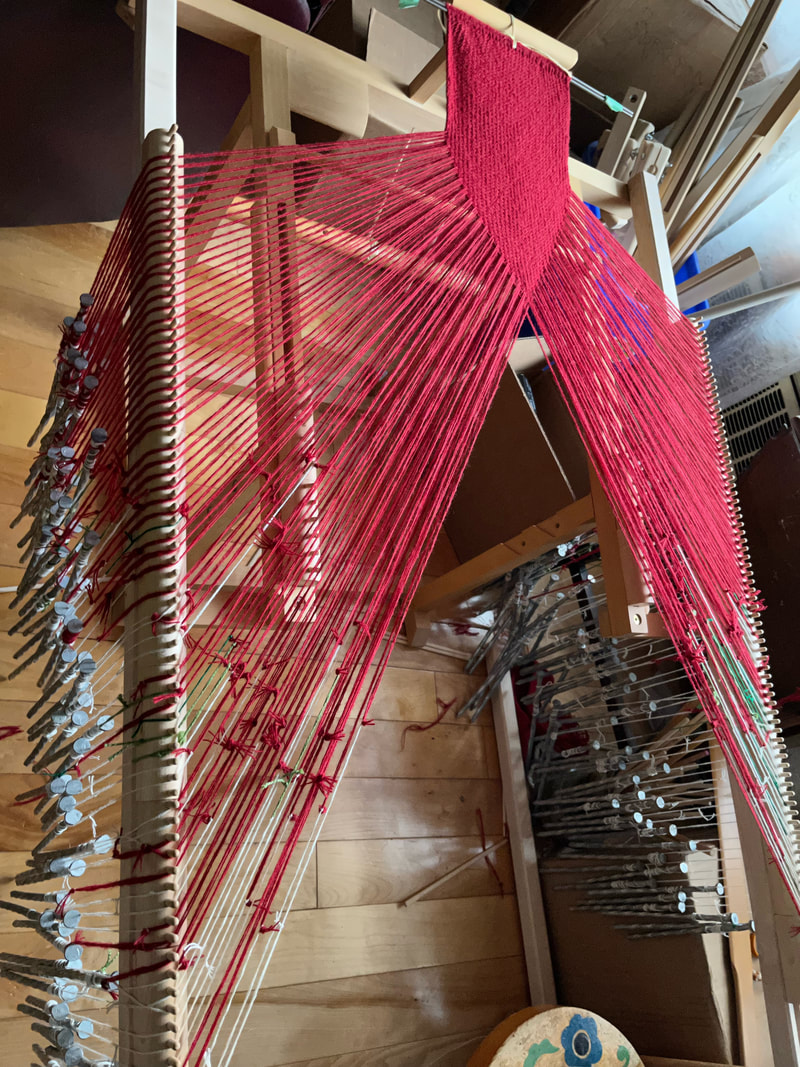
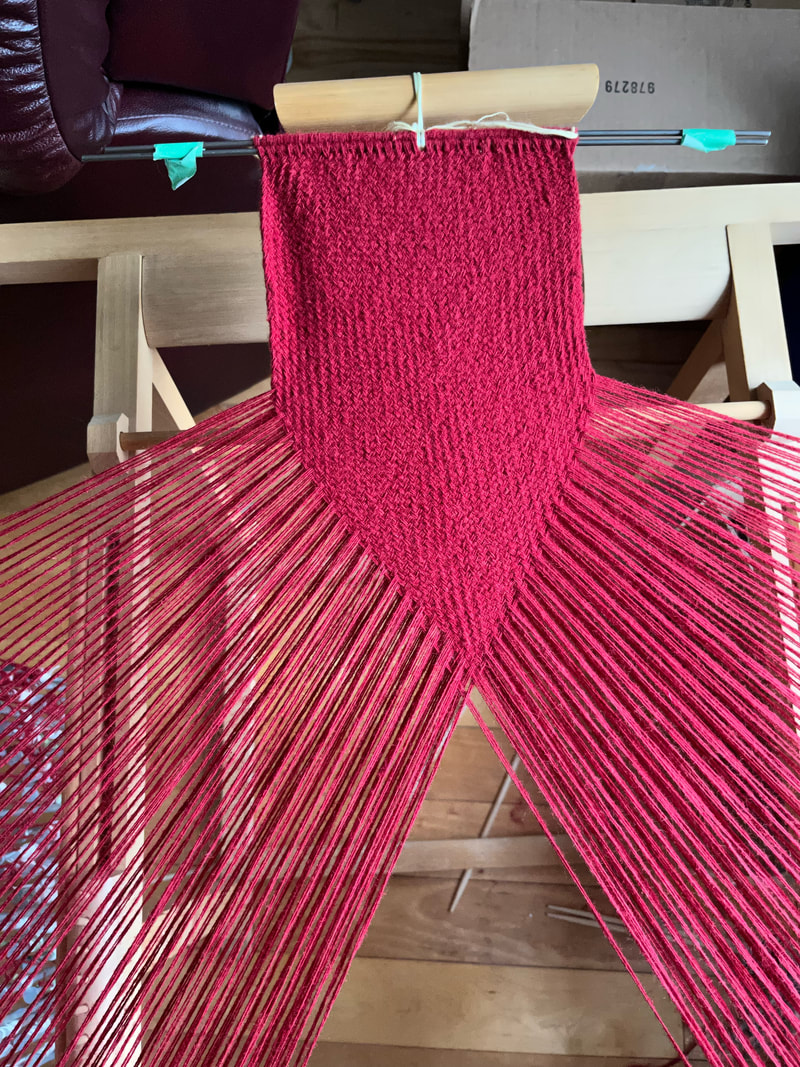
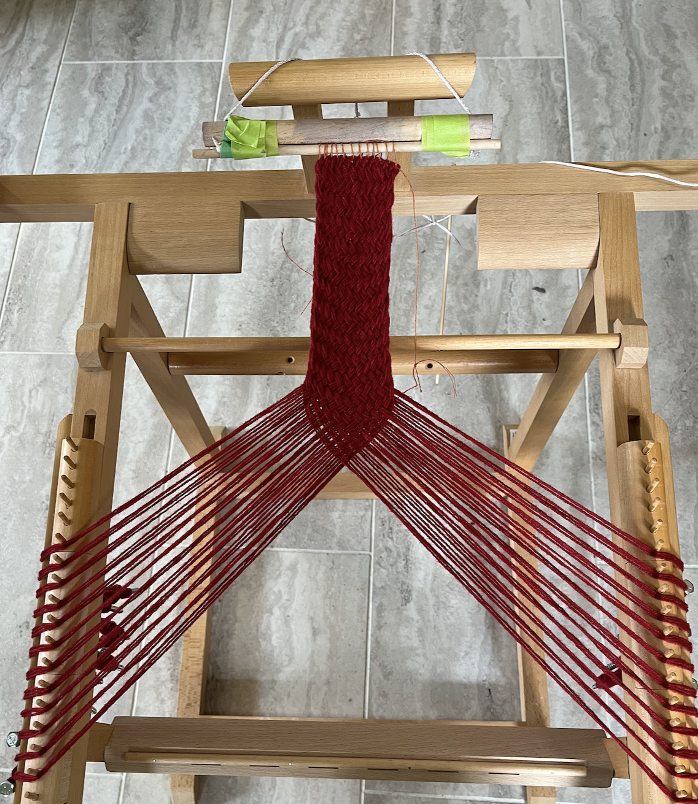
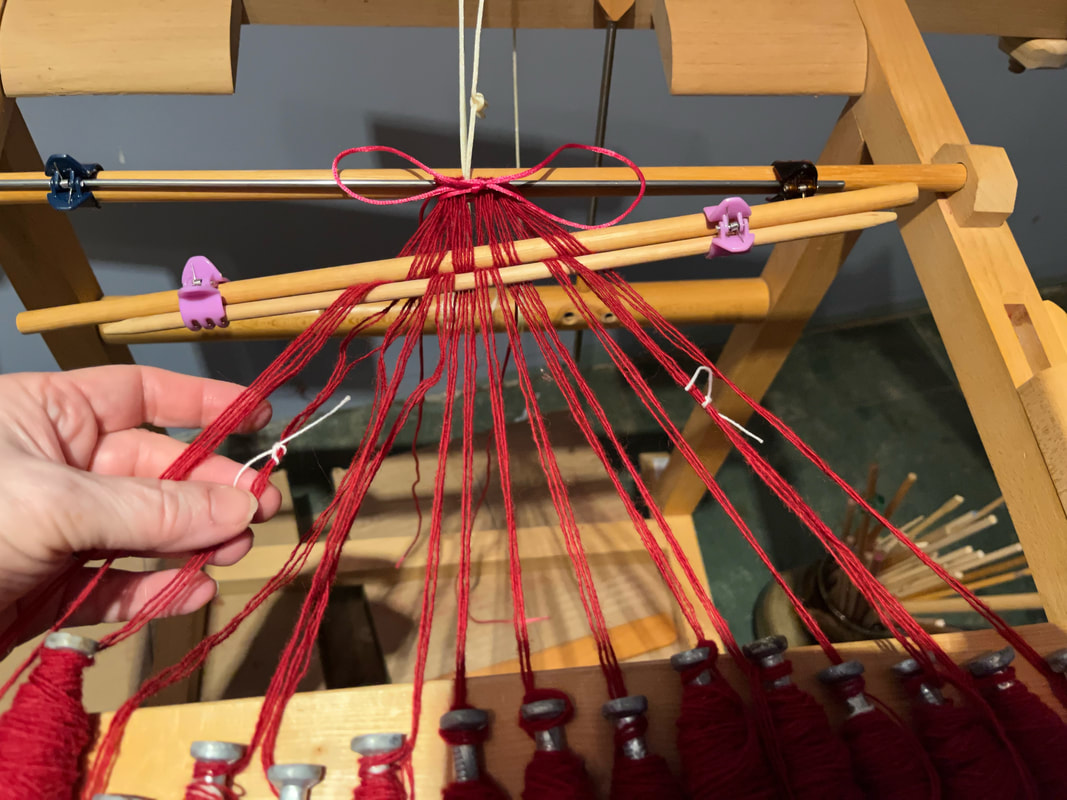
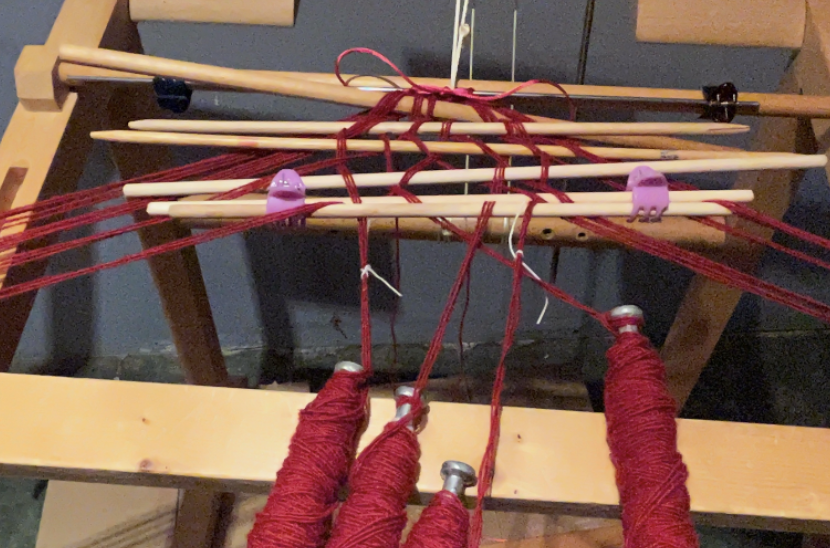
The German Archaeology Institute in Berlin, and in particular individuals working on their Silk Road Fashion Project have invited me to work with them in the past. My job has been to create braided bands. In 2016 I assisted with the project recreating the outfit worn with the world’s oldest known pair of trousers. Check out https://www.youtube.com/watch?v=Pl7siWwzibs More recently I was asked to create braided bands of a structure that is a 2-2 twill with a vertical rib. The desired length for the bands varied from some 1.3 meters to 11 meters long.
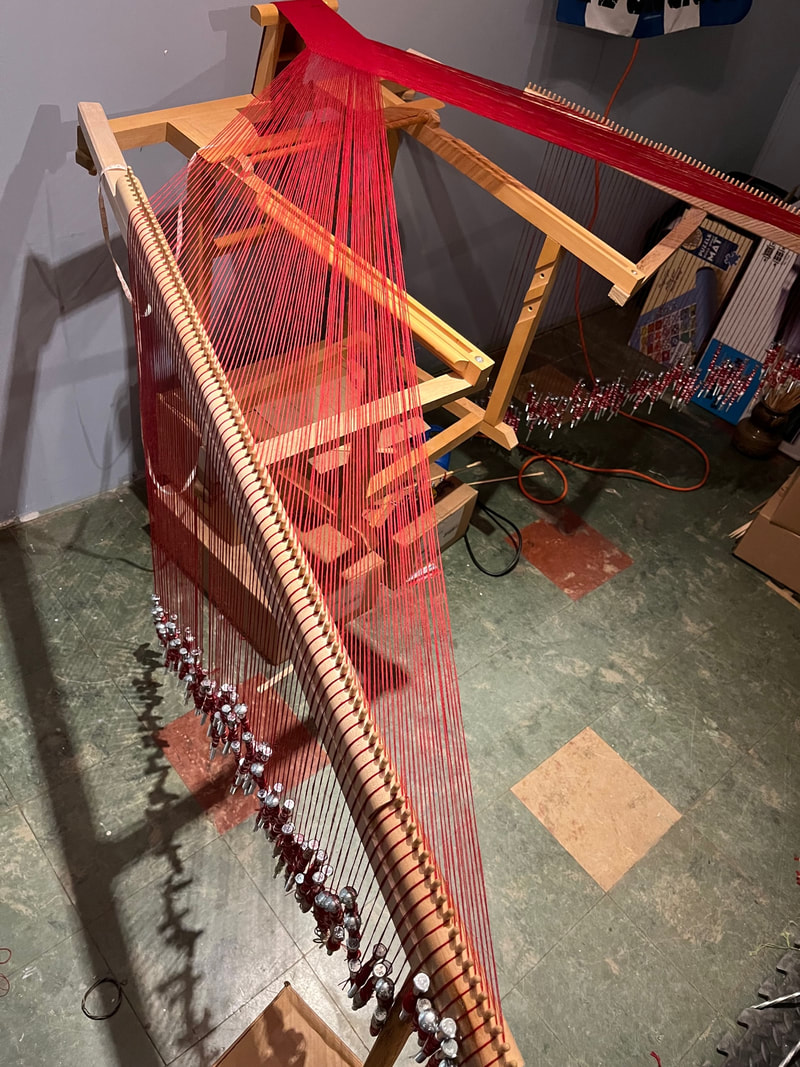
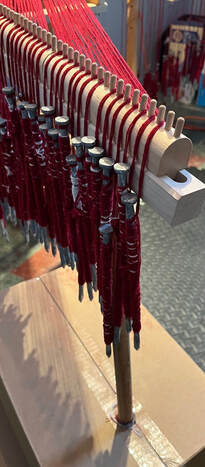
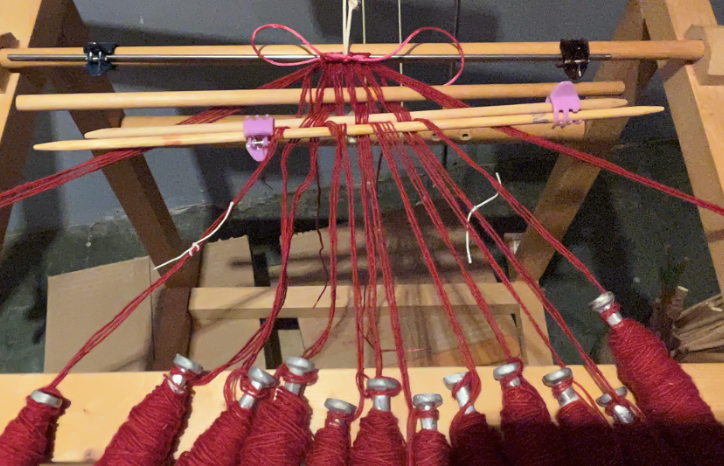
The result of this was the decision to create all the braids using a takadai, a Japanese braiding table. The takadai has the weaver set up the threads on bobbins, and the bobbins are placed around the takadai. The weaver manipulates the threads by moving the bobbins. The takadai facilitates the weaving by holding the bobbins in place.
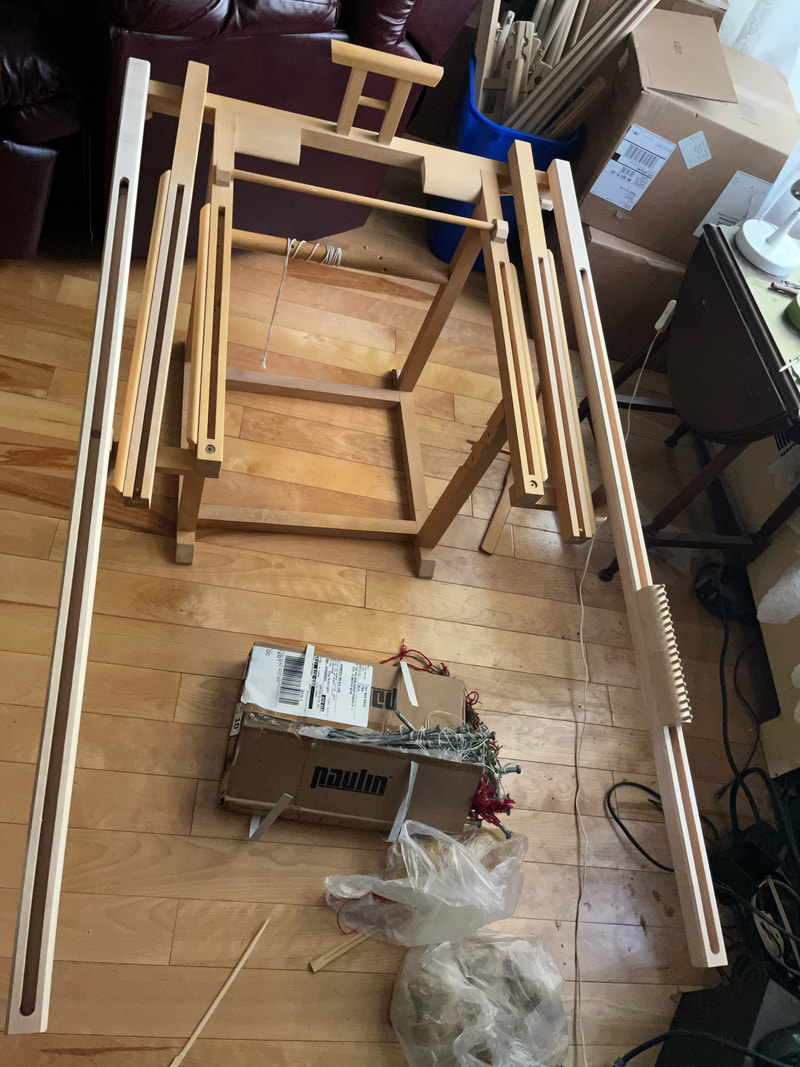
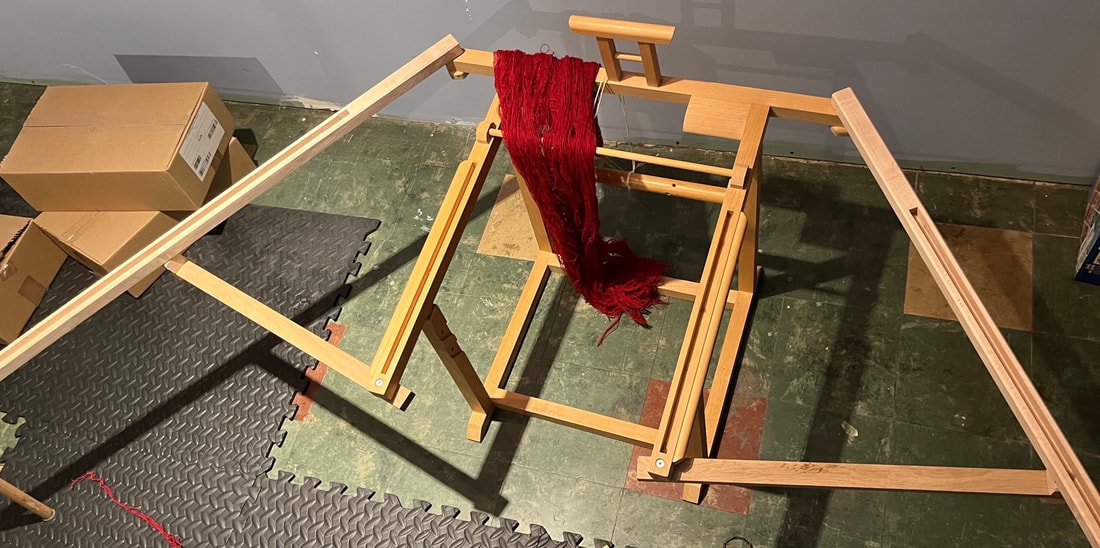
Back to Paul Shipman for adjustments to the longer arms.
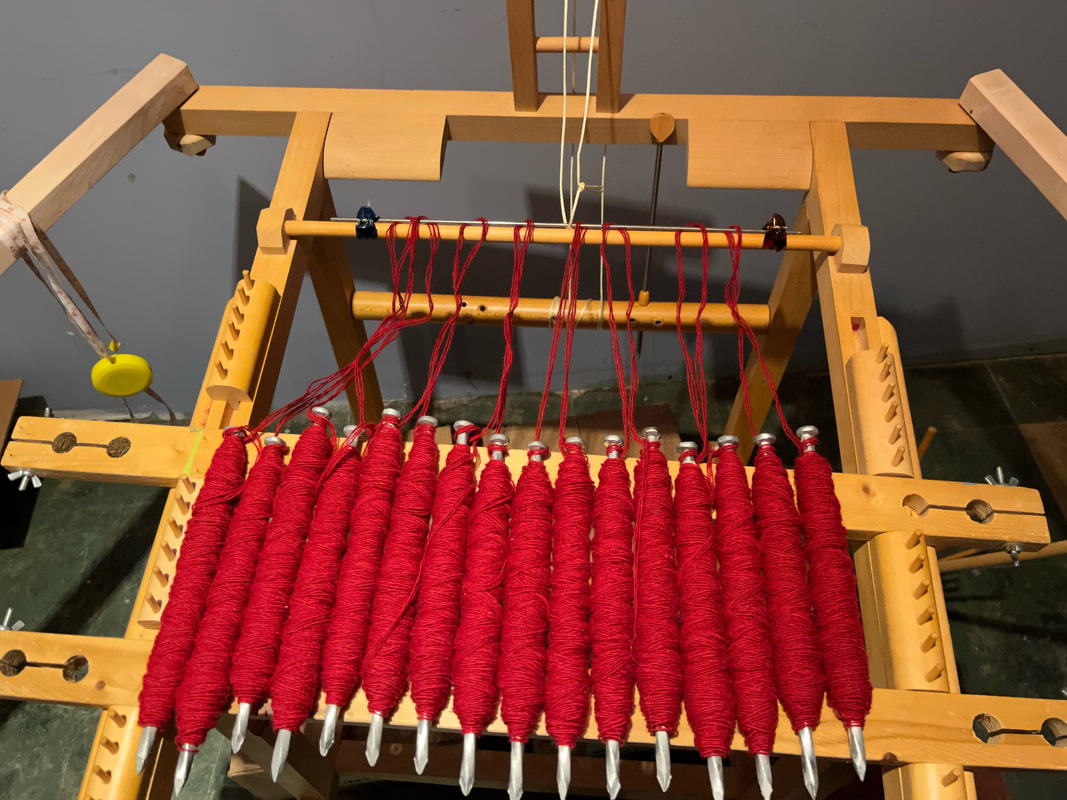
The longer arms, loaded with 92 bobbins, caused the takadai to tip over. This meant that I fitted the far ends of the long arms with legs, and it worked nicely. The great number of bobbins meant that each koma travelled a significant distance before moving to the bottom of the row. This meant that each bobbin descended a significant distance before passing as weft. All this resulted in a need to mount the takadai on boxes to allow for the space for the bobbins to descend.
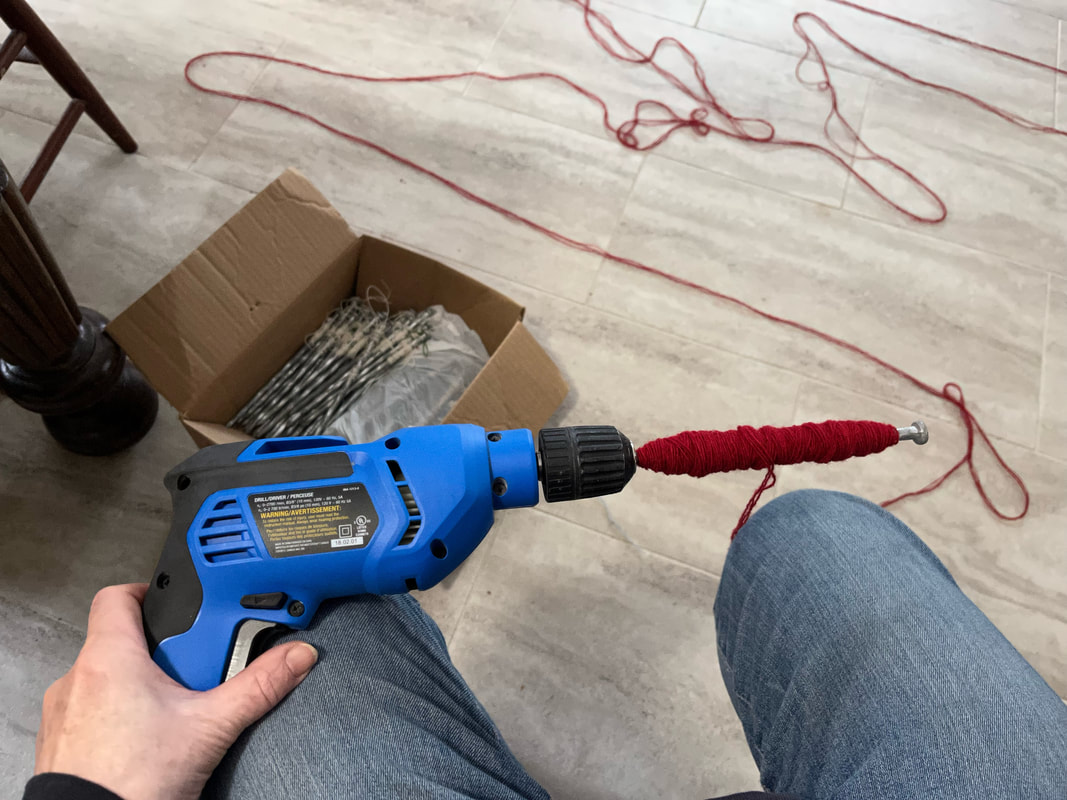
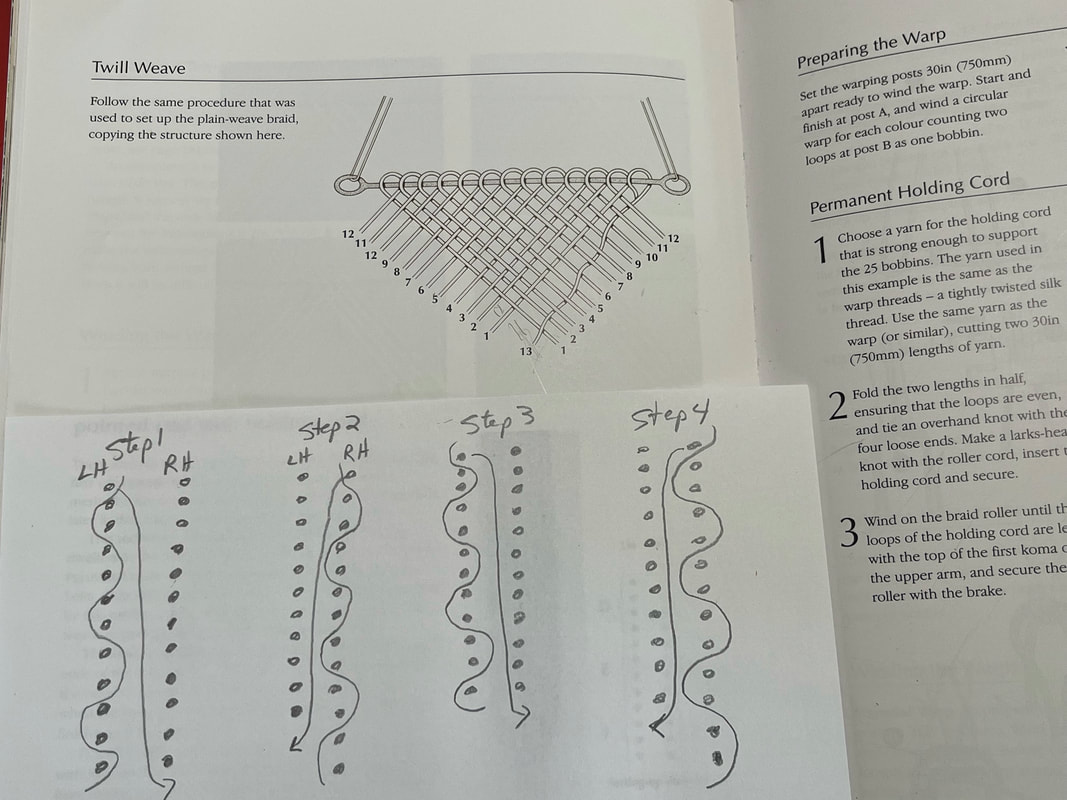
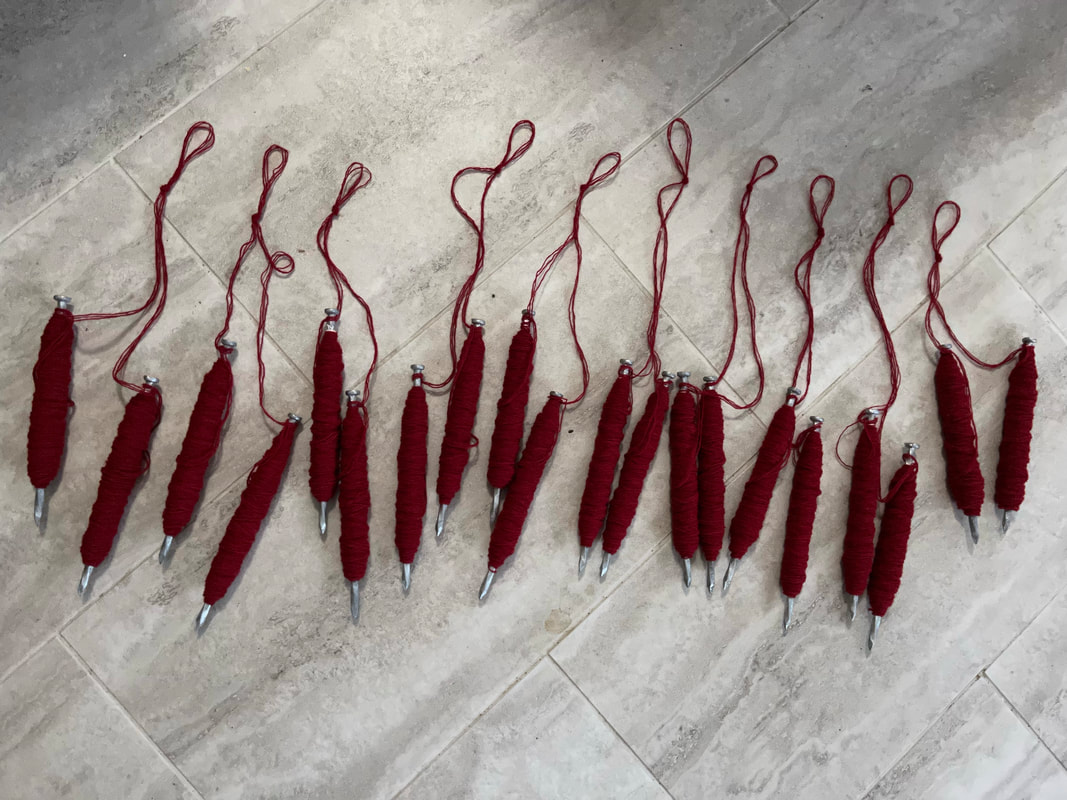
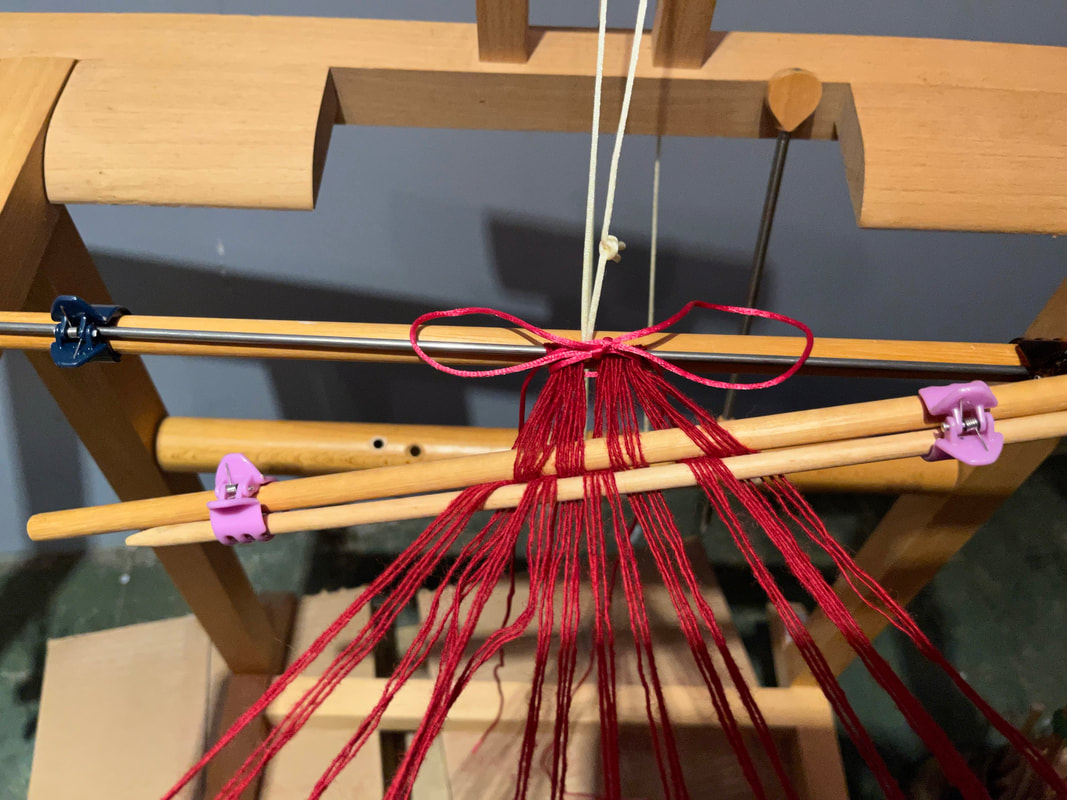
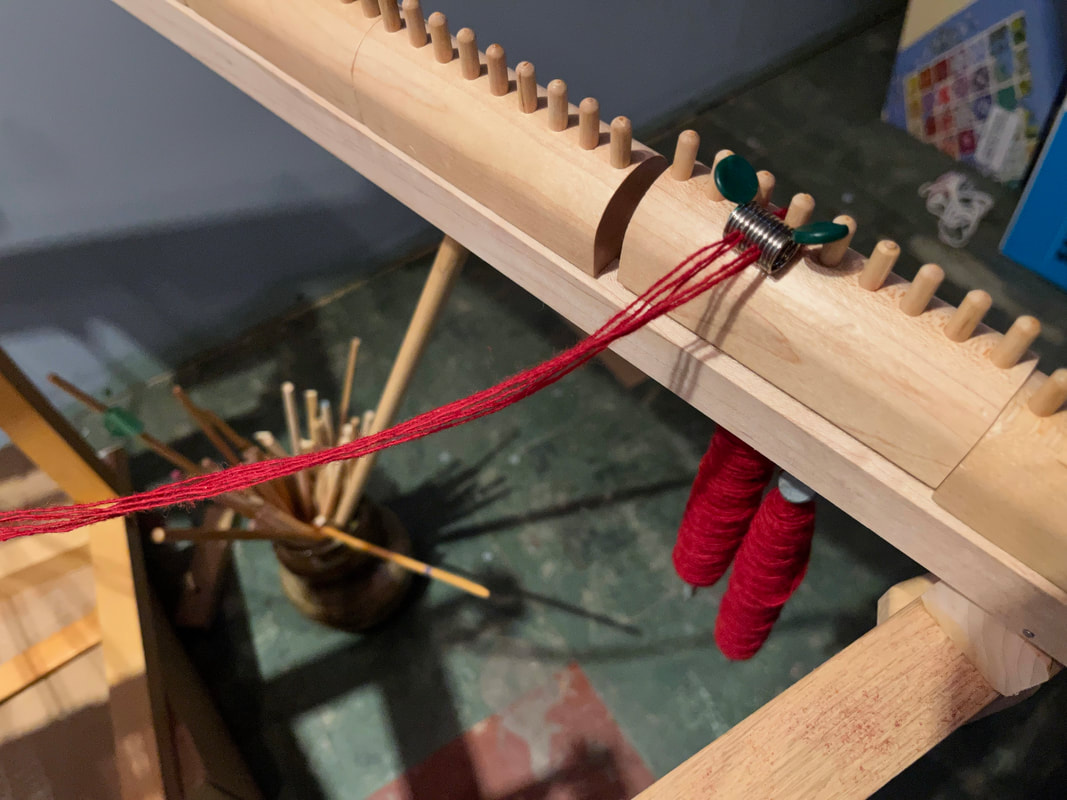
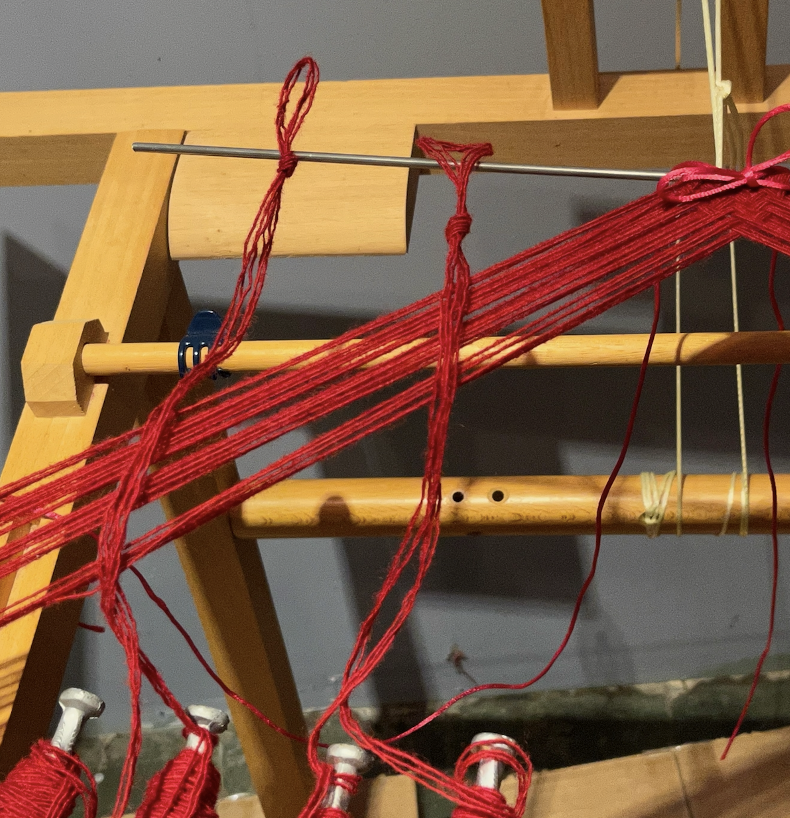
In the end I realized that I need to set up the warp using the rules for the Vertical Ribs. I measure out the warp threads two at a time. I mark the center of the two warp threads by tying a large loop. In this manner I begin with a set of pairs of bobbins.
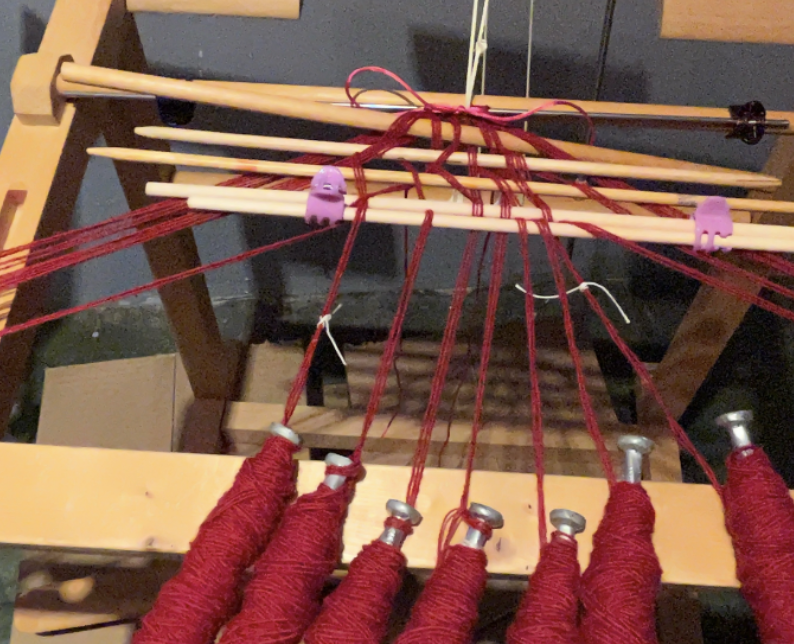
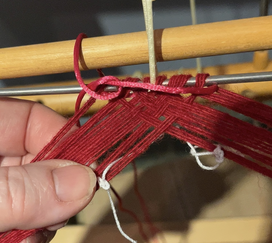
After each row of manipulation -Re-arrange the bobbins -Take the threads that have passed the triangle margin (white marked thread) off to the side
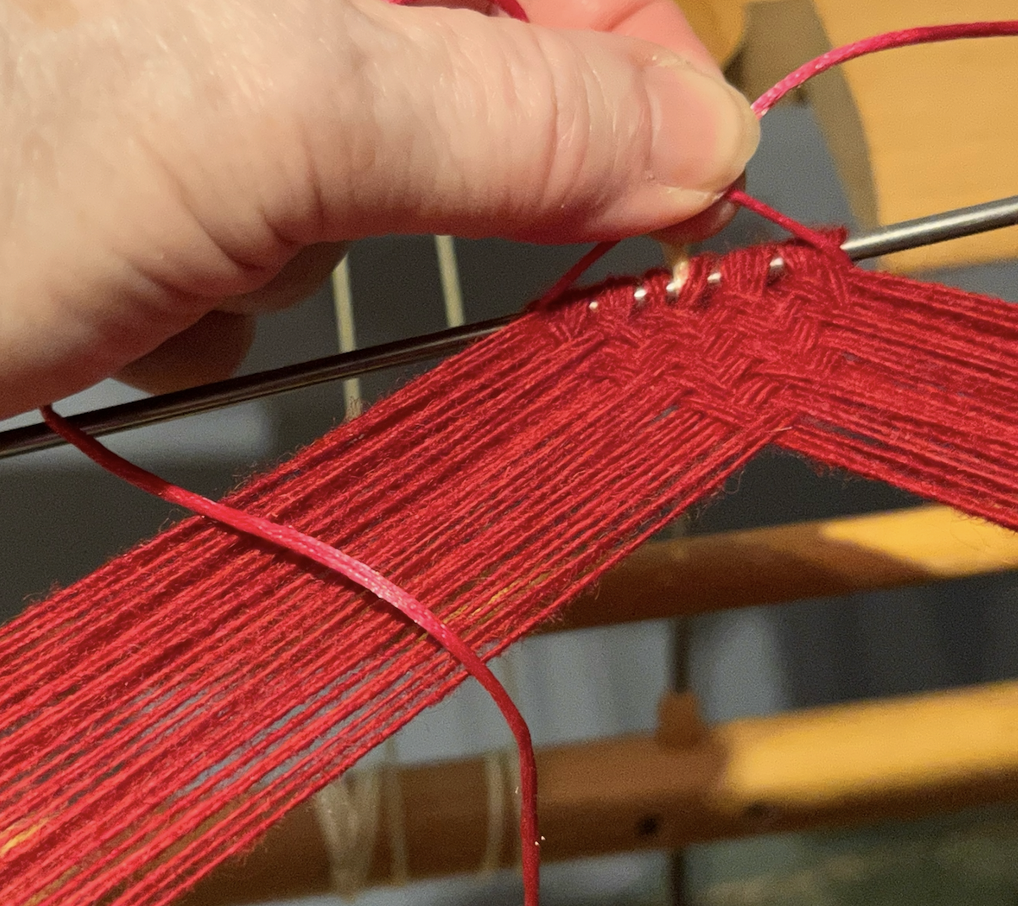
When the margin threads (white marked threads) meet at the middle, your initial triangle is complete, and the structure has been established.
The next added thread will enter the cloth by passing under 1, then follow an over 2, under 2 path.
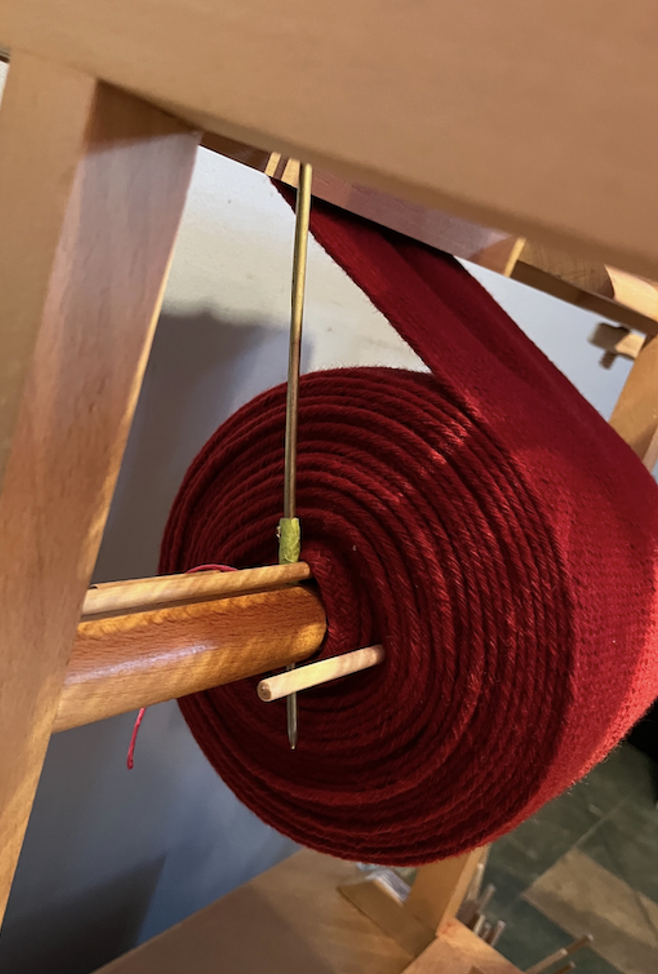
Once the desired width was reached, it was a matter of putting in the time necessary to create the desired length. I needed to learn to check each row for accuracy. Common errors were inaccurate over-2-under-2, and Due to the fact that each bobbin holds three threads, another common error was splitting the 3 threads from a bobbin. The other challenge was to pack each row consistently. Beyond that it was a matter of working a couple of hours each day .... for several weeks ... to achieve the desired 11 meter length. I found that the stretch of the cloth caused a bit of sagging at the center of the cloth. I noted a slight ruffling of the center of the cloth between the tori and where it winds up at the back of the takadai. To minimize this I decided that I needed to support the cloth when winding on. To prepare for winding the cloth onto the back of the frame each time I inserted a stick into the current shed on either side of the cloth. I used these sticks to push upwards (towards the tori) on the cloth at the same time as I wound the cloth onto the back of the takadai. This minimized the amount of sagging at the center of the cloth as it wound onto the back of the frame.
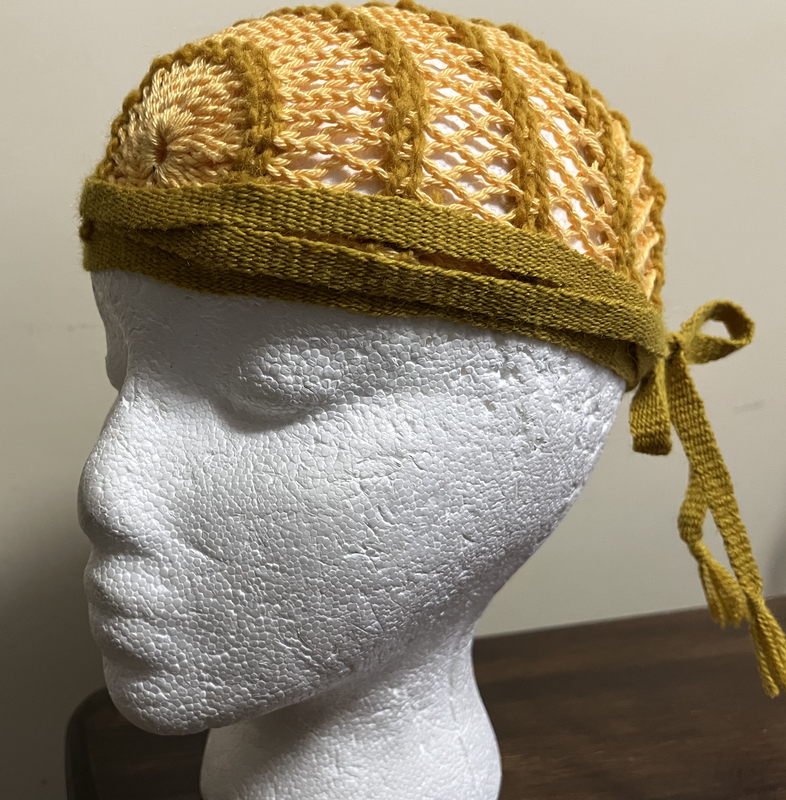
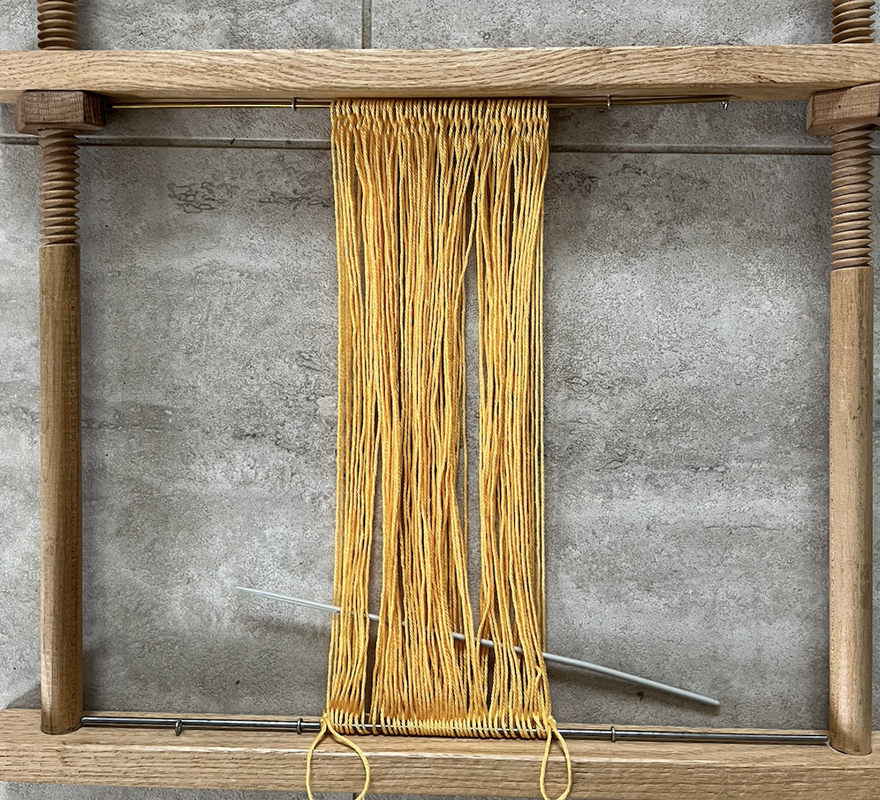
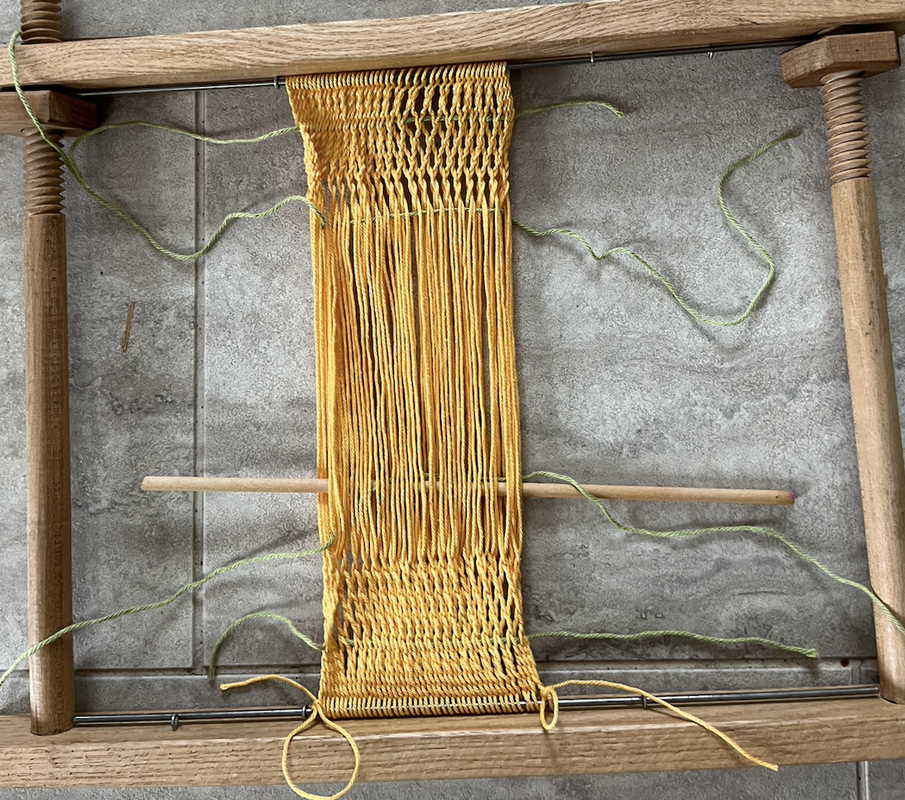
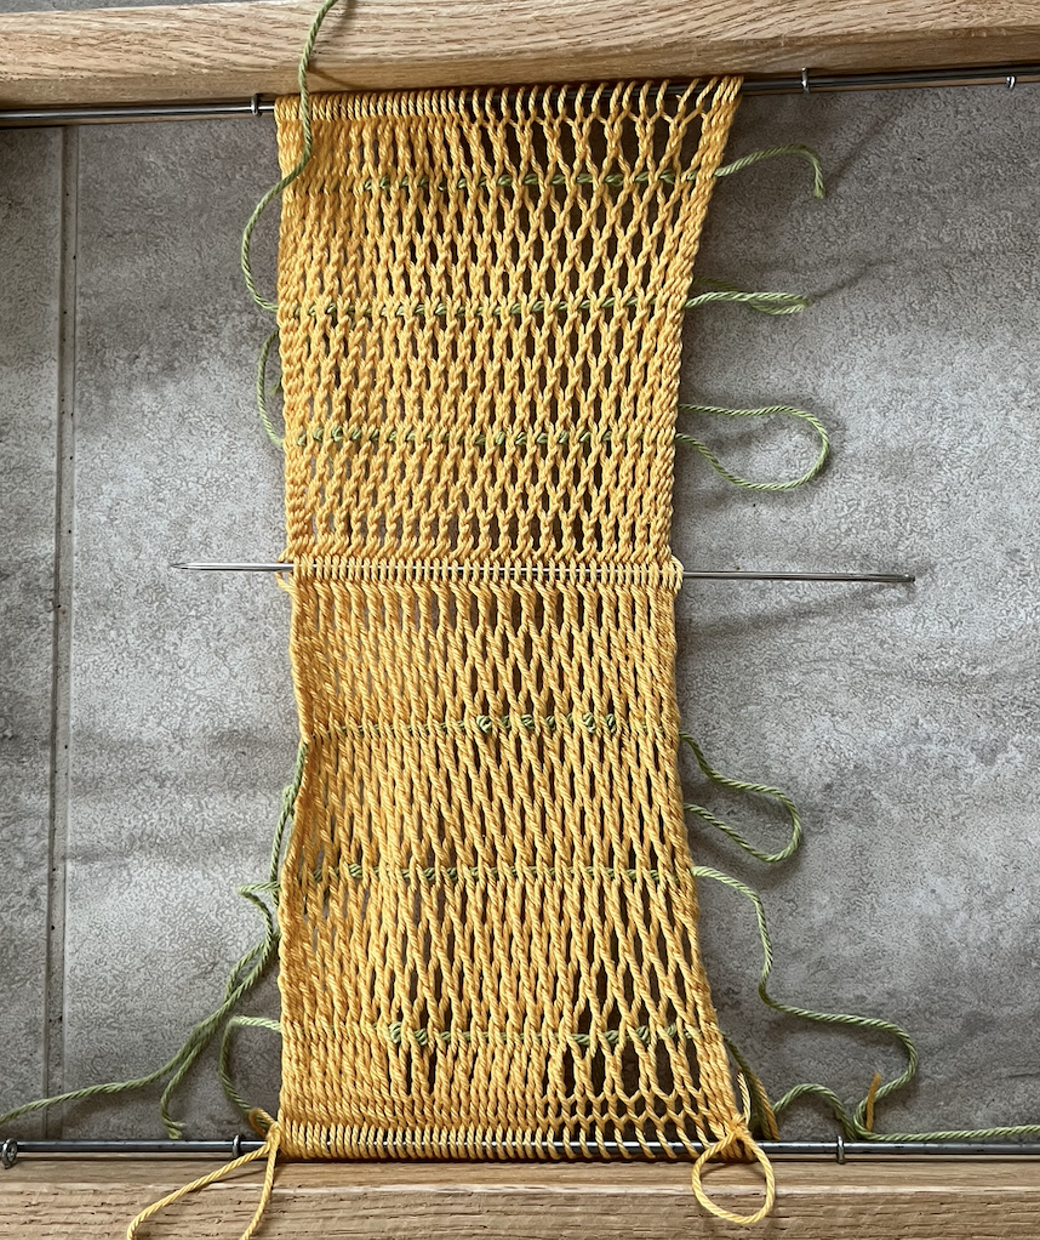
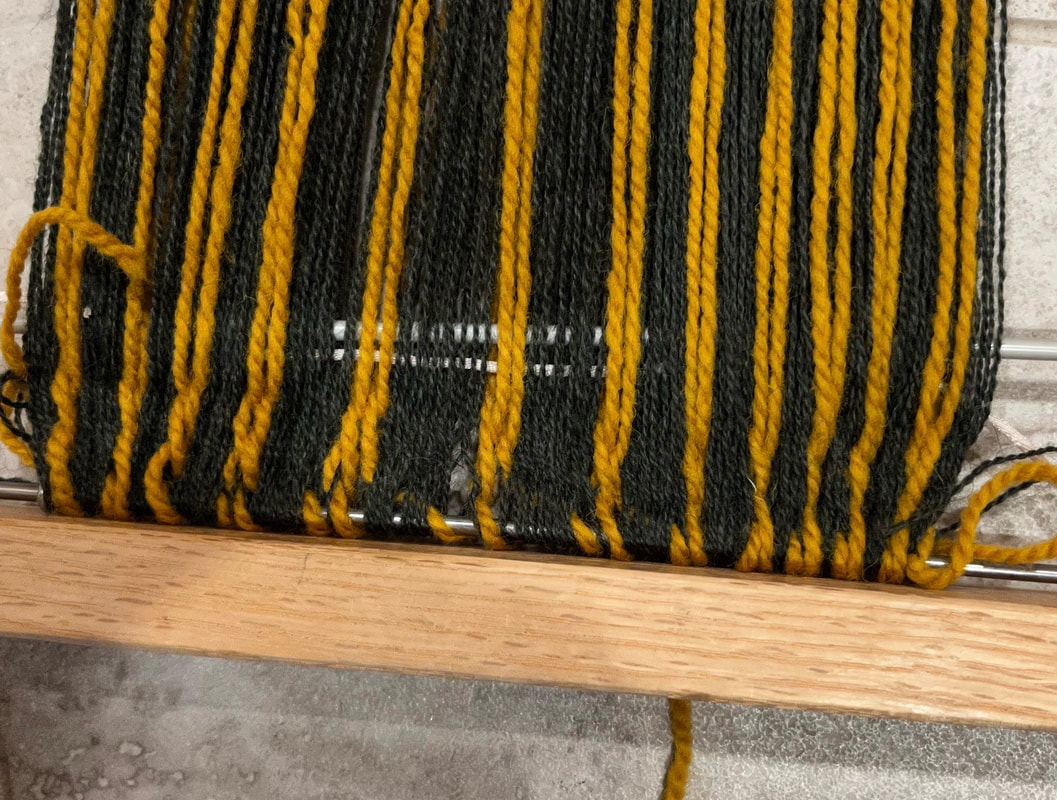
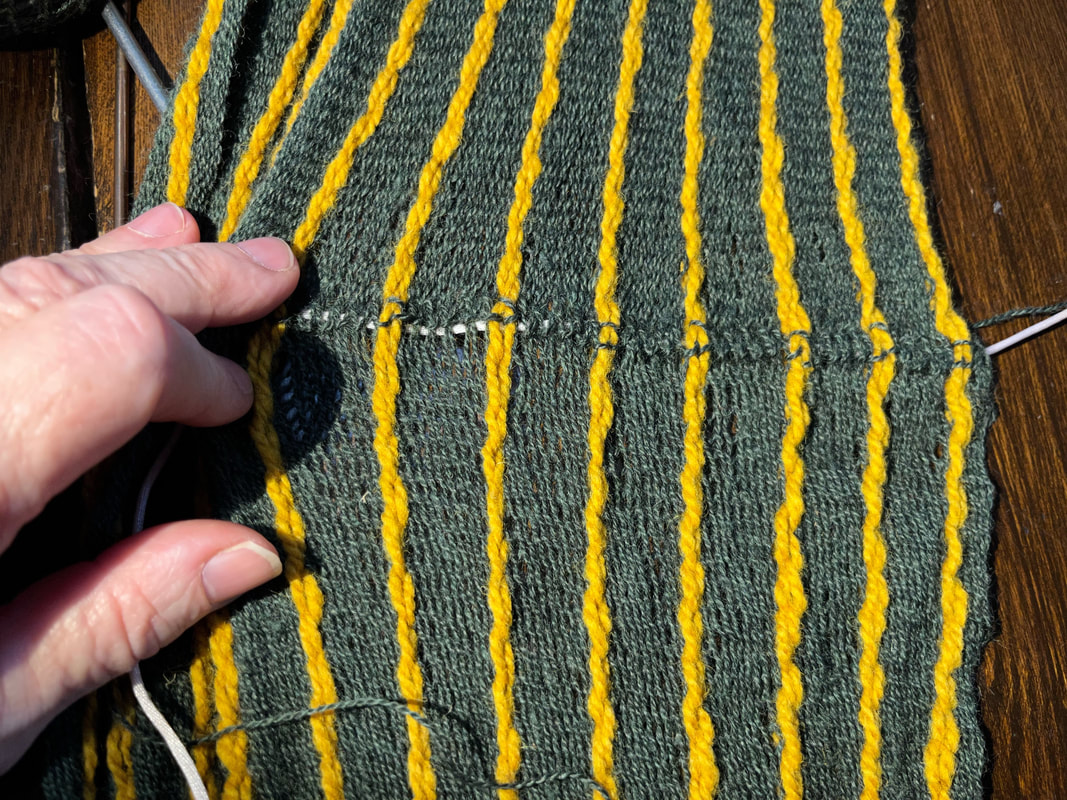
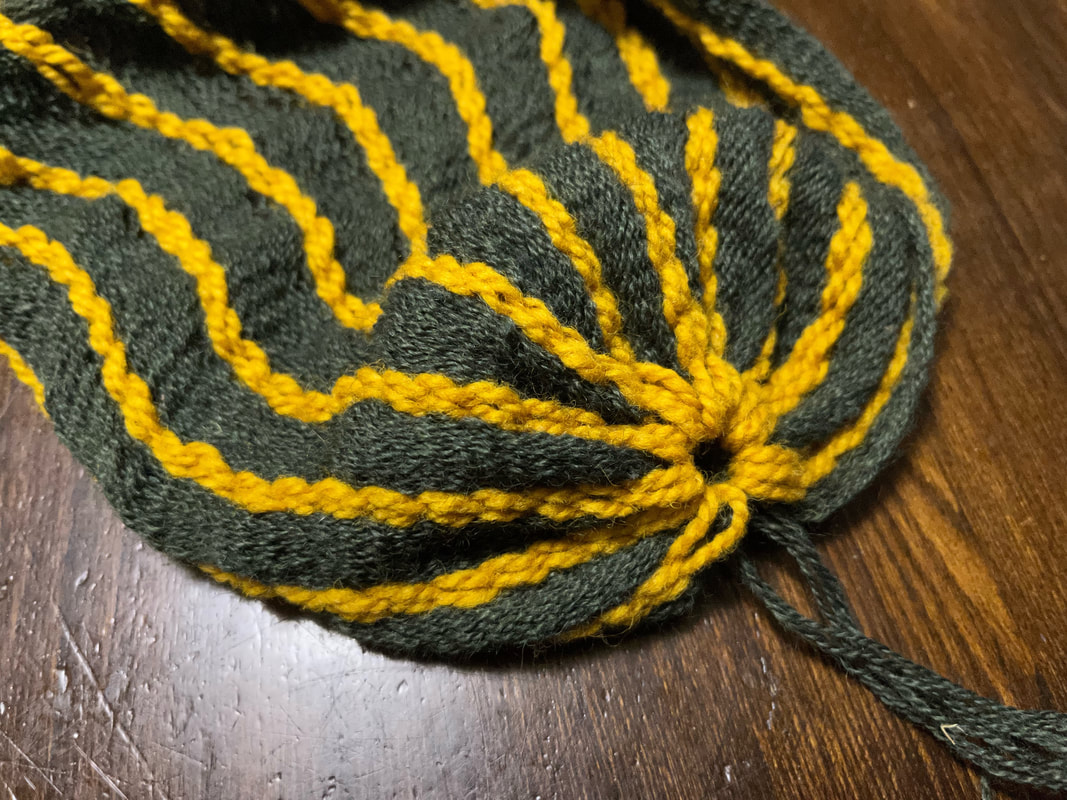
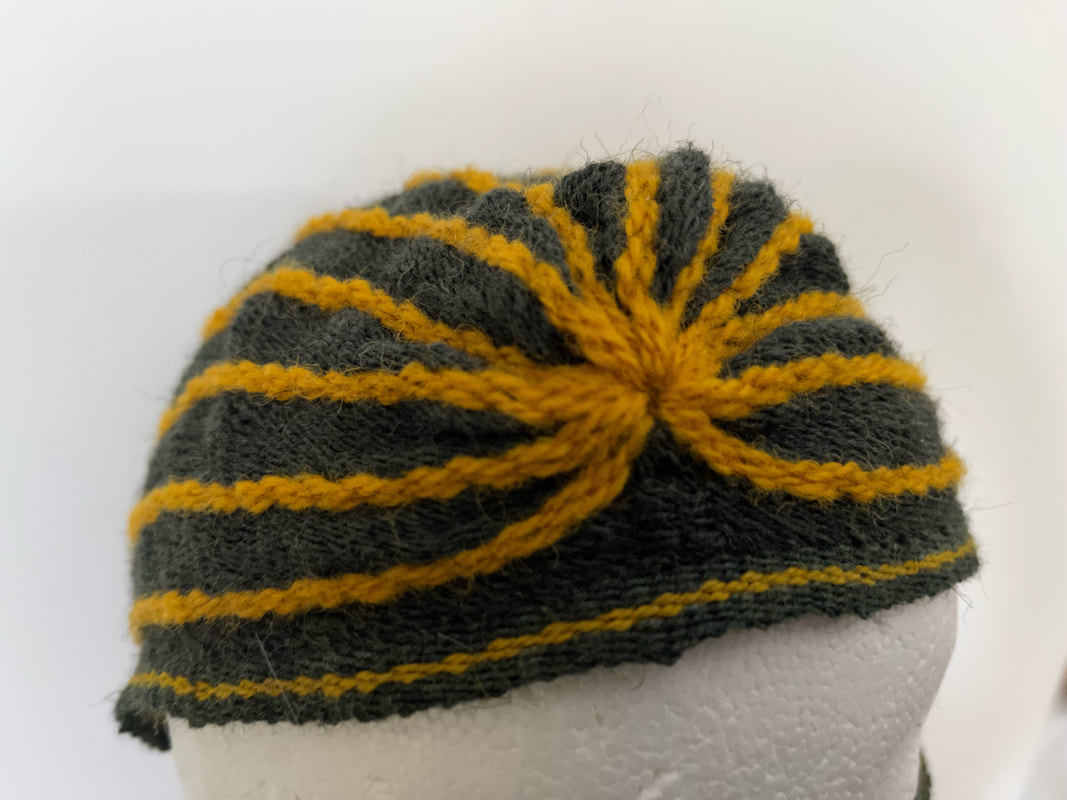
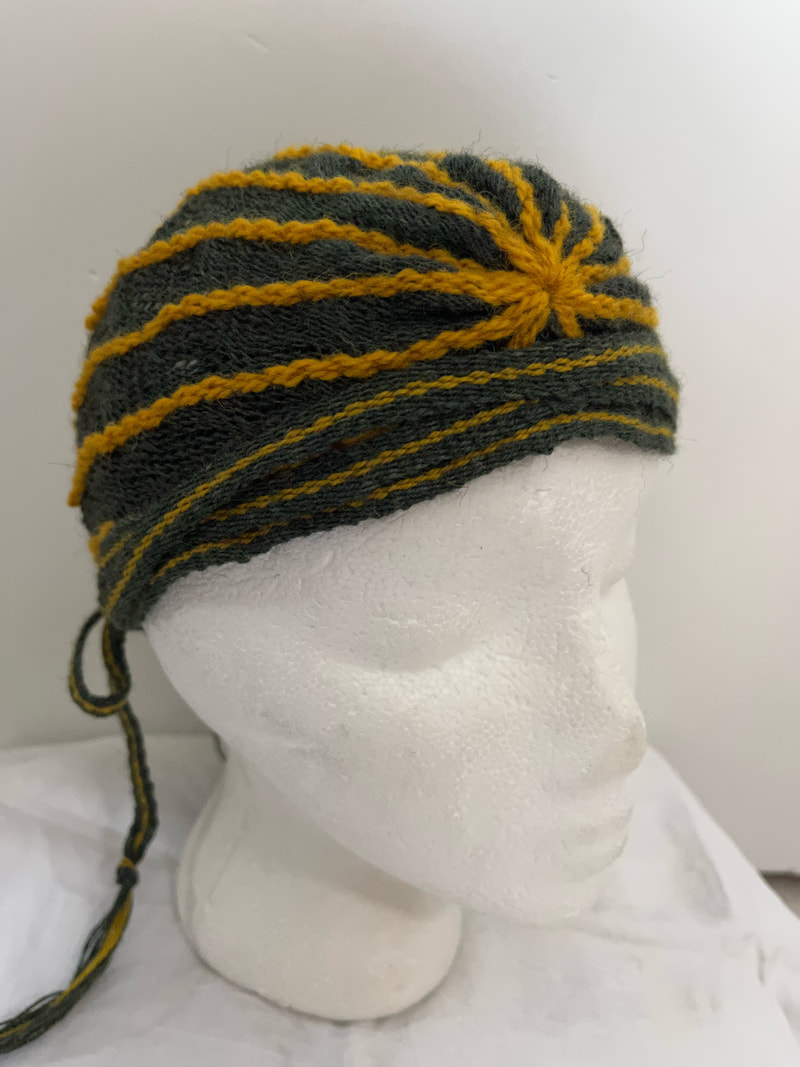
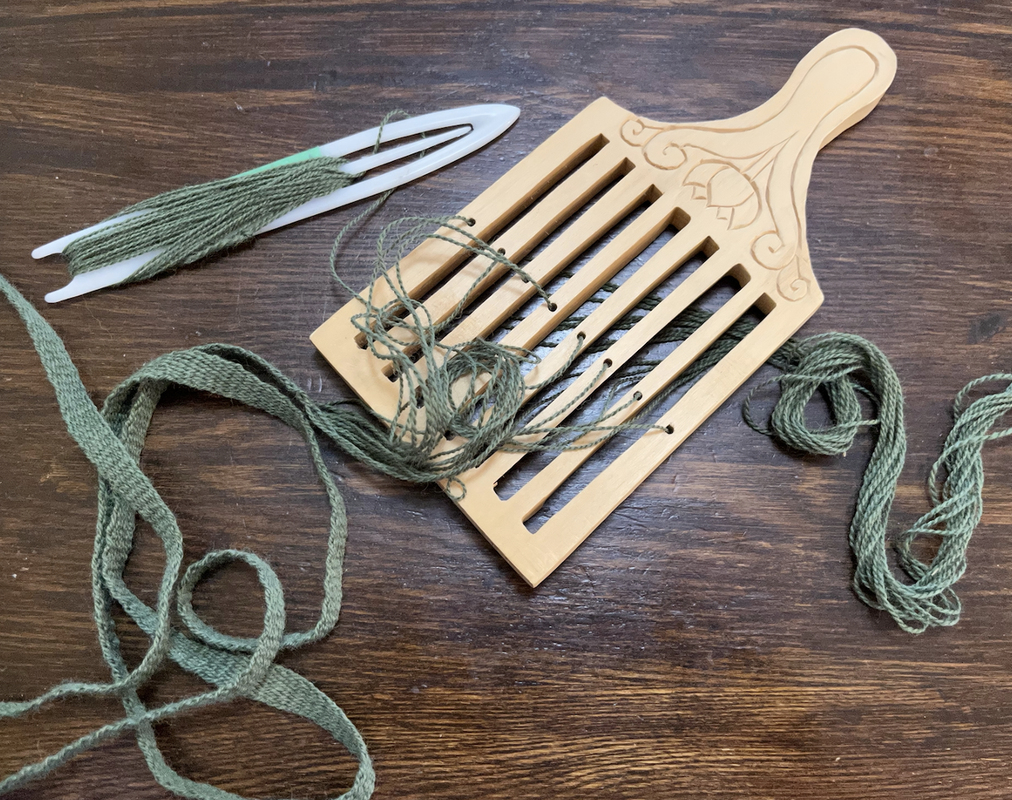
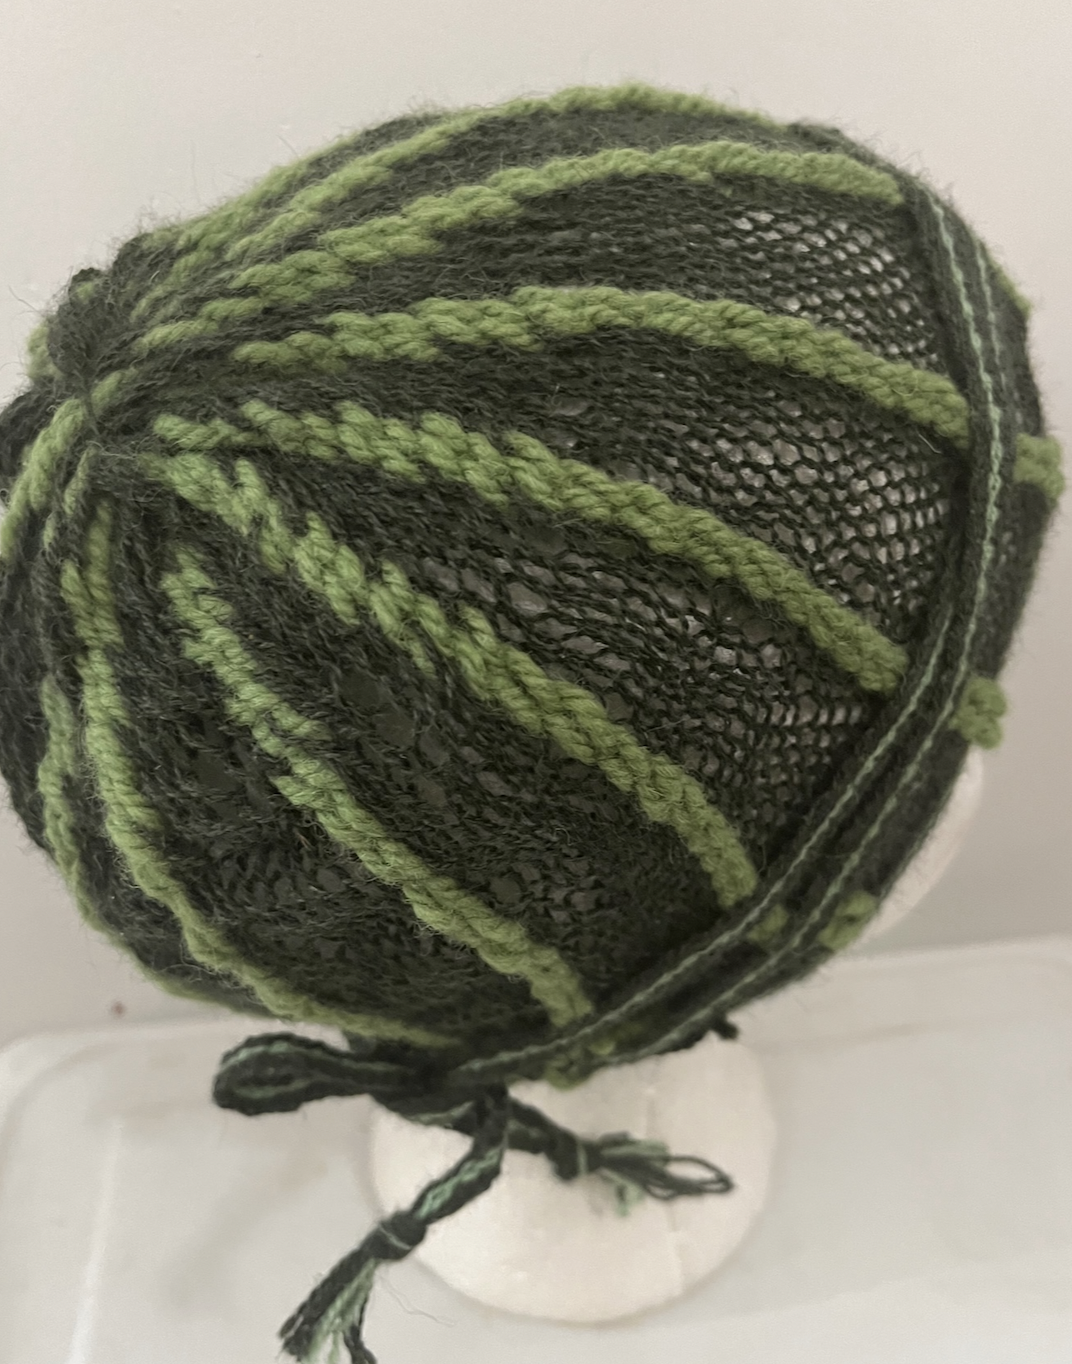
To make such a bonnet, I set up a 16 inch long (41cm) warp of a dark green 2/8 wool and a worsted weight yellow, alternating 10 green and 2 yellow, ending with 10 green.
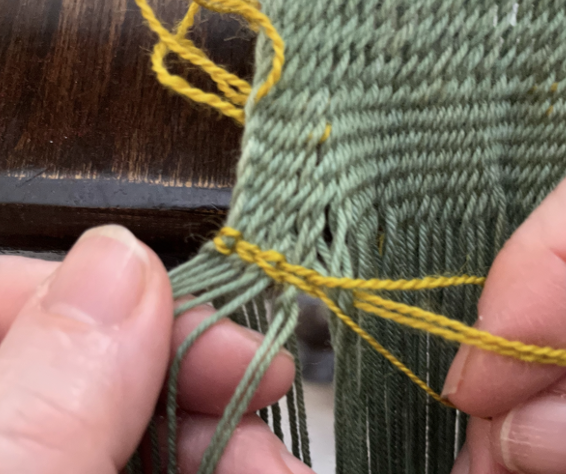
I worked the green threads in an interlinking stitch, and the yellow threads in a vertical twining stitch. I described the vertical twining in my post of Feb 2, 2023.
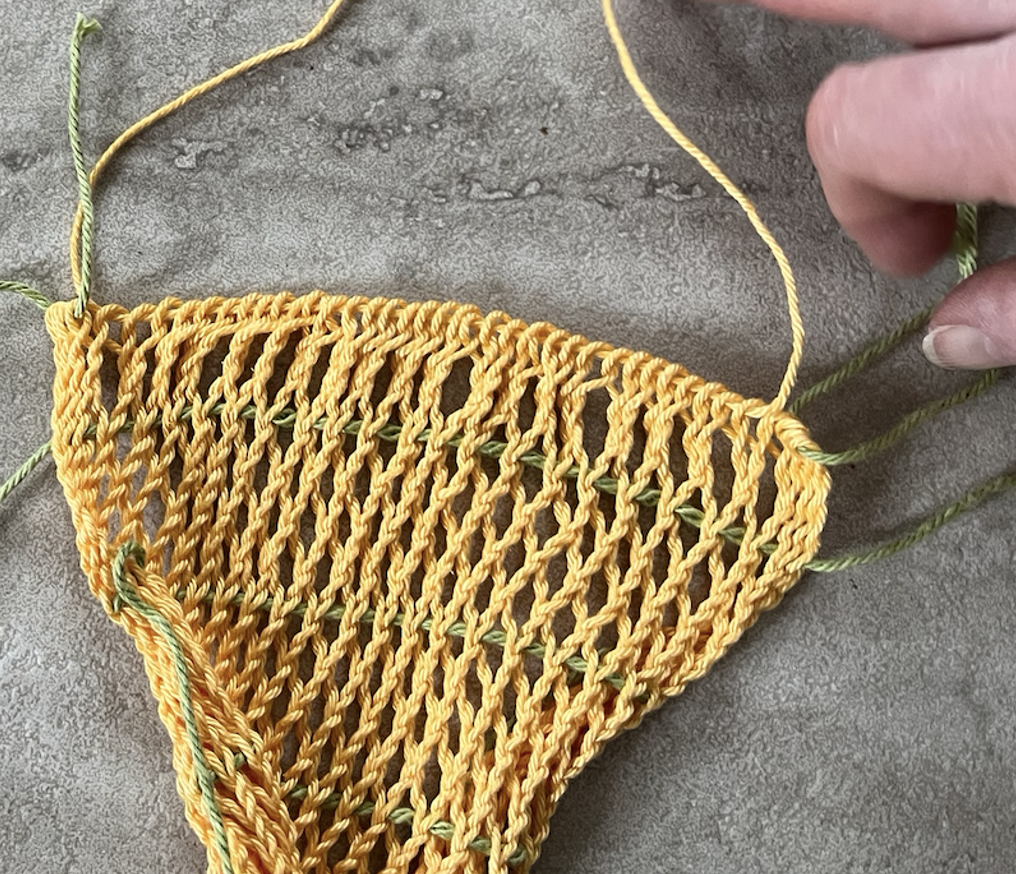
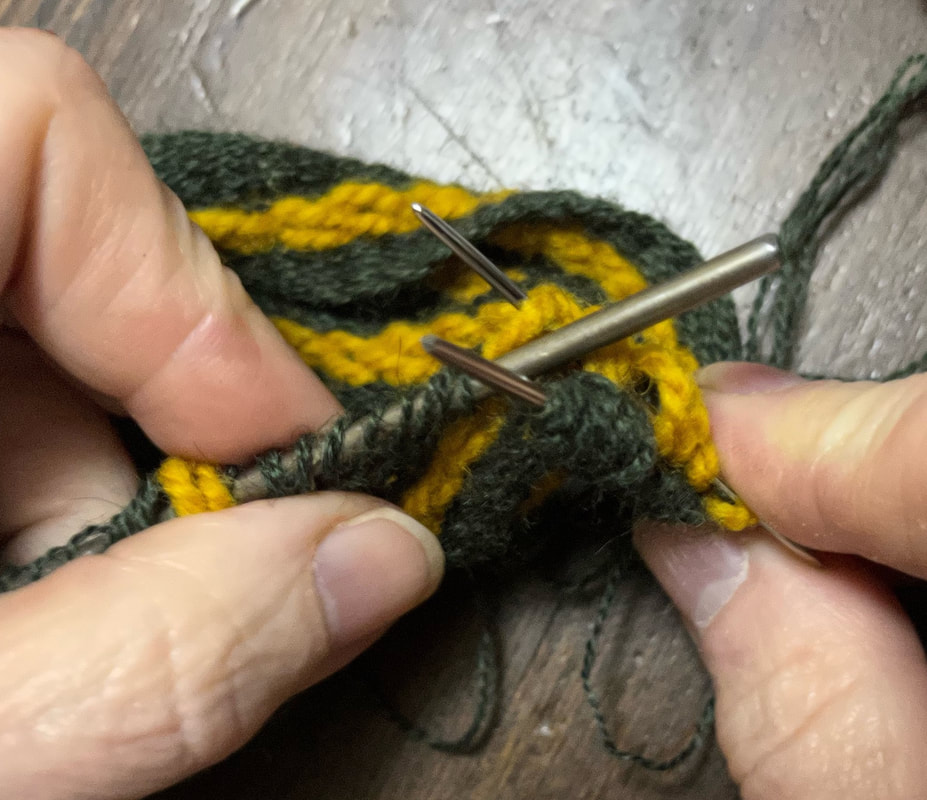
To gather the end loops, I divided the end loops into two groups, separated by color. I slid one color of loops on one blunt sewing needle, and the other color of loops onto the other blunt sewing needle.
Dividing the loops in this manner allows me to snug the loops into a far smaller circle.
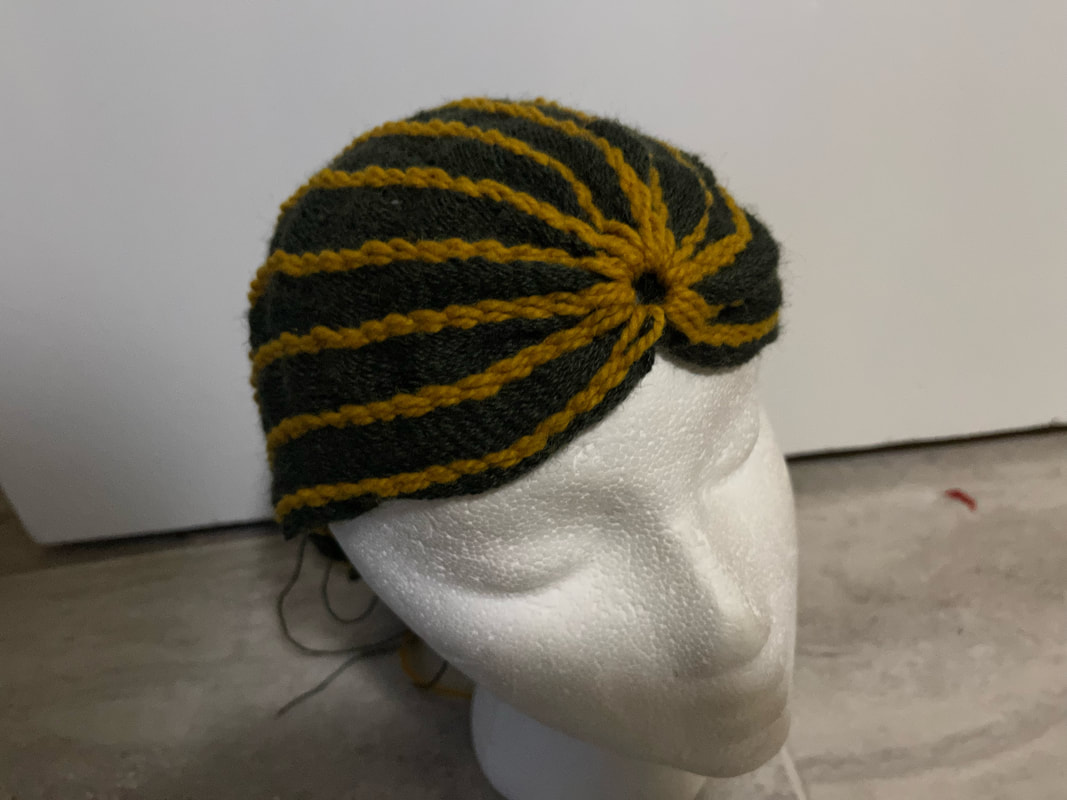
When the loops are tightly gathered there is a reverse-widow's-peak in the centre of the forehead. To avoid this reverse widow's peak, I reserved the dark loops at either edge, did not include them in the gathering. Instead I stitched them together in a tight seam at the centre front of the bonnet.
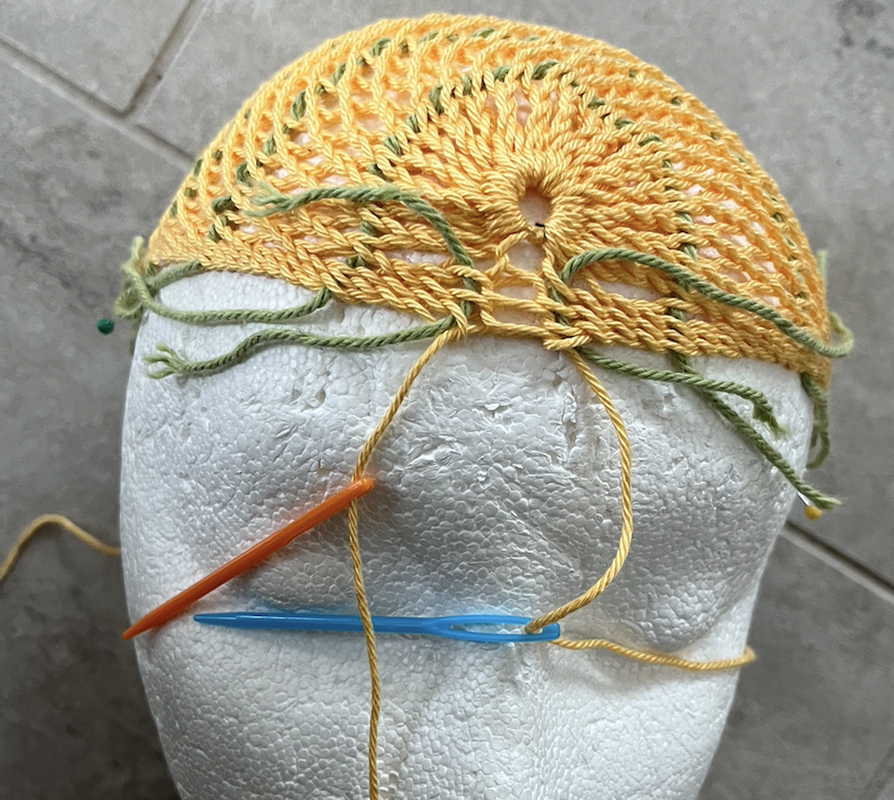
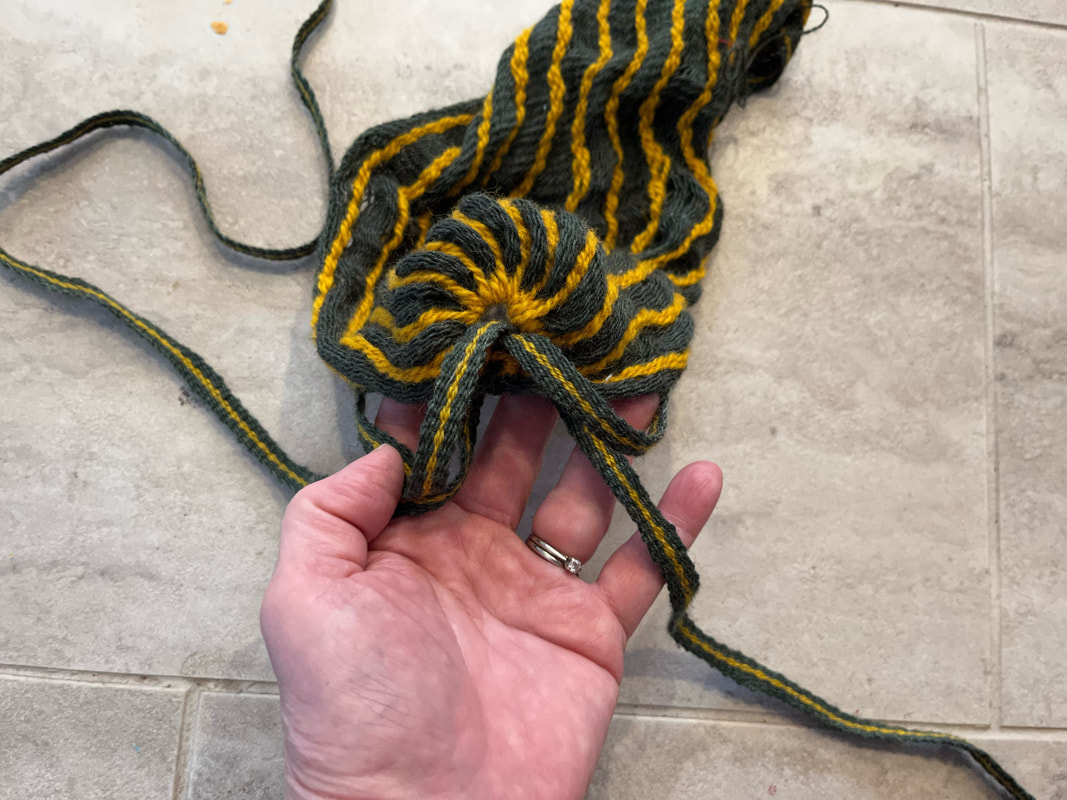
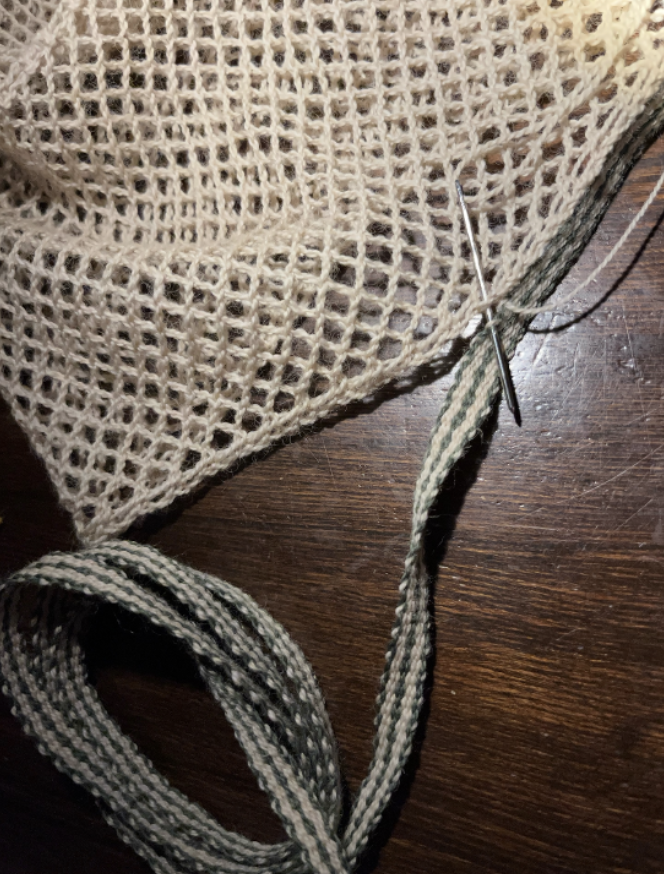
The reserved dark loops, sewn together at the forehead, make for a smoother line to which I could attach a brow band. The brow band is a length of weaving, made on a tape loom. I gathered the loops at the back of the bonnet in a fashion similar to the treatment of the loops at the front of the bonnet..
I stitched the brow band to the front 3/4 of the bonnet, leaving the band free at the very back of the bonnet.
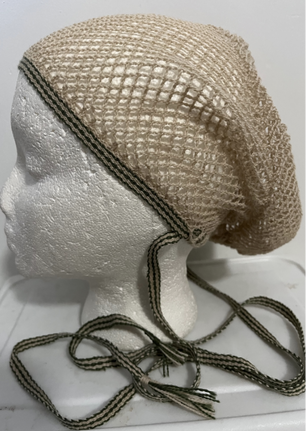
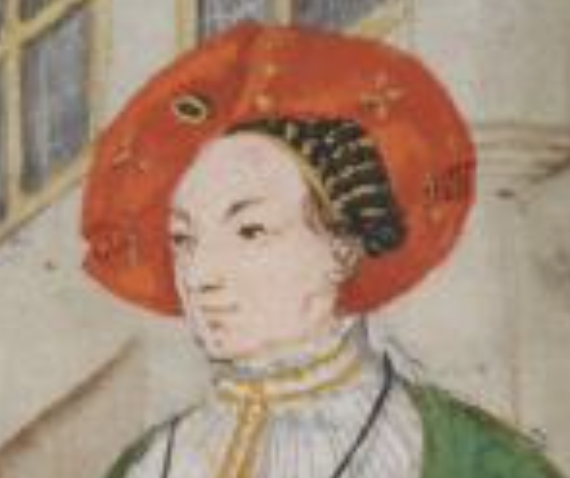
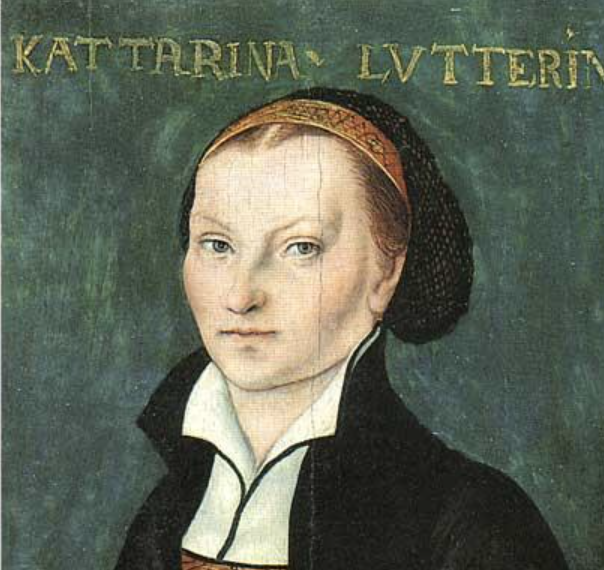 The portrait by Lucas Cranach, painted in 1526, of Katharina Luther, wife of the famous Martin Luther, depicts a woman wearing a hairnet. It was Dagmar Drinkler of the Bavarian National Museum who showed me this image some years ago. It is her opinion that Mrs. Martin Luther is wearing a sprang bonnet. I interpret this as possibly an interlinking structure, what I call a doubles grid.

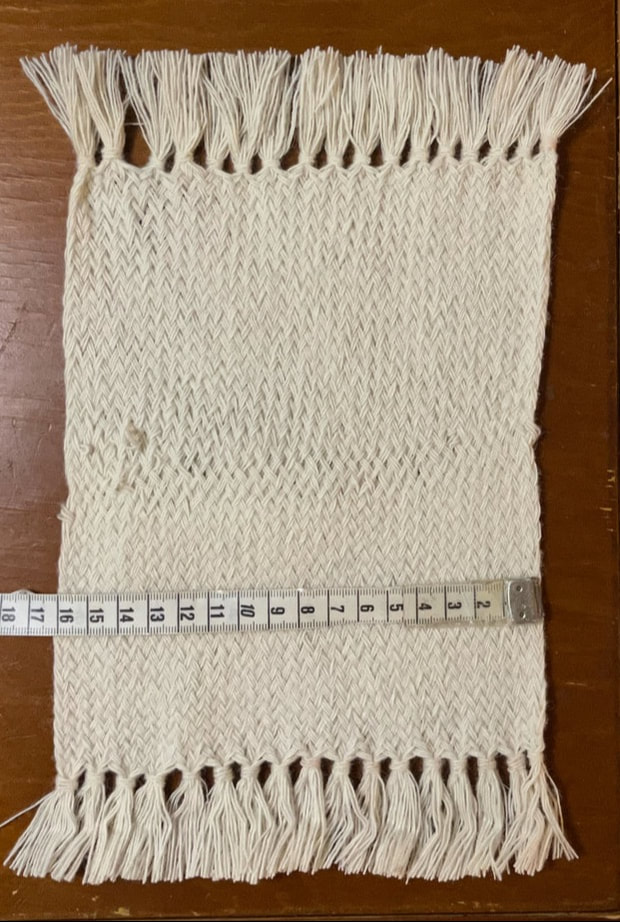
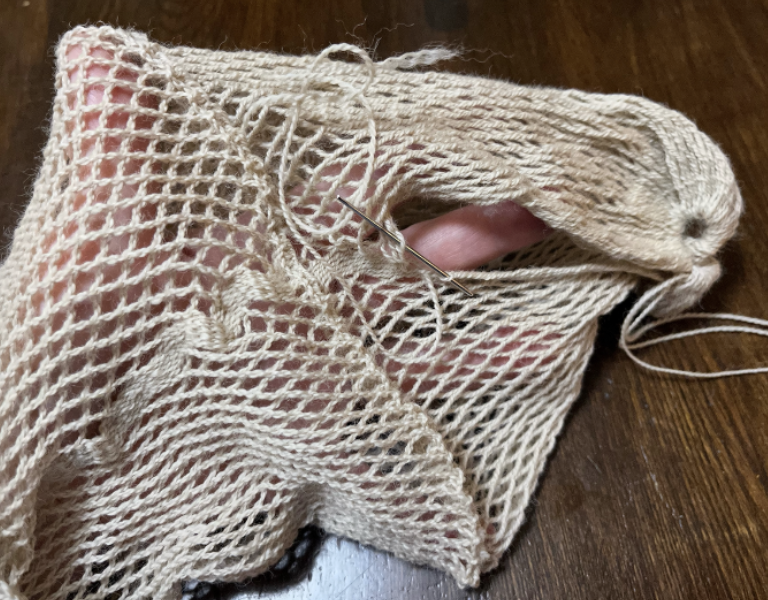
Arriving at the centre, I chained across to secure the cloth. I chained threads one at a time. 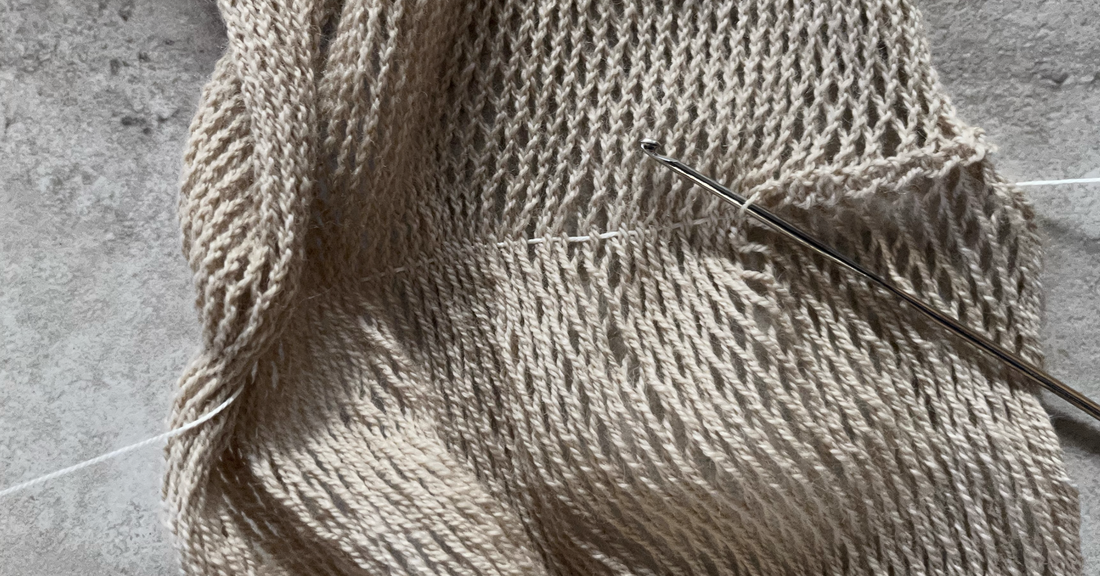
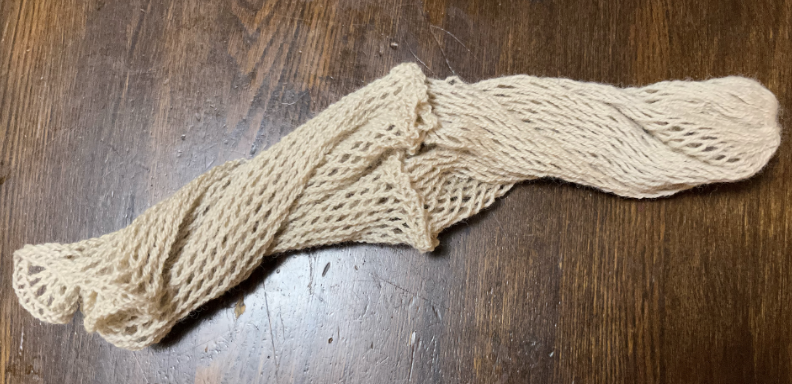
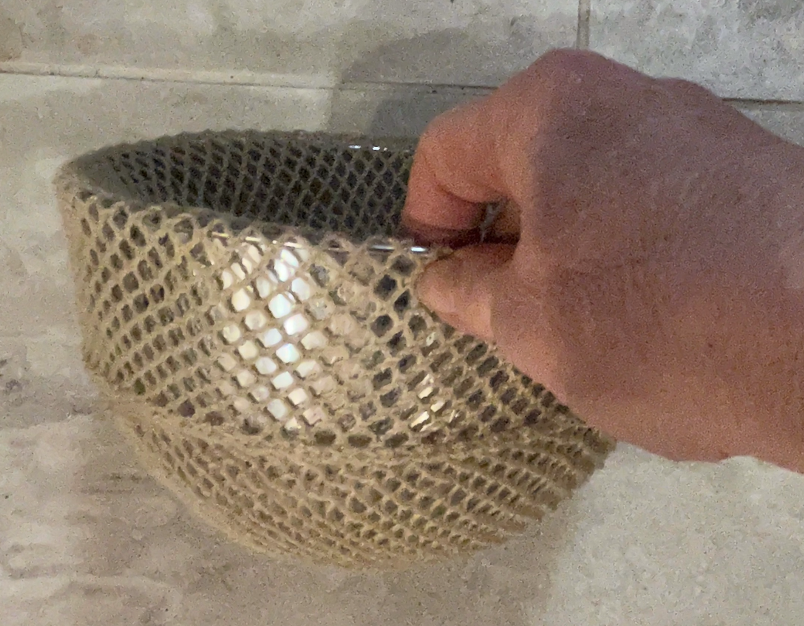
Then I blocked it. I got it soaking wet, and then selected the right sized mixing bowl from my kitchen.
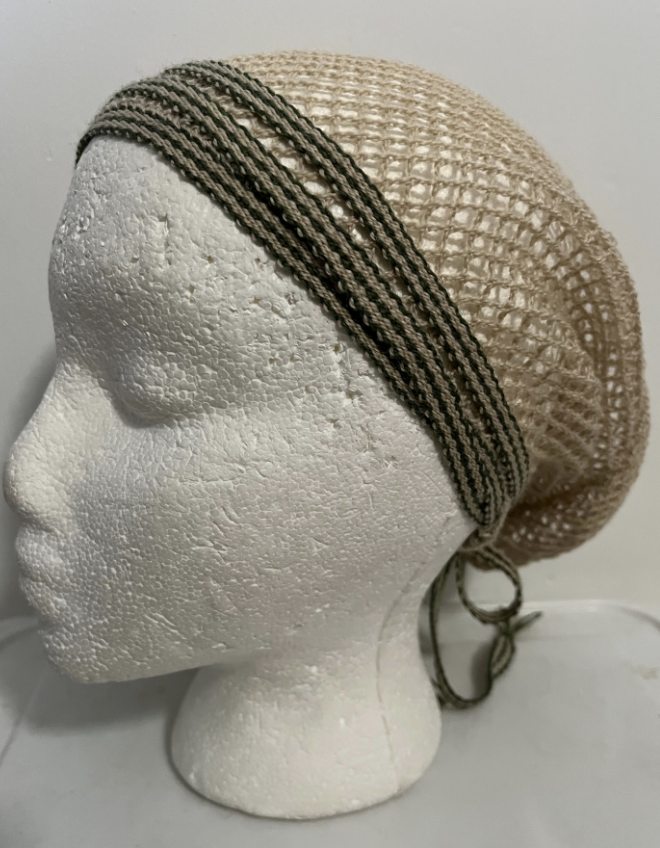
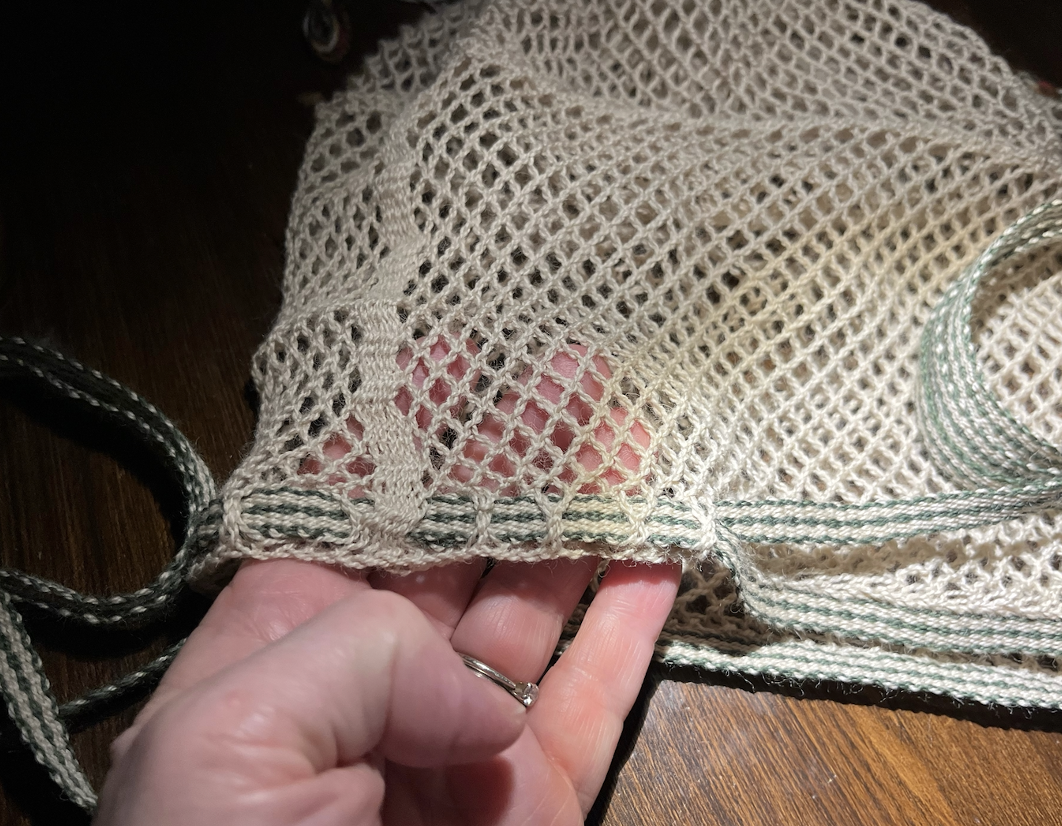
Mrs Luther's bonnet seems to have a band around the rim. I made a band using my tape loom. I measured out threads of sufficient length to make a band that will go around my head three times, plus a bit extra to tie a knot.
I made this first bonnet using a pale wool, hoping you would be better able to see the details of construction. Mrs Luther is wearing a dark colored bonnet. You will also note that the band around the head is rather wide, far wider than the band I made for this pale-coloured bonnet.
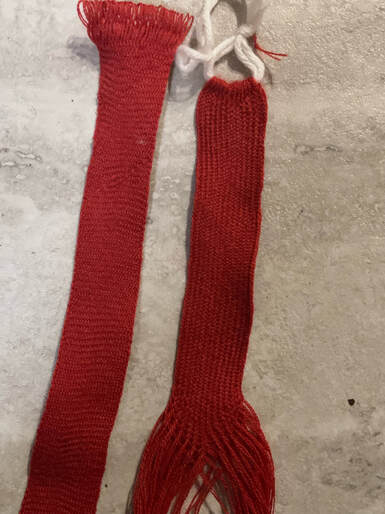
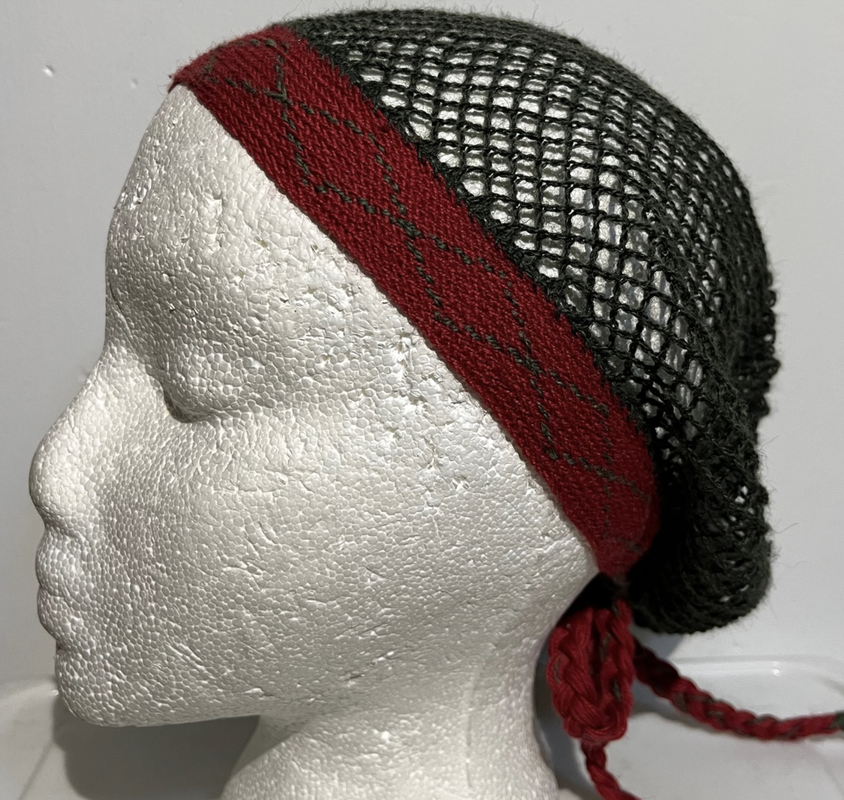
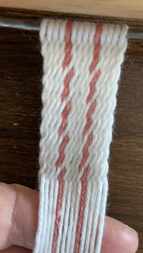
I worked a band in a 2-2 interlace stitch, with vertical ribs, and a 4 contrasting colored threads. OK, the red yarn I selected is rather close in color value to the dark green, and the green design does not stand out well on my band. I was also disappointed to note that the design in my band is far more elongated that the design in Mrs. Luther's bonnet. OK. Maybe I should stick to my field of expertise, the sprang, and leave the band to someone else. Perhaps it is another technique, perhaps an embroidered design.
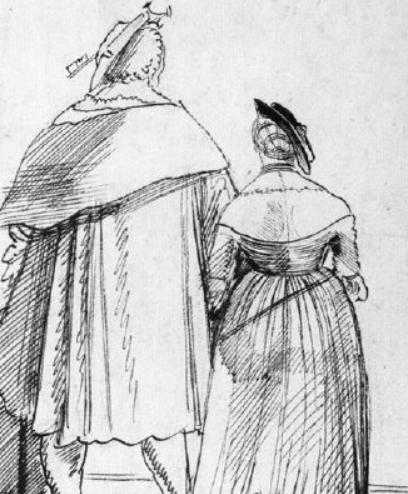
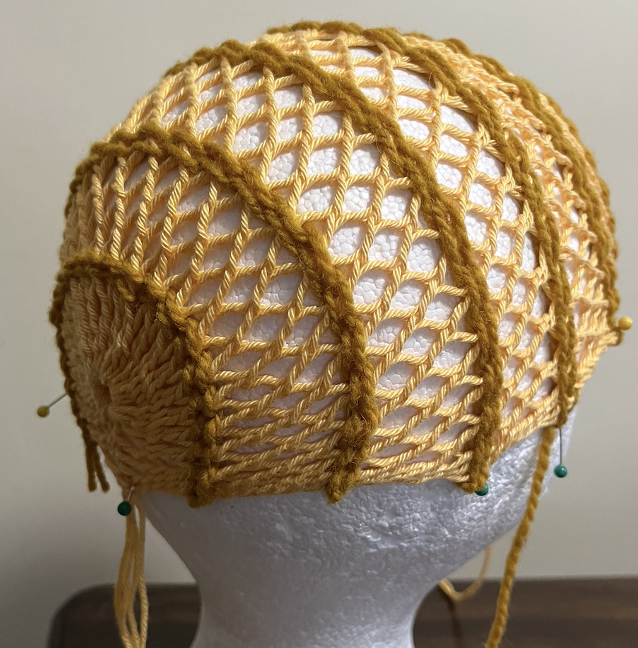
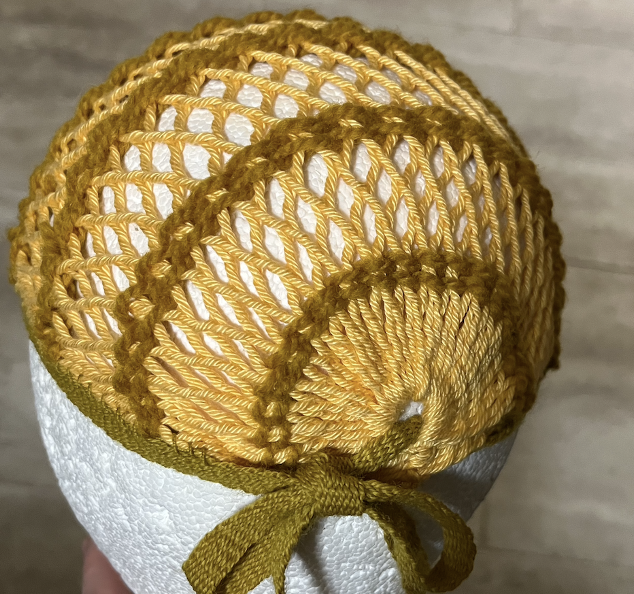
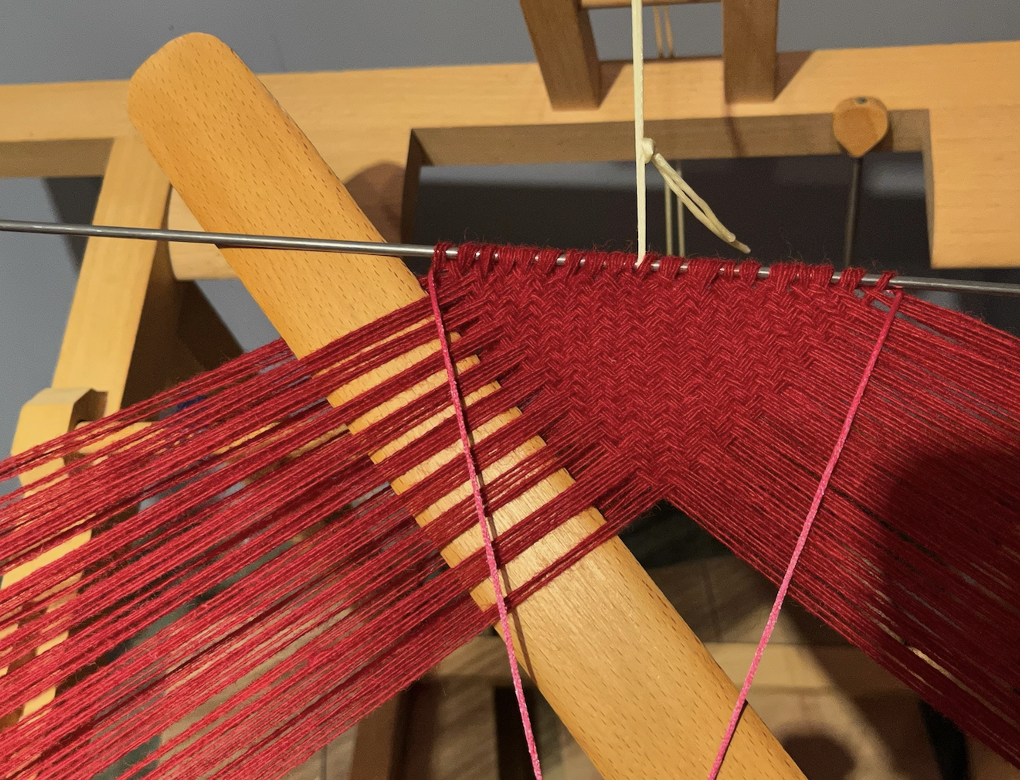
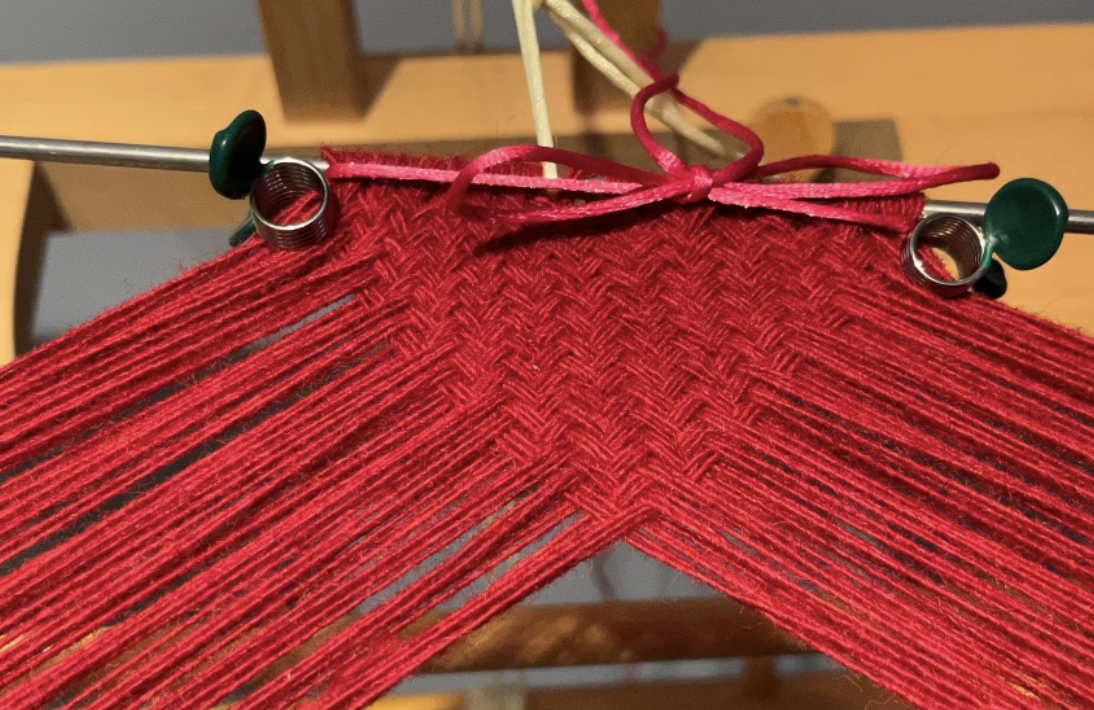
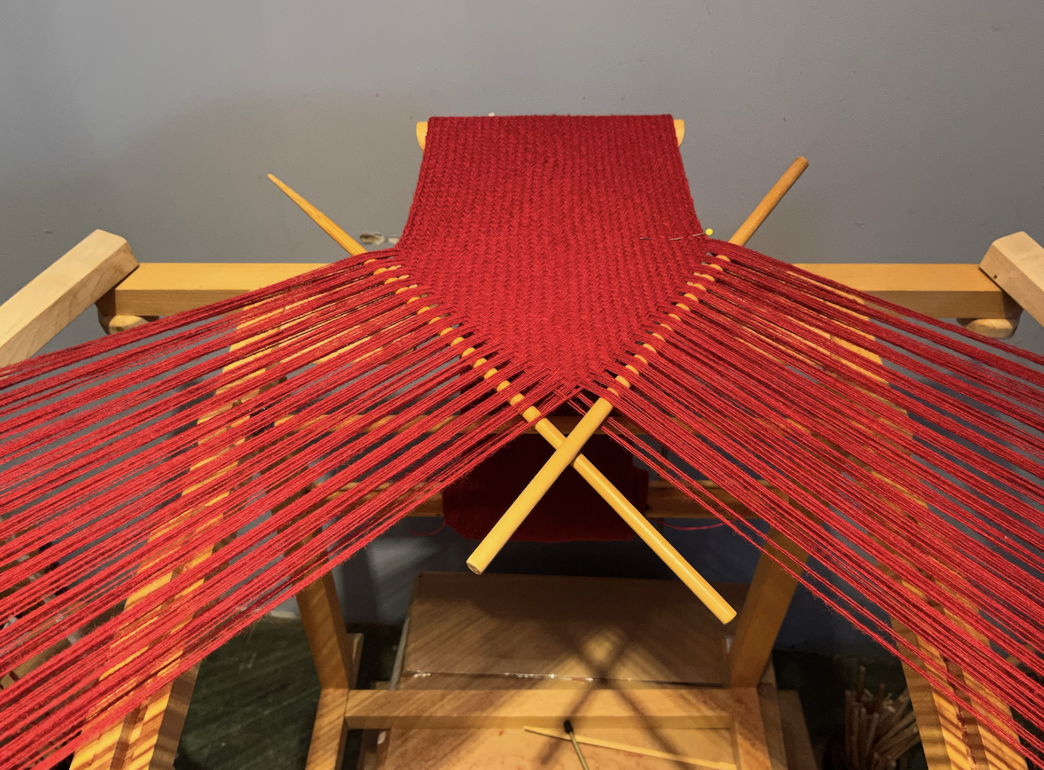
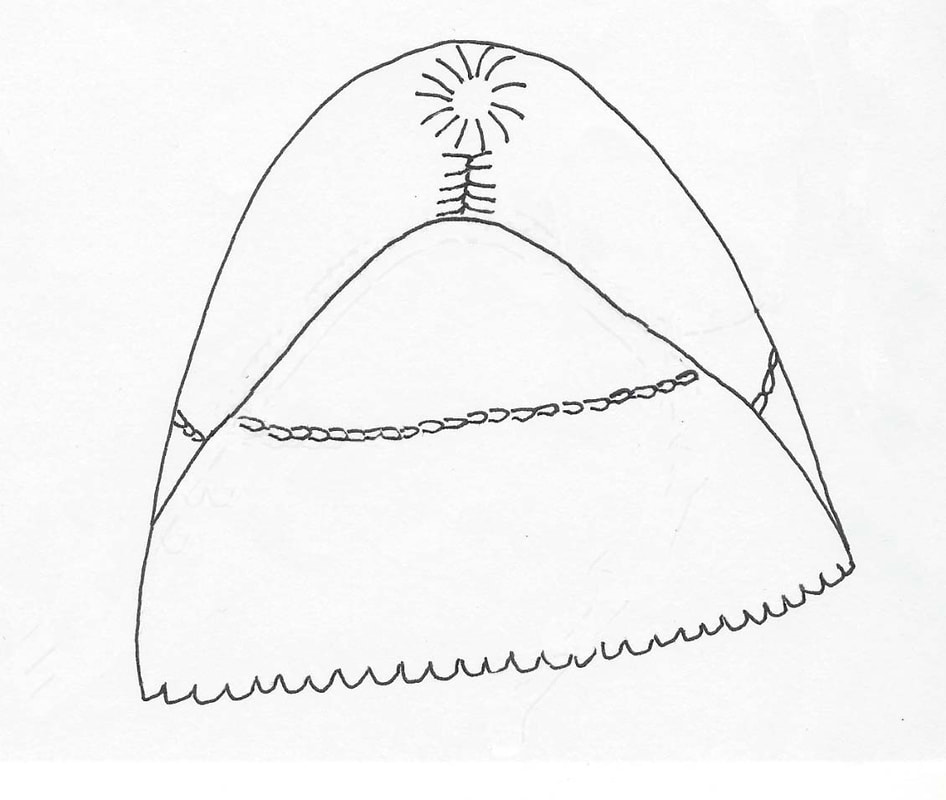
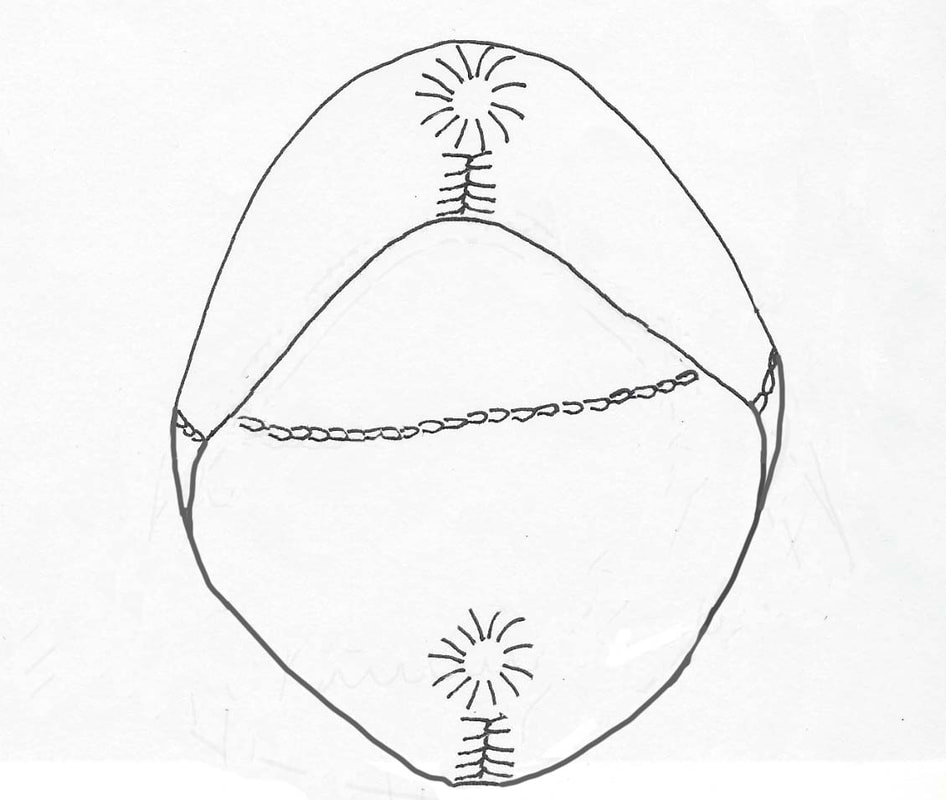
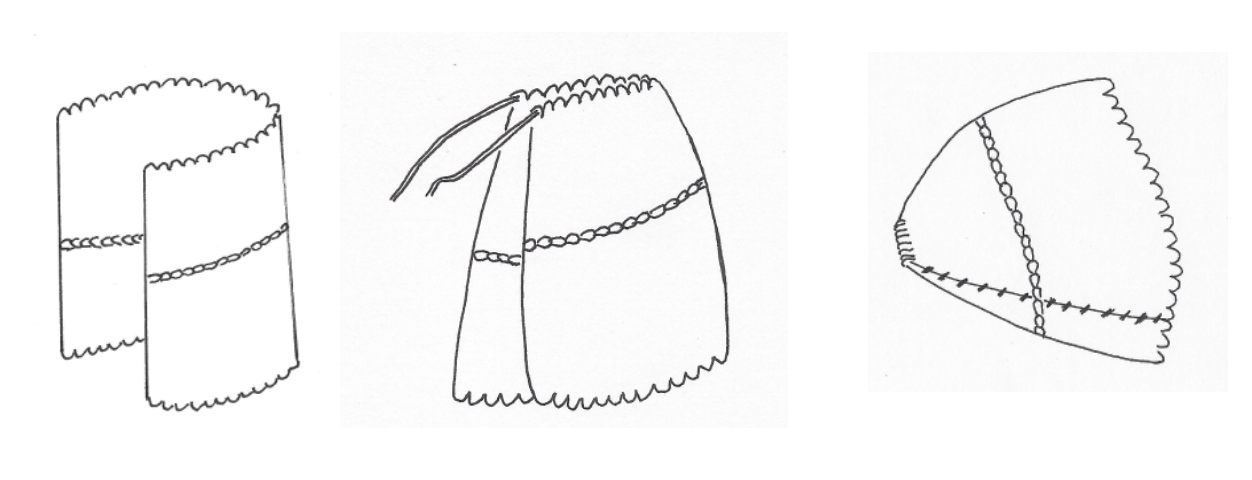
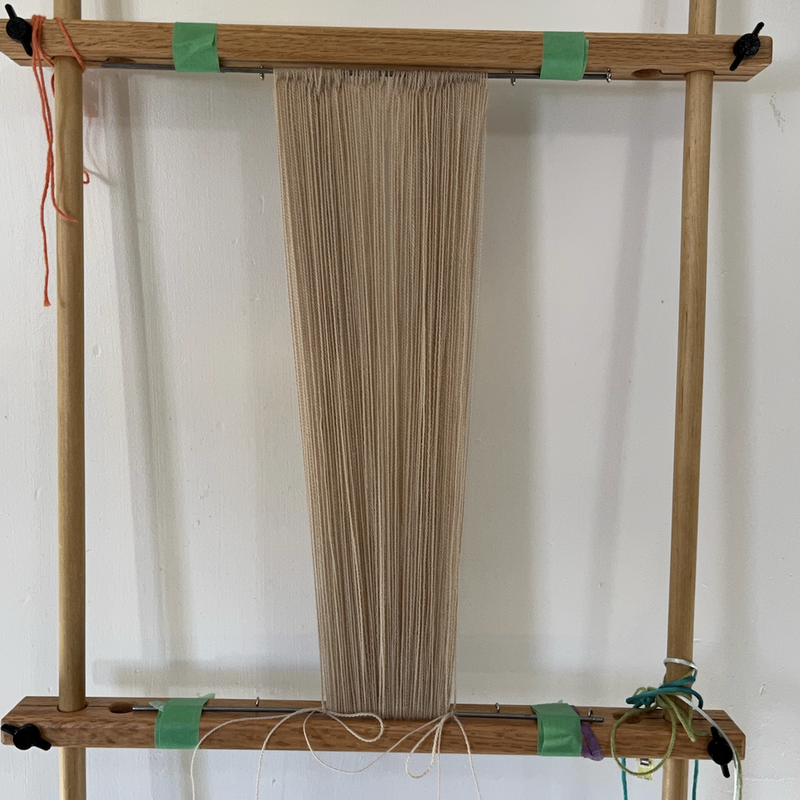
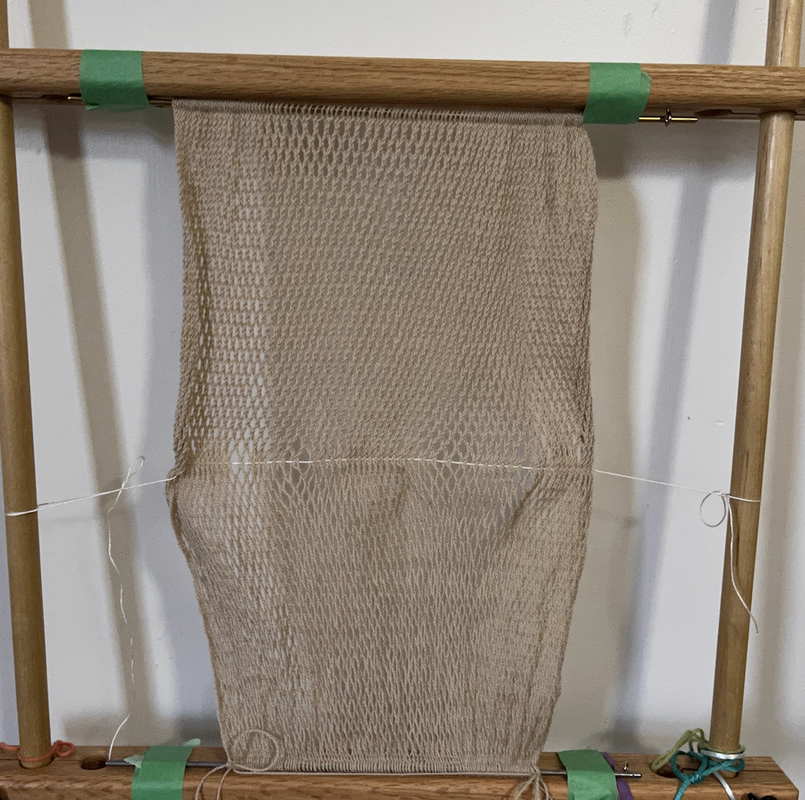
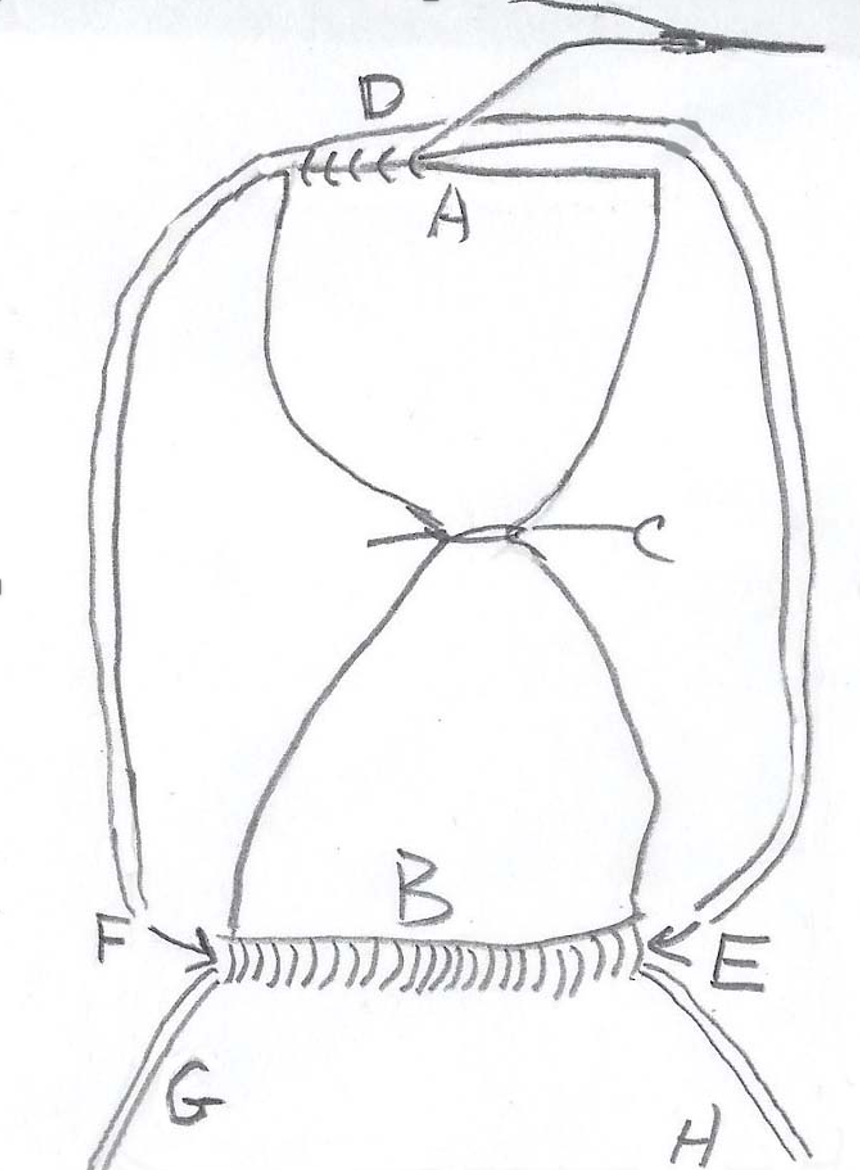
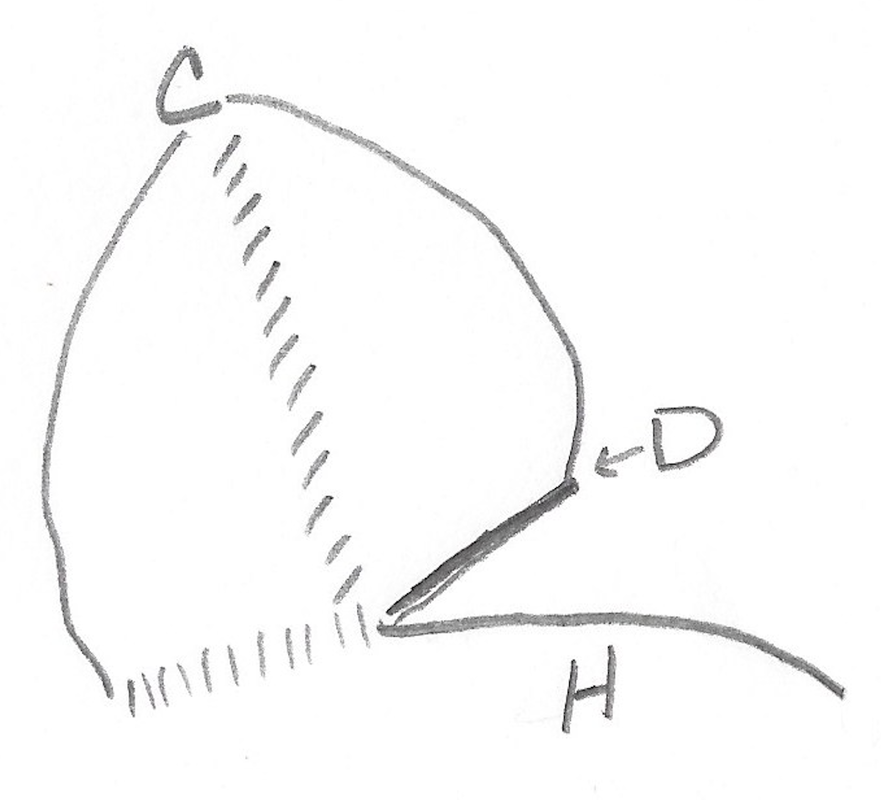
My take on this is that the fashion of the day was for a person to wear a large, wide-brimmed hat. The hat needed to sit on the side of the head. To secure the hat to the side of the head, keep it from falling off, a hairnet is worn. The large-brimmed hat can be secured to the hairnet with a pin ... that's my understanding. I have worked through a number of sprang hats, trying to replicate what I see. You will see the scheme for my version of hat in the drawings below. 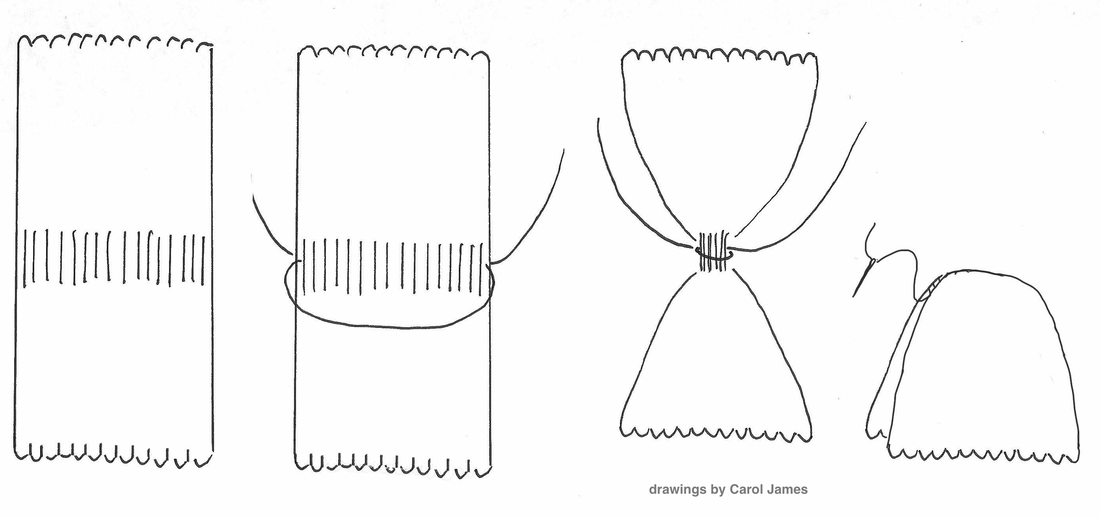 I began with a warp of sufficient length to produce a cloth that will cover the head, from forehead to the nape of the neck. The cloth must be wide enough to go half-way around the head. I worked until the two pieces of cloth met at the middle. I secured the middle with a piece of string, the same string as used for the warp. I tied a knot, and used the tails of the knot to sew up the cap. The knot sits at the top of the head (sort of) and the loops from the top and the bottom of the warp go around the rim of the bonnet.
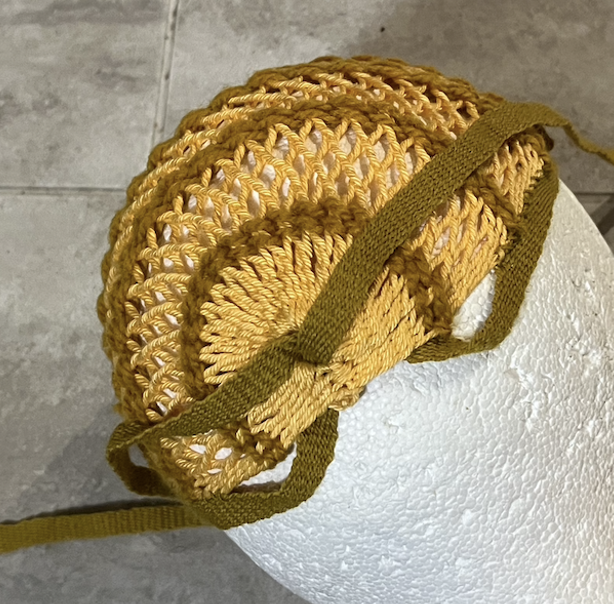
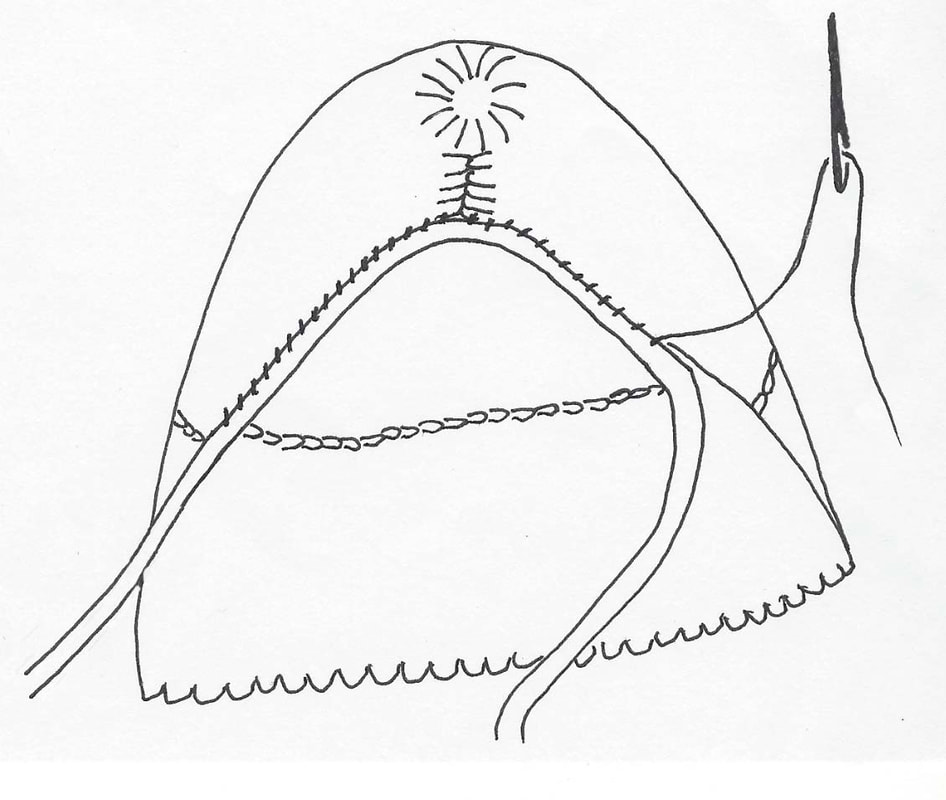
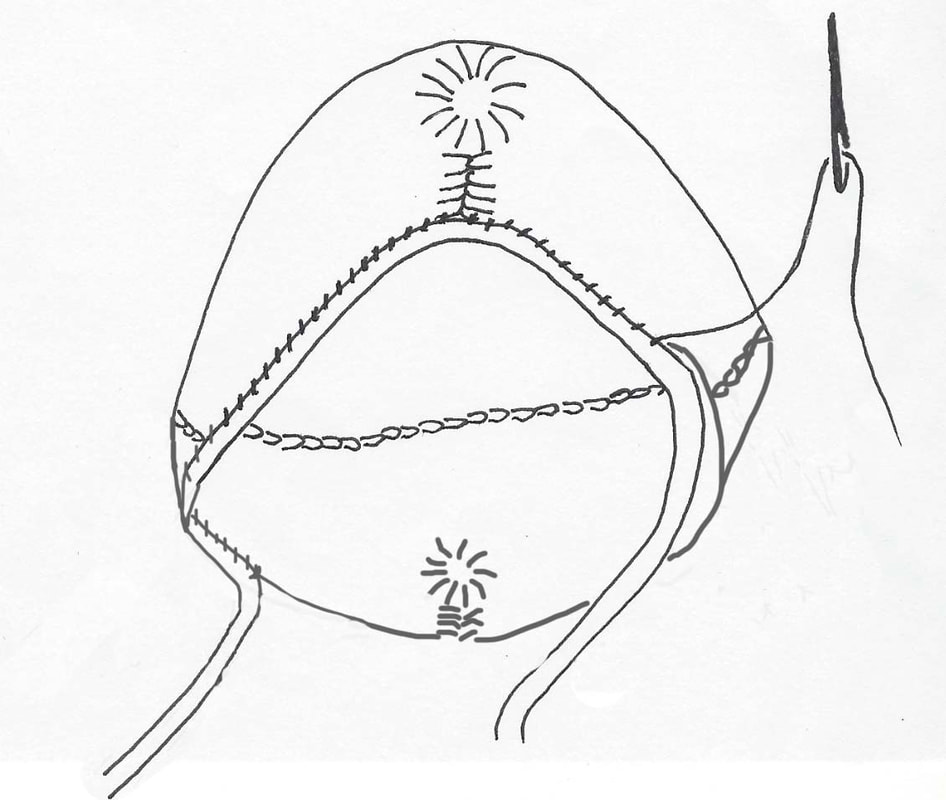
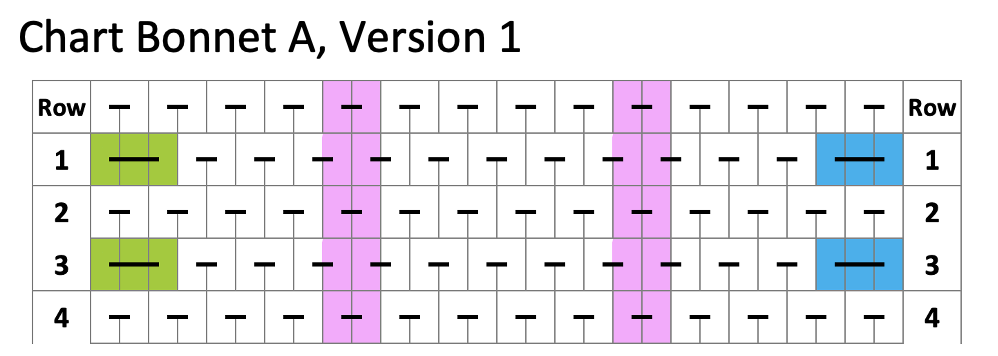
In the drawing A marks the loops that were at the top of the frame, B marks the loops from the bottom of the frame. I made sure that the loops at the bottom of the frame were loose ... you might put a stick in those loops, to keep them large and loose. C marks the centre of the cloth which comes to be located at the top of the cap. D is the band which I attached along A, the loops at the top of the frame, now the front of the cap. The ends of band D pass through those loose loops from the bottom of the frame. One end of D passes in at F and comes out as H. The other entered the loose loops at E and comes out as G. In this manner the bonnet sits, nicely spread out across the forehead, and can be cinched to fit the head. Those ends G and H can be brought around the head ... you need to make D long enough to go around the head 3 times ... and then you can tie G and H at the back of the head. One more set of things to ponder, the colored stripes in the hat. 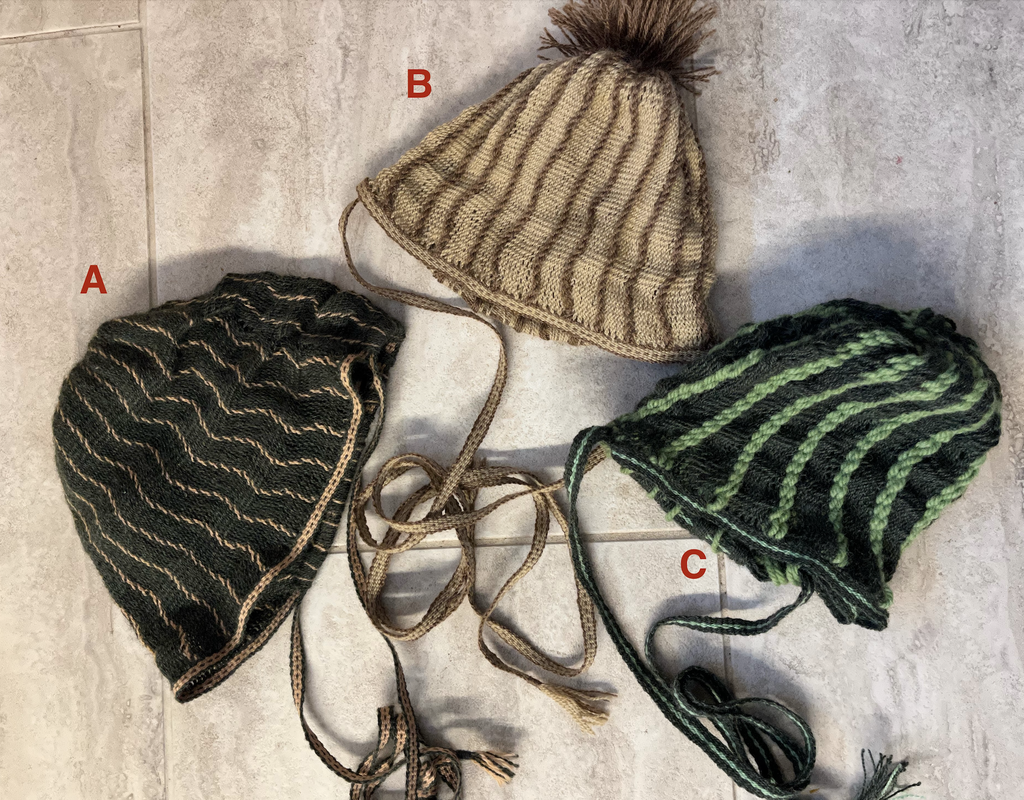 There are a couple of ways to get vertical stripes in your sprang work. For bonnet A in the image above, I used single loops of a contrasting color of thread ... that 2 threads. A single loop of the contrasting color will give you a broken line.
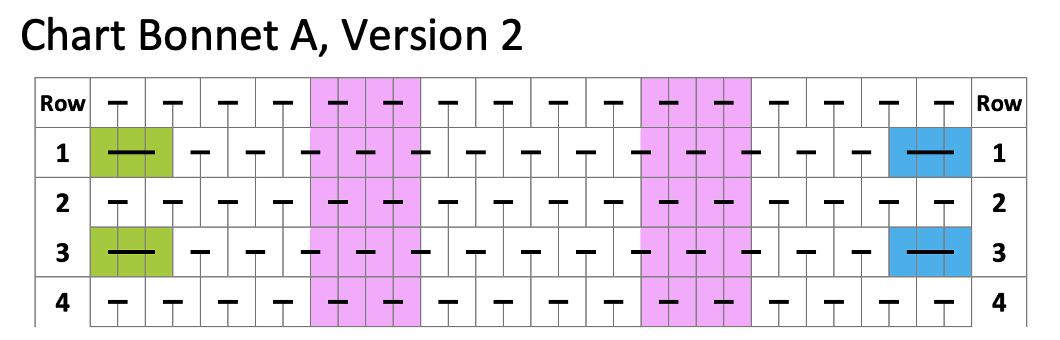
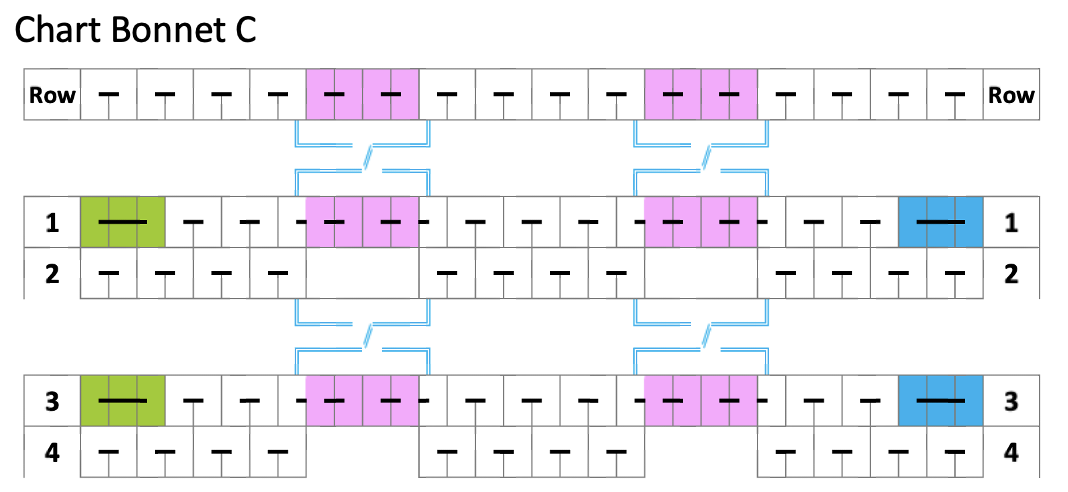
A pair of loops (4 threads) of a contrasting color will give you a solid line with a jog.
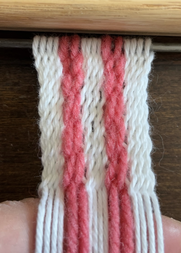
For bonnet B, I made cords of a contrasting color, and stitched them to the side of the bonnet. Actually I twisted a pair of contrasting colored threads, and then I folded the thread in half, and allowed the twisted thread halves to un-twist around each other. Where I folded the thread, that's what was attached the cord at the brim. The cut ends of the cord make for a tuft at the top of the head. Now, I don't see the tuft in the portraits ... but then again the top of the bonnet is hidden inside that large brimmed hat. I do like the idea of the thicker thread worked into the bonnet to create the stripes. This assumes that there is a reason for the stripes. The stripes being thicker would give a hat pin more bonnet to which to grip and to attach. I then thought of the idea behind bonnet C. Bonnet C features what I call vertical twining. The contrasting color threads in bonnet C always pair with same-coloured threads. There is no jog in the line. When working with vertical twining, the structure works nicely with the twined thread being thicker than the background colored threads ... perfect for this bonnet. I teach a class on sprang twining on a background of interlinking ... and this vertical twining is one of the variations covered.
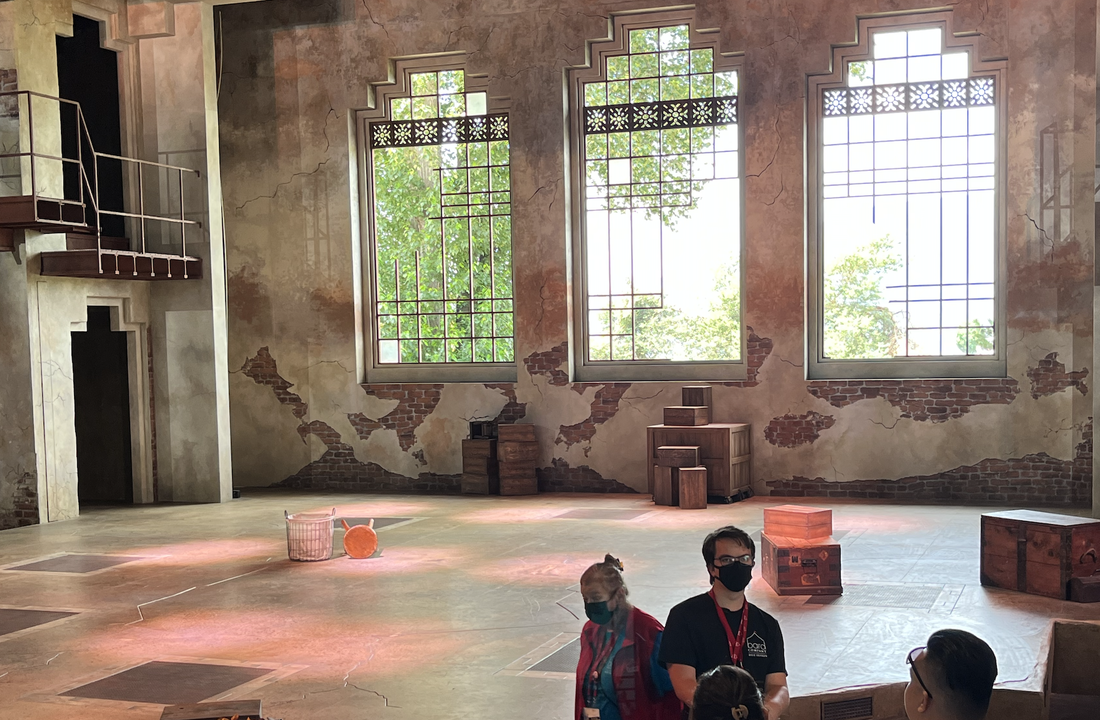
This summer has been extremely busy. I have not been writing in this blog, not for a lack of content but lack of time to sit down long enough to right it all down. July started with a trip to British Columbia, to visit my daughter who was working for Bard on the Beach, a Shakespearian theatre company in Vancouver.
While I missed not having my daughter near ... she gives me excellent tech support, we were able to remain in contact, thanks to the up-to-date computers. While in Vancouver we did check out Granville Island and its textile boutiques. If ever you are in Vancouver it is worth the visit! ... and so is Bard on the Beach
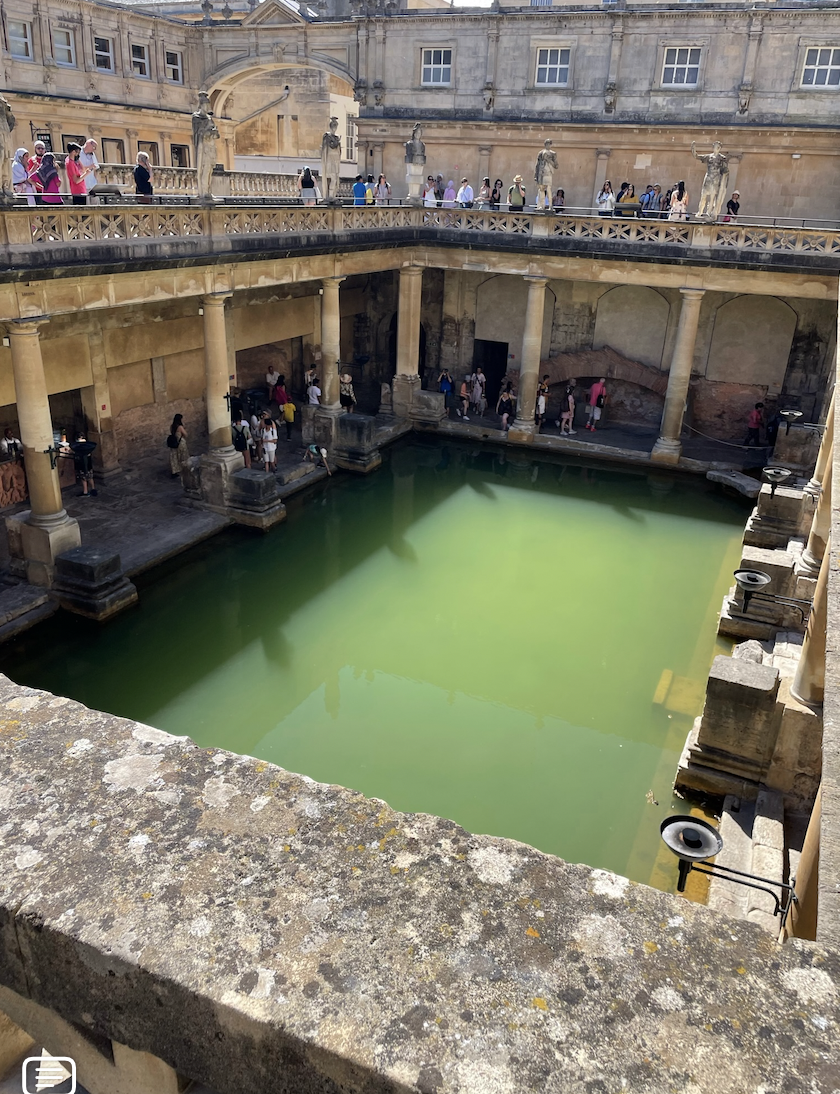
Arriving home from Tennessee I then had 2 weeks to do some laundry, and move some things around (we are having work done on the kitchen, but that is a whole other story), and prep for the next conference. In August my daughter Claire and I travelled to attended the Braids 2022 conference in Denmark. We started the trip in London, and spent some jet-lag-recovery time site seeing in London (also Stonehenge and Bath) before making are way to Copenhagen and then to Svendborg for the conference.
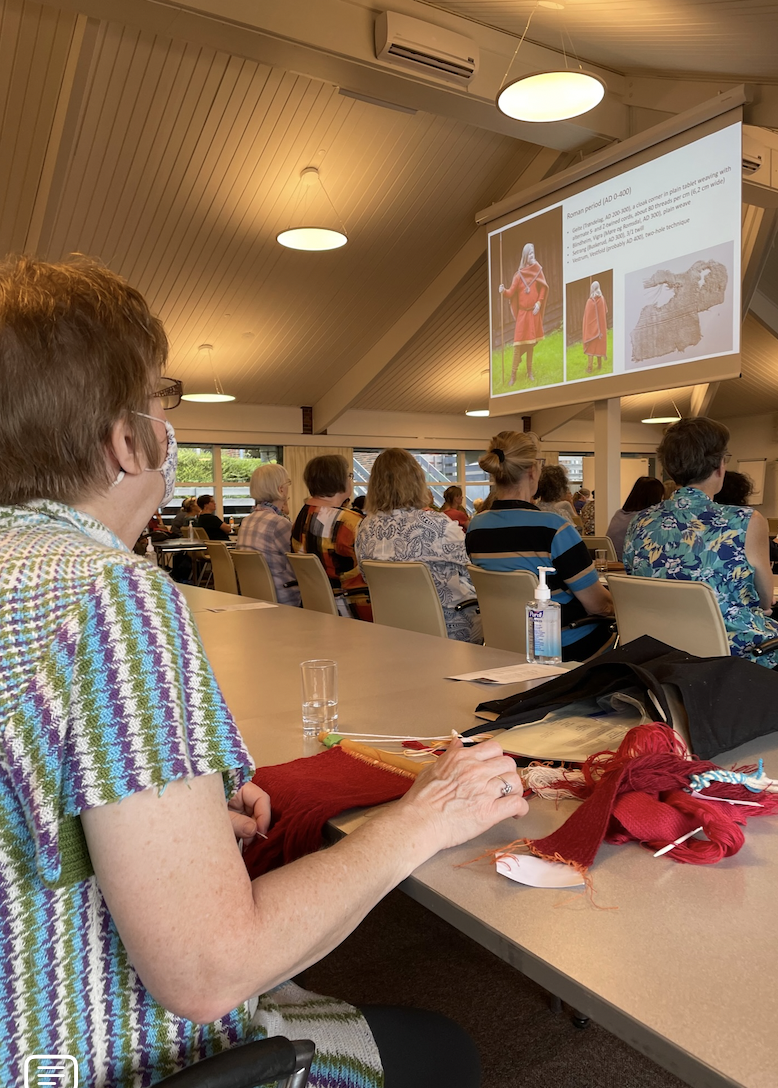
At the conference we attended several workshops. I did some loop braiding, my daughter did lucetting and naalbinding. As a teacher it’s important to take classes with something new, to remind myself how it feels to be a student. During the conference i had the privilege of talking with some very talented people and it was great to discuss up coming projects and get good feed back. I also taught and advanced sprang class that focused on lace making. It was helpful to have Claire there to provide extra support to the students, but mostly she provided me with tech support. It was such a great batch of students. Im so please with all of them. 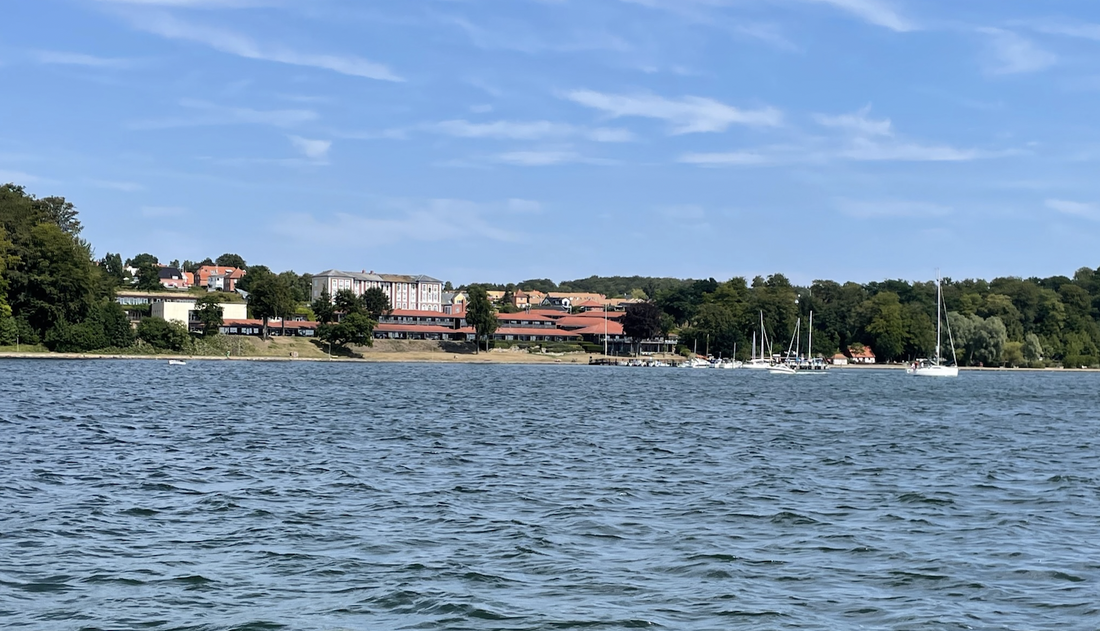 The conference site in Svendborg, Denmark
Coming up this fall, we have an intro to Sprang class starting September 22, and an other one in November. There is still room in both of these classes. You can sign up through the website
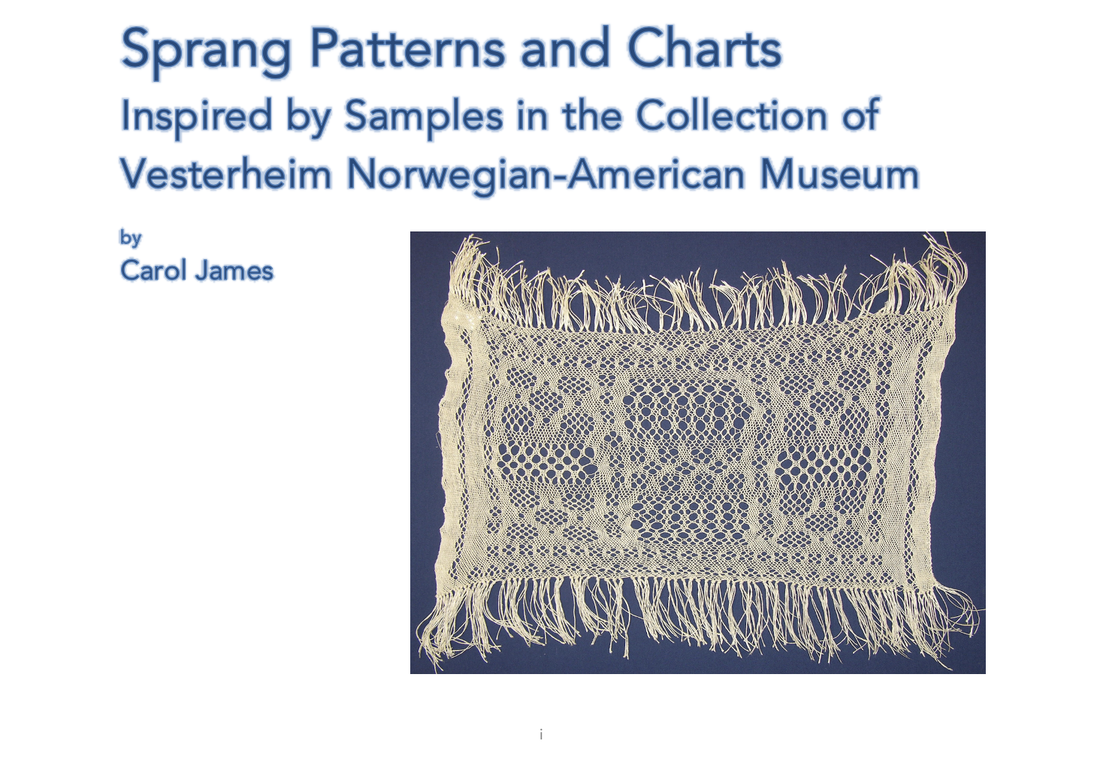
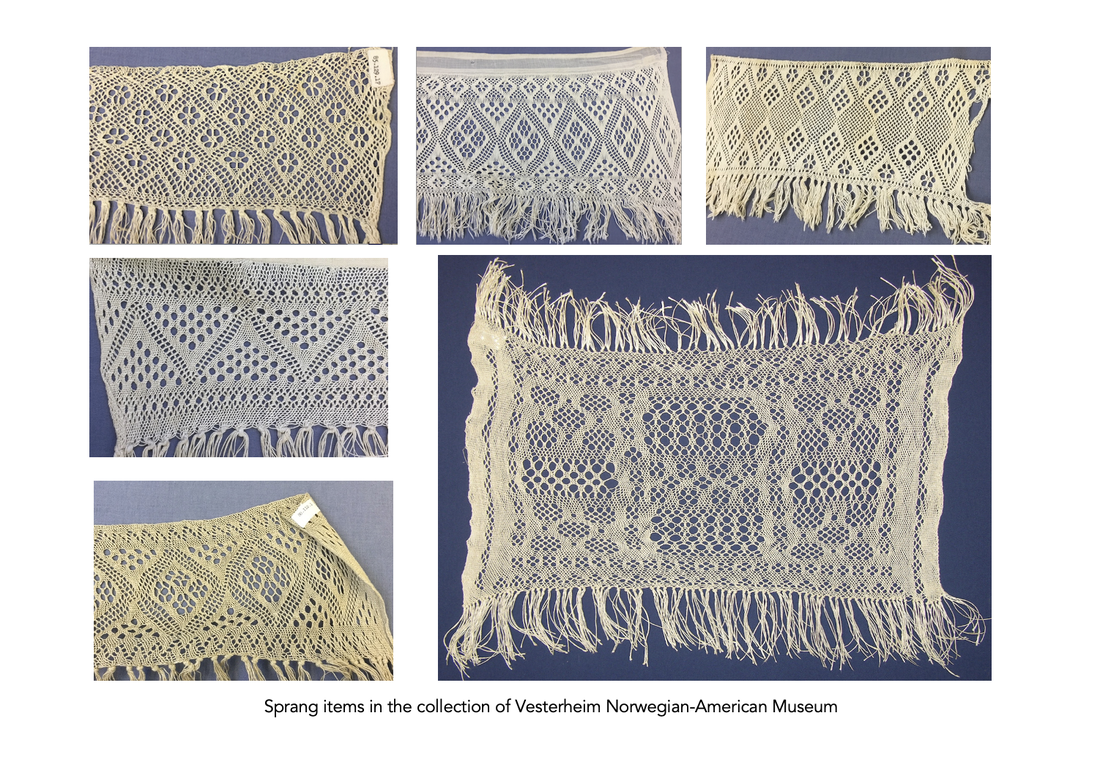
https://www.spranglady.com/store/p118/Intro_to_Sprang_Class_-Sept_2022.html https://www.spranglady.com/store/p119/Intro_to_Sprang_Class_-_Nov_2022.html Contact me directly for the September class as the deadline for registration is coming soon. I have also promised Claire that I will be working on the next year’s Sprang subscription so she can start building that webpage. More info coming on that soon. 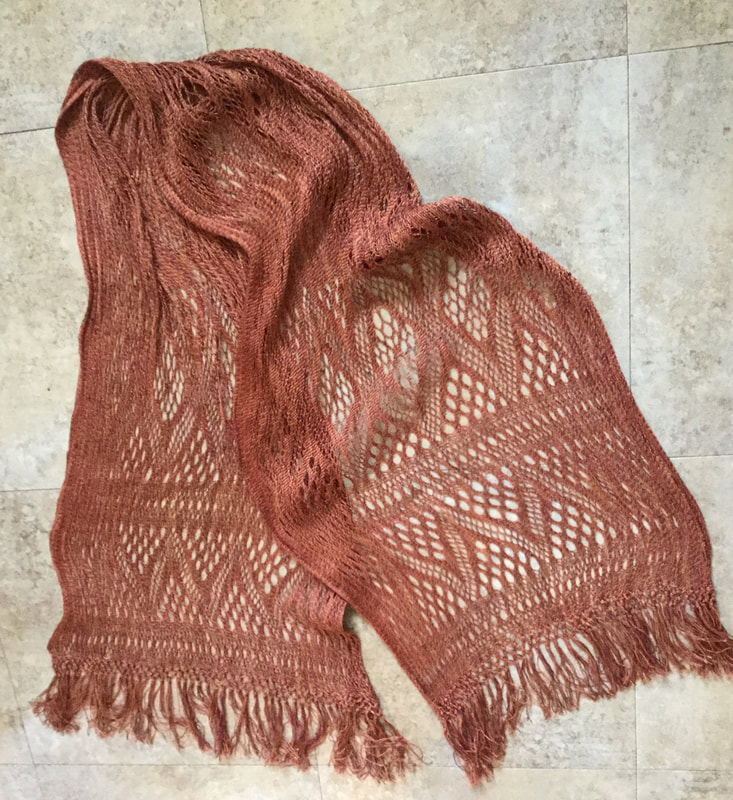 This is a shawl I made with motifs inspired by pieces in Vesterheim, the Norwegian-American Museum in Decorah, Iowa. In the spring of 2018 I had the honor of teaching a sprang class at Vesterheim Norwegian-American Museum in Decorah, Iowa. During the class the museum curator Laurann Gilbertson asked if we would like to see pieces of sprang from the collection. Of course we said, "Yes!!!" 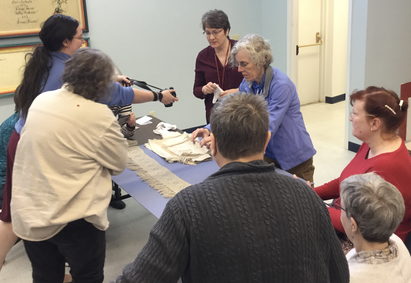 The class was allowed an up-close look at six lovely pieces of sprang lace. Back in the classroom I used the teachable moment to talk about the ways a person might derive a lace pattern from an existing piece. At the same time I promised the curator that I would provide the museum with charts for all the motifs. The lockdown of the past two years has provided me ample time to work through the many sprang lace charts I've created with pencil and graph paper, and to translate them into something that can be published. The big announcement in this blog entry is the publication of a new 50 page book of sprang lace patterns. These are the patterns I derived from the sprang lace in the Vesterheim, Norwegian-American Museum. Curator Laurann Gilbertson graciously contributed to the publication by providing information on the Norwegian lace tradition as well as information on the individual pieces from the museum records. For cover art for the book ... of course ... the sprang pieces themselves were perfect.
Now, the work to publish a book of sprang lace patterns is more than writing the charts. I have come to recognise the importance of checking for errors. It seems the best way to do this is to create a piece following the chart and to compare results with the photo of the original. My lovely apprentice Sharon Wichman offered to do this. She wrote down her observations as she worked and these, too, are included in the book. 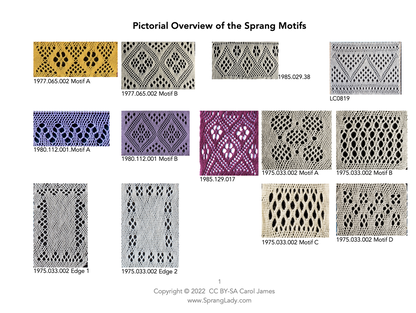 After many long hours, and diligent work by my editor Ruth Temple, I am happy to announce that the document has been sent to the printer. I expect to have copies of this brand new sprang lace pattern book available next month at the HGA's Convergence in Knoxville. The book will also be available for sale on my website. A down-load-able PDF version will be eventually available at www.taprootvideo.com
And by the way, that shawl featured in the photo at the top, that shawl will be on display at HGA's Convergence in the Leaders Exhibit. |
Categories
All
Archives
May 2023
Categories
All
|


 RSS Feed