|
Last Summer I made a scaled down copy of the Braddock-Washington sash for Carlyle House. The word is that the display is now complete, and viewable to the public. Here is the photo they sent me, the mannequin wearing the general's uniform .... complete with sash. 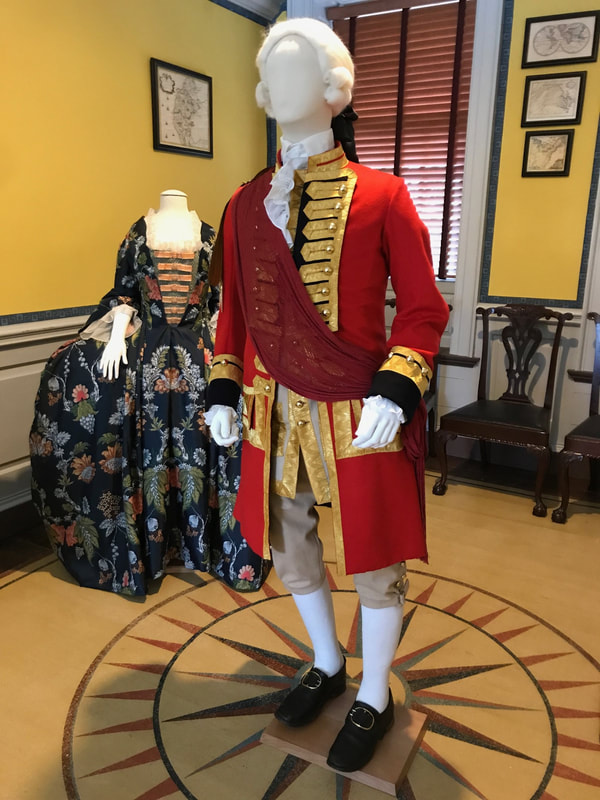
2 Comments
Wednesday was the first day of spring. You can’t tell it by the look of things outside. I took a picture in my back yard. 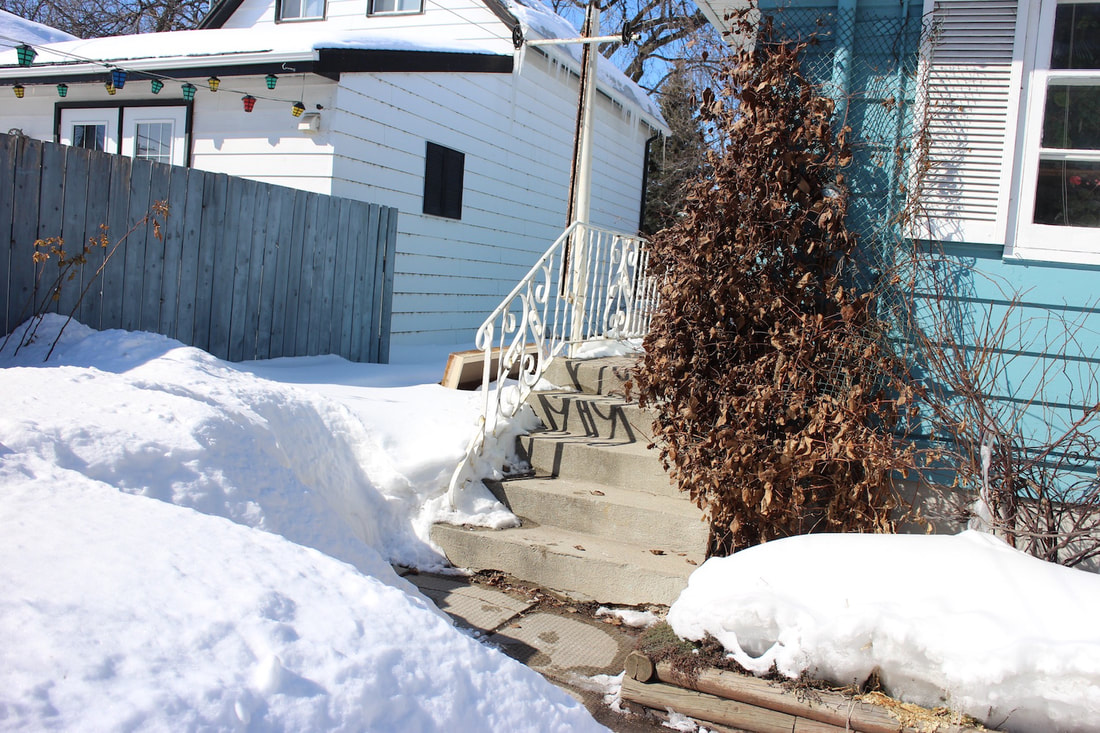 The backyard is level with that sidewalk at the foot of the stairs. Yes, the snow in my yard is up to my waist. Here’s hoping it all melts soon, but not so quickly that we have flooding.
Still working away on that sash. A small disaster yesterday. At the end of a row, I let the first part of the row slip off the other end of the needle. Lucky I have a safety line in place. Susan DuBois suggested those little rings that open up so you can place or move them easily to help keep track of stitches and patterns. Sounds like a great idea. I’m past the point where I was worried about keeping my count, fewer numbers in the repeats from here on. I’ll certainly try those rings next time. Thanks Susan for the suggestion. I am finding that numbers are my friends. The only way to prevent mistakes is to count stitches, and re-count after every row of work. 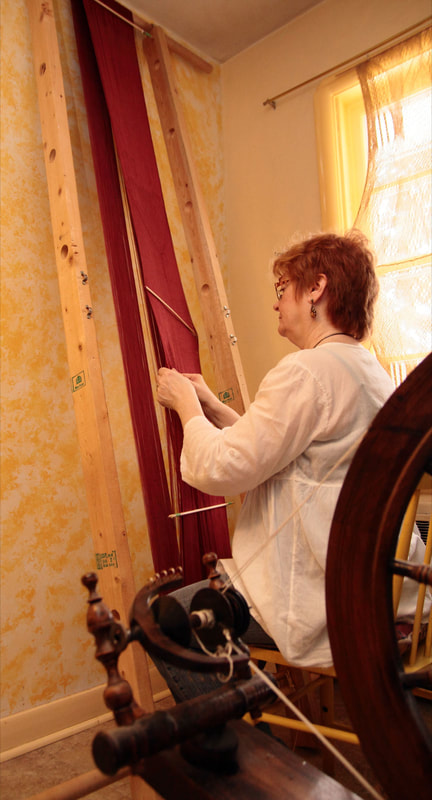 Photo by Chris Black Now, generally, when I get to working, my mind sometimes drifts. Counting more than, say, 20, I am never 100% confident that my count is Really correct. I experimented with a couple of things to help me keep track of threads. I thought about placing ‘marker beads’. This would mean sliding on the required number of beads ahead of time, sliding them along as I measured out, and leaving a bead in place at the appropriate place. The problem I anticipated was that any knot or slub on the thread would mean that the rest of the beads could not pass. I opted for placing little ‘marker threads’ every 100 threads. We re-counted at each 100, to make sure this marker was accurately placed, and to be keeping accurate account of the number of warp threads.
As soon as I began to ‘sprang’, however those markers proved impractical. They got tangled, and created tangles. So, I’m relying on counting and looking, checking each row twice. Breaking down the pattern into smaller pieces helps. Indeed, most of the patterns on this replica sash do that. And let me stress again, keeping the threads well separated goes a long way toward error-prevention, as well as making it possible to push each work around to the other side. Work on the sash replica continues. The length of cloth is now such that I’m ‘over the top’. 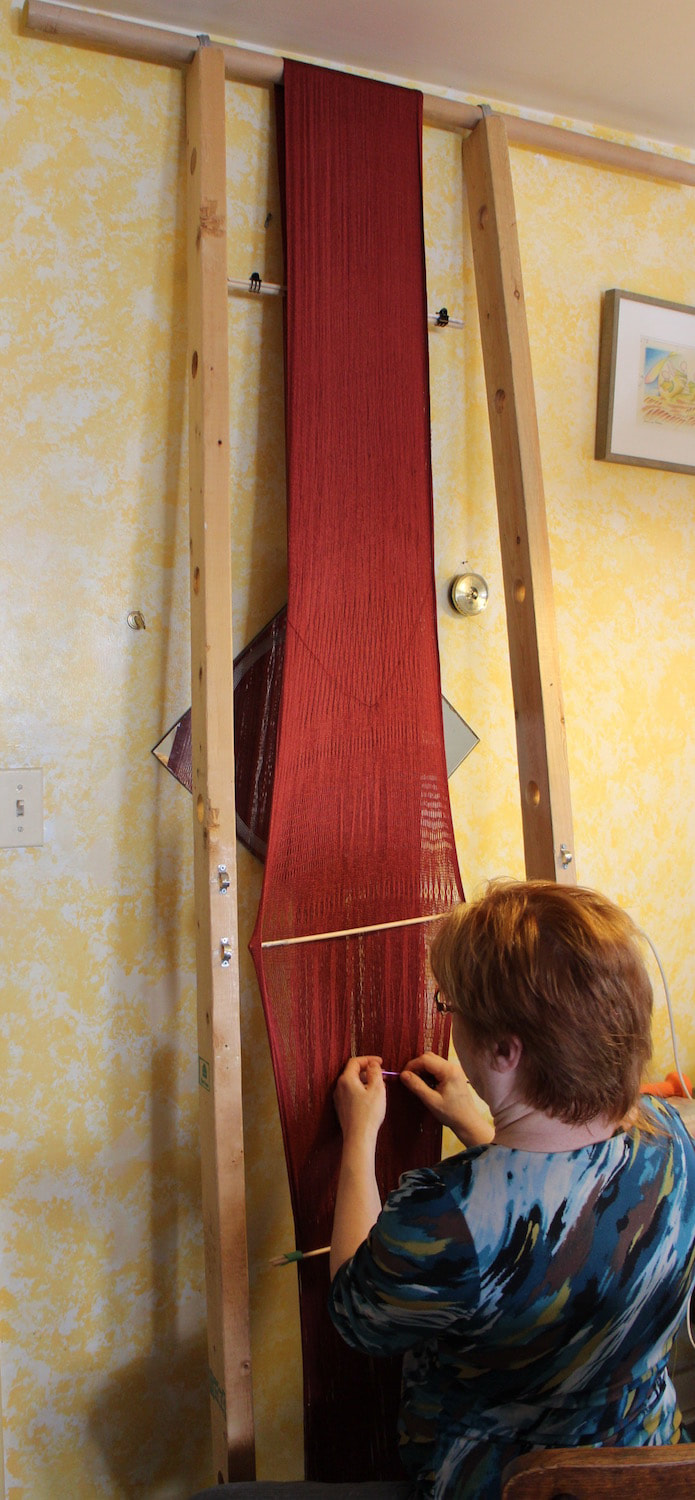 The cloth is now long enough to extend over the top. The first few feet of the sash were worked on the ‘front’ of the frame. Each time I worked a row, the new shed was pushed down, around the bottom, up the back of the frame, and finally over the top. Each time a ‘Z’ row was completed, an ‘S’ row was added above.
I’ve arrived at the point where I now sit and work with the ‘Z’ row at a comfortable height and the most recent ‘S’ row is on the ‘back’ side of the frame. The ‘S’ portion seems to need a bit of encouragement to compact together. Early on I found that a heavy knitting needle in the last row, clasped to another needle for security, was the right thing to press each row against the previous. It also served as ‘safety’ line, should (horror of horror) I loose my working shed. Now that I’m over the top, the heavy knitting needle works at cross purposes. A few rows past the top of the frame, I noted that the needles were weighting downward and away from the cloth. At this point I switched to wooden sticks. The sticks are lighter than the metal knitting needles and not particularly well finished, so they ‘grab’ to the threads in the last shed, don’t fall down. Progress is slow, but steady on the sprang sash. Here is where I am. The date is now on the sash. 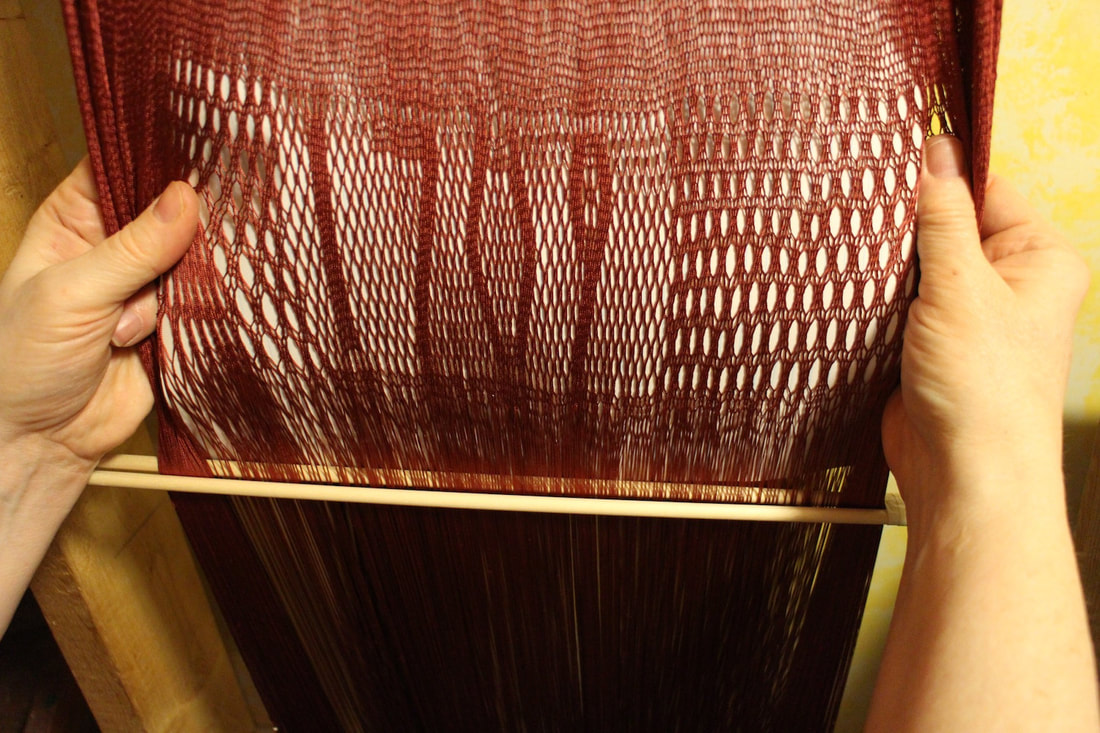 General Braddock’s father graduated from military academy in 1709. A reporter for the local French language newspaper stopped by to interview me. Her camera is also a video camera. She shot a short youtube video. For those who do not speak French, I explain the basic idea of sprang, two rows of cloth for every one row of work. The video then shows you a close up of the sash, and then how I move a row of work around. The sash grows from a central line outward towards the fringes. Tension in sprang is always a question. How tight should I keep my warp? Too tight and it is hard to get your hands in there to work, and strings break. Too loose and it becomes impossible to move the row just worked to the mirror image portion of the cloth. I am finding that tension also plays a role in the ‘rows per inch’ of the finished cloth. Oddly enough, a very tight tension prevents a tightly packed cloth. High tension will ‘loosen’ the cloth as you weave the next row.
Preparation work for this massive replica project included the creation of samples, using the threads that seemed right for the project. Those samples were narrower and much shorter than the finished product. Finishing the samples, and comparing them to measurements of the original sash I was concerned. The number of rows per inch was much higher in the samples than in the larger sash. Now that I am working with a 15 ft warp, I find that high tension is mandatory. It is my only hope for keeping the threads in order, and pushing the work around to the mirror-image side. Interestingly, without working at it, the number of rows-per-inch seems to be coming out just exactly right. The amount of tension required to manage such a long warp is exactly the amount of tension to give me the right rows-per-inch. It’s looser than my sample pieces, but correct for my measurements. Go figure! My sash replica project is progressing. 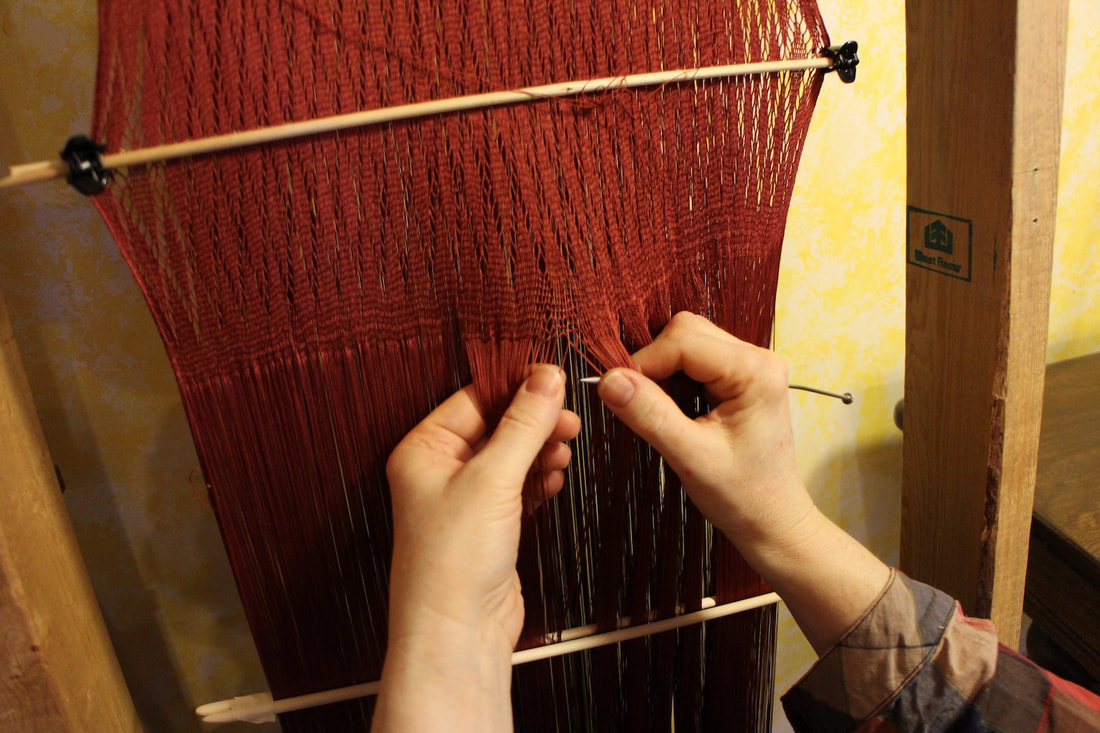 Keeping the cloth spread helps alot. A stick holding the cloth spread out goes a long way to prevent errors and it also has made it easier to push each row around for the mirror-image row. I am amazed at the ‘hand’ of the cloth I’m producing. It is soft and luxurious.
I’m going to see a new play in town “The Penelopiad”. Written by Margaret Atwood, the subject matter looks at the Odyssey from the point of view of Odysseus’ wife Penelope. Now, Penelope was supposed to be weaving by day and un-weaving by night. Sprang apparently was known to the ancient Greeks. I’m wondering if Penelope was working in sprang. Circular warp sprang requires a very even warp. Slight variations in tension while setting up results in slight differences in length. This warp is 15 ft long, and took almost six hours to set up. Slight variations occurred. We did take a couple of breaks for tea. I also noted weaknesses in the yarn, and some small knots. If there had to be knots in the warp, I wanted them to be all lined up in a place where the warp would be separated into the two fringes. Perhaps the pause to deal with these flaws also introduced small variations in tension and length. At any rate, after the first few rows, I KNEW that some threads were longer than others, and these were causing all kinds of trouble. In desperation, I went through the warp, and pulled the longer of these to the center. This resulted in what looked like a mess.  Evening out the length left arge loops at the center of the weaving. Most every circular warp of any length that I have worked has had this issue to some degree (mostly a much lesser degree). In my experience this always evens out over the length of the cloth. Indeed, over the next few rows, the loops diminished, and the unevenness worked itself out. 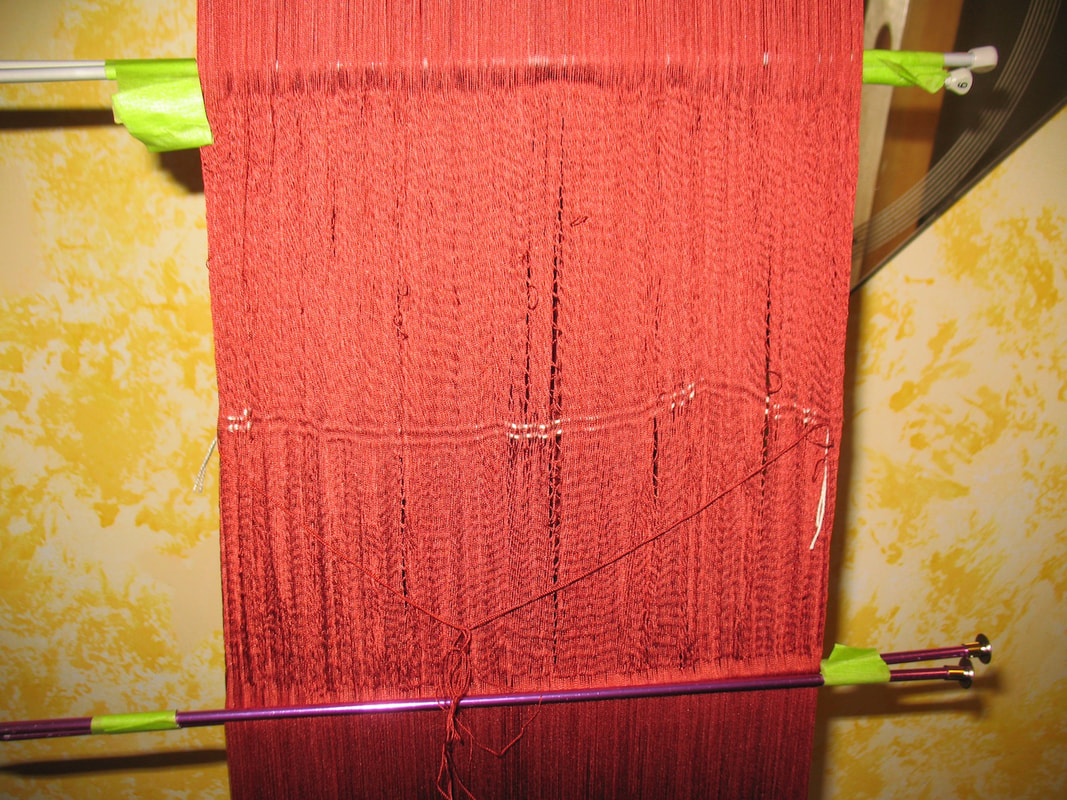 Several rows later, the imperfections loops are smaller. Working several hours a day, after ten days, I’ve got 5.5 inches of work done, resulting in 11 inches of cloth. The unevenness in the warp has completely resolved. 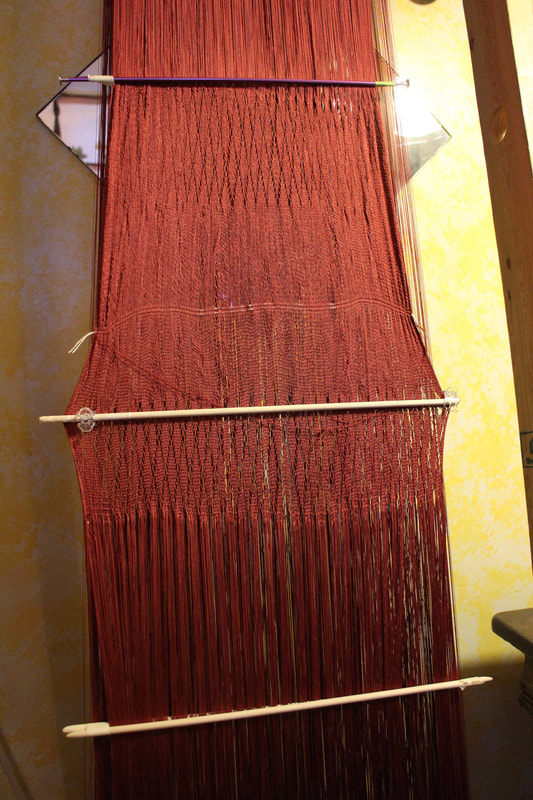 You would not guess the problems I had a few inches ago. I’ve begun work on that replica sash. 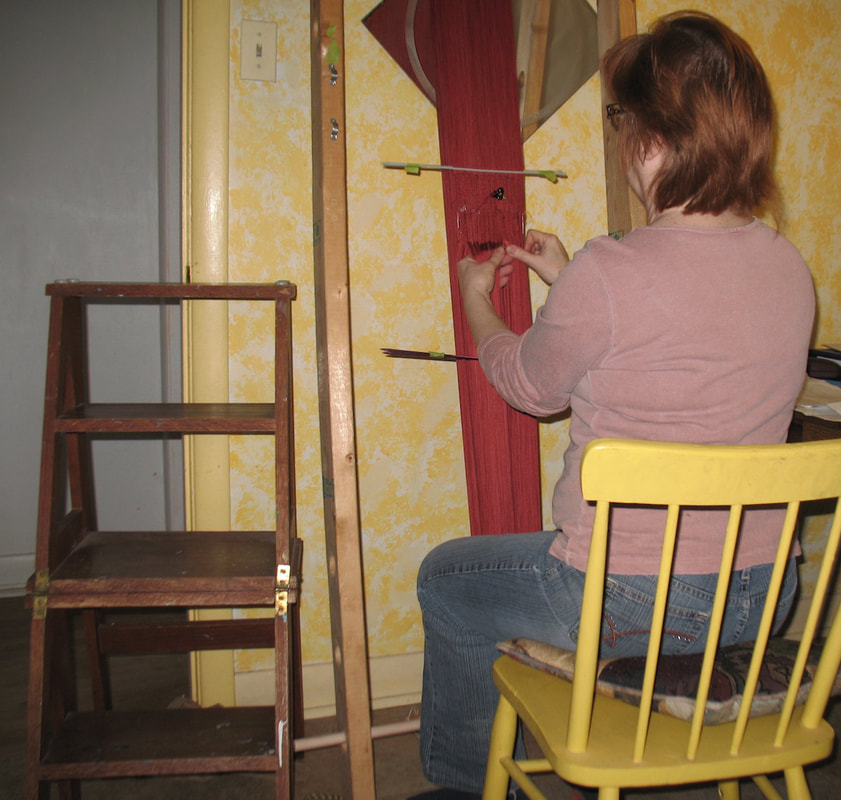 Work happens on the warp and frame that I set up last week. The first row was very slow, took over an hour. Then there was the challenge to move the work around the frame and back to the starting place. Note that stepladder beside me. I thought the warp had been set up with even tension throughout. Think again! Guess it’s nearly impossible to maintain exactly the same tension for almost six hours. Very slight differences in tension mean different lengths of thread within the warp. Different lengths in the warp cause no end of trouble in pushing the work around.
And yet, this is to be expected. I have not yet worked a long sprang piece that has not had this trouble. The first several rows, the first foot, are always difficult. Eventually the warp evens out, and it goes more smoothly. As they say in German, “aller Anfang ist schwer,” beginnings are always difficult. Looking for smoother weaving ahead. Warping Day. The silk is now the right color, or as close as I can get. Still tied in sections to prevent tangling in the dyepot, I’m leaving those ties to try to avoid troubles un-reeling. 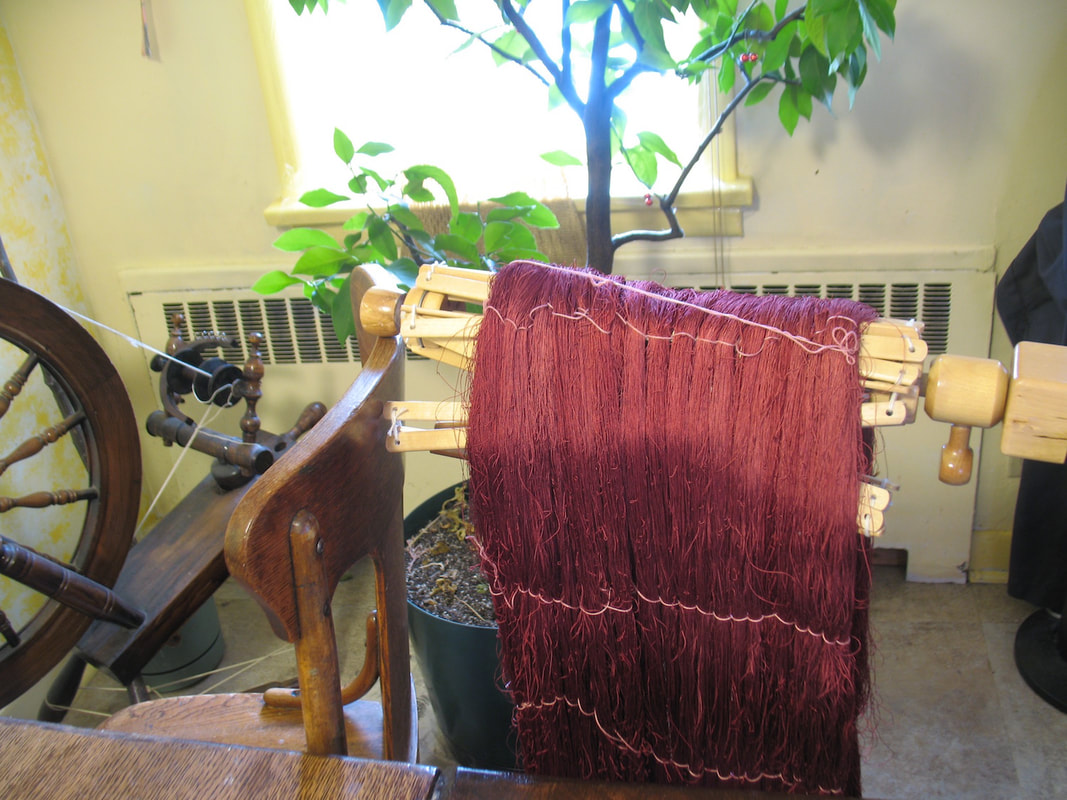 The skein hanging on my umbrella swift, ready to set on the frame. Here you see the sprang frame. It consists of two 2x4s, one on the floor, and one on the seat of chairs. There are convenient holes drilled every foot or so. Holding the 2x4s together are 1.5 inch dowels at either end. Small pipe straps hold finer dowels for the cross. To make it easier to see the cross, we placed my cutting mat behind the cross. 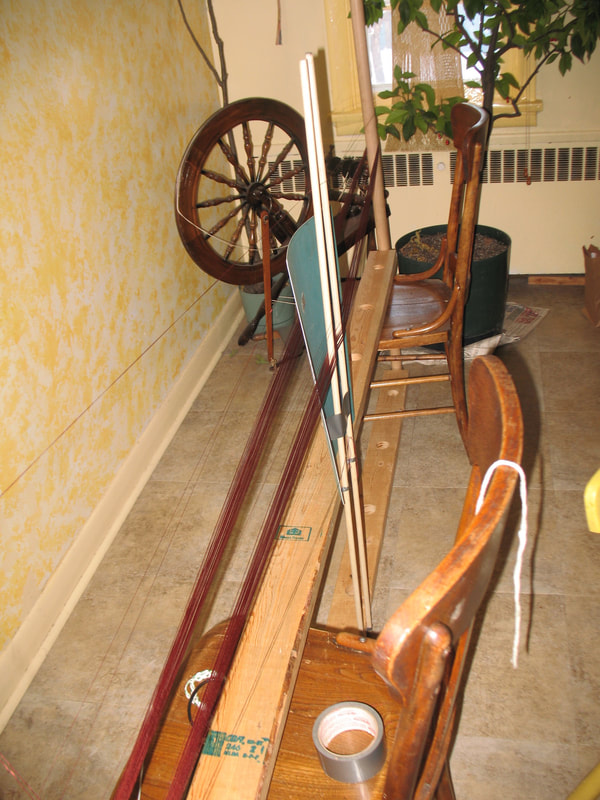 My heavy-duty frame Usually I set up the sprang frame by myself. In honor of the size of this warp and the fine thread, this time it is a three-person job. 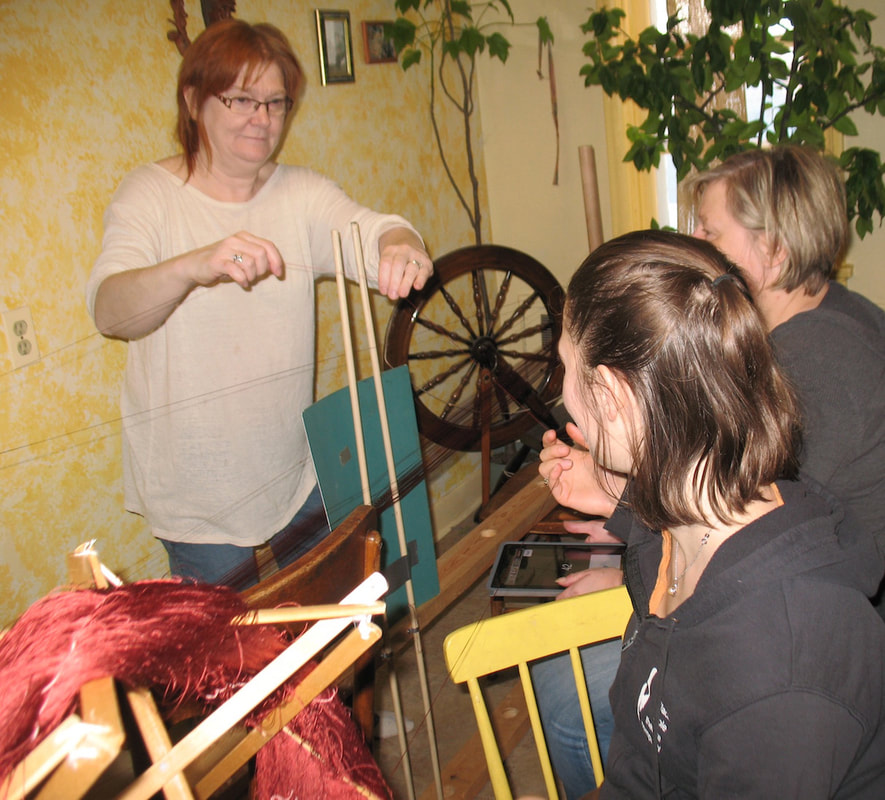 The three-person job One person manipulates the umbrella swift, preventing tangling at that end, another winds the thread around the sprang frame. The third person keeps track of the cross, makes sure it is laid in correctly. This third person also keeps track of the number of warp threads, lets me know when we’re done. 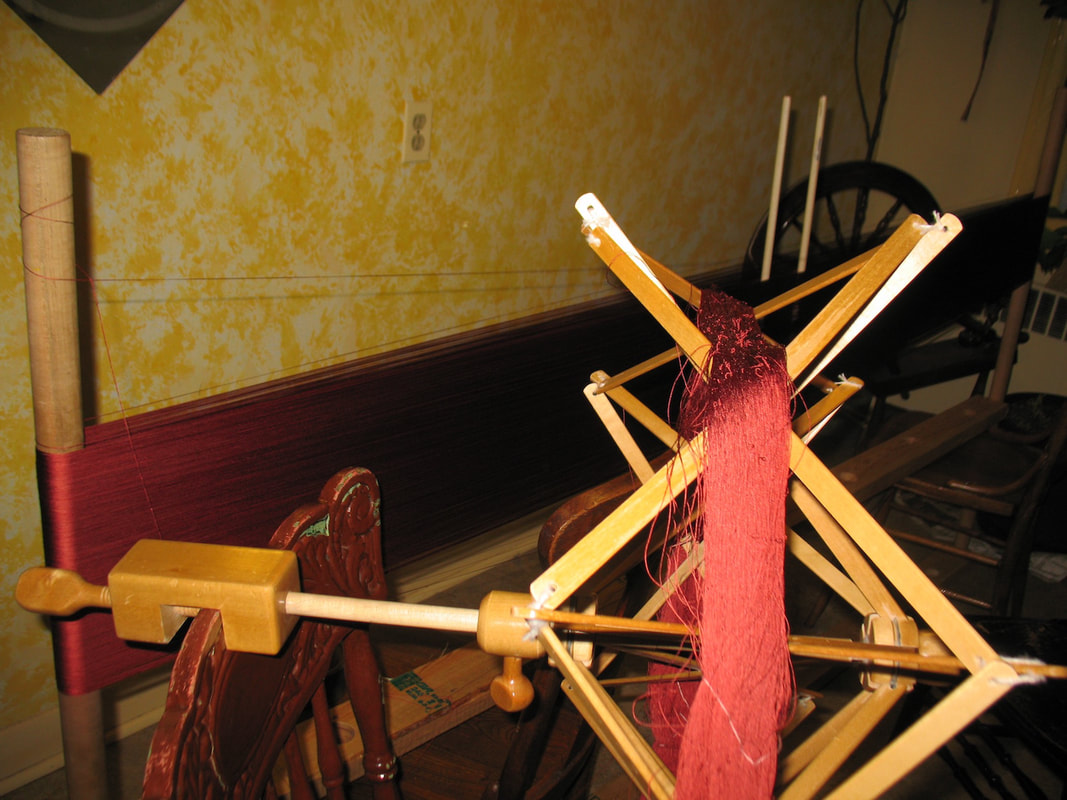 Getting there It required six hours to set up the warp. Whew! Glad that part is done. The 2×4 that was on the floor gets placed on top, and then the frame is turned and lifted. 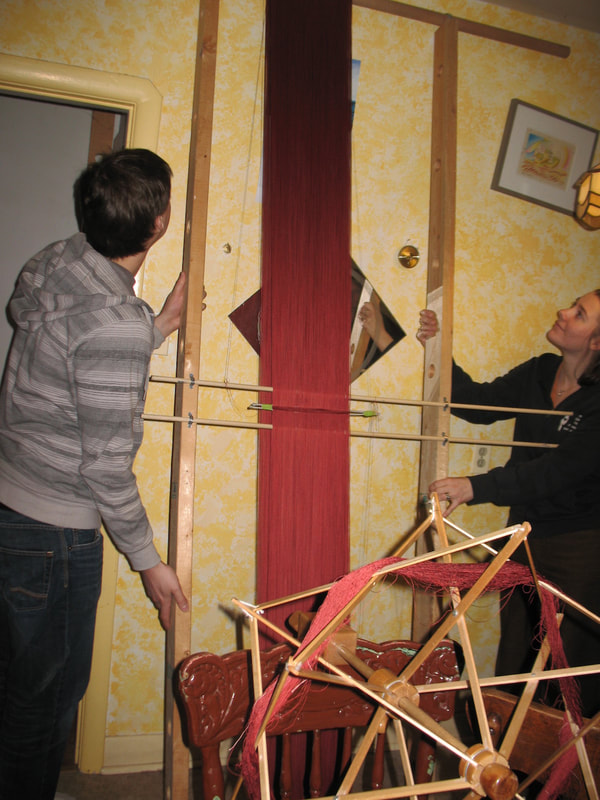 The frame set into position for work. Enough work for one day.
|
Categories
All
Archives
May 2023
Categories
All
|
 RSS Feed