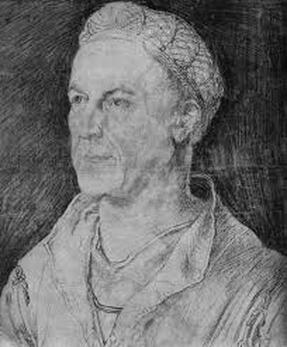
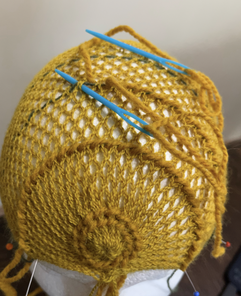
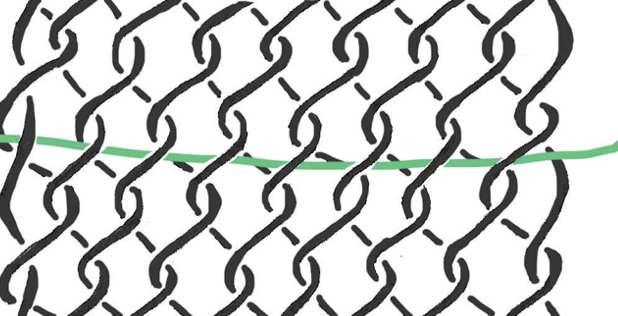
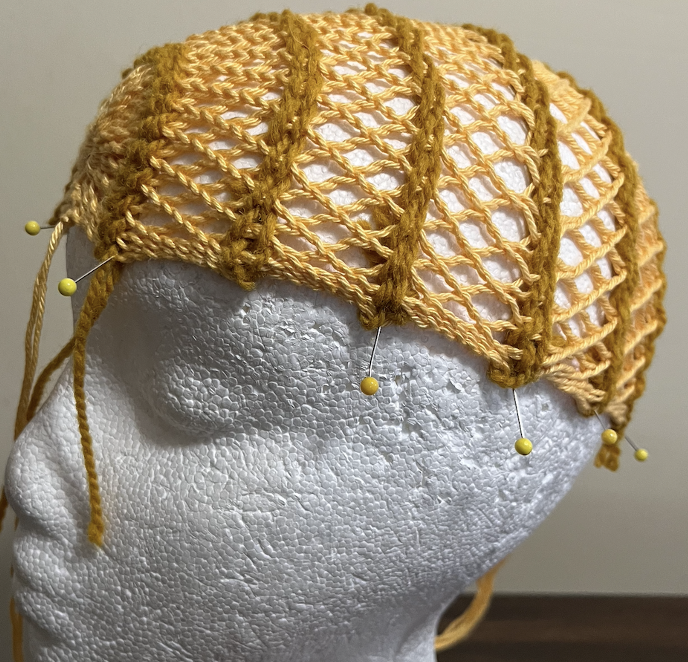
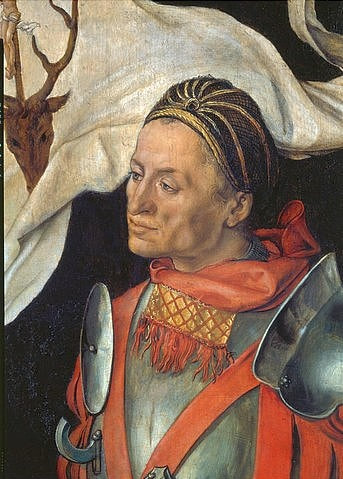
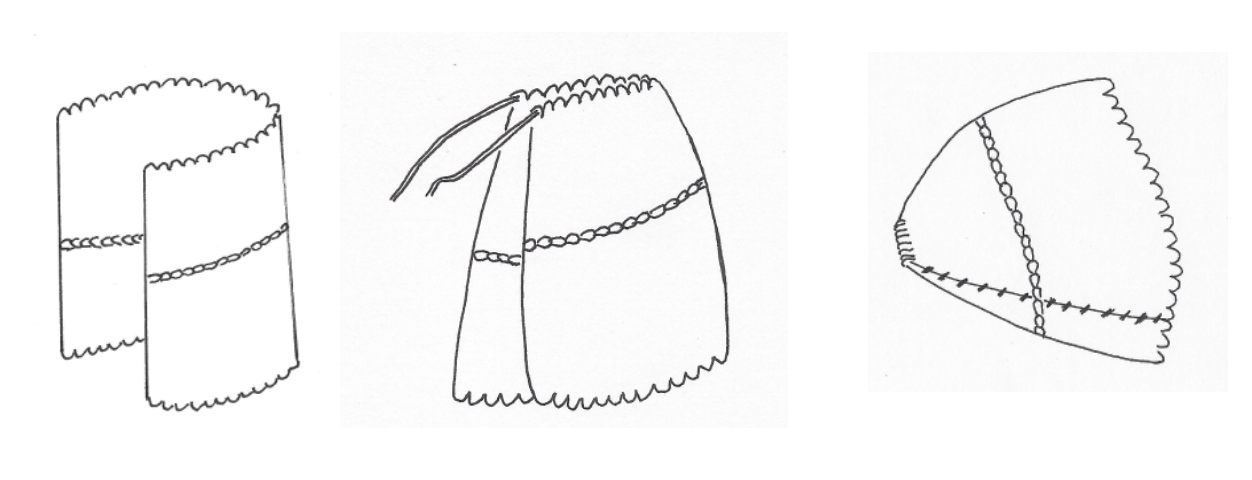
The portrayal of Jacob Fugger by Albrecht Drürer leads me to think that Mr Fugger wore a sprang bonnet. I tried to make a similar bonnet. I interpreted the heavy lines in the bonnet as lines of horizontal twining in a sprang bonnet. When I tried this myself I found that there may be a reason for the twining in the sprang bonnet, as you will see.
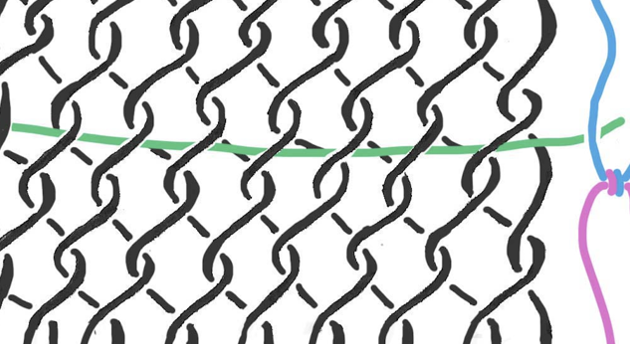
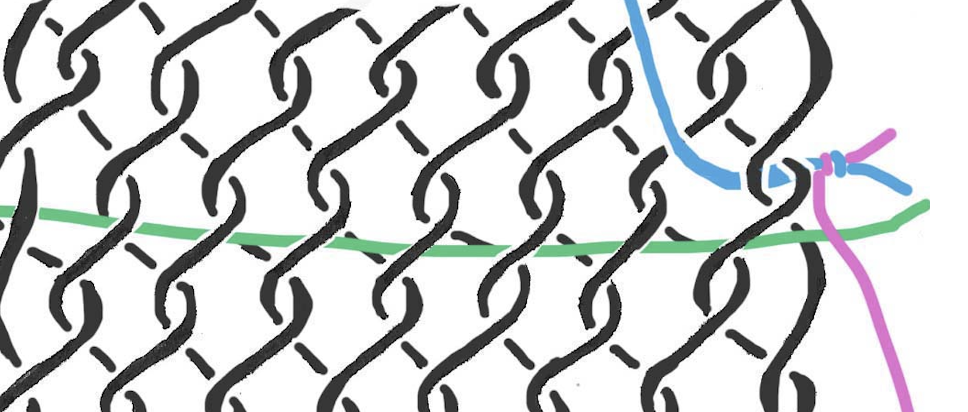
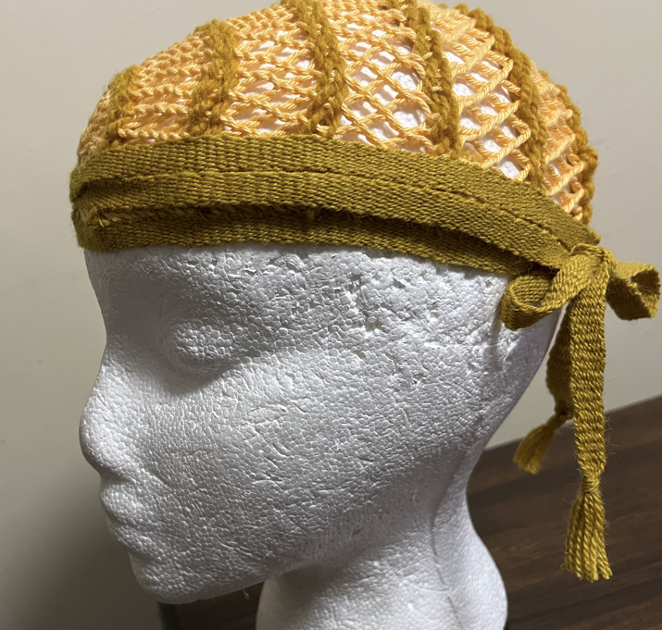
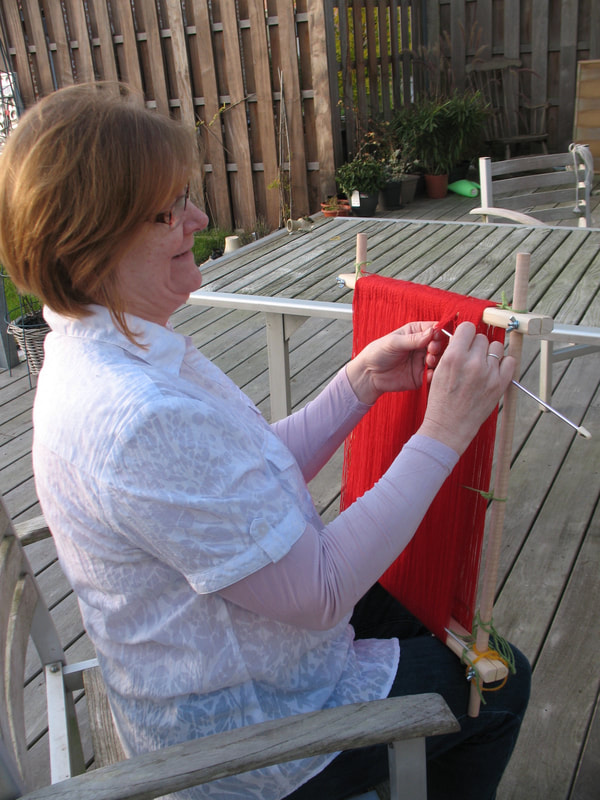
Thinking about approaches to incorporate horizontal twining into the sprang cloth, I thought of two ways to do this. One way (method #1) is to create a line of weft twining as I created the cloth. The other way (method #2) is to add the twining stitches after completing the sprang. The twining stitch does not have the stretch of the sprang cloth. Maybe, indeed, this was the whole idea of the twining line. This risk of method #1 is that the line of twining is too narrow for the desired width of the bonnet. I found method #2 to be more effective, in that I could place the sprang cloth on a head shape (styrofoam head) and then work the twining stitch at the desired tension, creating the desired width of the cloth, fitting the bonnet to the head. How did I work the twining stitch?
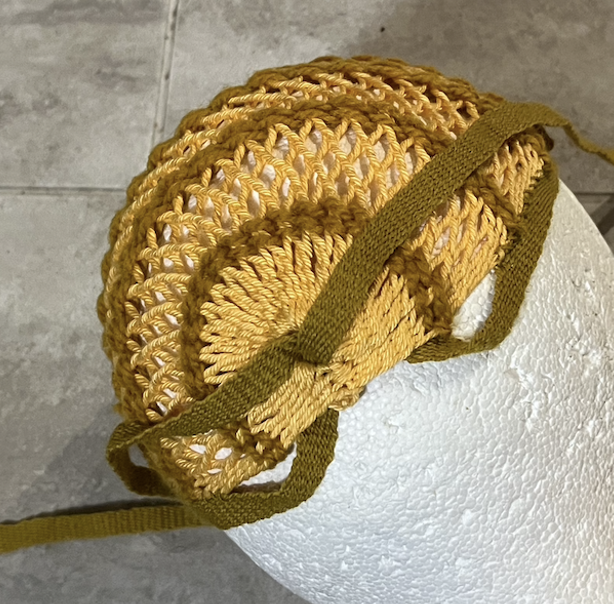
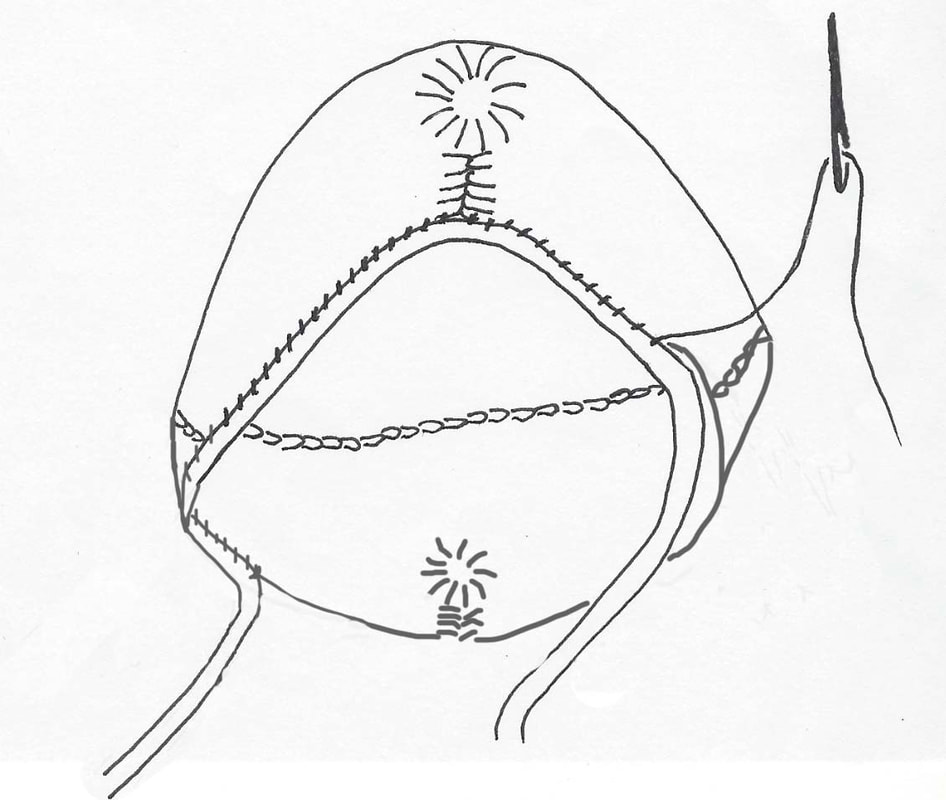
How do you tie the bonnet on the head? Two approaches come to my mind.
If you want the ends of the band to pass all the way around the head, then I would pass both ends through the circle at the back of the head.
0 Comments
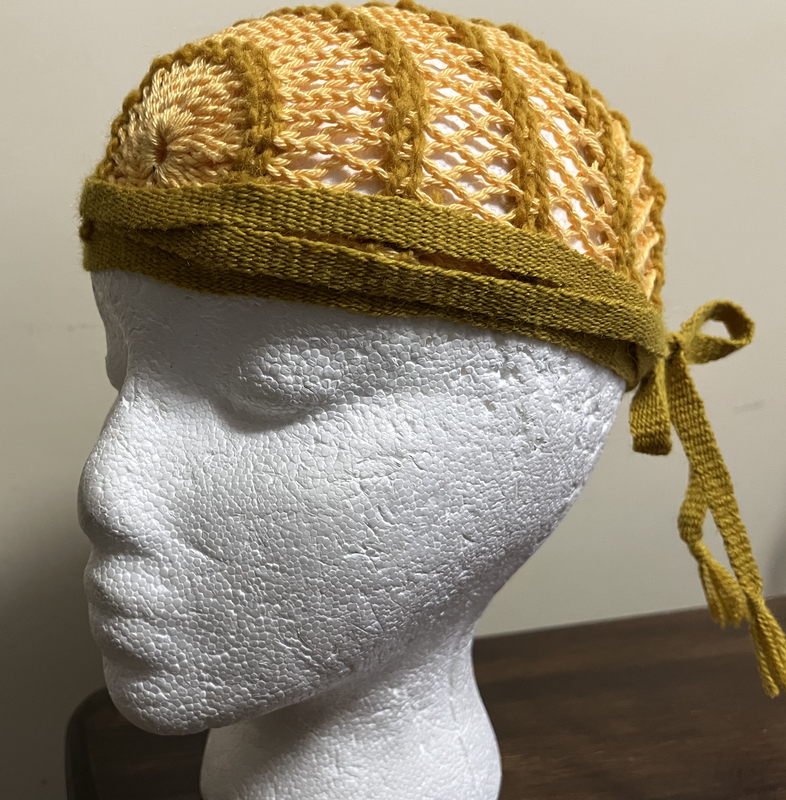
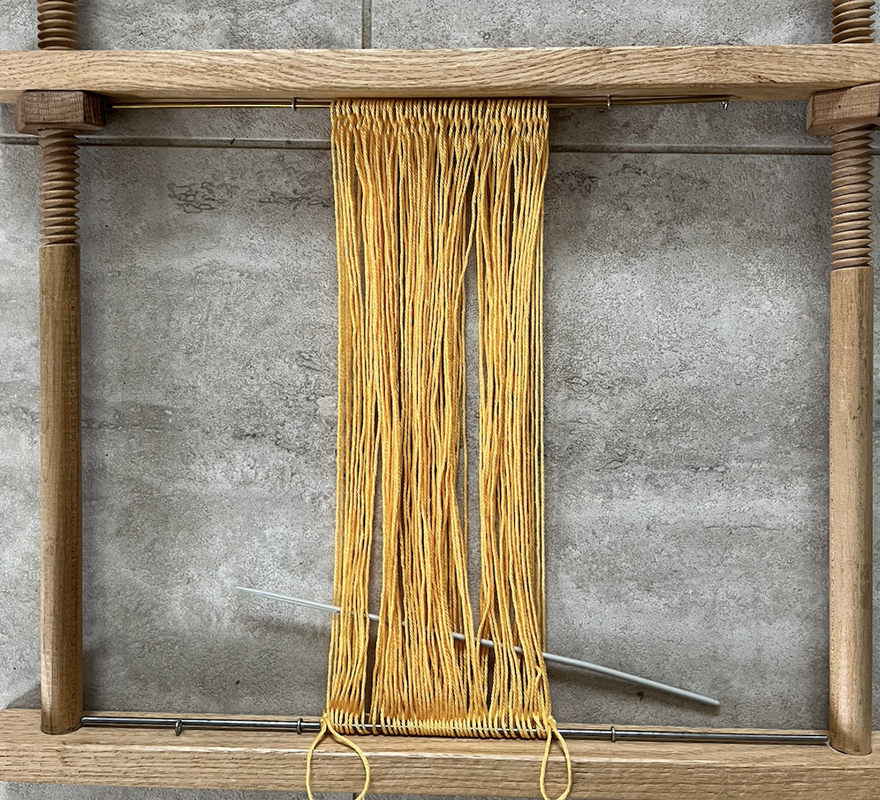
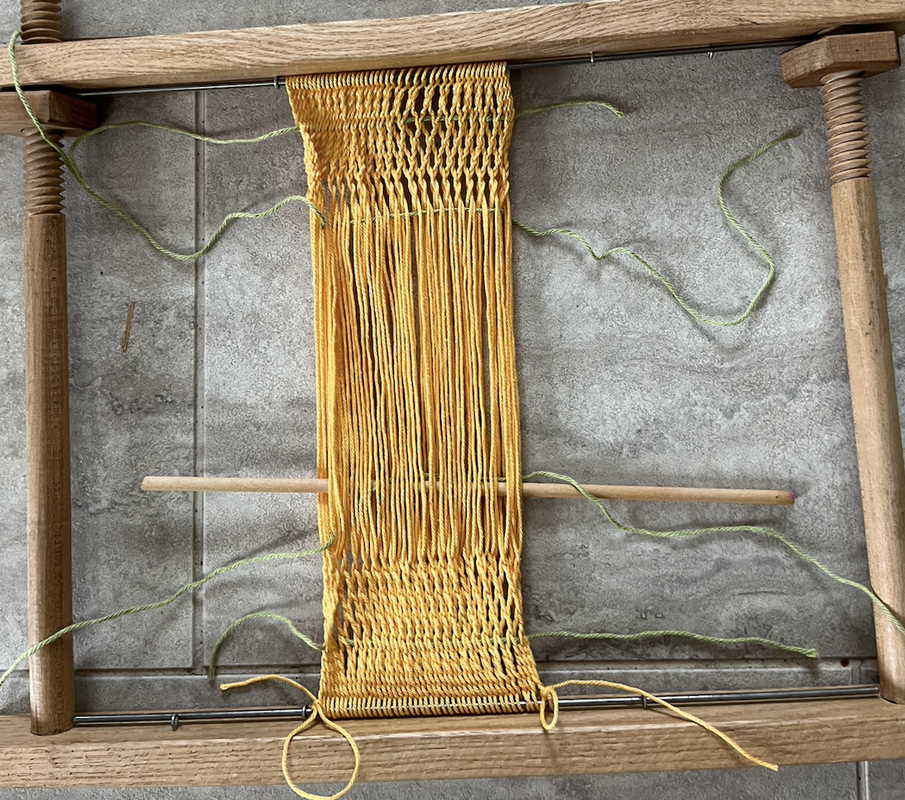
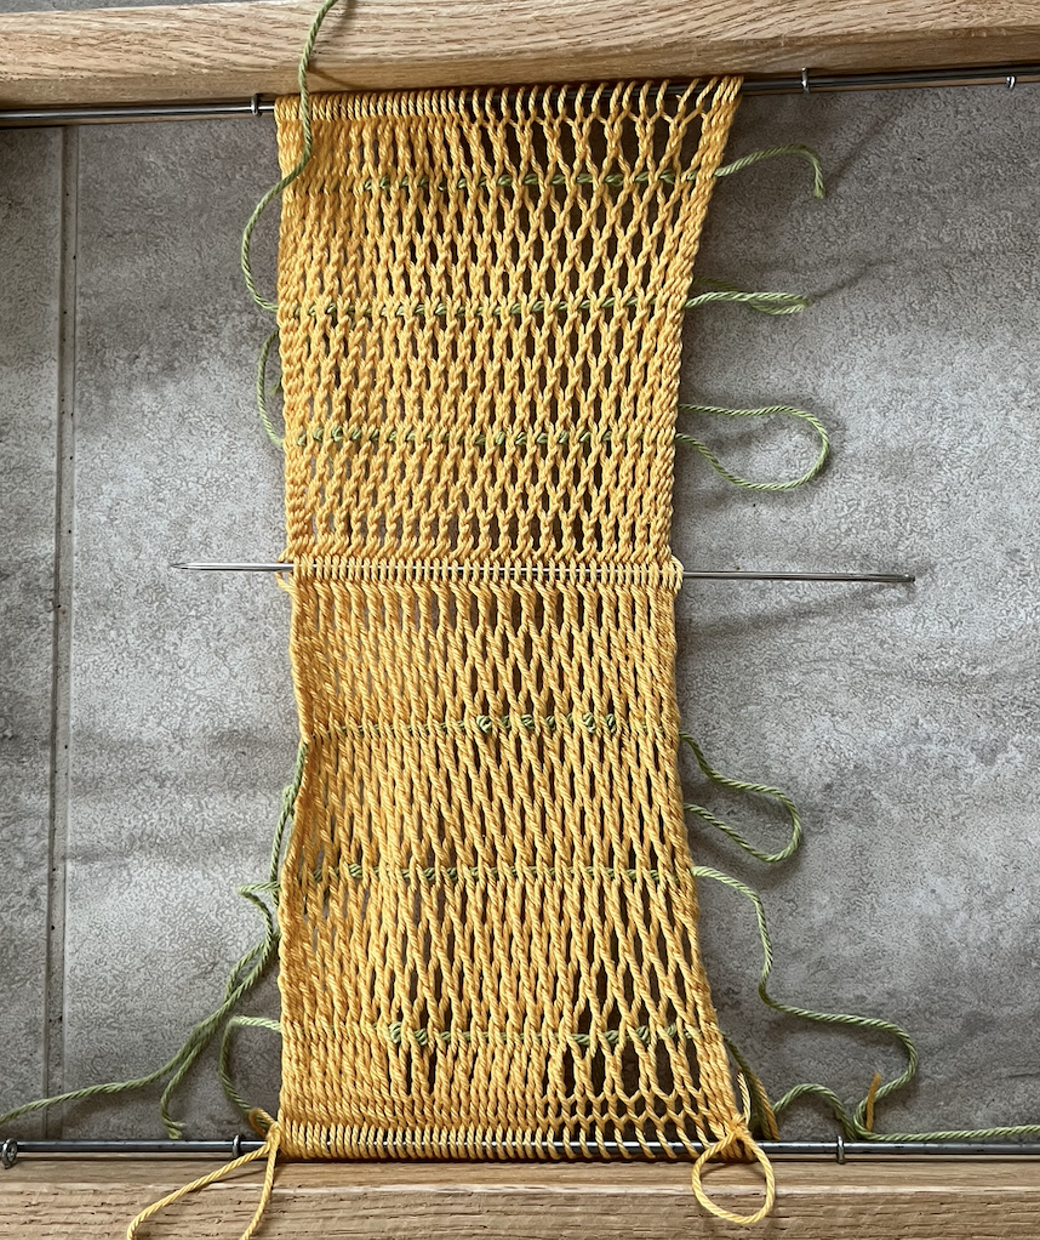
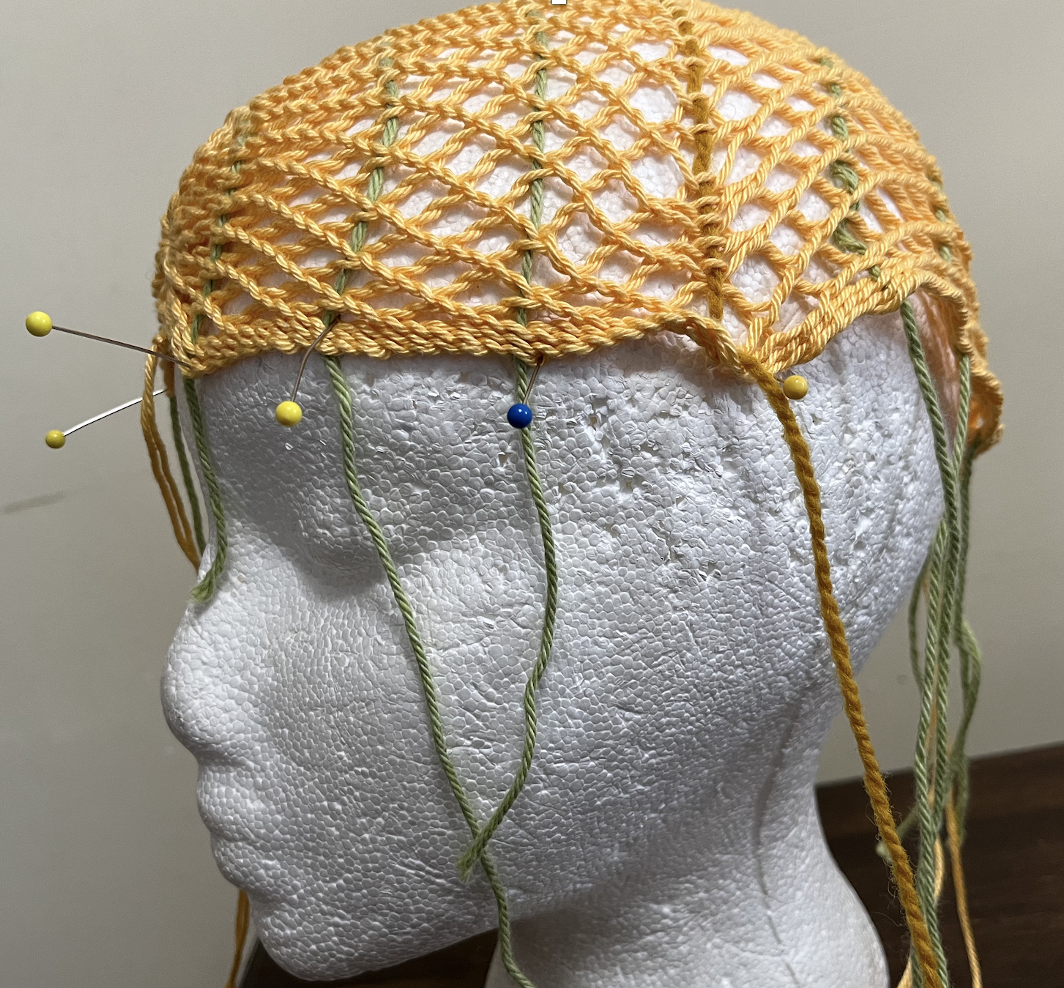
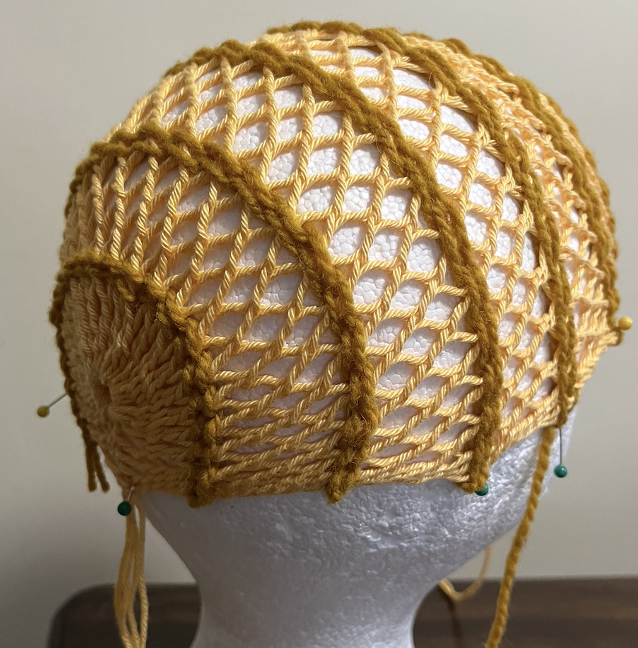
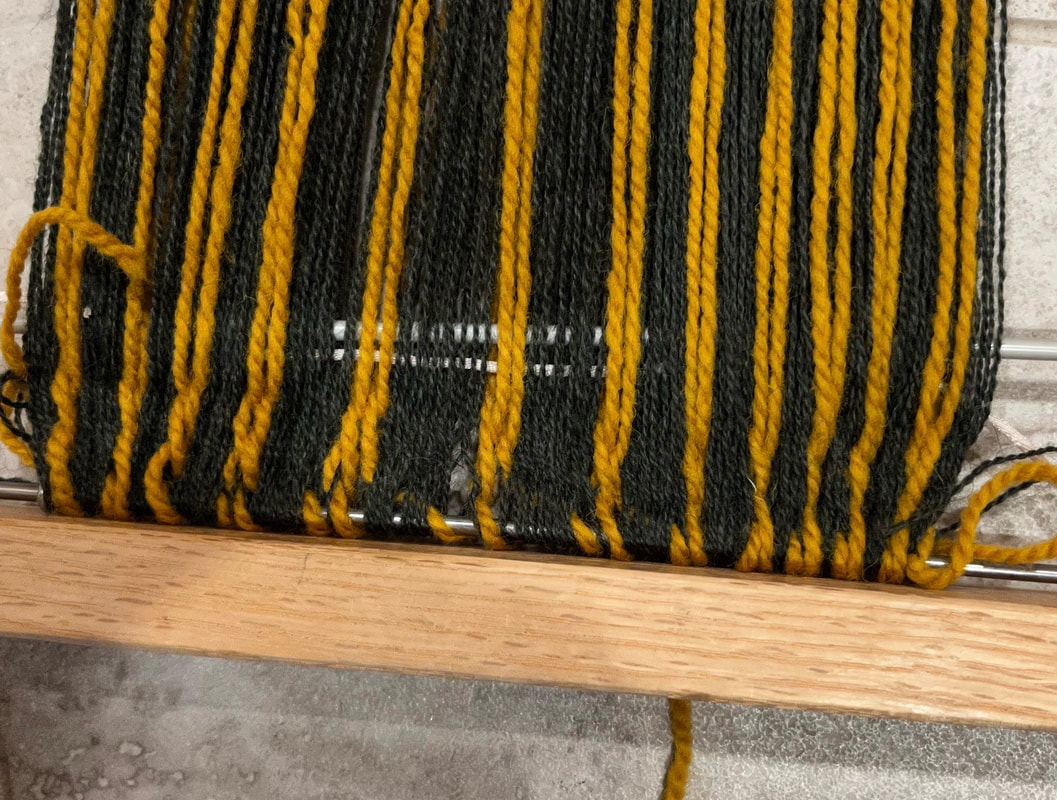
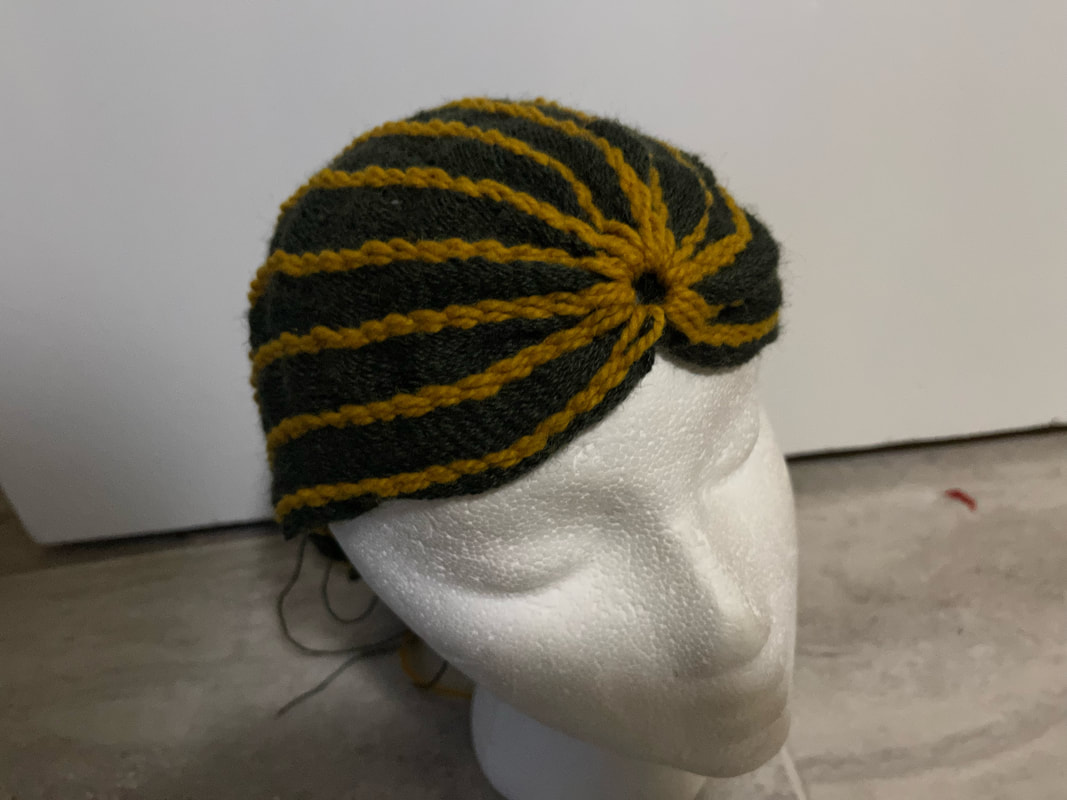
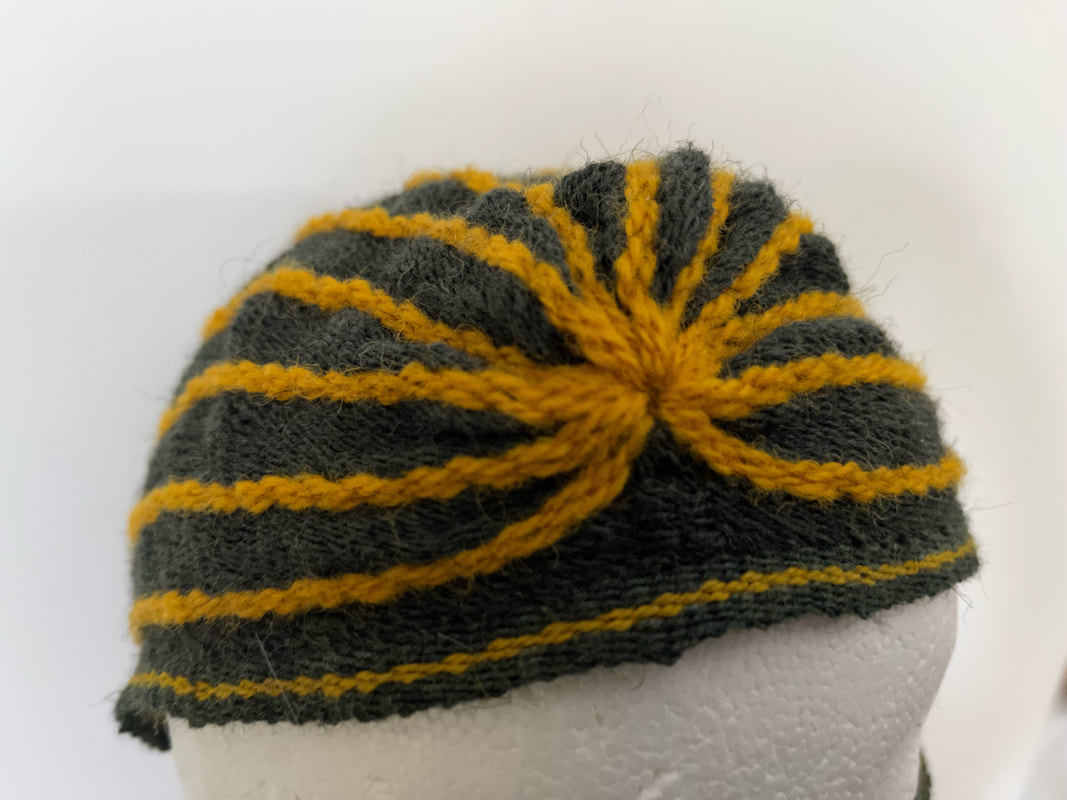
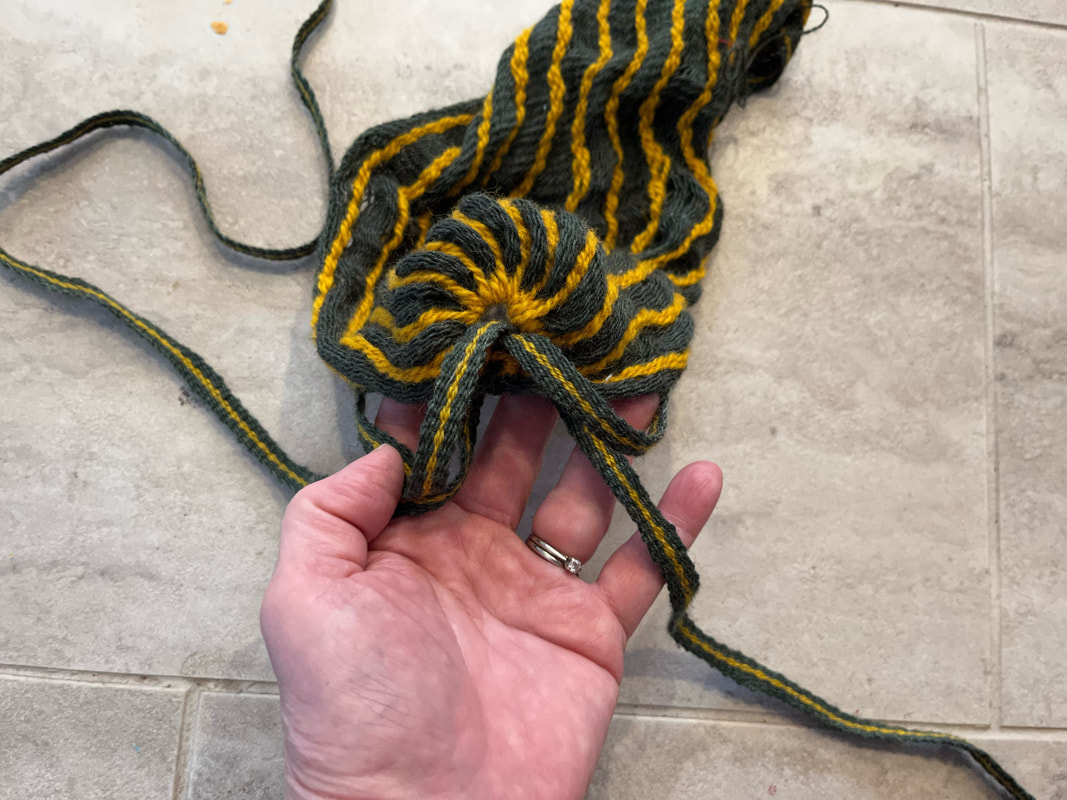
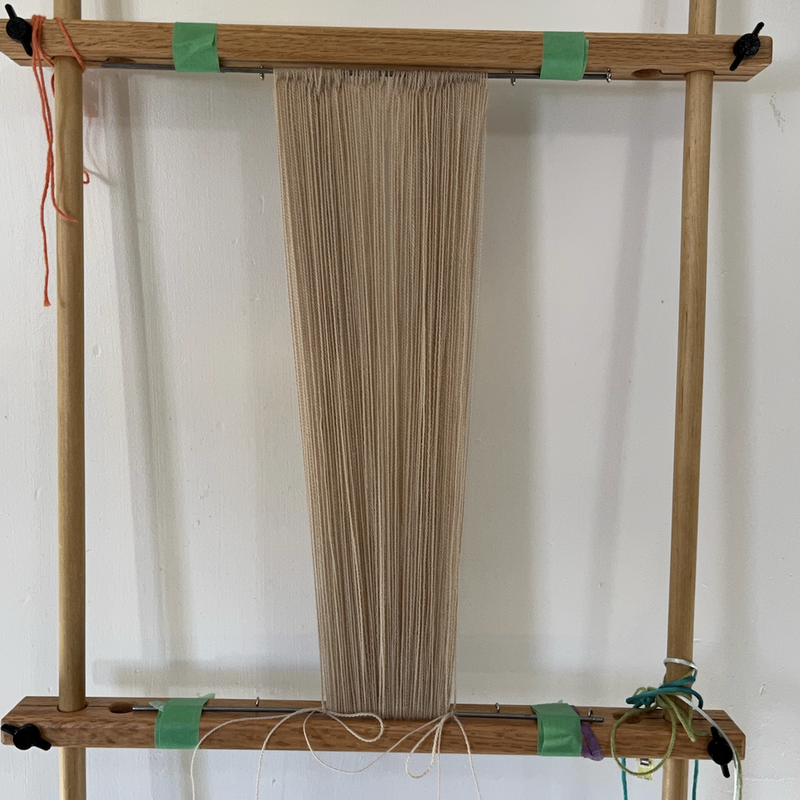
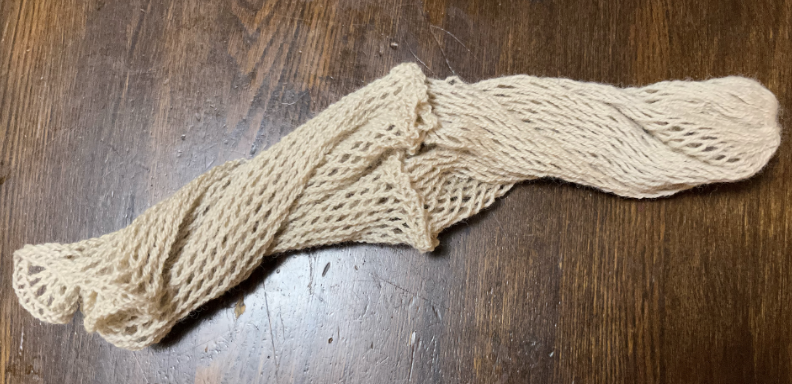
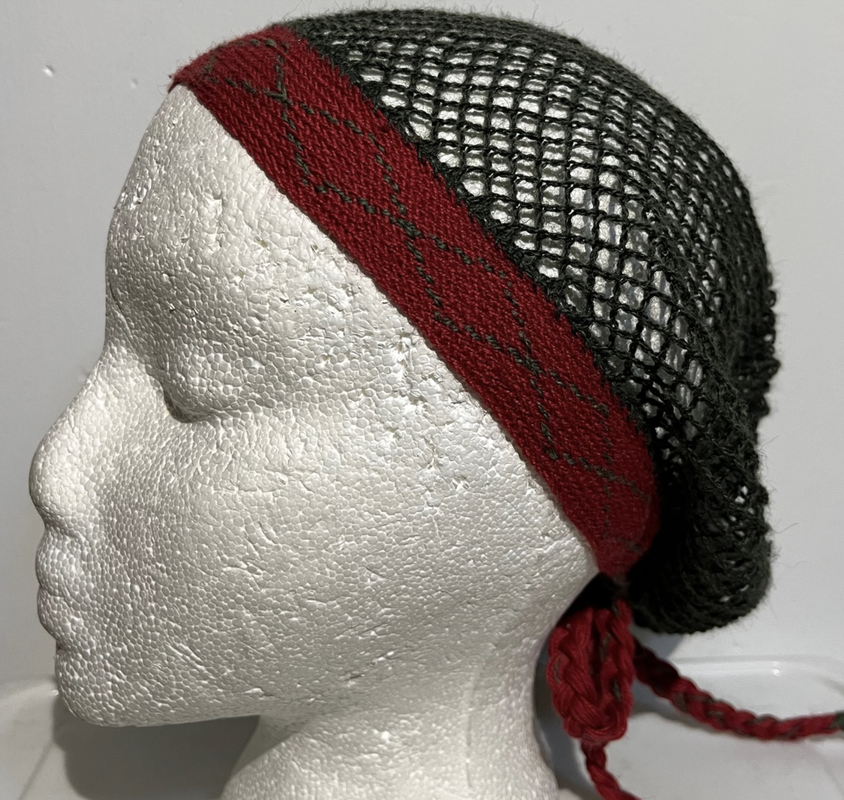
To make such a bonnet, I set up a 16 inch long (41cm) warp of a dark green 2/8 wool and a worsted weight yellow, alternating 10 green and 2 yellow, ending with 10 green.
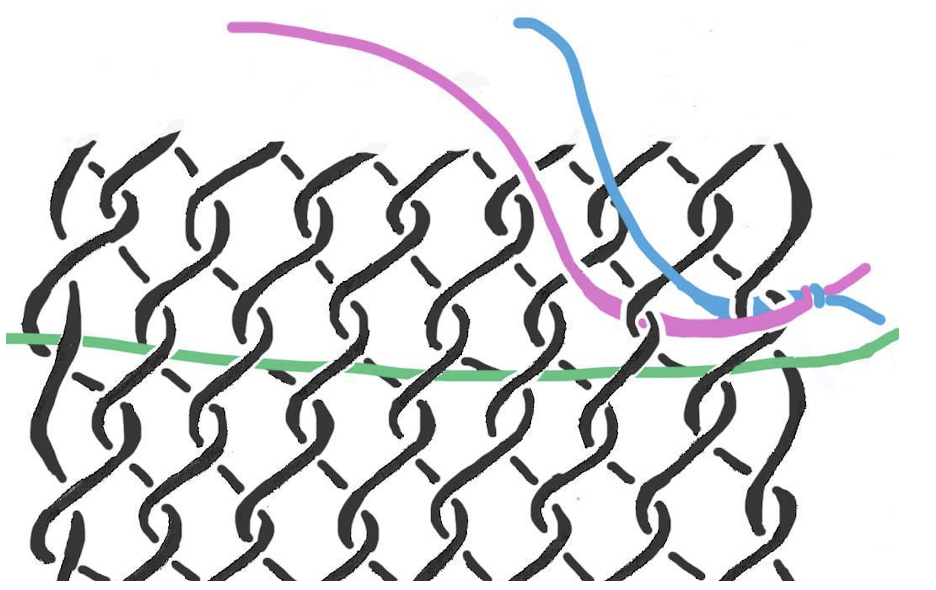
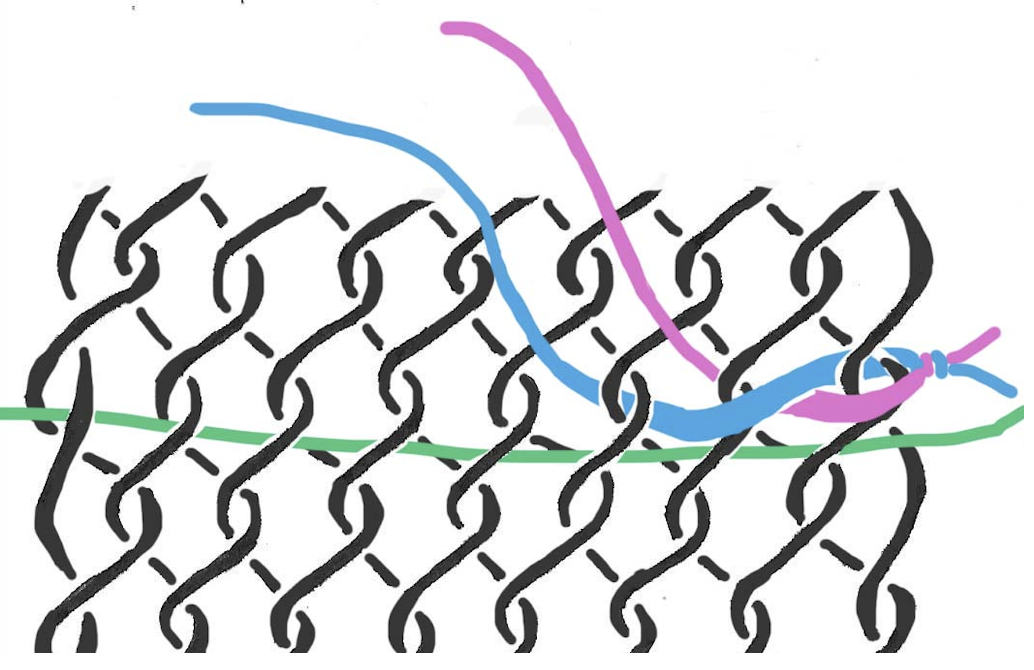
I worked the green threads in an interlinking stitch, and the yellow threads in a vertical twining stitch. I described the vertical twining in my post of Feb 2, 2023.
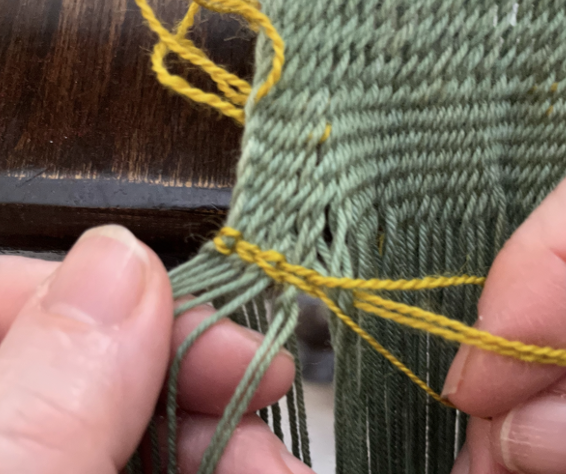
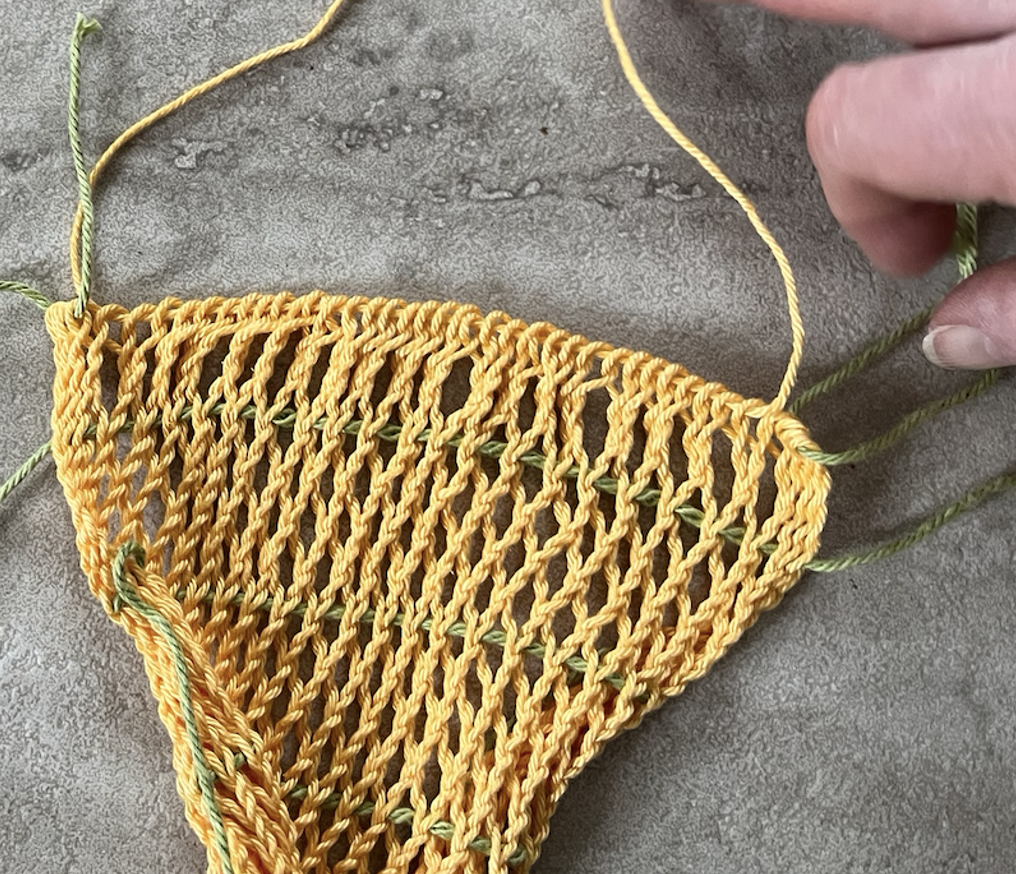
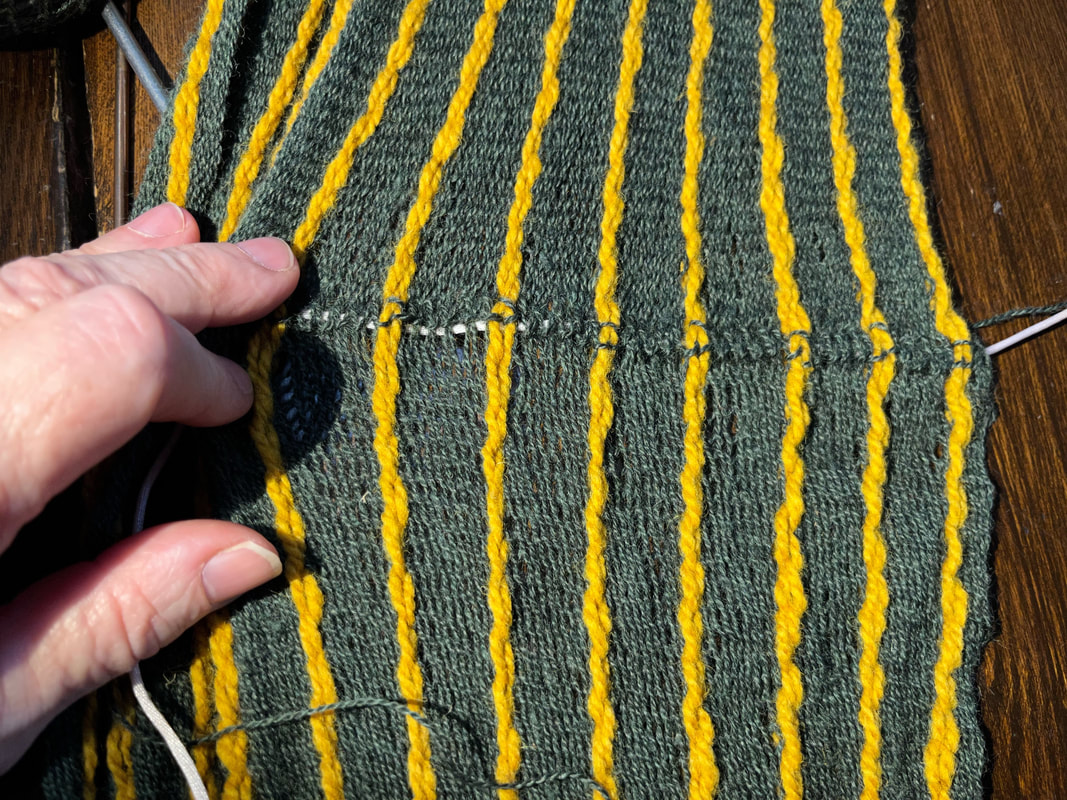
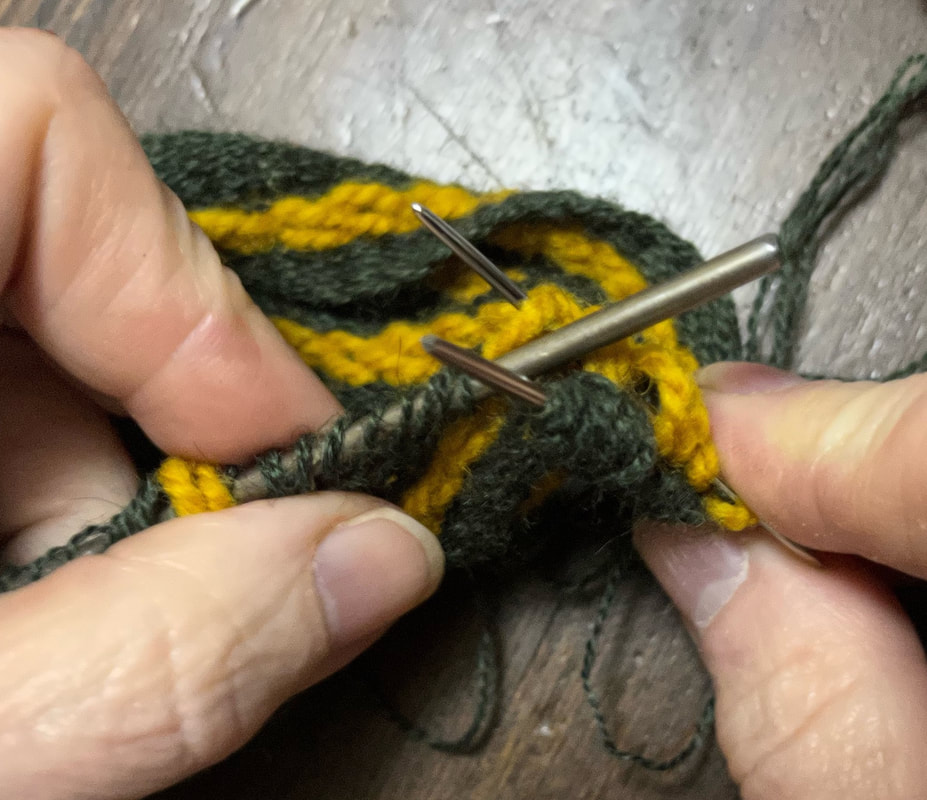
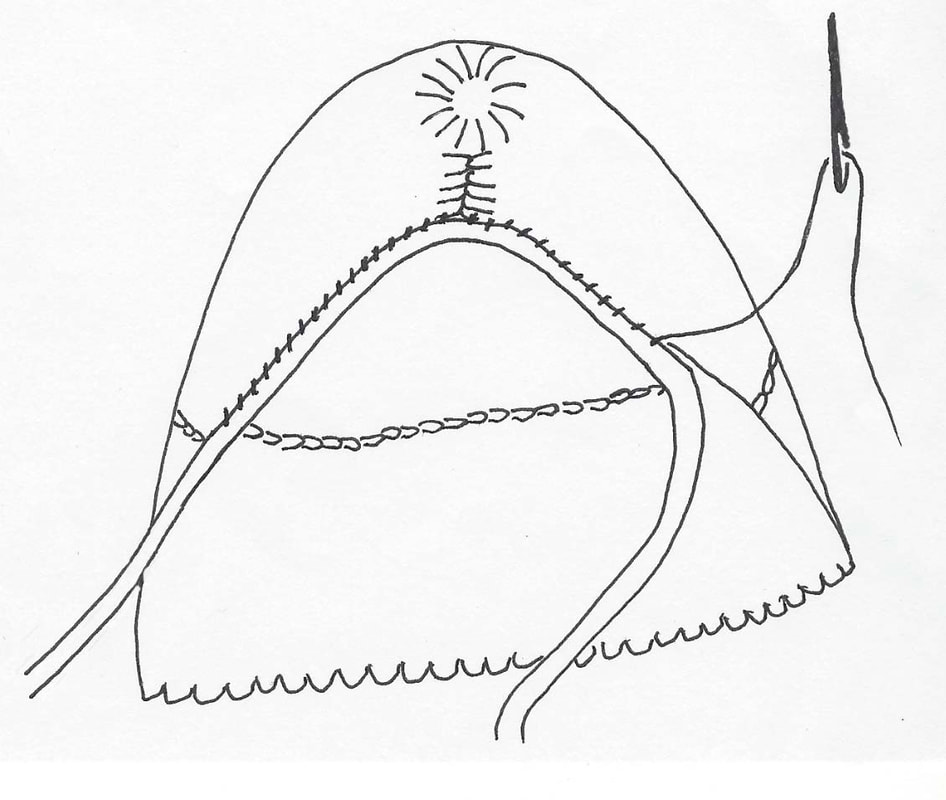
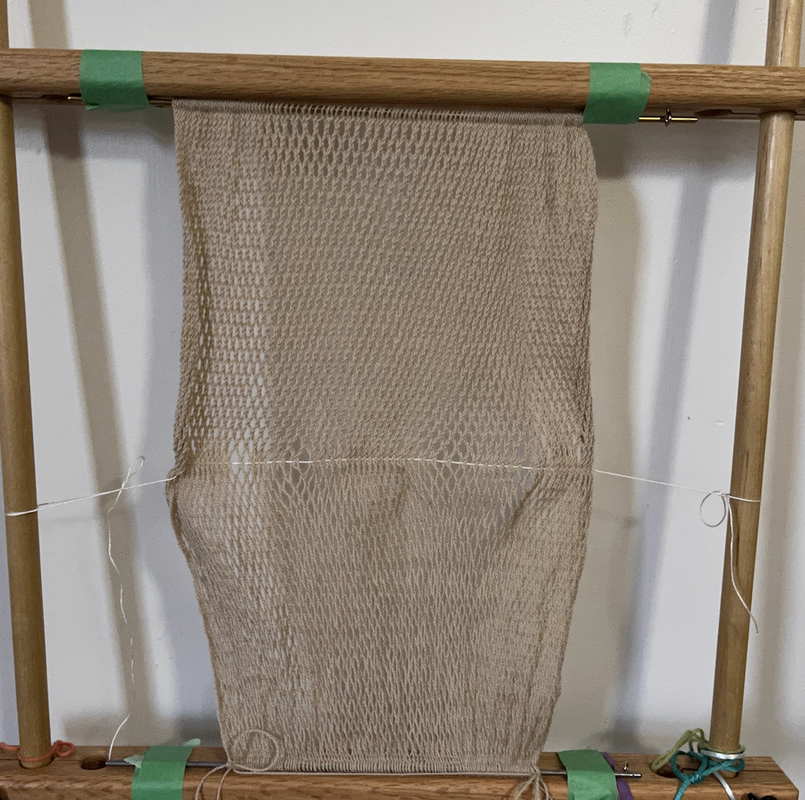
To gather the end loops, I divided the end loops into two groups, separated by color. I slid one color of loops on one blunt sewing needle, and the other color of loops onto the other blunt sewing needle.
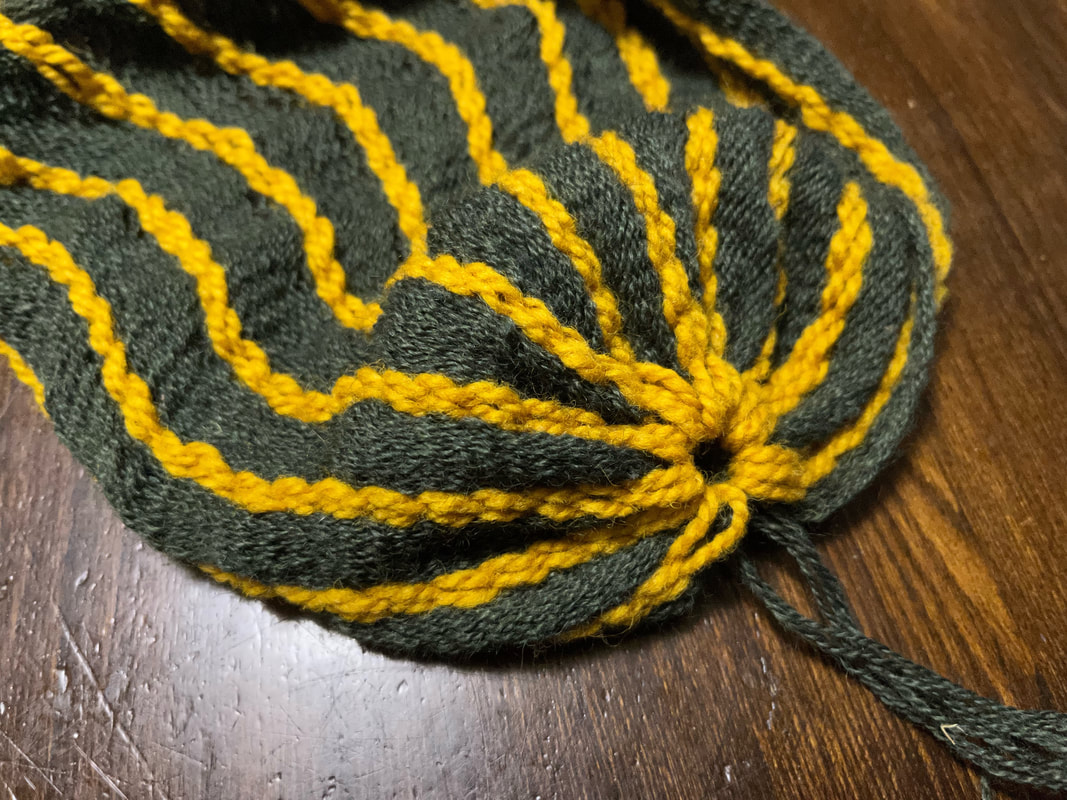
Dividing the loops in this manner allows me to snug the loops into a far smaller circle.
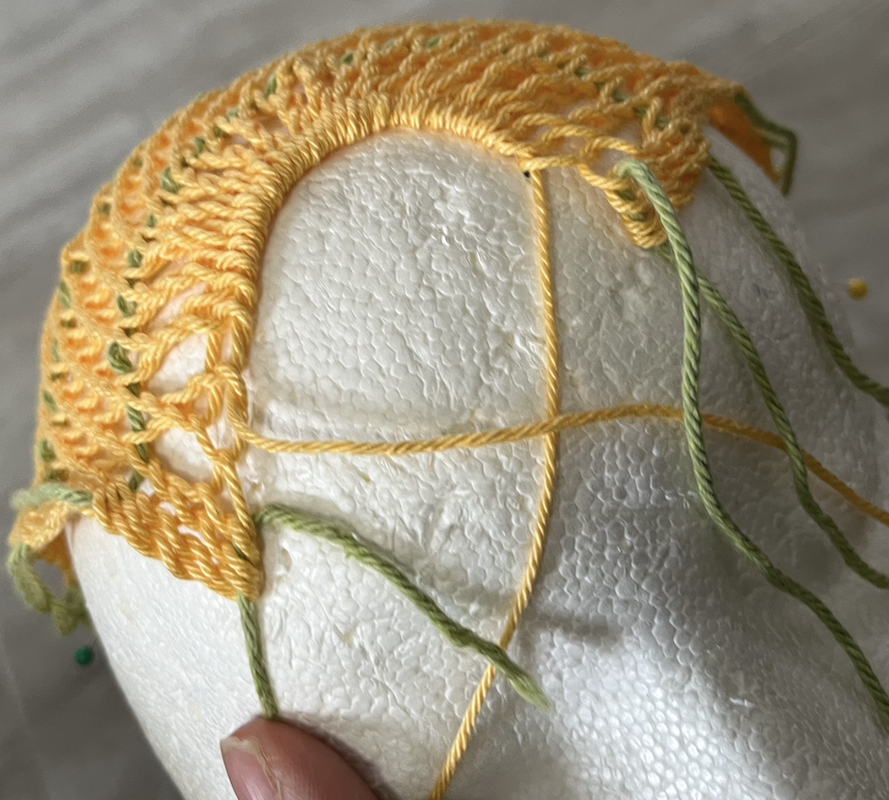
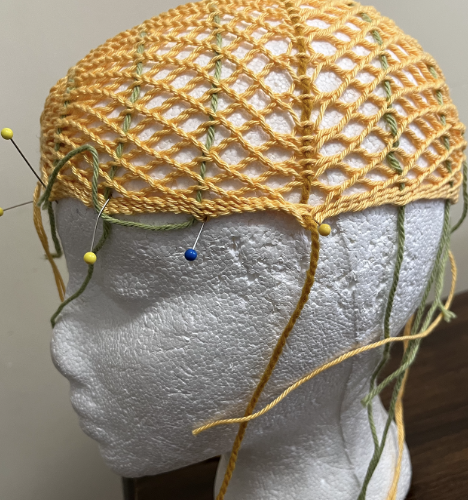
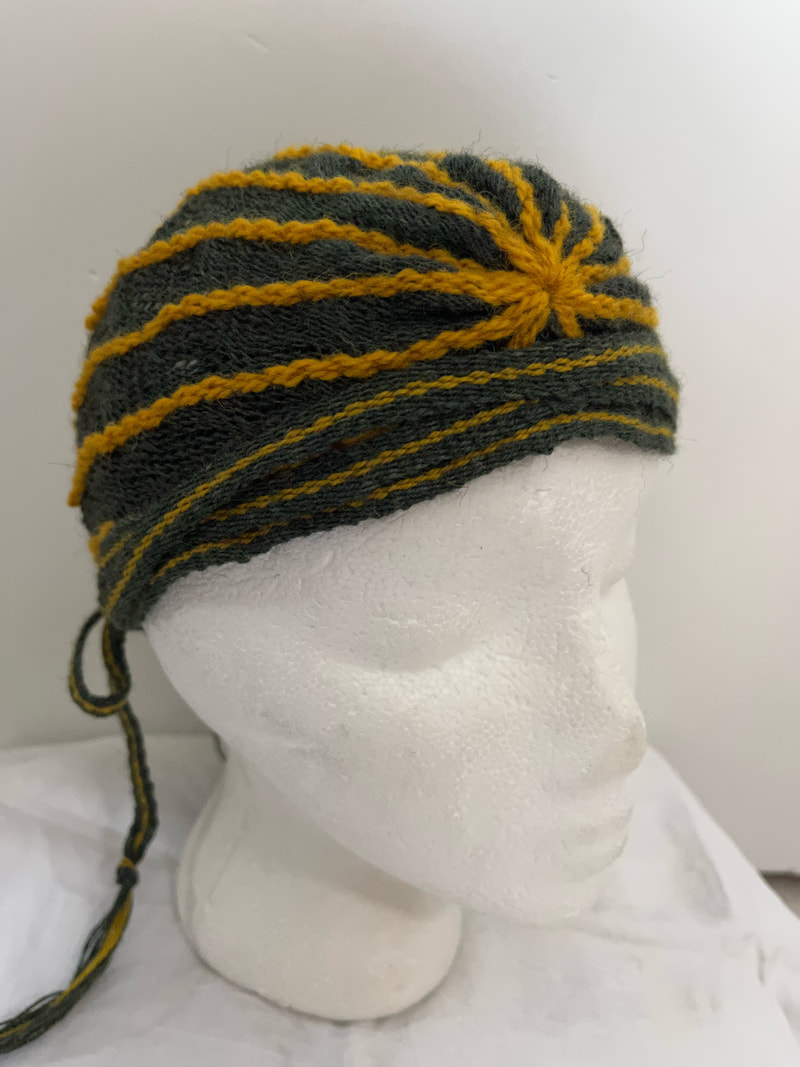
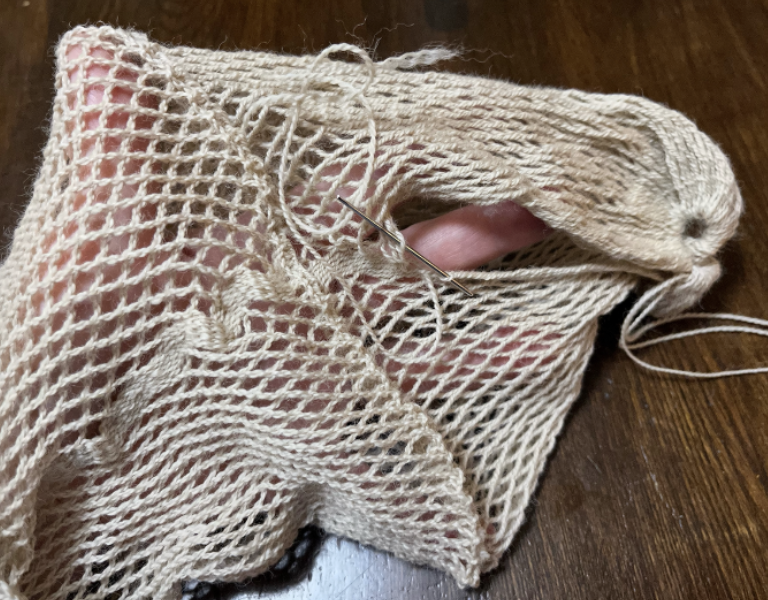
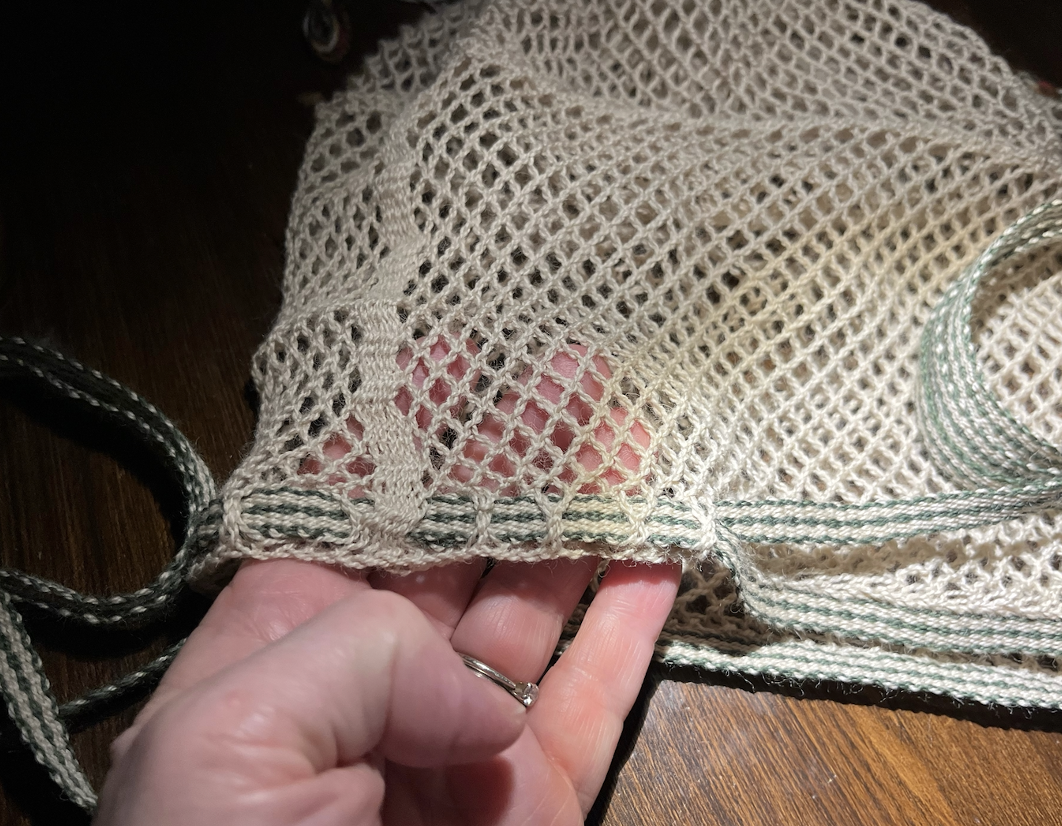
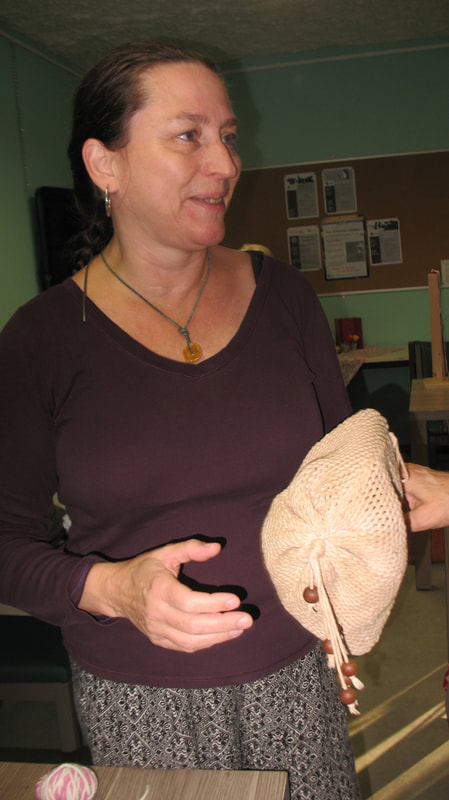
When the loops are tightly gathered there is a reverse-widow's-peak in the centre of the forehead. To avoid this reverse widow's peak, I reserved the dark loops at either edge, did not include them in the gathering. Instead I stitched them together in a tight seam at the centre front of the bonnet.
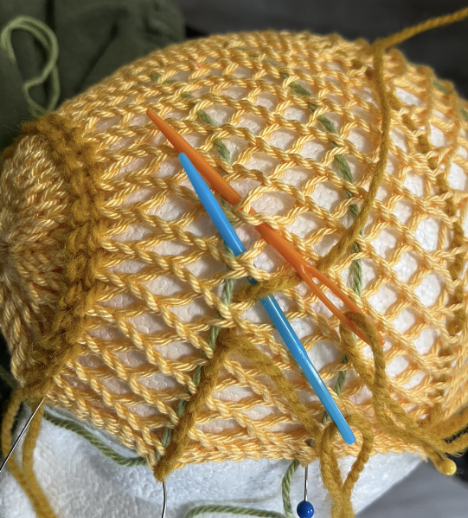
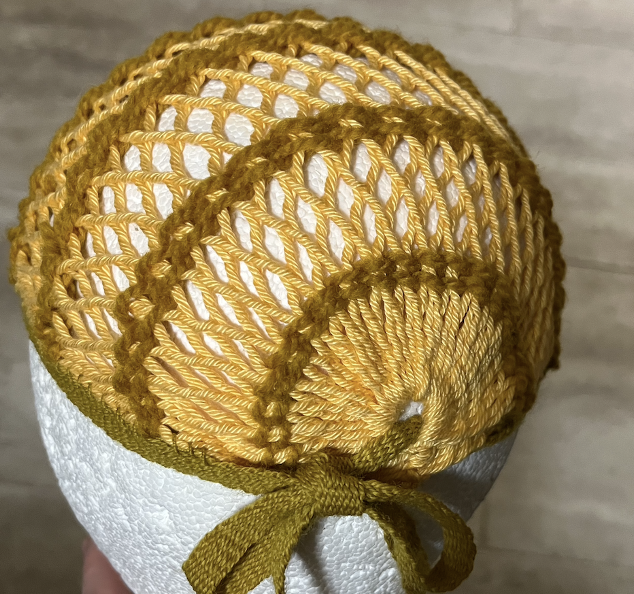
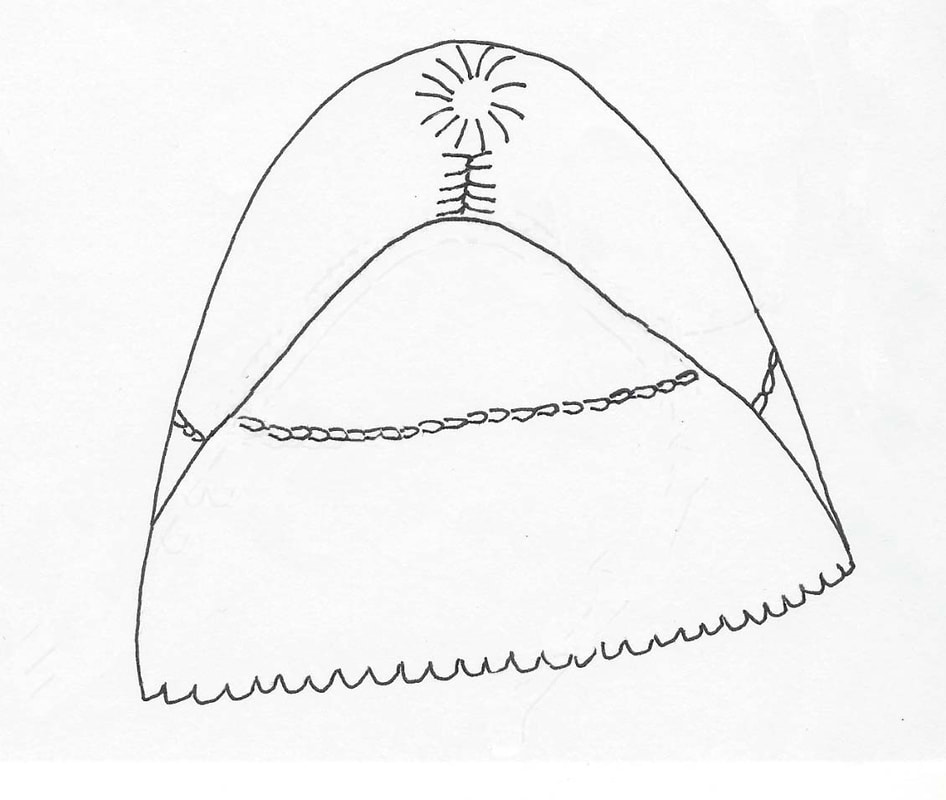
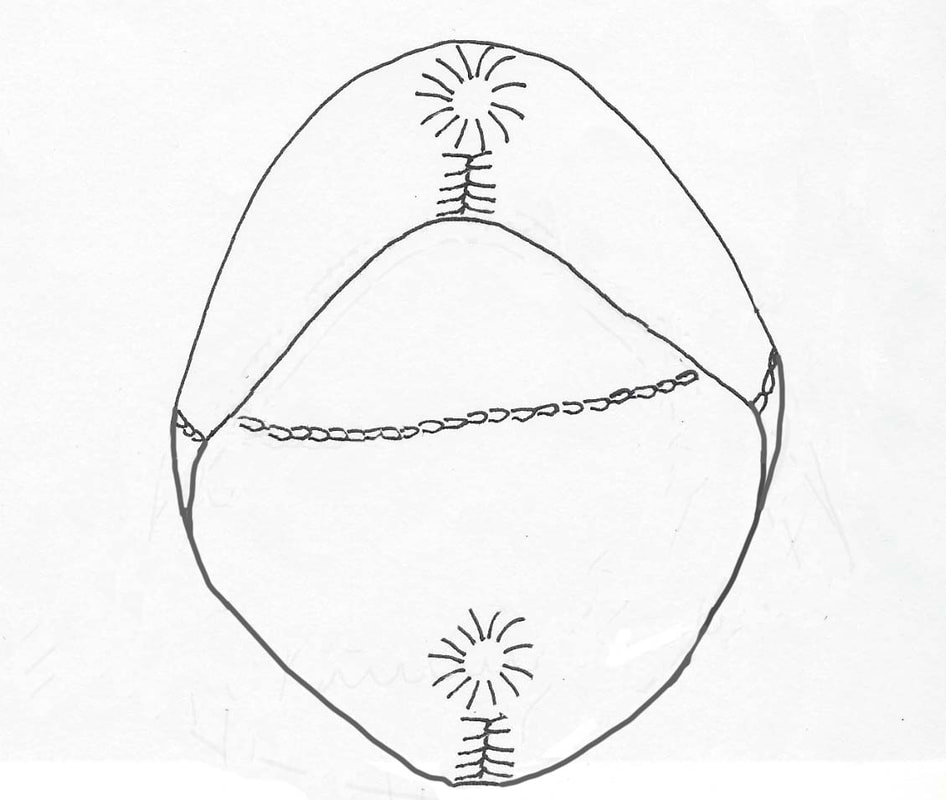
The reserved dark loops, sewn together at the forehead, make for a smoother line to which I could attach a brow band. The brow band is a length of weaving, made on a tape loom. I gathered the loops at the back of the bonnet in a fashion similar to the treatment of the loops at the front of the bonnet..
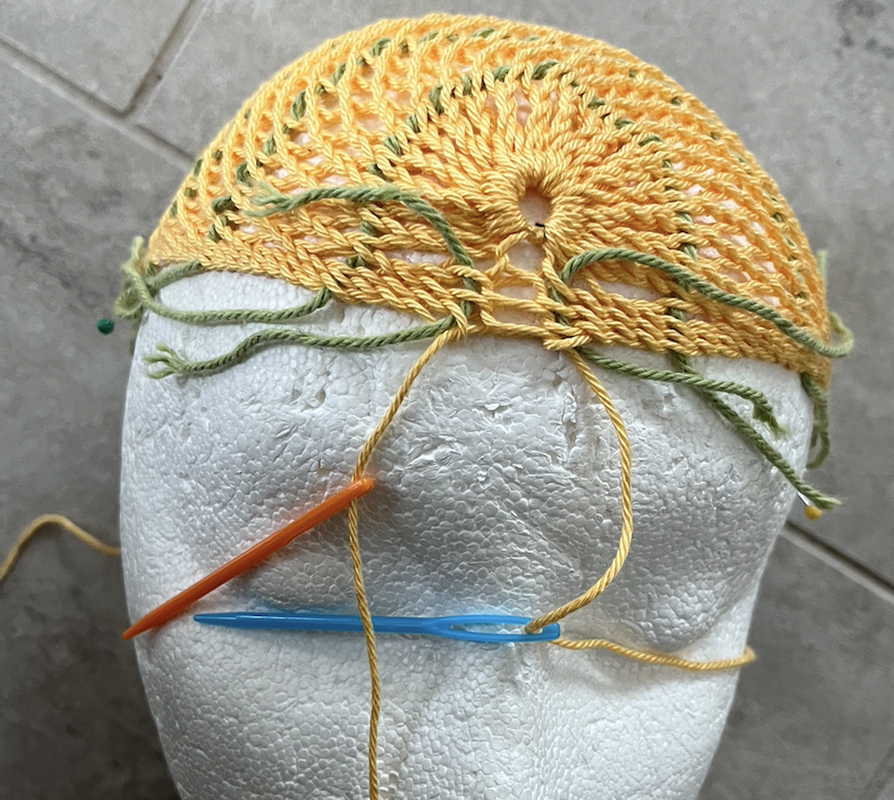
I stitched the brow band to the front 3/4 of the bonnet, leaving the band free at the very back of the bonnet.
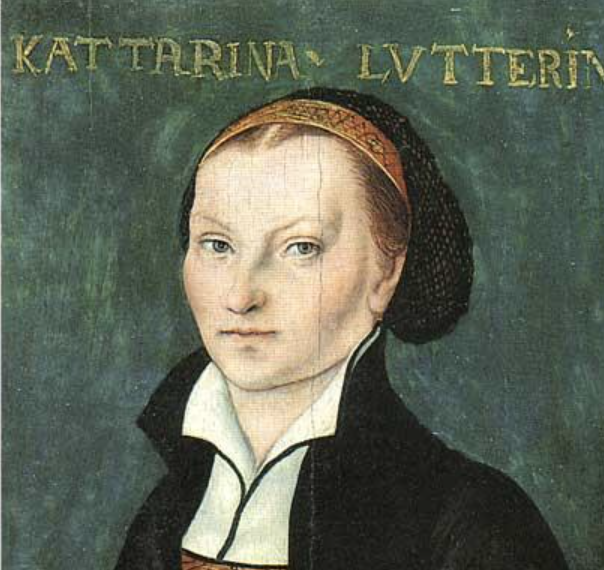 The portrait by Lucas Cranach, painted in 1526, of Katharina Luther, wife of the famous Martin Luther, depicts a woman wearing a hairnet. It was Dagmar Drinkler of the Bavarian National Museum who showed me this image some years ago. It is her opinion that Mrs. Martin Luther is wearing a sprang bonnet. I interpret this as possibly an interlinking structure, what I call a doubles grid.

Arriving at the centre, I chained across to secure the cloth. I chained threads one at a time. 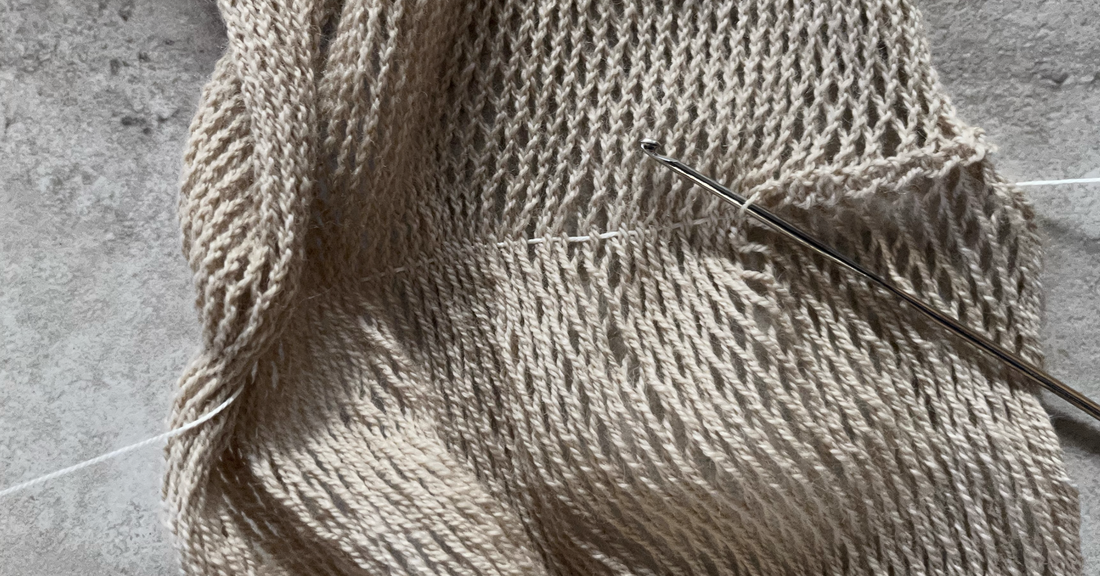
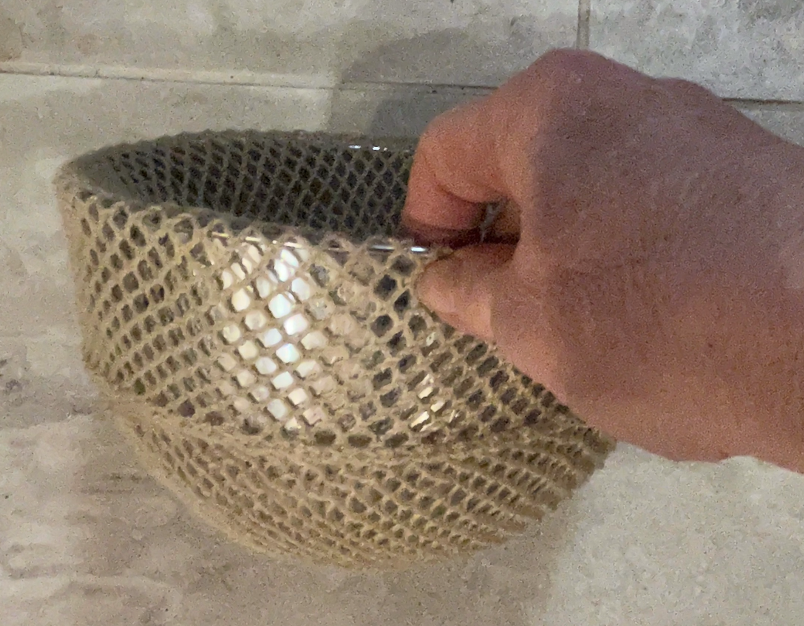
Then I blocked it. I got it soaking wet, and then selected the right sized mixing bowl from my kitchen.
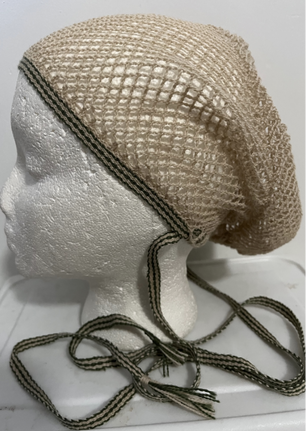
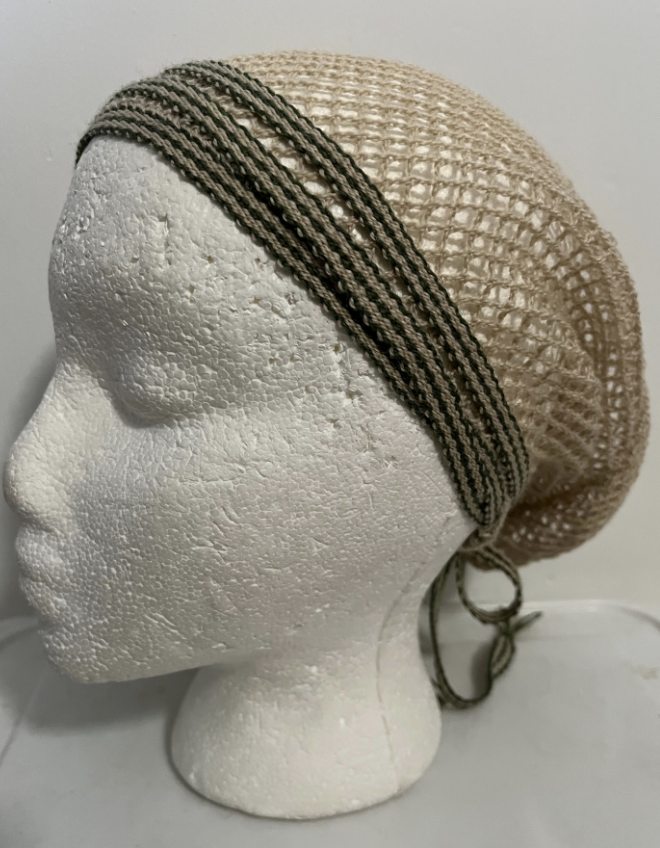
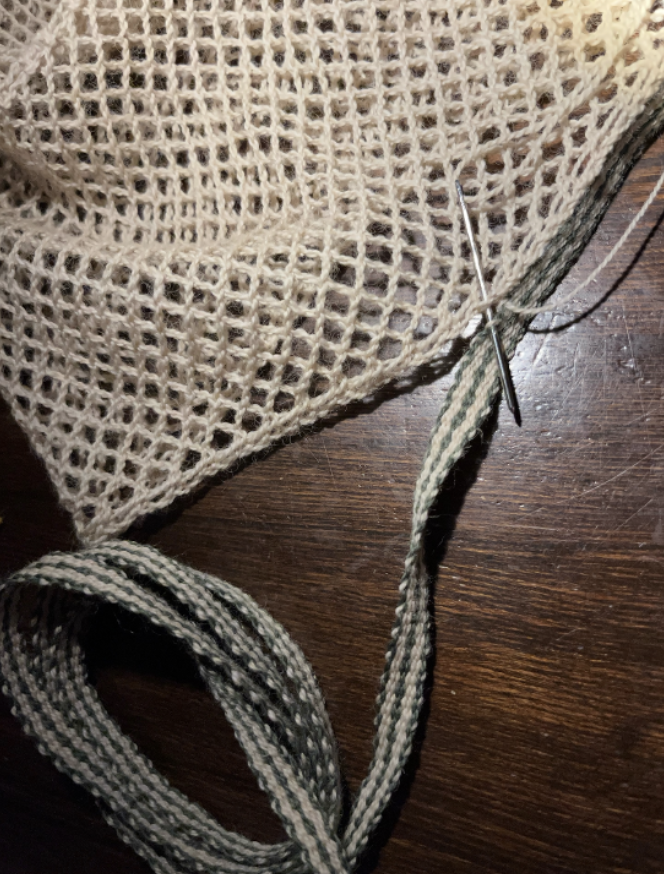
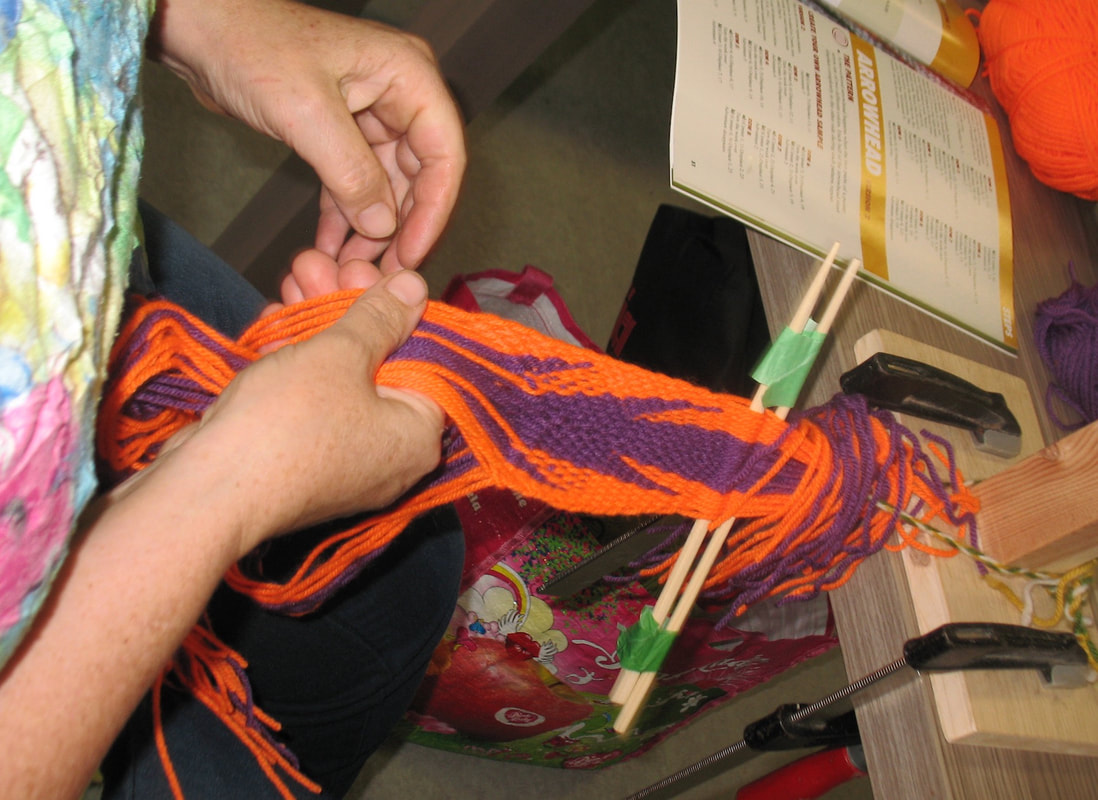
Mrs Luther's bonnet seems to have a band around the rim. I made a band using my tape loom. I measured out threads of sufficient length to make a band that will go around my head three times, plus a bit extra to tie a knot.
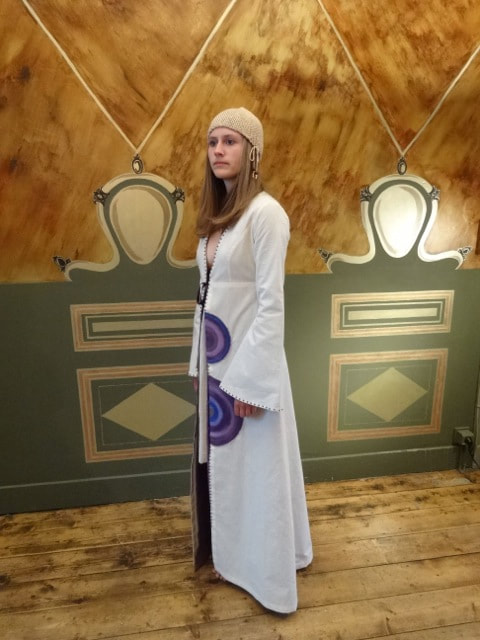
I made this first bonnet using a pale wool, hoping you would be better able to see the details of construction. Mrs Luther is wearing a dark colored bonnet. You will also note that the band around the head is rather wide, far wider than the band I made for this pale-coloured bonnet.
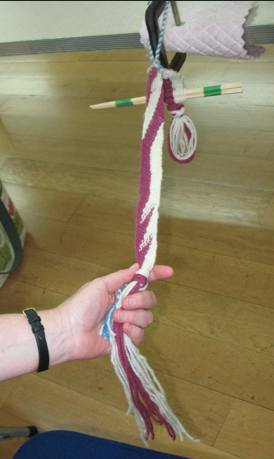
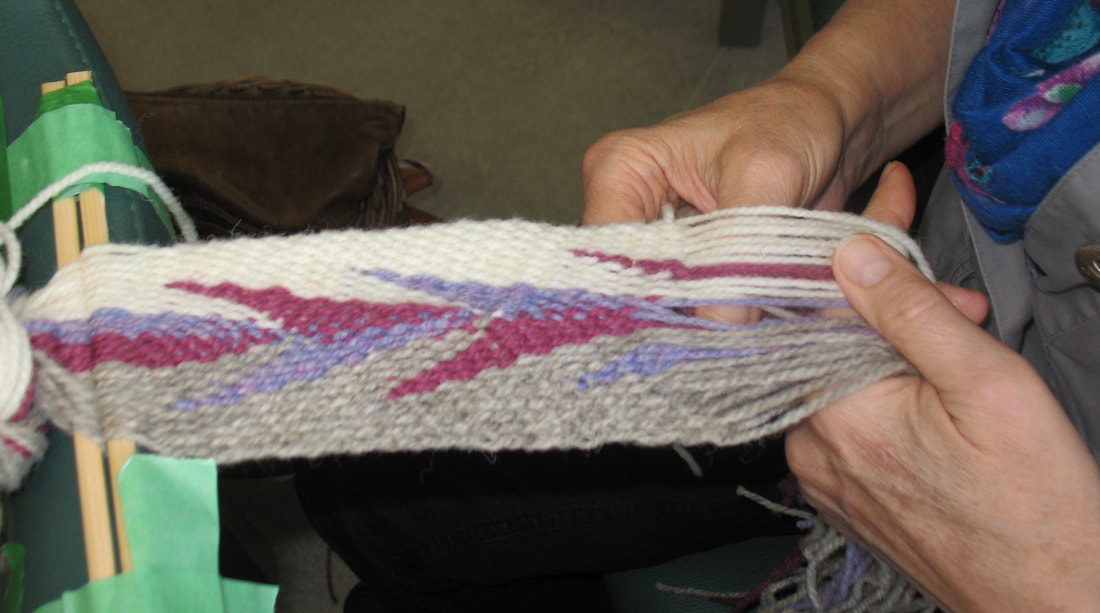
I worked a band in a 2-2 interlace stitch, with vertical ribs, and a 4 contrasting colored threads. OK, the red yarn I selected is rather close in color value to the dark green, and the green design does not stand out well on my band. I was also disappointed to note that the design in my band is far more elongated that the design in Mrs. Luther's bonnet. OK. Maybe I should stick to my field of expertise, the sprang, and leave the band to someone else. Perhaps it is another technique, perhaps an embroidered design.
Since I've got time on my hands, all travel plans cancelled, I figured I should put my efforts to a project worthy of a great deal of time ... all those lace patterns. I've seen sprang lace in a number of collections, have photographed them, and have made some samples. Now is the time to sit myself down and to go through these, one by one, and render patterns that will be read-able to others. 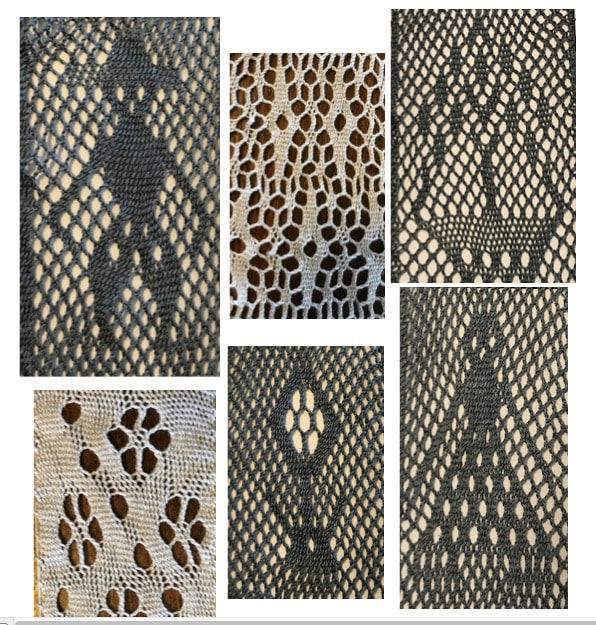 The inspiration for these patterns come from several sources. There's that book of sprang sashes, repaired by Coby Reijndeers-Baas, sashes with all manner of designs, people, boats, deer, mermaids, and a variety of geometric designs. Then there is that collection of lace from the Cinquantenaire Museum in Brussels that I visited back in 2013. Other lace patterns come from pieces in the British Museum, the Victoria and Albert Museum, the Petri Museum, and assorted other collections.
I'm working on putting the patterns onto a grid, so you'll have a grid pattern. From that grid, I'm deriving a "written pattern" that will read "right-edge stitch, 3 plain stitches, left-edge stitch". Having done that, I then set up a warp and make an actual sample, to check my pattern, and to be reasonably sure that the pattern is correct. I'd be very happy to have others check these patterns. If you're interested, send me a message by commenting on this blog, or to the "contact me" on this website.
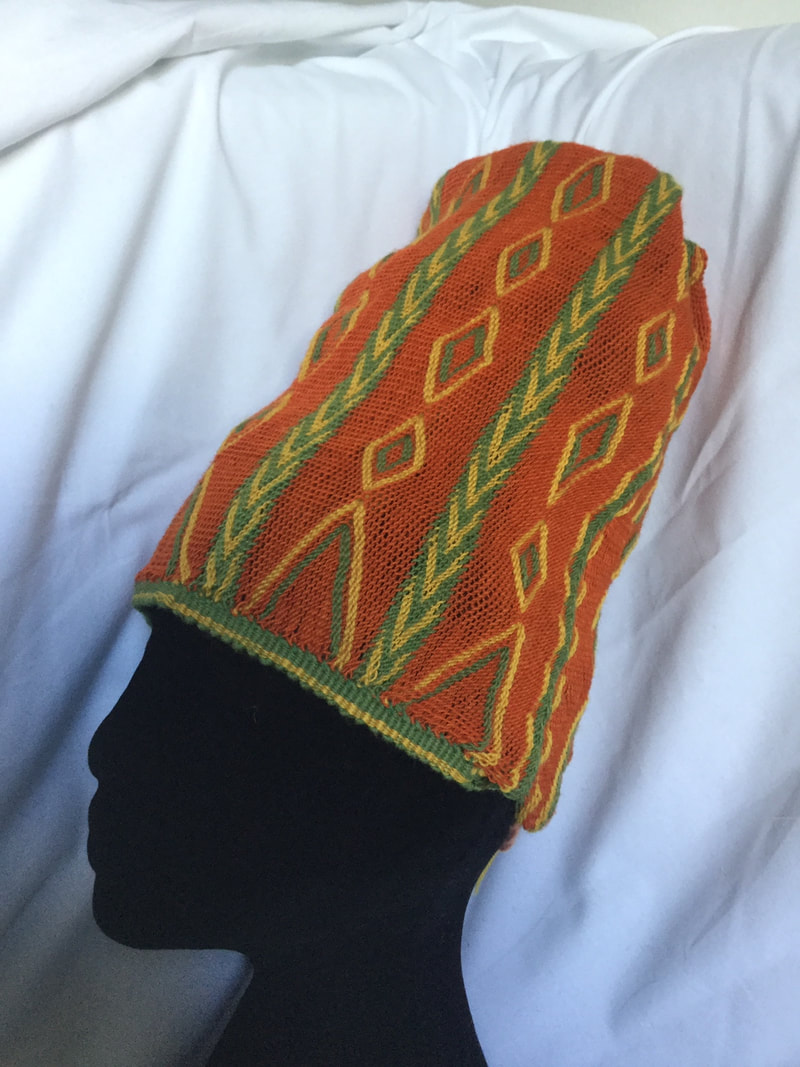
I visited the Kelsey Museum collection in the spring of 2016, went home and worked out the pattern for this hat, and then came back in the summer of 2017. At the occasion of my second visit, I took a photo of my replica beside the original. Actually I took two photos. In one of them, my replica is inside-out. 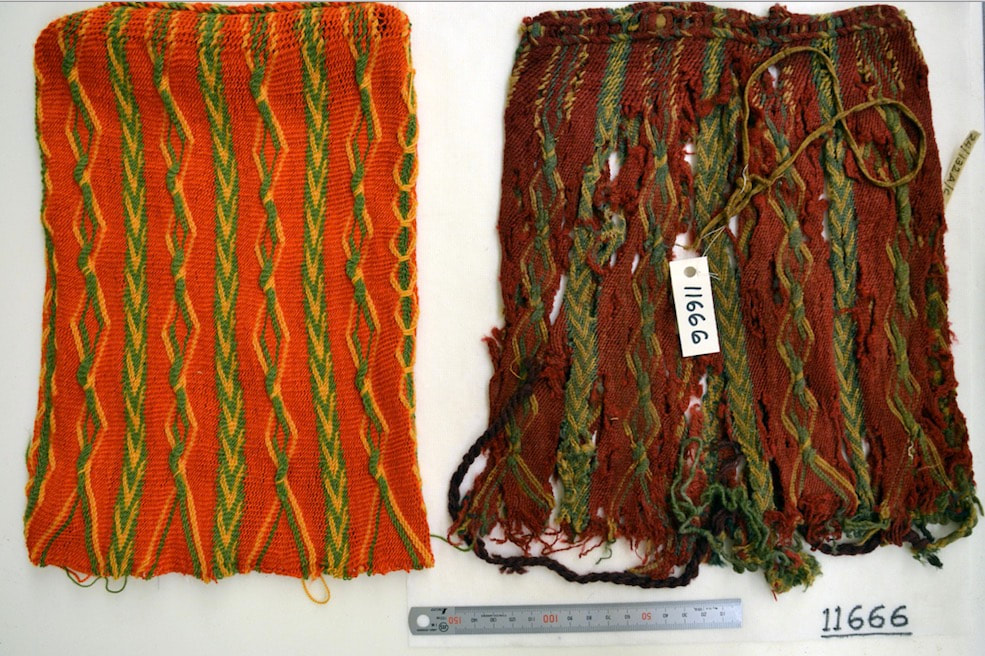 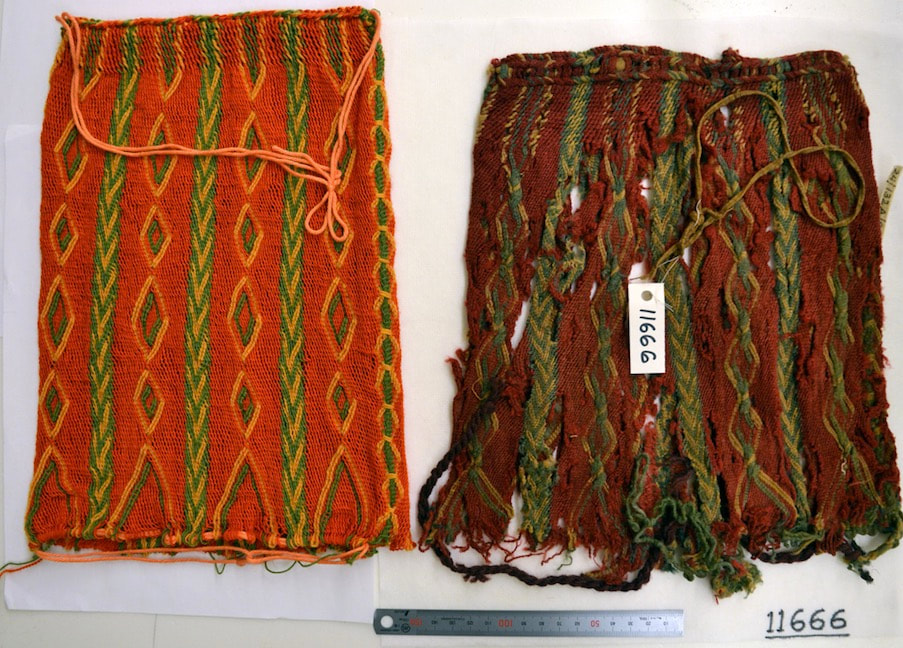 If anyone is interested, my SprangLady website contains three tutorials that take you step-by-step, showing you how to do this twining technique on a background of interlinking. And I do still have the specific pattern for this bonnet.
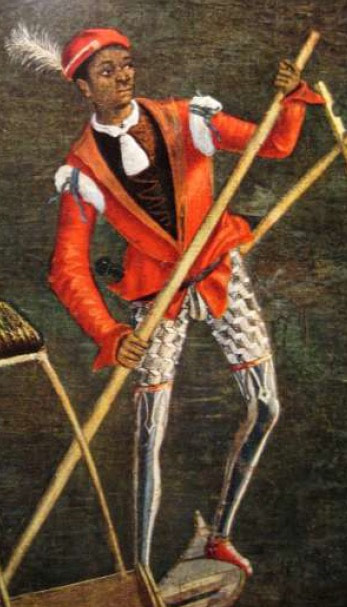
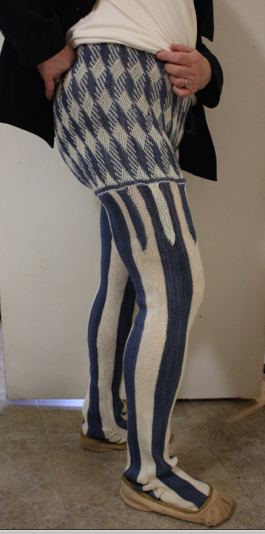
Last Summer I made a scaled down copy of the Braddock-Washington sash for Carlyle House. The word is that the display is now complete, and viewable to the public. Here is the photo they sent me, the mannequin wearing the general's uniform .... complete with sash. 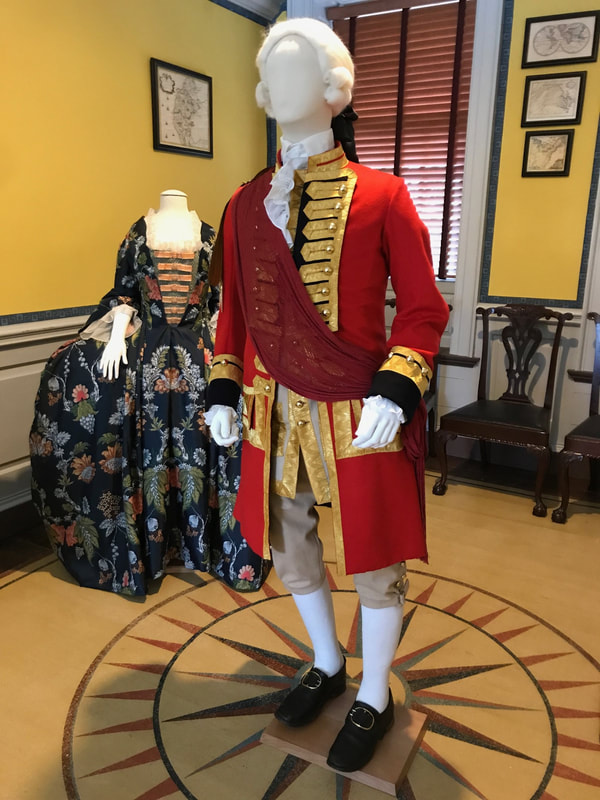 En route to the British Museum, I stopped off to visit a friend who lives near Sheffield. I met Andy and Elaine a few years back. Elaine really wanted to know more about sprang. They were, at that time preparing to participate in an event, re-doing the battle of Marathon in Greece ... he was going to be one of the bad guys. I made him a pair of leggings, appropriate to the time period, and based on research by Dagmar Drinkler. 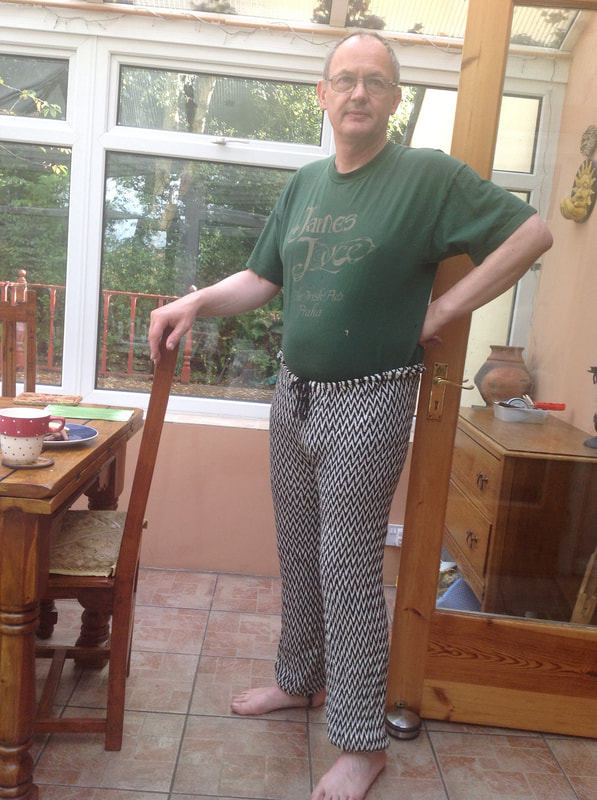 It seems that Andy has worn these leggings to several events. Imagine my surprise when I read on the internet that sprang is not at all suitable for leggings! Andy showed me a post indicating that, with one broken thread, the pants will fall apart. This, I thought, is the perfect moment for a bit of testing, some experimental archaeological if you will. Andy allowed me to cut a thread in his leggings. To make it a fair test, I cut a thread at the knee, a place that would be affected by movement of the leg. 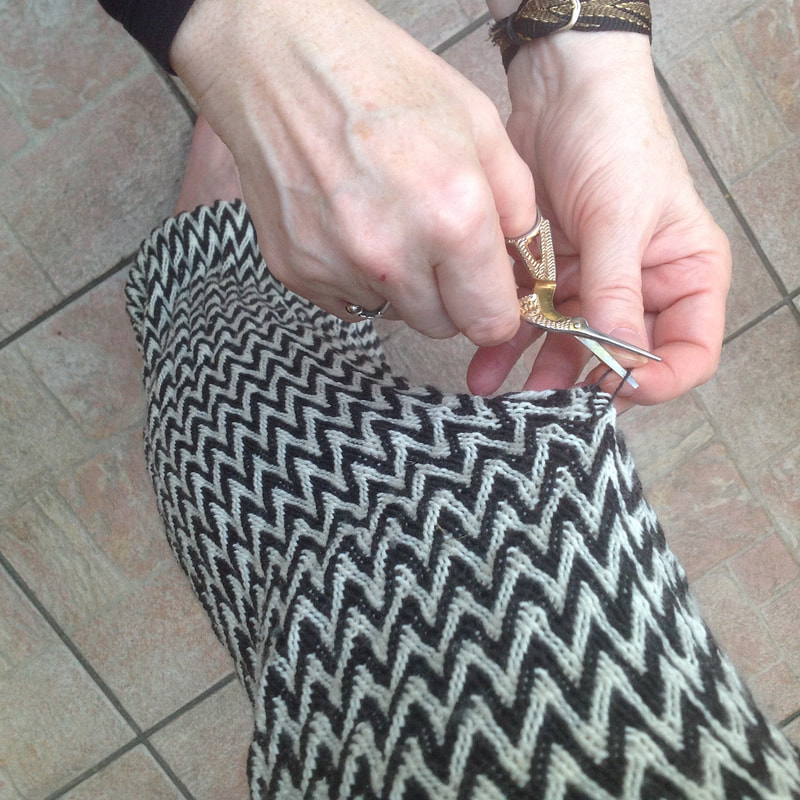 Andy took a picture of me cutting the thread just in front of his left knee. 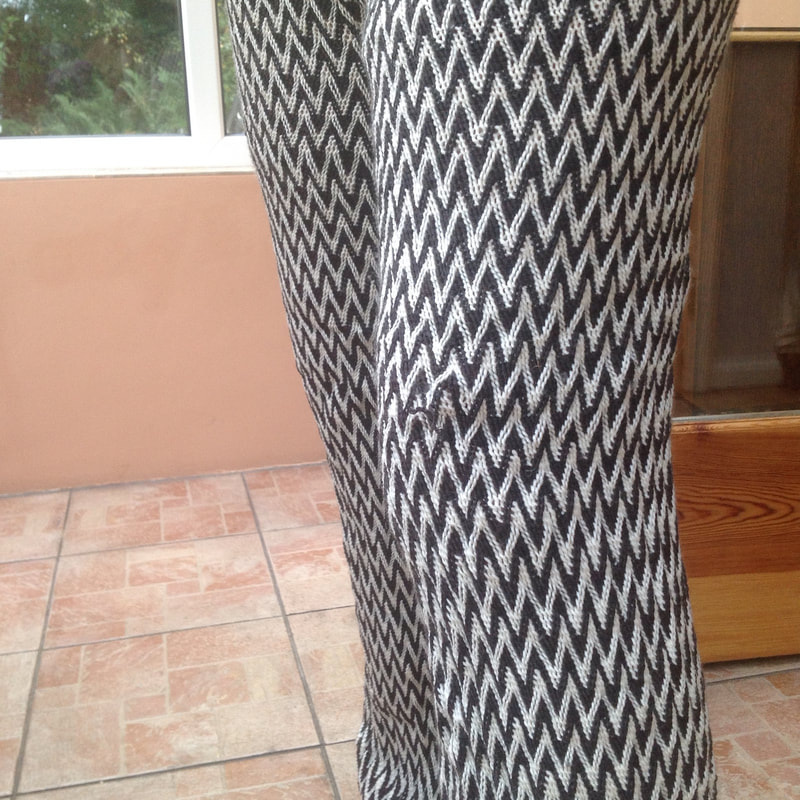 Here you see the broken thread at the left knee. Andy then went outside to do some work in the yard. 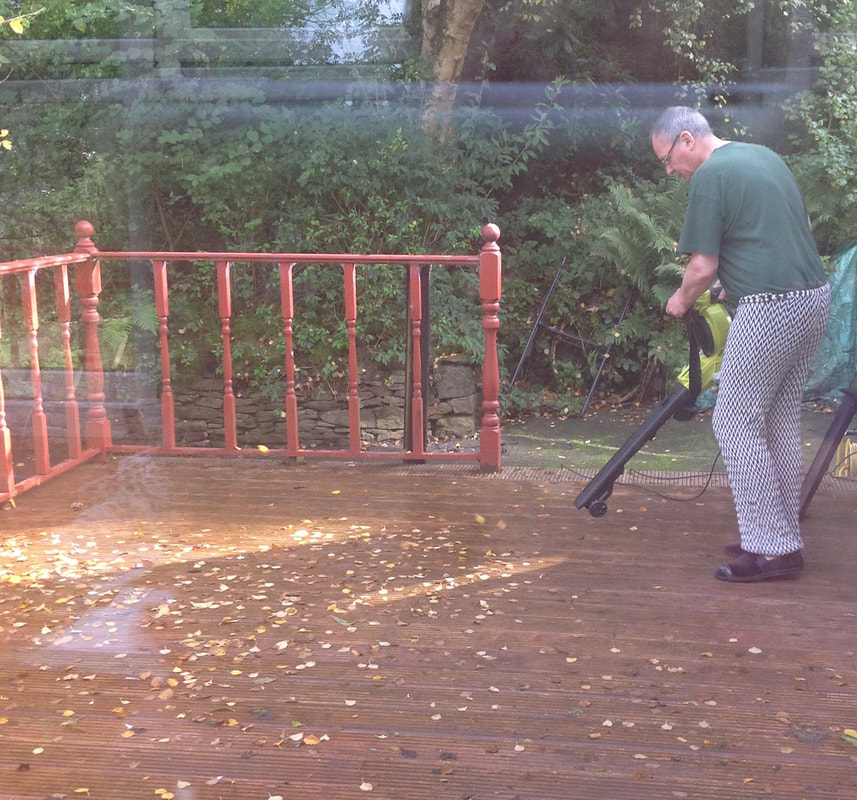 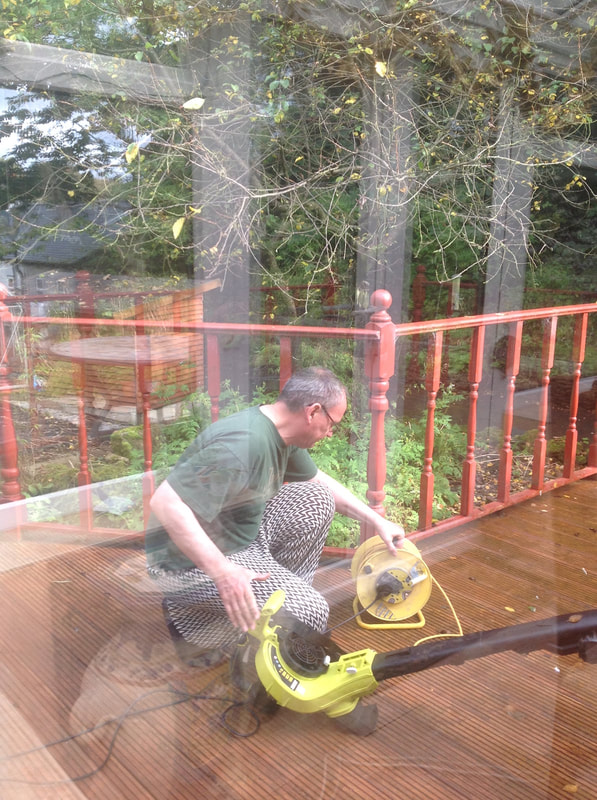 He cleared his deck of the leaves, and tended to his leaf-blowing machine. His leggings stayed on the entire time ... no falling apart ... no falling off. Indeed no increase in the size of the hole. The wool threads stayed put. 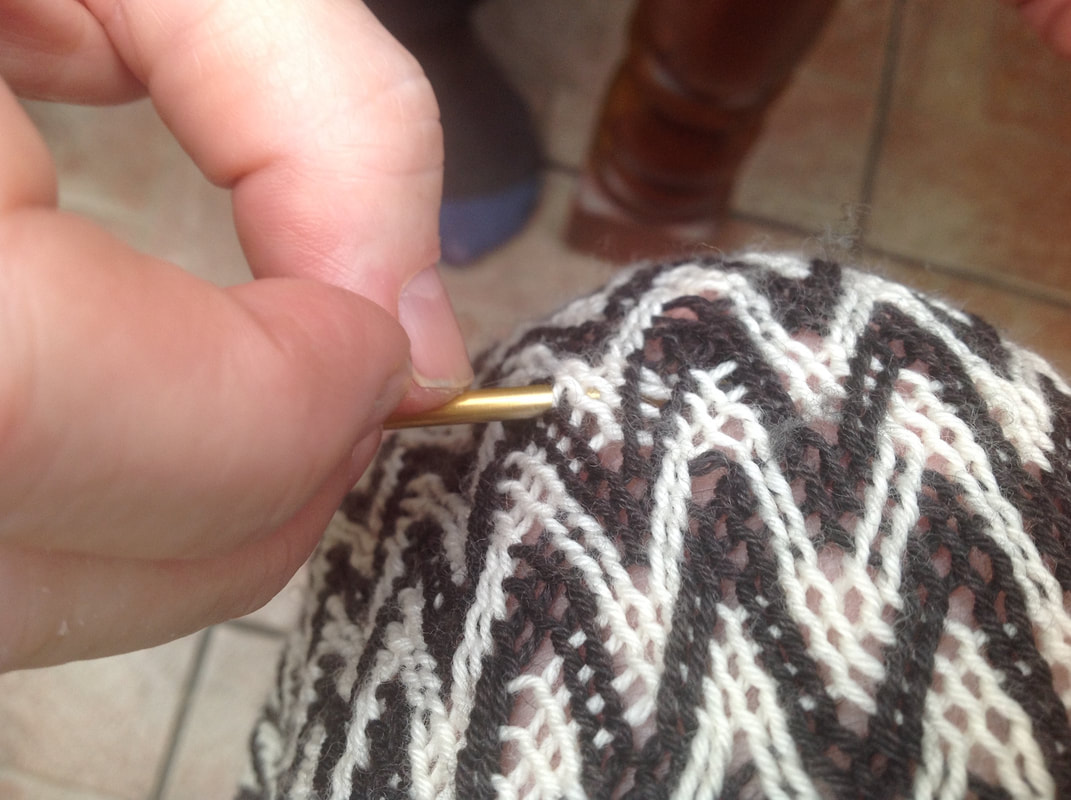 Wool has a certain 'grabbiness' to it's surface, and the wool sock-yarn that I had used to make the leggings is no exception. Yes, I've seen silk sashes in museum collections with long vertical slits, where a thread broke. The slipperiness of silk as well as the simple interlinking structure would allow a slit to develop ... but the slit will only open up so far. At some point the length of the cut threads will, itself, prevent further un-doing. The structure of the zig-zag pattern in these leggings also helps prevent un-doing. I repaired the damage I had caused, tied a knot to mend the cut ends, and tucked the knot to the inside of the leggings. 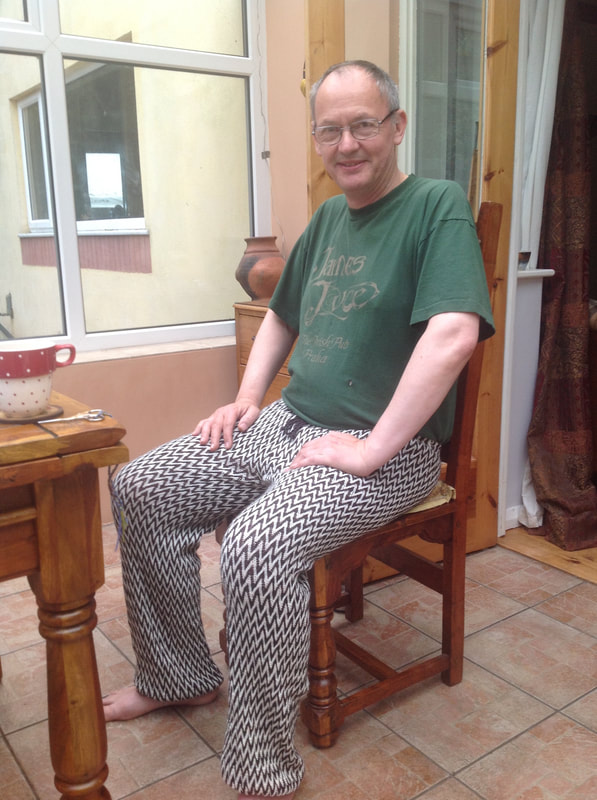 The damage is now repaired, the knot almost imperceptible.
A big Thank You to Andy Cropper for permitting me to carry out this test. I attended the 2017 CIETA conference, held at The Hermitage. 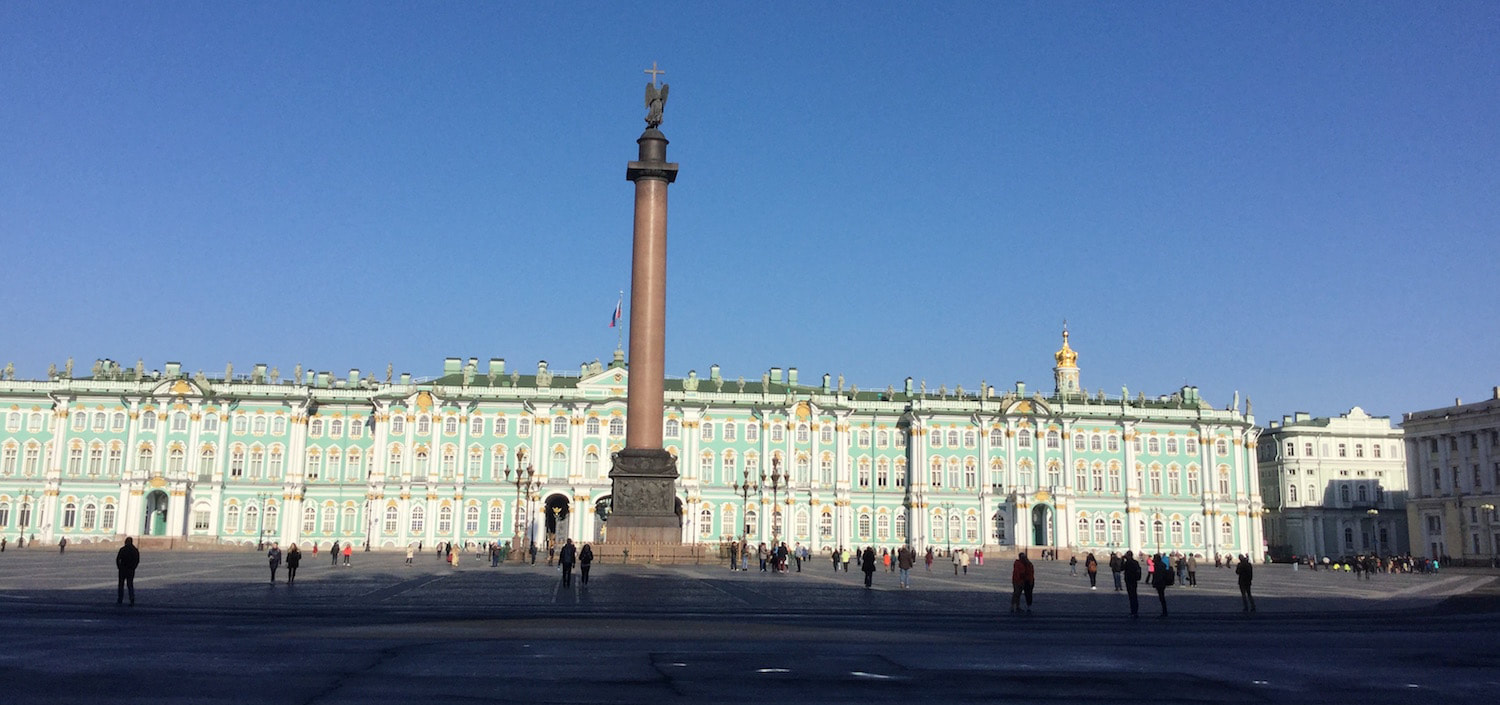 Very interesting discussions of textiles as symbols of power. The Hermitage treated us to a special exhibit of their collections ... including a display featuring garments worn by Peter the Great. His military uniform included a sprang sash. 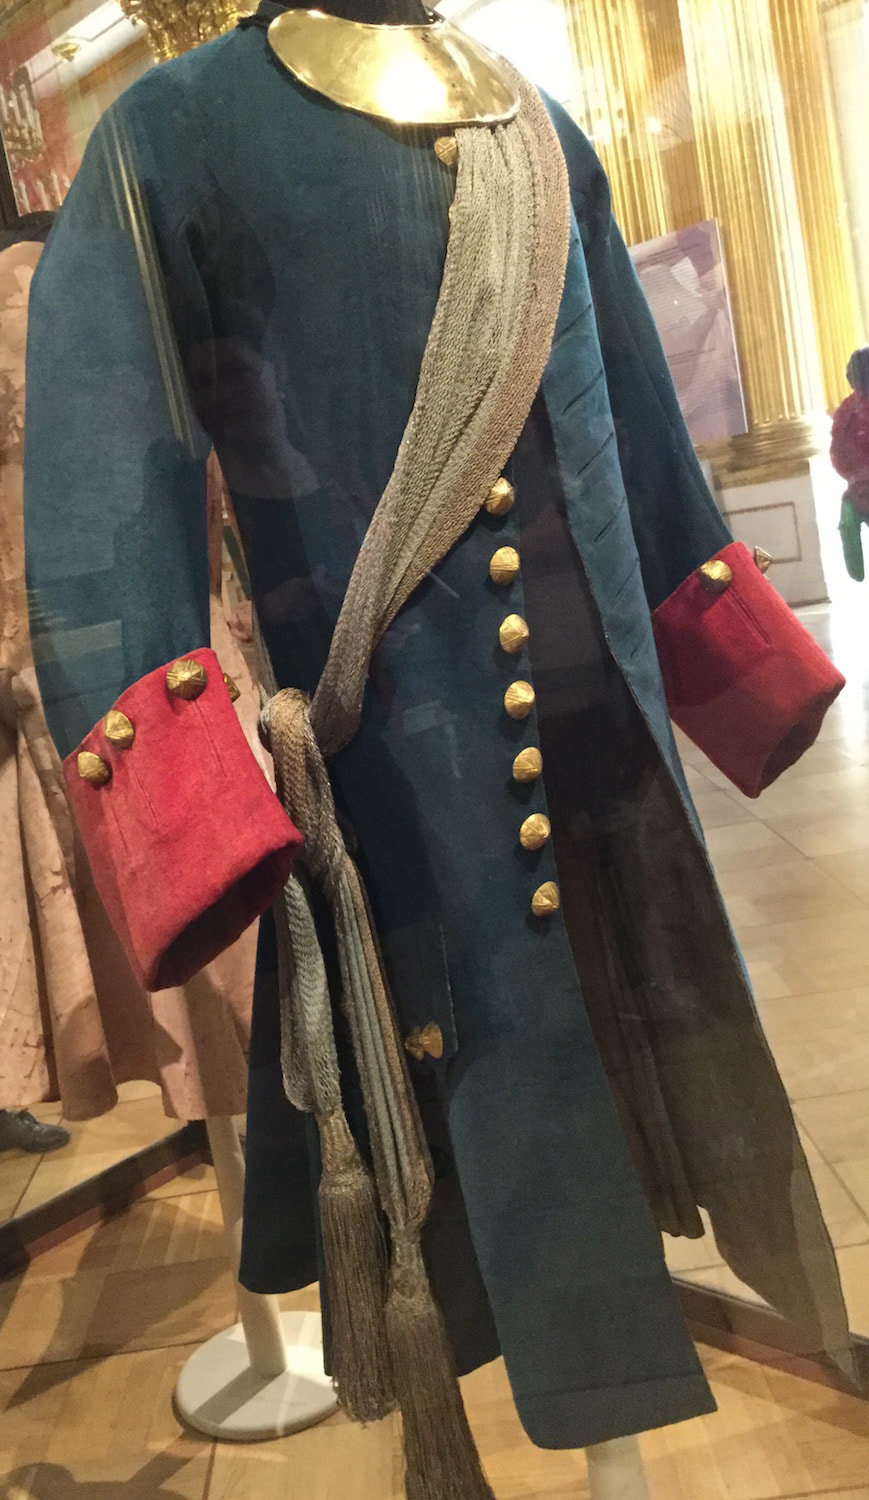 The curator told me that the sash originally was tricolore: red, white, and blue. The fiber is silk with silver threads worked in. You can tell it is sprang, because one side features an S twist to the stitches, the other side features Z twist. There is a line at the shoulder where the S and Z meet.
The idea of sprang mittens has come up ... twice within the last week. A researcher colleague of mine found a pair of sprang mittens at a textile market in Bavaria. The seller had no provenance, but they look like sprang mittens in the collection of the Brussels History Museum, that date to the early 1800s. 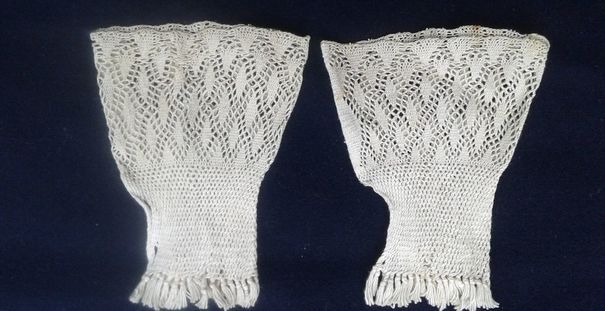 And then and e-mail from someone who took my sprang class earlier this year, Jenny from Regina. She sent me photos of her explorations since that class, including a photo of a lovely sprang mitten. 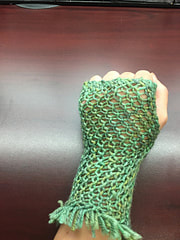 Mittens are a great place to explore sprang. Make two rectangles, cut them apart, tying knots at the cut ends. Sew each piece into a tube, and voila, two fingerless gloves, aka, mittens. Use the opportunity to explore patterns.
October 2014 was spent in European travels. The impetus for the trip was the invitation to present information on sprang at the Early Textile Study Group conference in London. The topic for this year’s conference was Peter Collingwood. Dagmar Drinkler agreed to present her research on the subject of ‘tight fitting clothing in antiquity’, and I contributed my experience making leggings.
I did take the time to tour around London, spent a day on a double-decker bus. 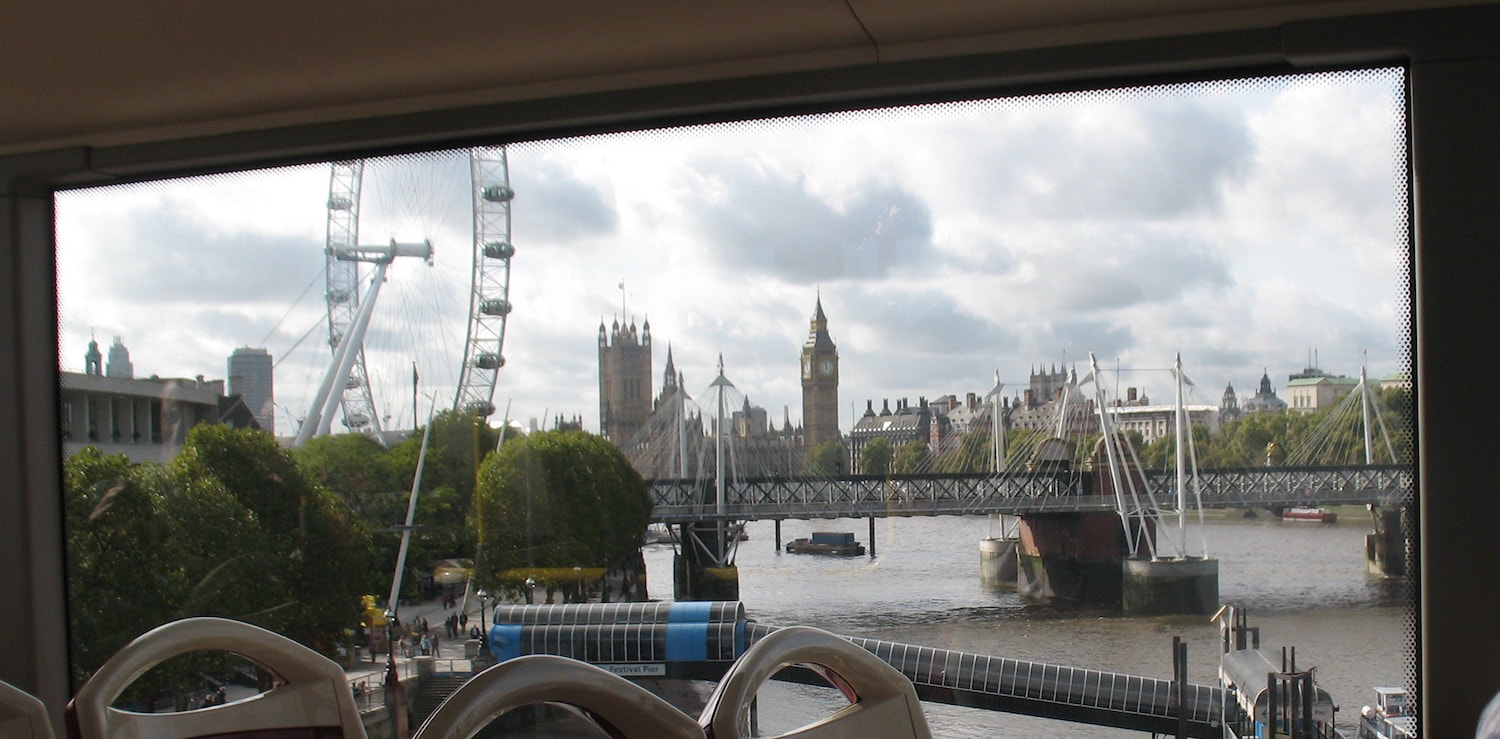 Big Ben and the London Eye from the tour bus While in the UK, I stopped in to visit friends. First up was Oli and Erica of Weavolution. They hosted me while I taught a finger weaving class to the Cambridge Weavers.
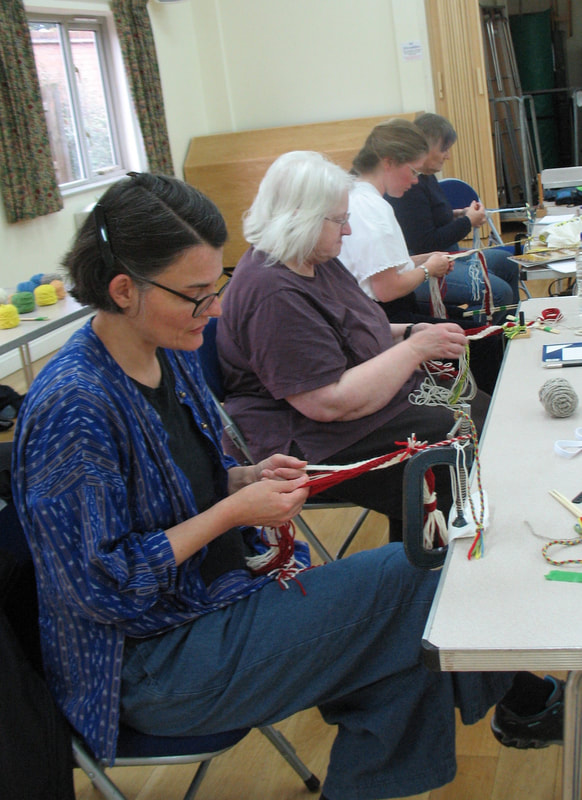
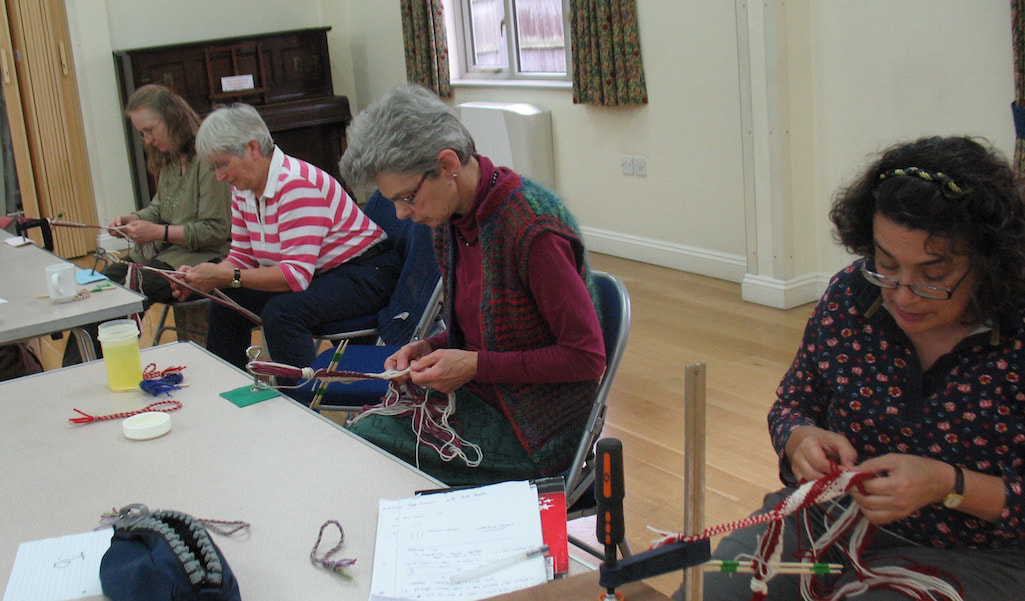
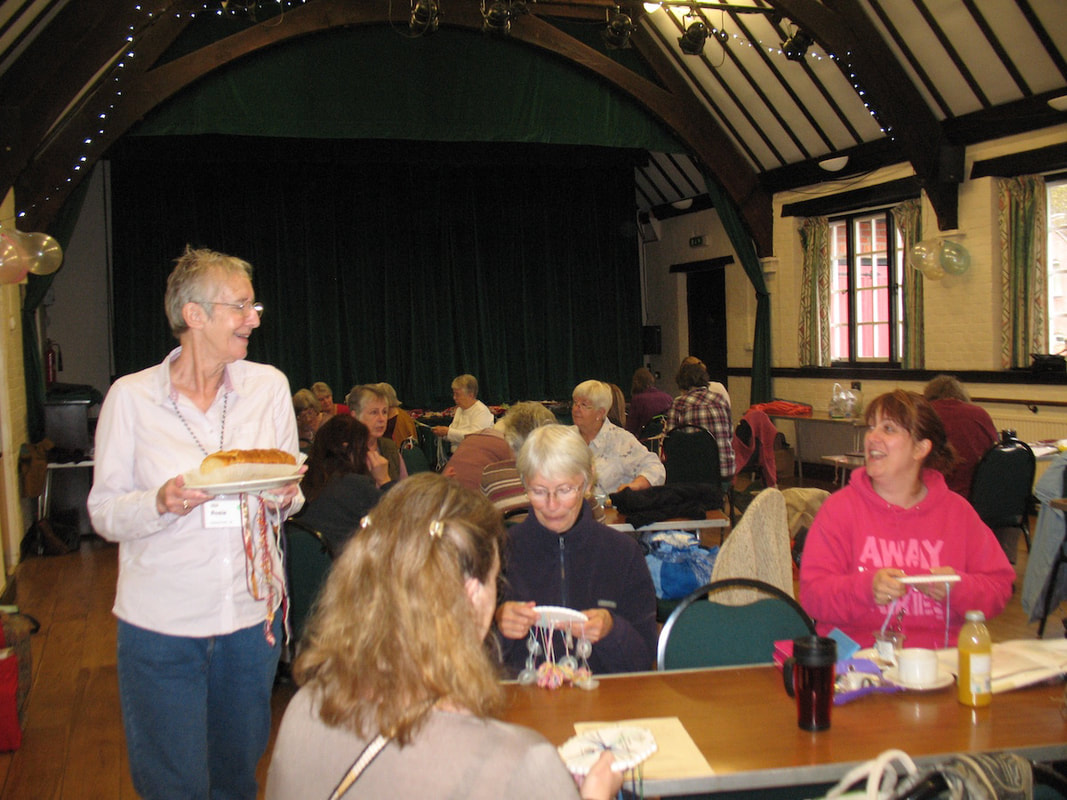
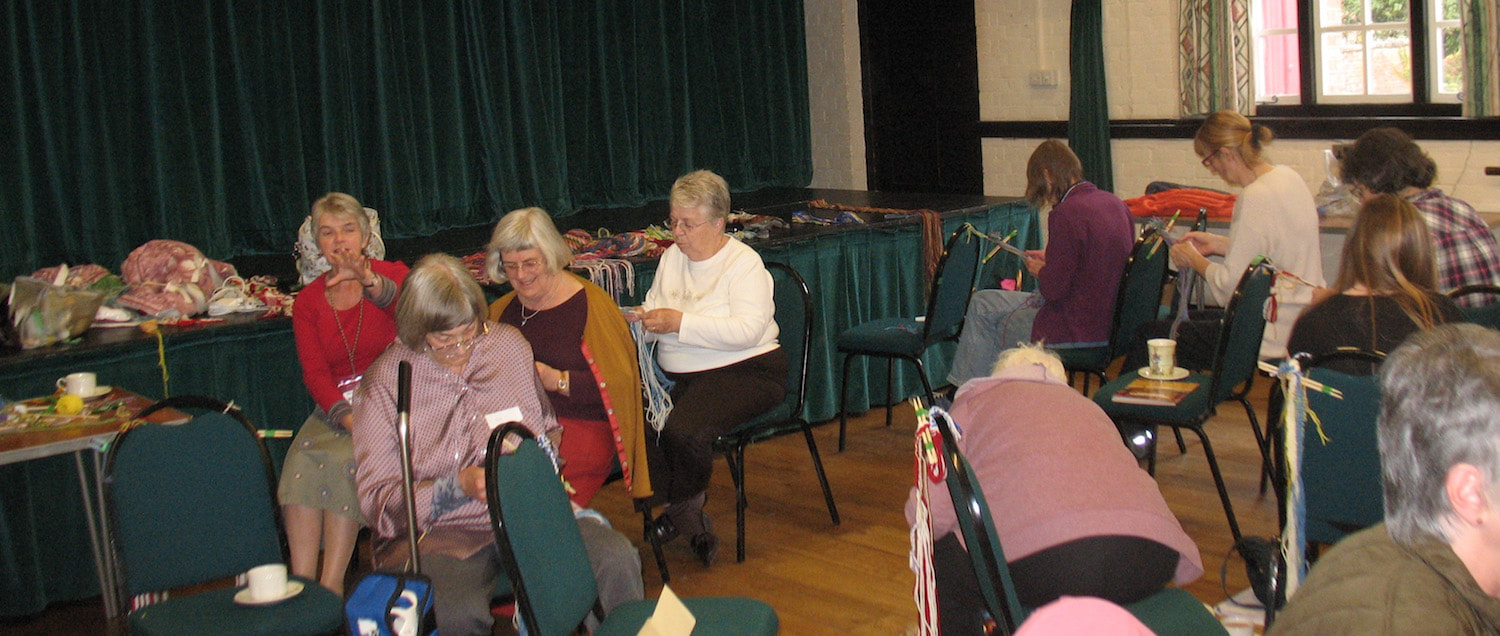
 Members of the Cambridge weavers were very quick to pick up the technique, and master some basic patterns. Next I visited my friends Elaine and Andy. They toured me through Yorkshire, including a trip to Chatsworth House, an amazing place. 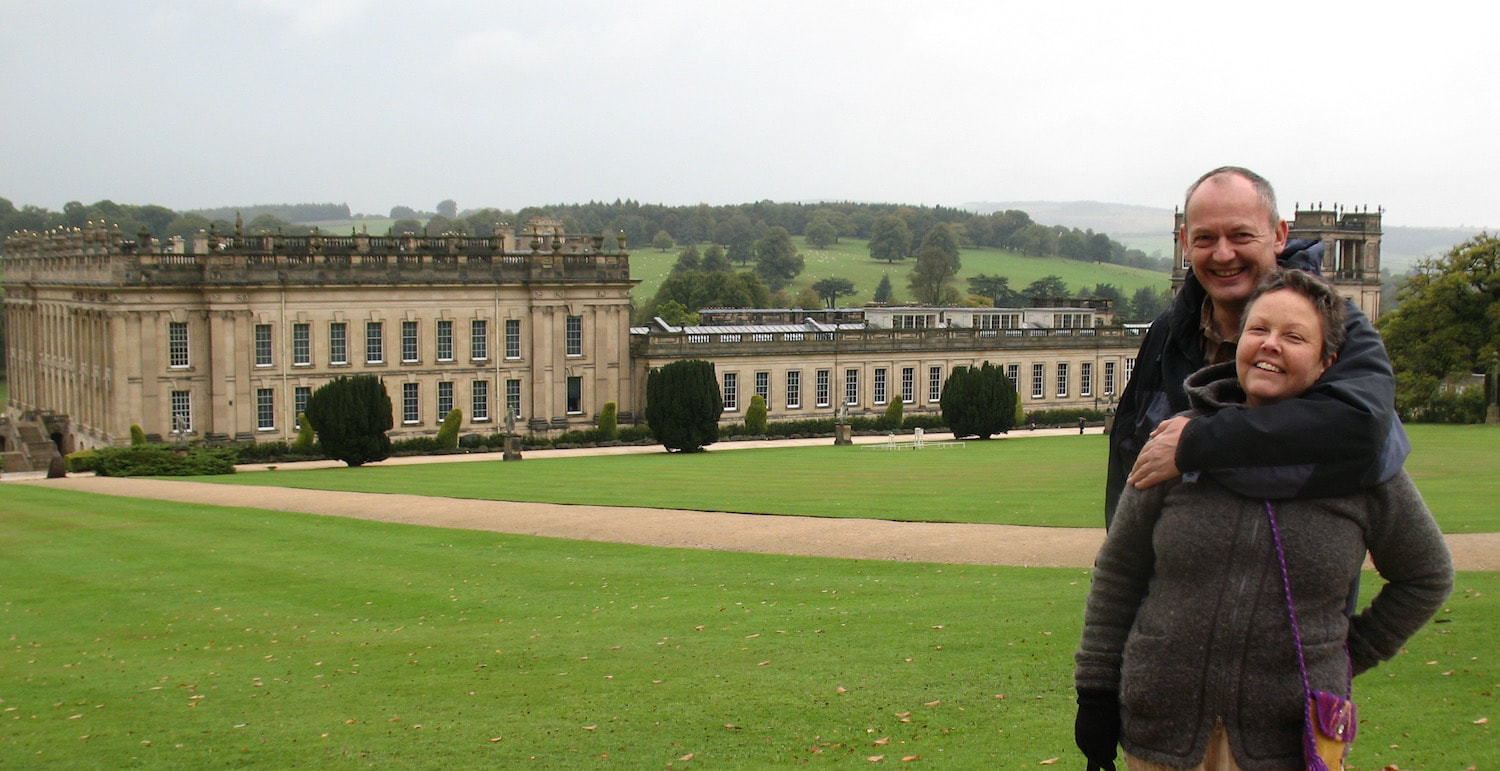 Places like Chatsworth House helps one understand Downtown Abbey. Elaine and I talked sprang, and the probability that ancient Persians and Celts work sprang clothing. Back in London, I stopped in at Alexandra Palace for the Knit and Stitch show, on Oct 9, minding a booth for The Braid Society, and gave a class on finger weaving: Weave a scarf on the train. 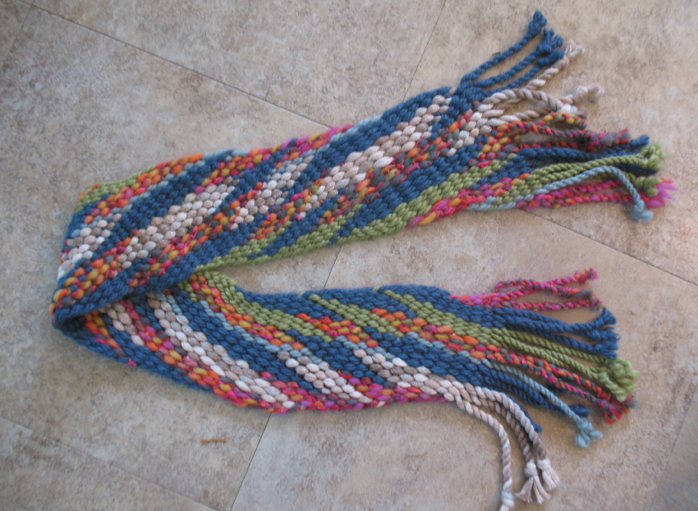 This is the finger woven scarf, made on the airplane and train. After the Early Textile Society conference in London, I travelled to Reading. There I was able to have a sneak preview of an amazing collection of braided pieces in the Reading Library, the Braid Society’s Biennial Exhibition. 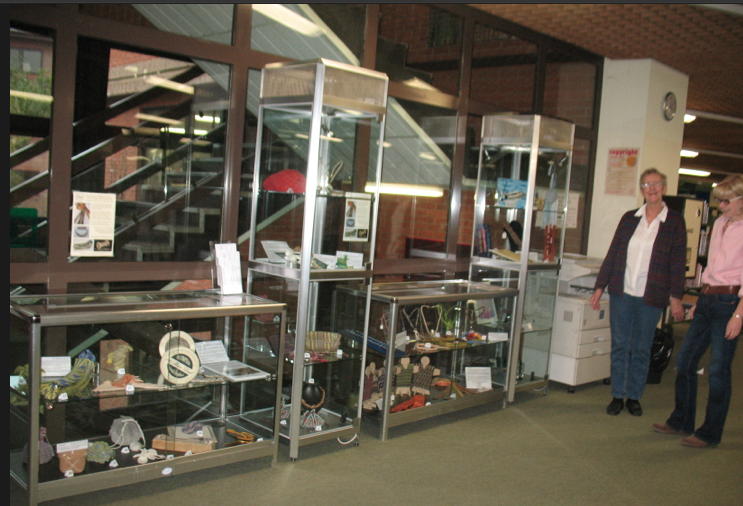 Rosie and Helen finish up mounting the display in the Reading public library. Near Reading is the town of Aldebourne where individuals interested in diverse braiding techniques meet regularly in the local town hall. Thanks to Sally, and to my hostess Rosie, I taught another workshop there, this time finger weaving (last time was sprang).
On to the mainland of Europe. Thanks to Frieda who met me at the train station in Antwerp, Belgium. I taught classes in the Belgian town of Sint-Job-in-‘t-Goor. 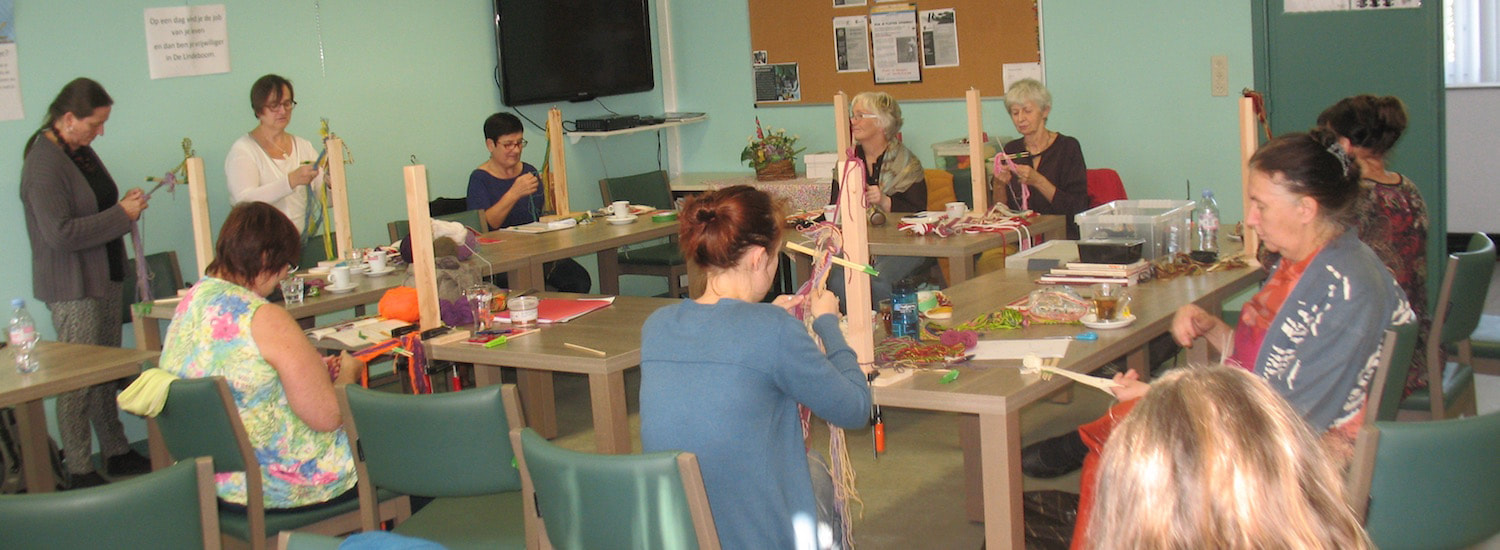 Organizer and hostess Ina had some ‘braiding stands’ made up for the finger weavers. This was an ‘advanced finger weaving class’, the follow-up to a previous session. Participants explored some of the variety of patterns possible.
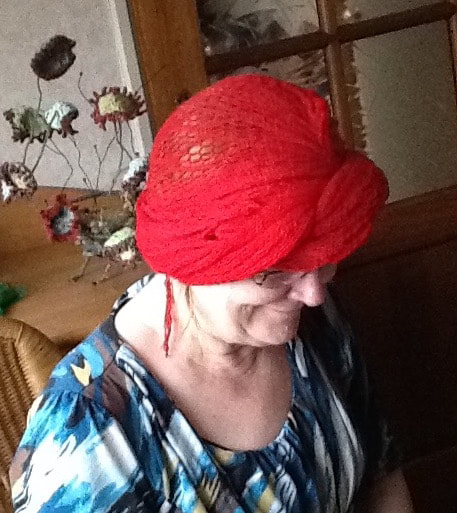
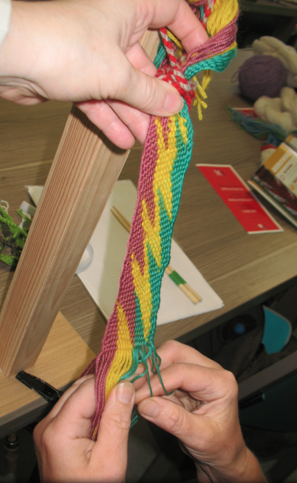 lightning pattern The following day was a sprang class. Pauline brought a sprang cap that she had made after the sprang class last year.
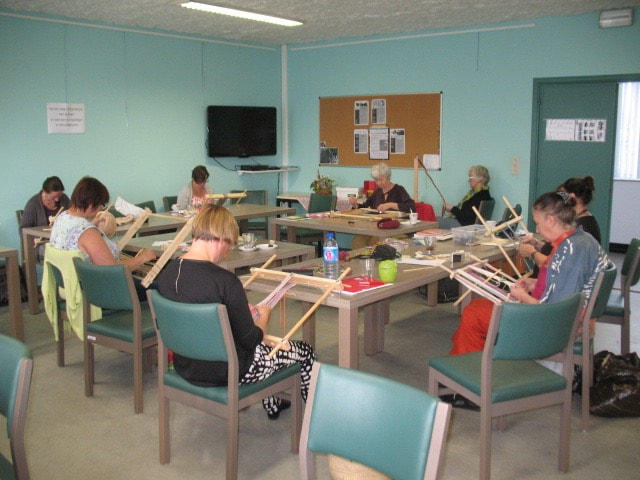 The advanced sprang class explored circular warp. By then it was time for a rest. My friend Karin took me home. I sat in her backyard and worked on other sprang projects.
Accepting an invitation to visit a very talented bobbin-lace weaver (this sister of a Winnipeg friend) I travelled to Braunschweig. Between discussions on the subject of bobbin-lace, finger weaving and sprang, we toured through downtown Braunschweig, and made a visit to the top of the newly rebuilt ‘Schloss’ and the Quadriega. 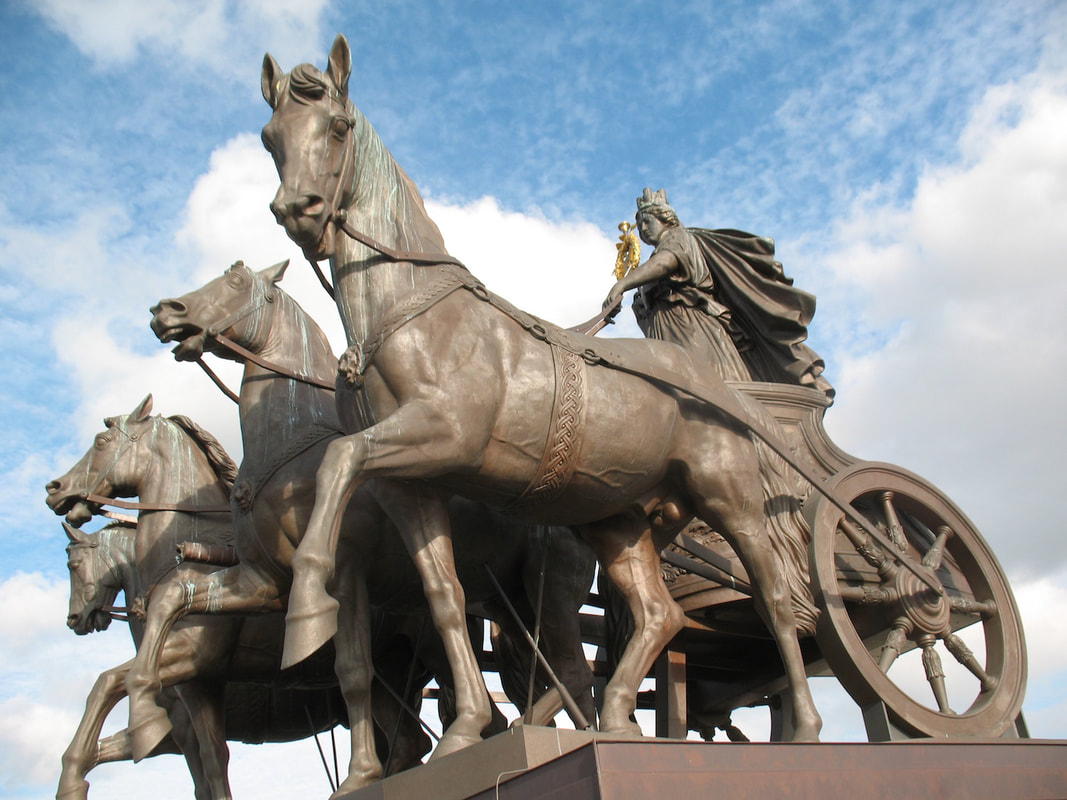 The “Quadriega” is on the top of the “Schloss” (castle). You get there by way of an elevator and stairs. On to the Netherlands. Braid Society member and friend, Ria toured me around the Netherlands. 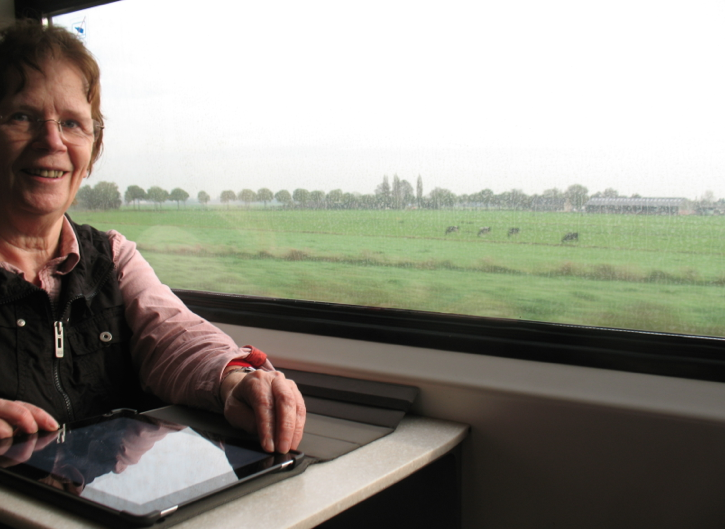 Ria kept track of the train schedules, ensuring we made the connections. We had been invited to the island of Terschelling. 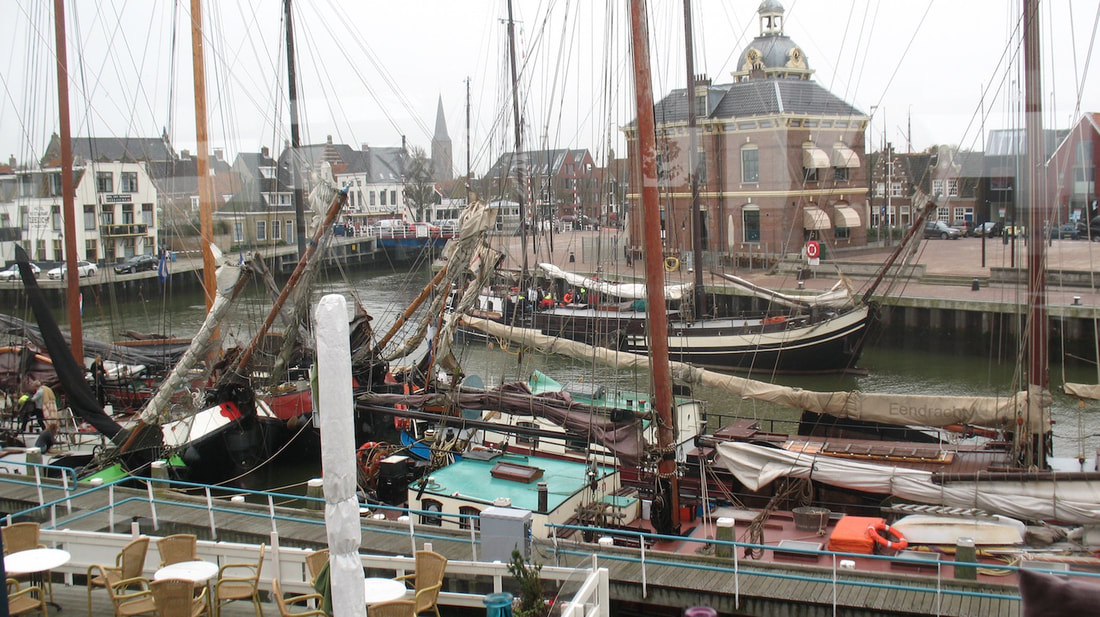 You get to the island of Terschelling by way of a ferry. Here’s a scene at the harbour. Resident of Terschelling, Marianne, is a very talented textile artist. She also has an amazing collection of textiles. She introduced us to the neighbourhood chickens. 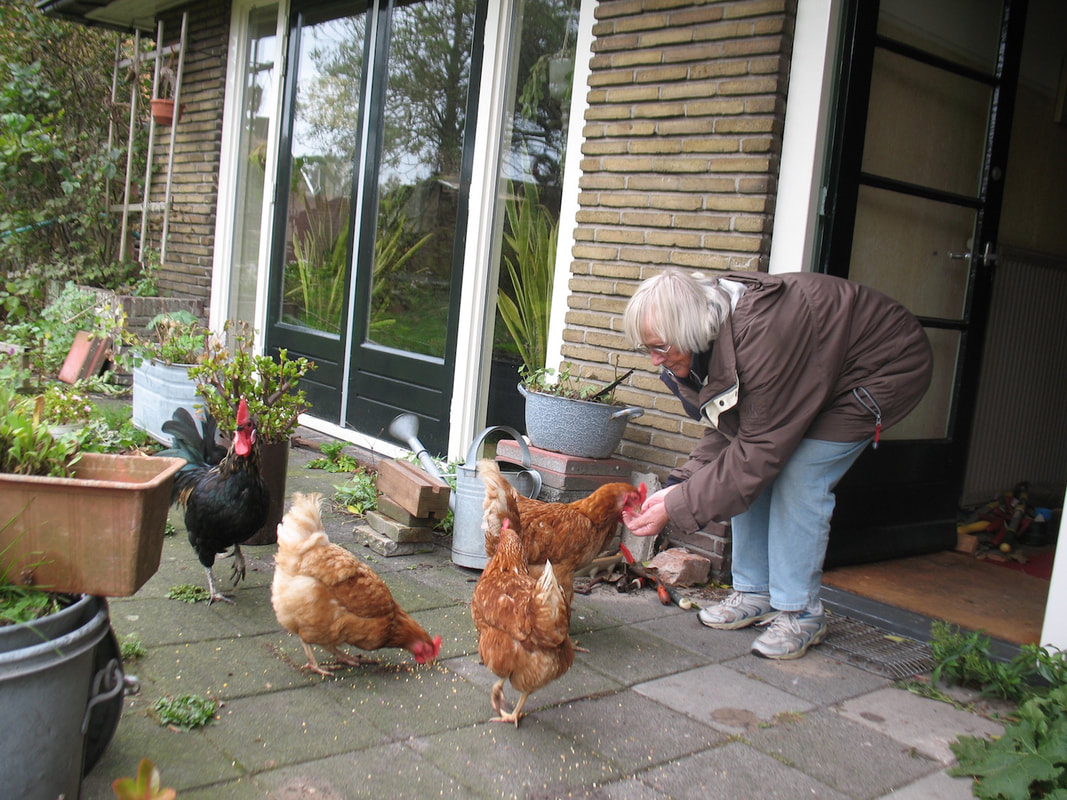 Chicken neighbours eat out of Marianne’s hands. While on Terschelling, I visited the local yarn store, Tante Lies. Come to find out, I’d been volunteered to give a talk on the subject of sprang at the Tante Lies yarn store. I brought along a frame, and people were invited to give it a try. While in the Netherlands I was privileged with a visit to another Ria. 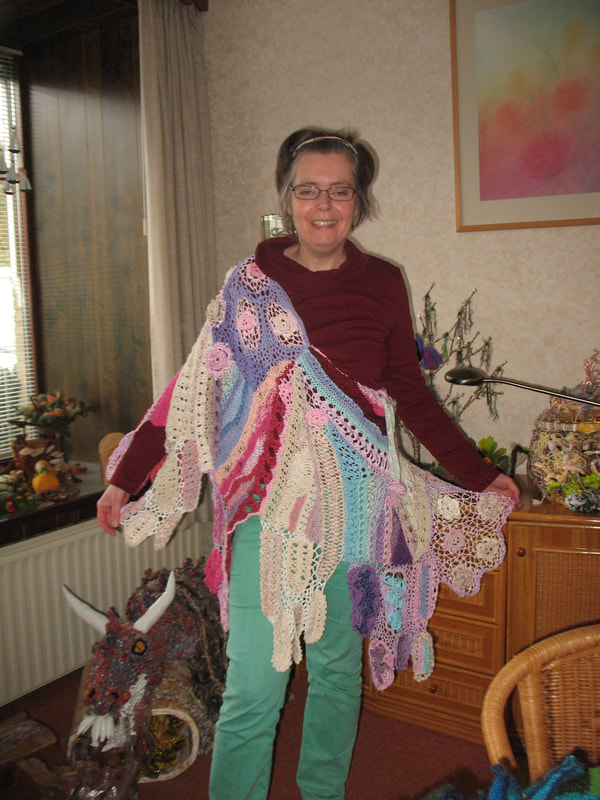 Ria is an incredibly creative person. Check out her website www.feathers-and-dragons.nl On Nov 1, I taught a sprang class in The Hague at the textile studio known as DeSpinners. Thanks to Dineke and Katia, this was a follow-up to a finger weaving class I taught last year.  Sprang workshop at DeSpinners in TheHague. What a pleasure to spread the good word about these amazing techniques to individuals interested in learning. On to the final destination, Lyon, France. 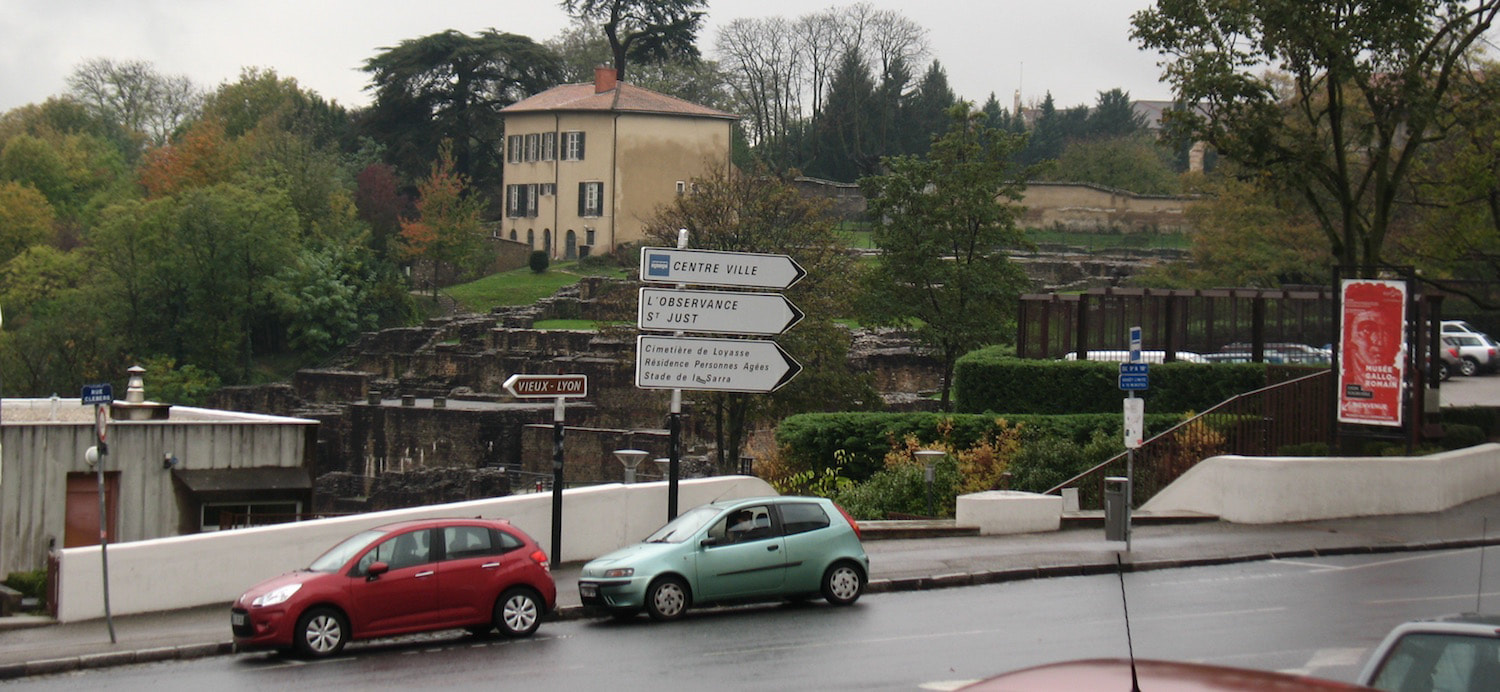 The entrance to the Greco-Roman museum in Lyon, France, is easy to miss. Look carefully and you can see the amphitheatre in the background. The Greco-Roman museum is built into the Fourviere hillside, right beside the remains of two Roman amphitheatres. If you’re in Lyon, you really should stop in, it’s a ‘must see’. The theme of the month at the Fourviere Gallo-Roman Museum in Lyon was textiles. I had been invited to give a lecture on the subject of sprang bonnets. This is the reason I’d been working on that sprang turban. Wednesday I presented a workshop for children (and their parents, grandparents) on diverse braiding techniques. Thursday I presented my lecture and workshop on the subject of sprang. I brought along several replica sprang bonnets that I have made. Sprang frames were available and seven women took the opportunity to explore the basic sprang technique. The Gallo-Roman museum had a lovely little sprang bonnet, on loan from the Textile museum. 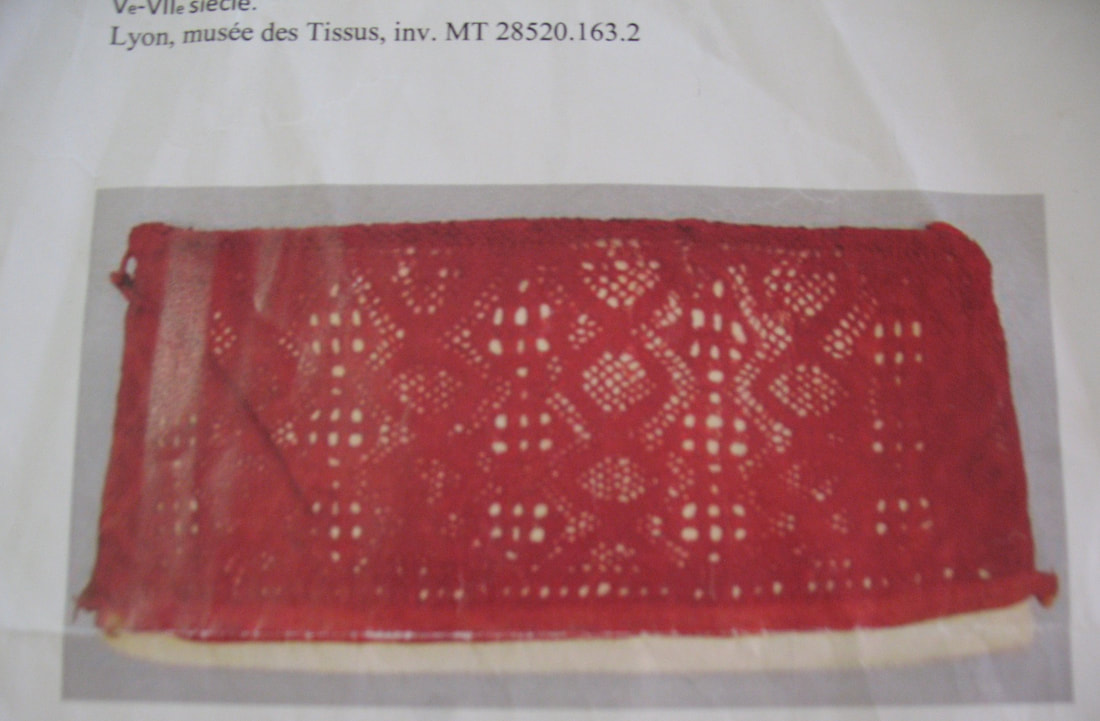 This is a low-resolution image of the bonnet, shared with me by the curator. The fiber is a very fine (looks like sewing thread) wool. Back at home, I’m now trying to map out the pattern. 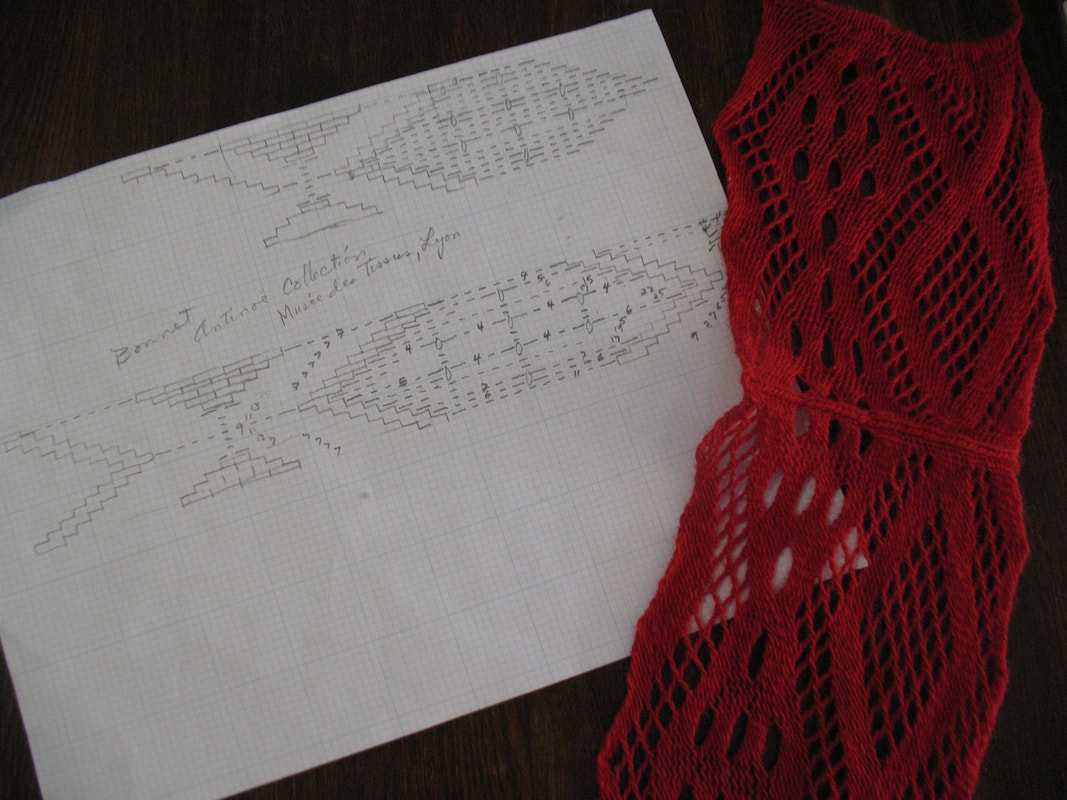 My grid pattern and sample, trying to imitate the pattern of holes. |
Categories
All
Archives
May 2023
Categories
All
|


 RSS Feed