SashWeaver
  • Home
  • About the artist
    • Gallery
  • Store
  • Sprang
  • Fingerweaving
  • Virtual Class Room
  • Contact me
  • Blog

Blog

Jacob Fugger's bonnet (SPRANG BONNETS PART 4)

3/11/2023

0 Comments

 
SPRANG BONNETS PART 1
SPRANG BONNETS PART 3
Picture
Jacob Fugger as portrayed by Albrecht Drürer
Picture
My version of the bonnet
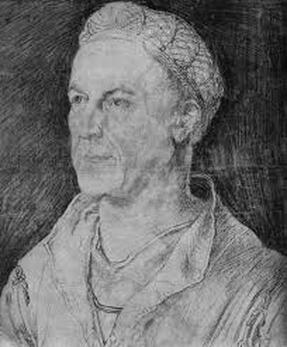
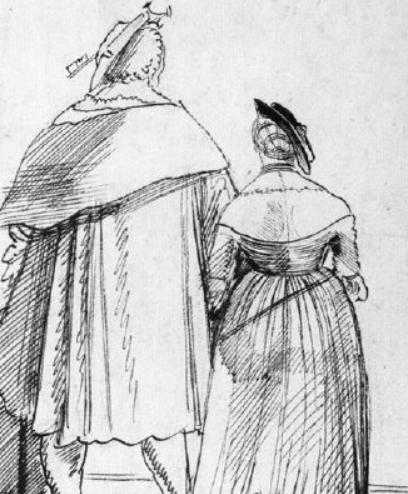
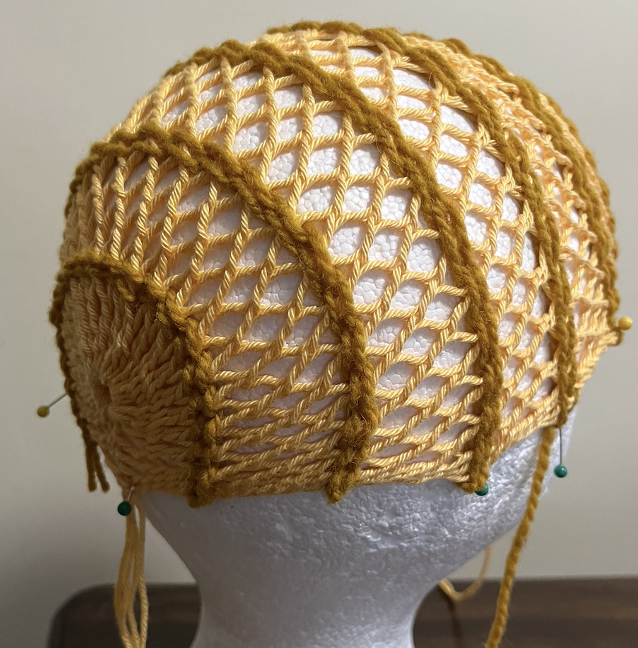
The portrayal of Jacob Fugger by Albrecht Drürer leads me to think that Mr Fugger wore a sprang bonnet. I tried to make a similar bonnet.
I interpreted the heavy lines in the bonnet as lines of horizontal twining in a sprang bonnet. When I tried this myself I found that there may be a reason for the twining in the sprang bonnet, as you will see.
Picture
Picture
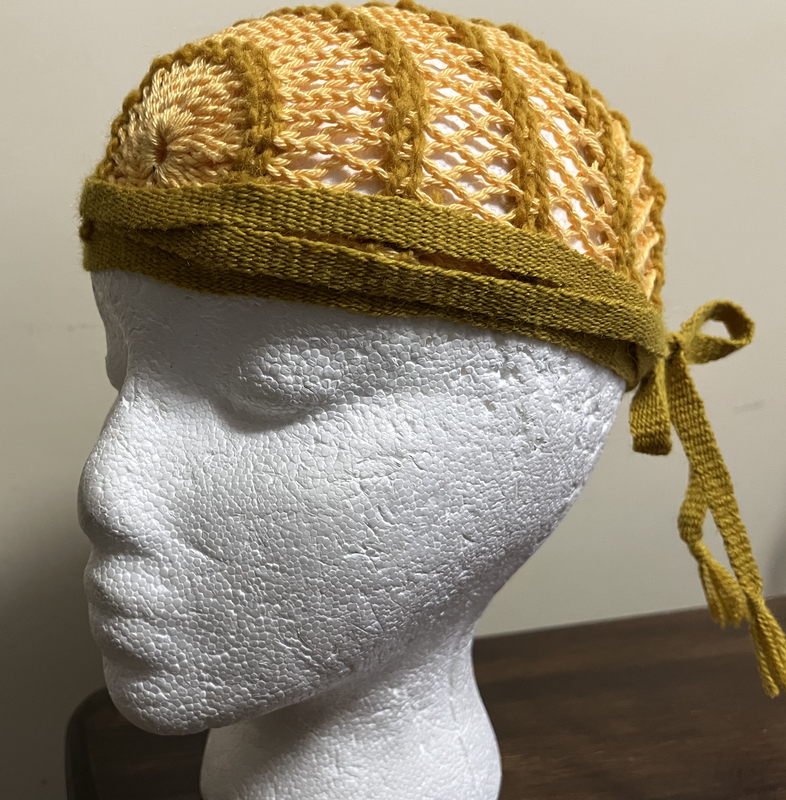
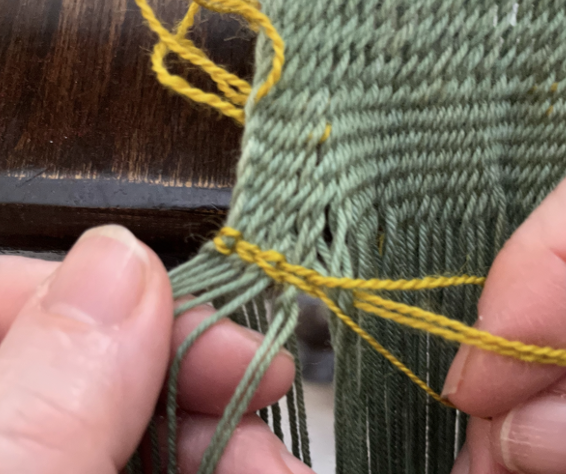
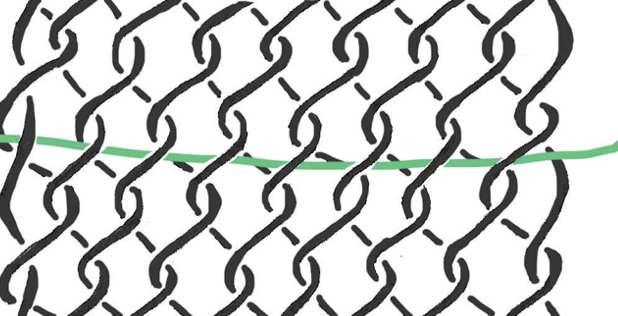
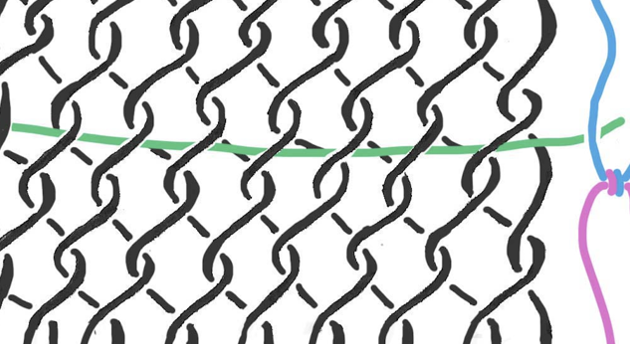
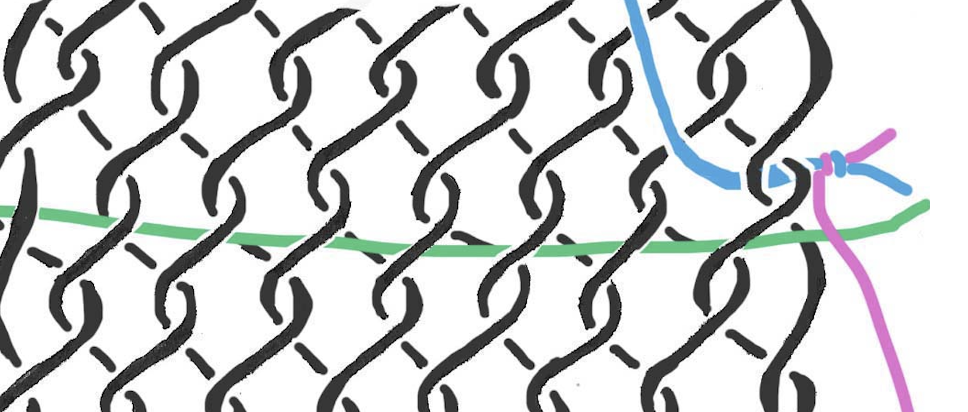
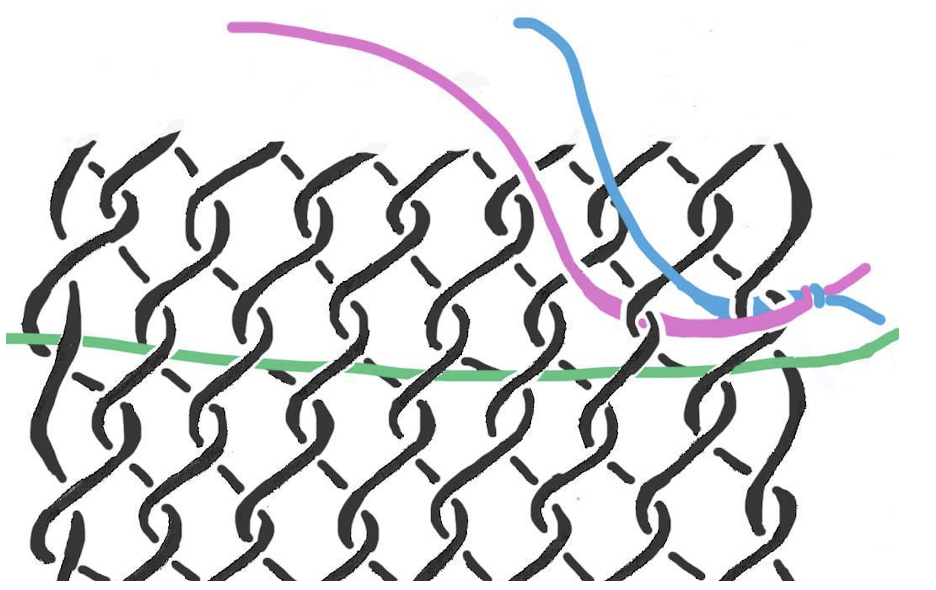
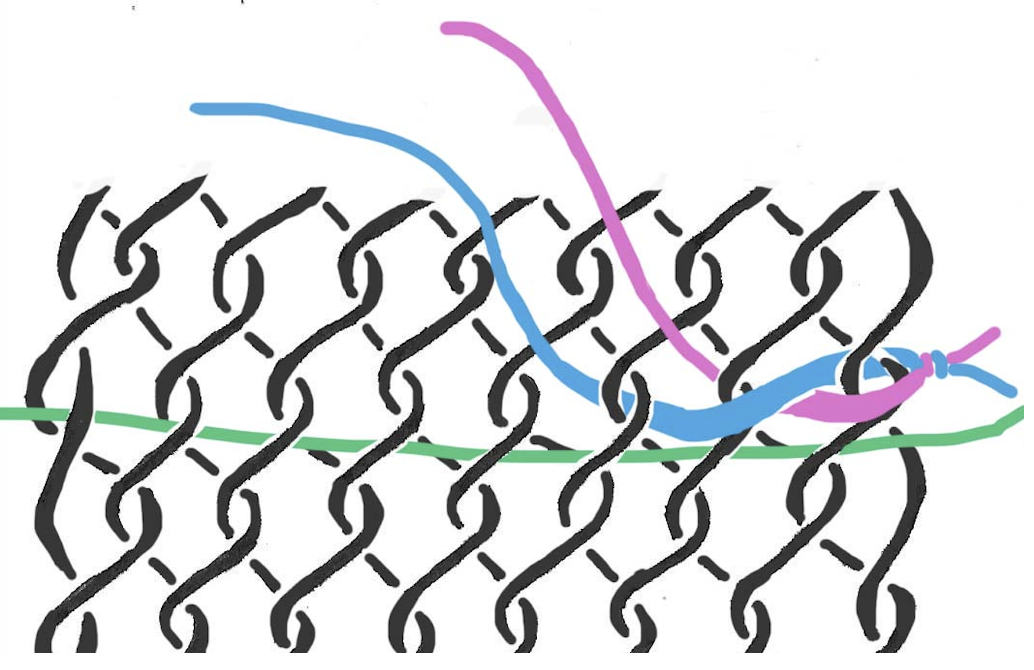
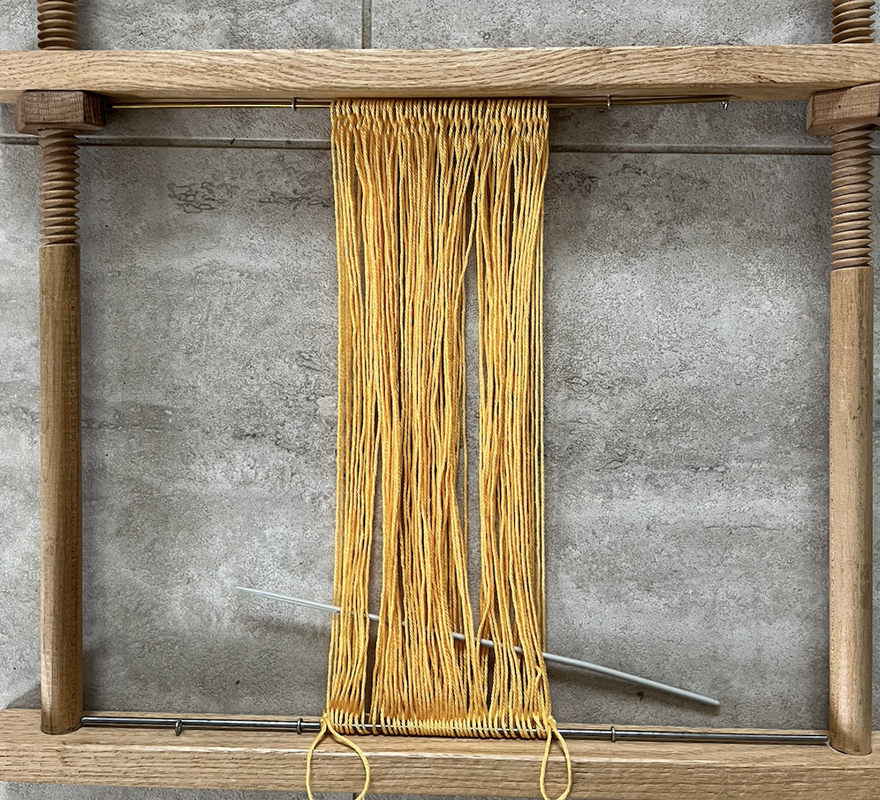
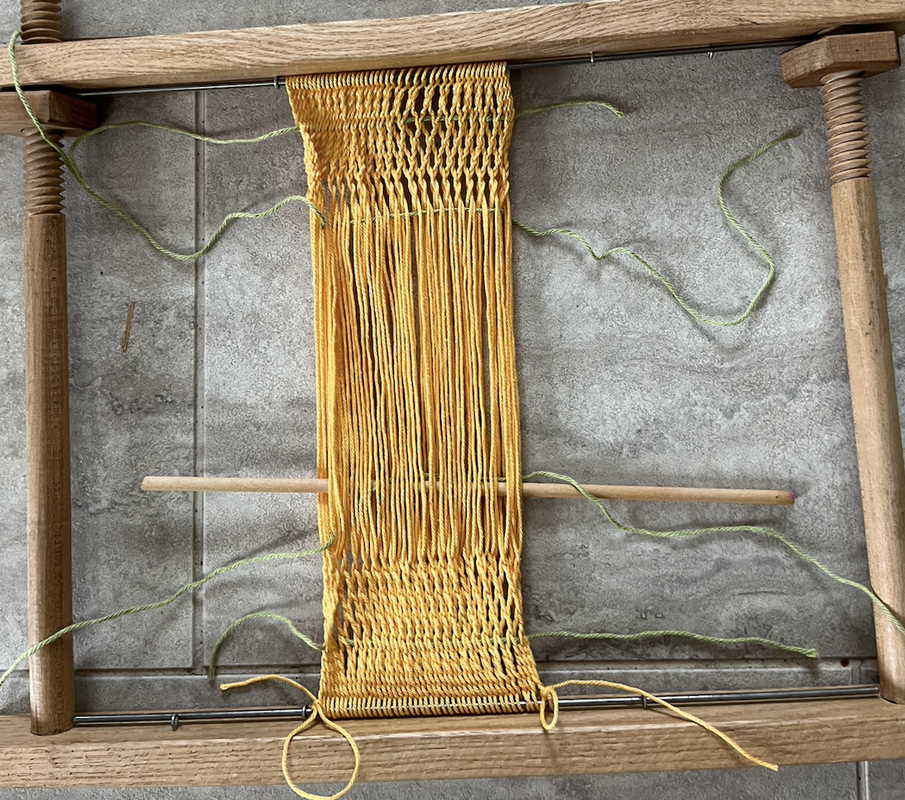
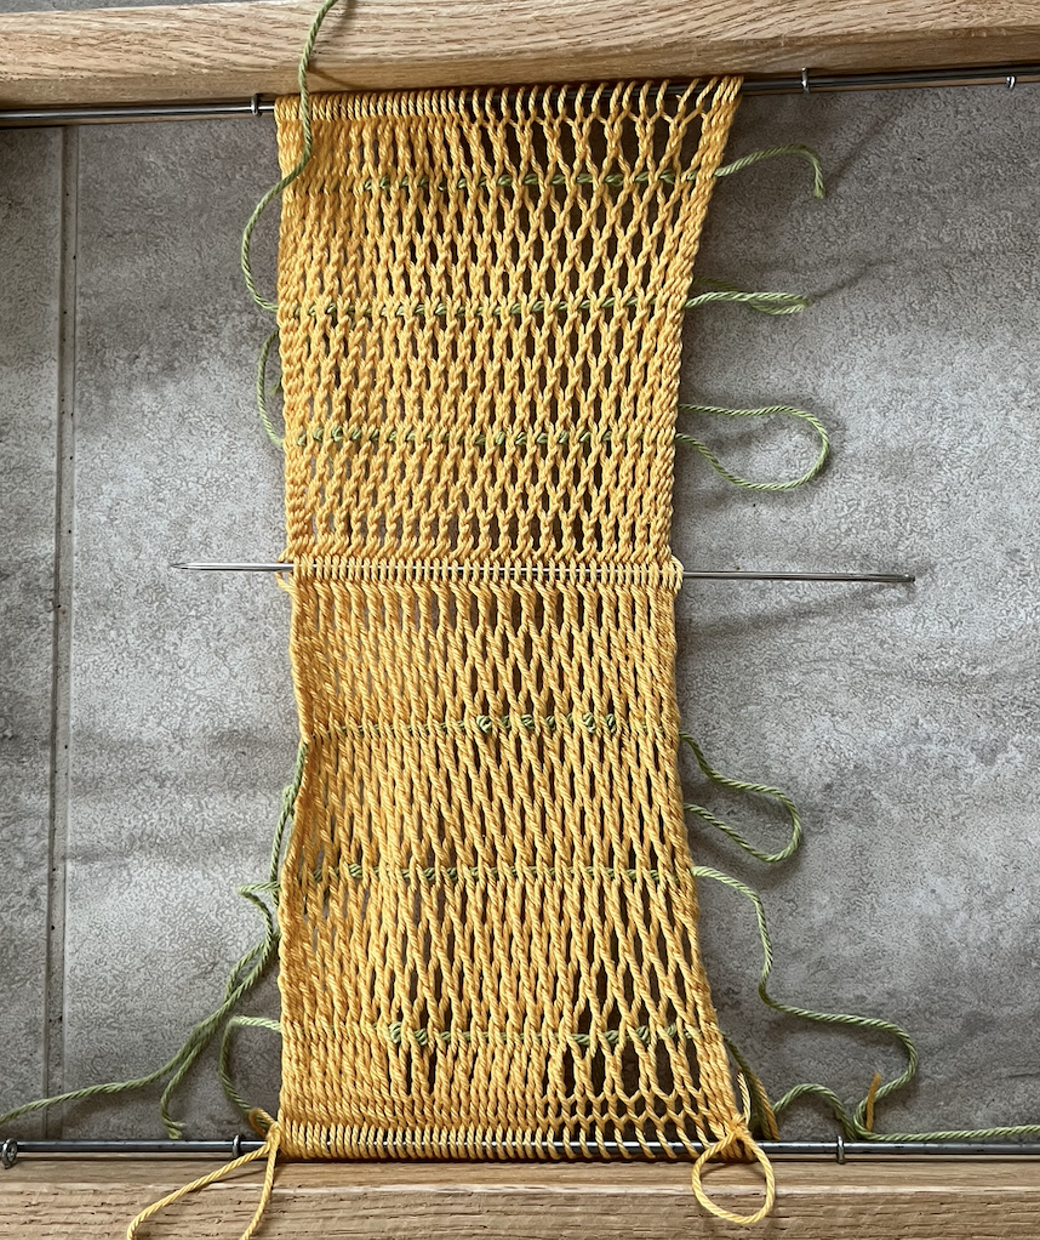
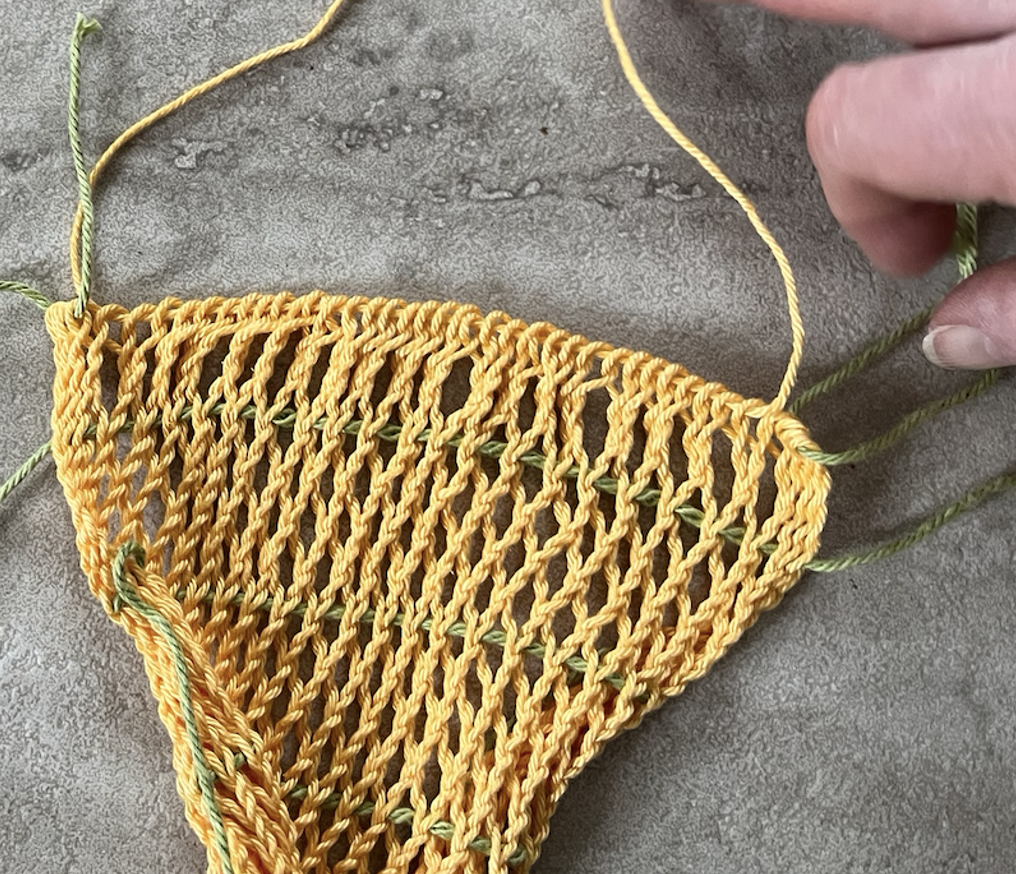
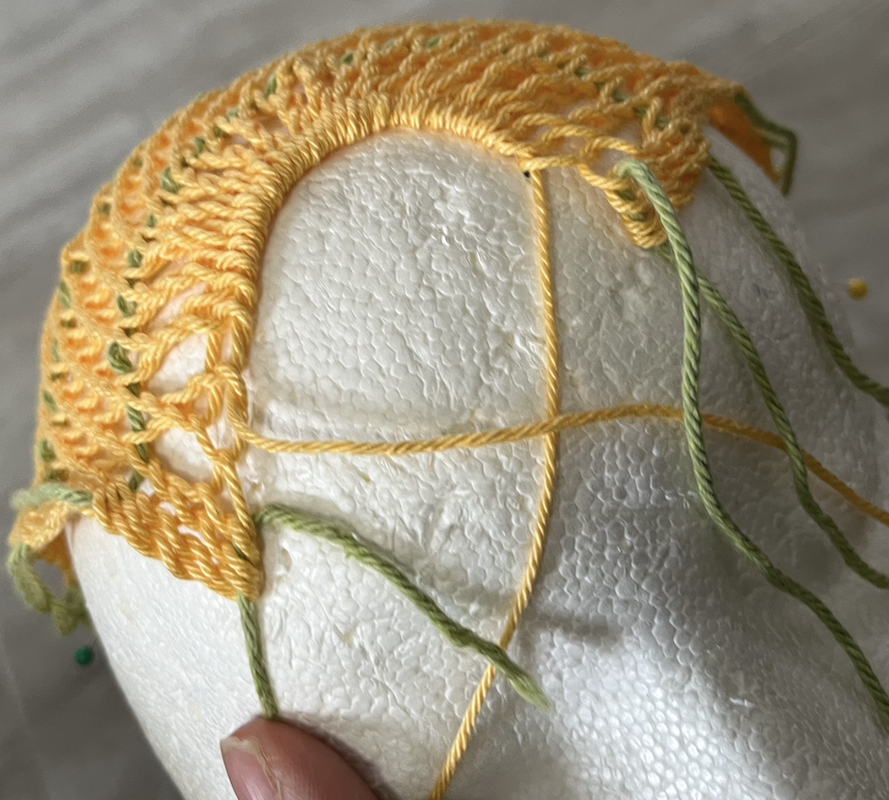
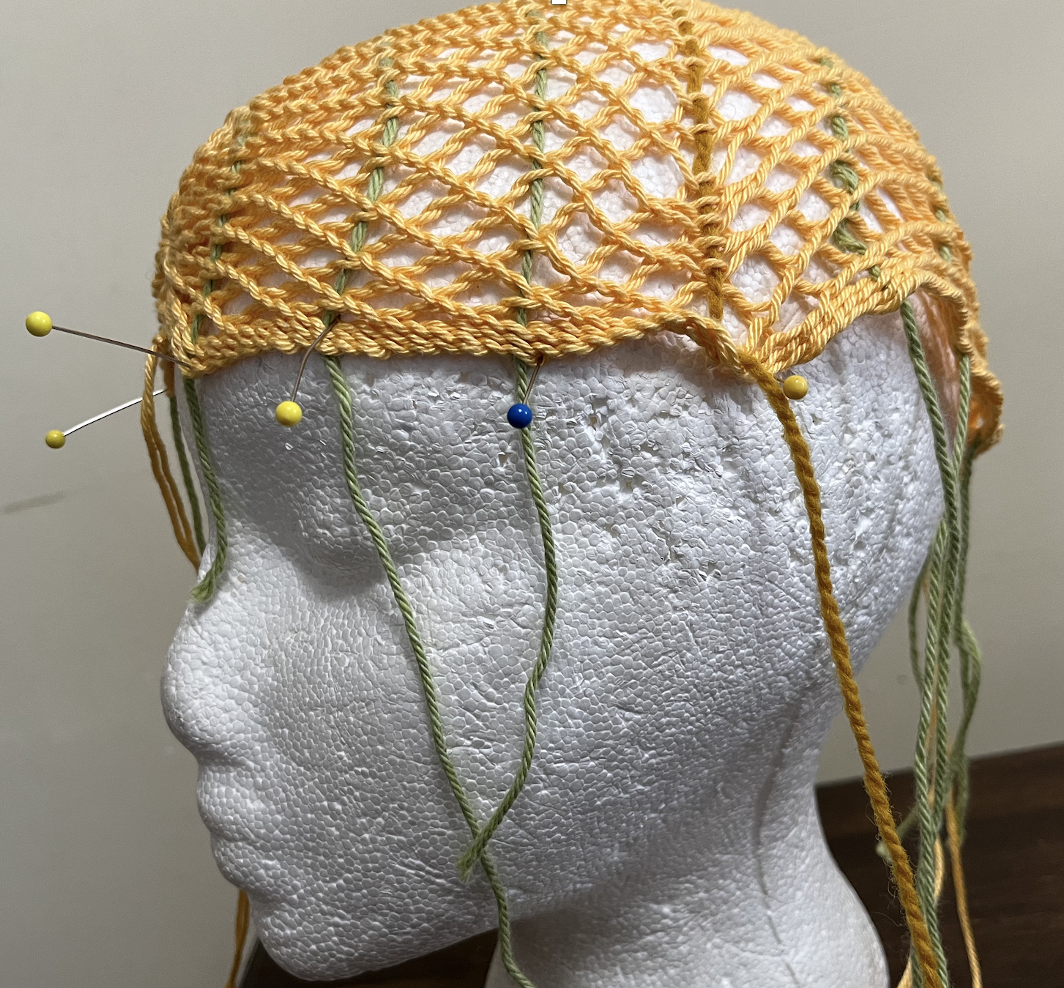
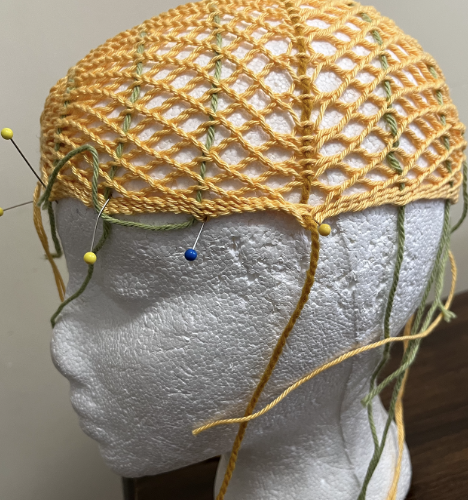
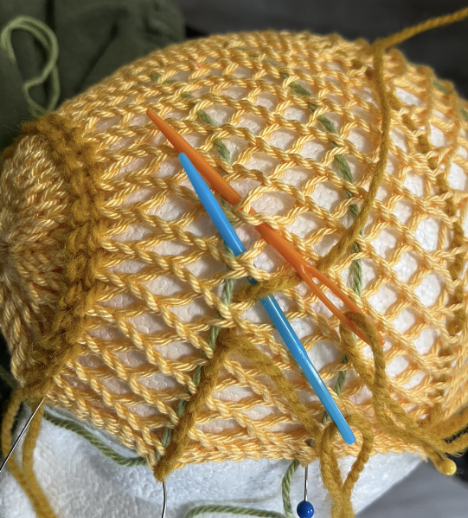
Thinking about approaches to incorporate horizontal twining into the sprang cloth, I thought of two ways to do this. One way (method #1) is to create a line of weft twining as I created the cloth. The other way (method #2) is to add the twining stitches after completing the sprang. The twining stitch does not have the stretch of the sprang cloth. Maybe, indeed, this was the whole idea of the twining line. This risk of method #1 is that the line of twining is too narrow for the desired width of the bonnet. I found method #2 to be more effective, in that I could place the sprang cloth on a head shape (styrofoam head) and then work the twining stitch at the desired tension, creating the desired width of the cloth, fitting the bonnet to the head.
How did I work the twining stitch?
Picture
1. I placed a safety cord in the rows where I anticipated later adding the twining .... OK, two safety cords each time, one on the Z-side of the cloth, and one on the S-side of the cloth.
Picture
2. In my drawing I use two colors of thread, so you can better see what is happening.
Picture
3. The blue thread passes behind the first stitch of the sprang cloth.
Picture
4. The pink thread passes in front of the first sprang stitch, and behind the 2nd sprang stitch.
Picture
5. The blue thread passes in front of the pink thread, in front of the 2nd sprang stitch and behind the 3rd sprang stitch.
Picture
6. The pink thread passes in front of the blue thread, in front of the 3rd sprang stitch, and behind the 4th sprang stitch.
With this in mind, I set up a warp. I used a cotton yarn (Berroco Pima 100), and set on a 12 inch (30 cm) long warp of  44 loops (88 threads).
Picture
I worked the doubles grid stitch (you might see the instructions I gave for Mrs Luther's bonnet for more information about the doubles grid ... or check out Sprang Unsprung).
Picture

I placed a safety line in both the S-side and the Z-side at intervals, as guide lines for the twining stitches to be added later.


When the two sides met, I inserted a string in the last row.
Picture
I removed the cloth from the frame.

I slid the loops at the top of the cloth onto 3 separate strings. 
The first 4 loops went onto thread #1.
The next 36 loops went onto thread #2.
​The last 4 loops went onto thread #3.
Picture
I set the cloth onto my head-shaped styrofoam mold.
Picture
I cinched the 36 loops at the centre into a tight loop and tied a knot.
Using the tails from that knot, I stitched together the 8 remaining loops, 4 on one side, 4 on the other side.
Picture
Cinching the loops together into a ring begins to bring the sprang rectangle into ah hat shape.

Note the edges of the cloth at the front of the head sit tightly against the head. 
 
​The edge of the cloth near the back of the head is loose, rather ruffled.

Picture
How to finish the back of the bonnet? ​How are the other loops finished?
This drawing, done in 1514 by Urs Gra gives me an idea.
 
The figure at the right may be wearing such a bonnet seen from the back side.


Picture
When I gather the loops at the other side of the cloth, forming a ring at the back of the head, that ruffling along the edges disappears.
Picture
​I worked a twining stitch along the guide lines.  This stabilized the width of the bonnet.
Picture
​The rectangular shape of the cloth takes on a very nice bonnet shape.
Picture
Picture
​I created a woven band using a tape loom, and stitched the band to the edge of the rim of the sprang bonnet.
Picture
I stitched the band to the rim of the bonnet, leaving the band not attached at the back of the head. This will make it easier to put the bonnet on, and will allow for the bonnet to be tightened to sit snugly on the head.
Picture
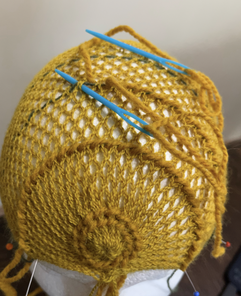
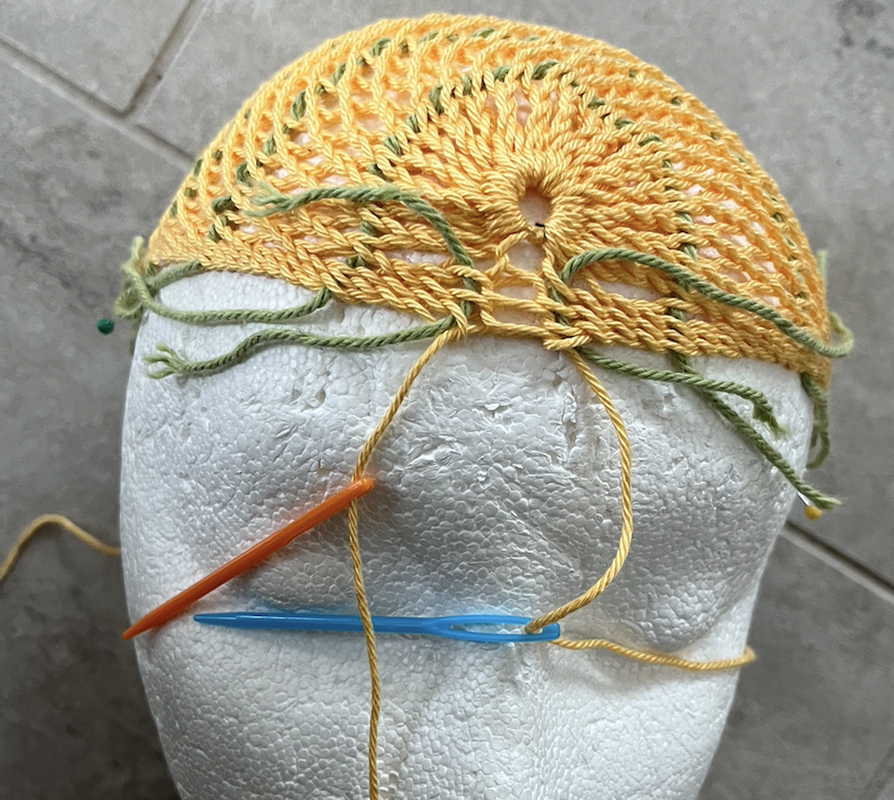
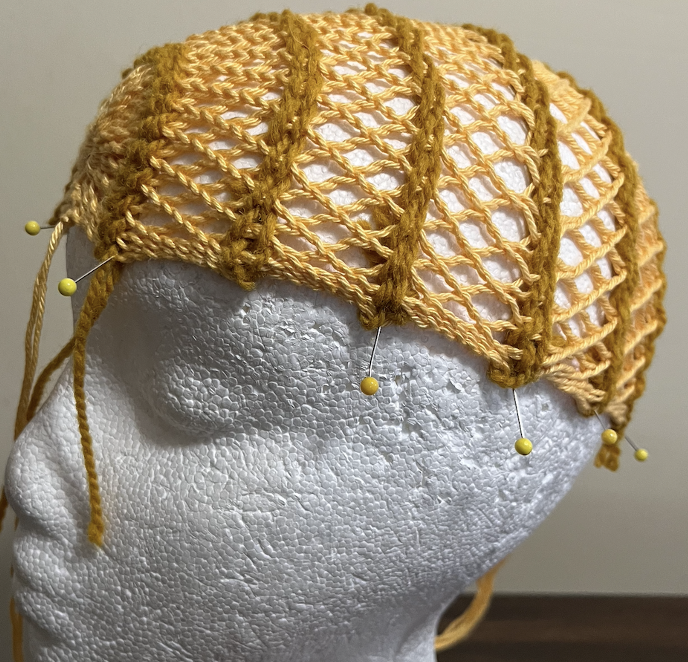
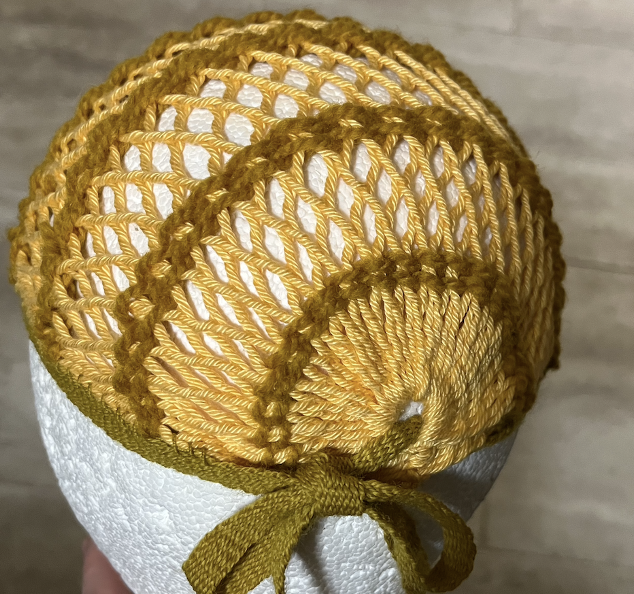
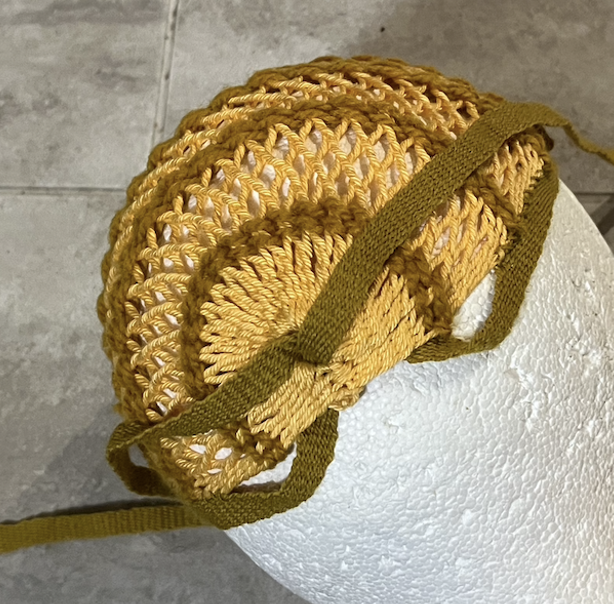
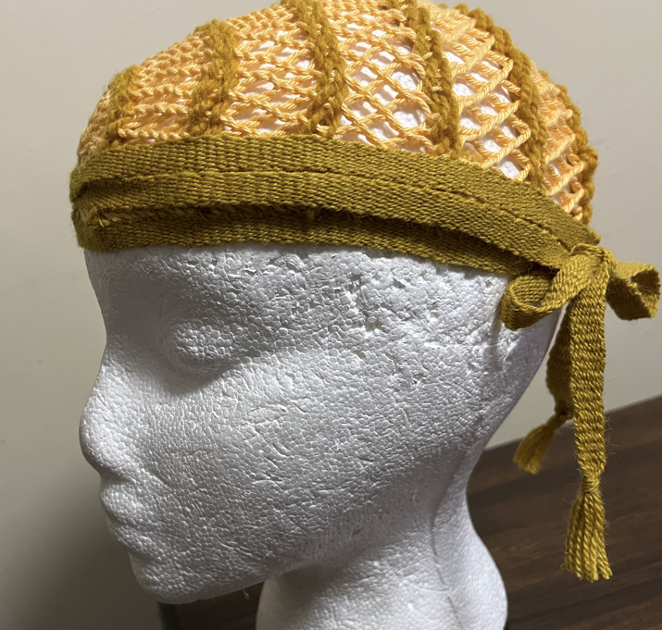
How do you tie the bonnet on the head?
Two approaches come to my mind.
One approach is to pass one end of the head band through the circle at the back of the head, and tie it to the other end of the head band.
This is the method if your band is short, and/or if you do not want the band to pass all the way around the head.
Picture
If you want the ends of the band to pass all the way around the head, then I would pass both ends through the circle at the back of the head.
Picture
Picture
0 Comments

Your comment will be posted after it is approved.


Leave a Reply.

    Carol's blog archive

    RSS Feed

    Categories

    All
    Arizona Openwork Shirt
    Art
    Book Reviews
    Books
    Braddock Sash
    Ceinture Fleche
    Clothing
    Demonstration
    Dying
    Easily Transported Work
    Exhibit
    Exploration
    Fashion Show
    Fashion Sow
    Finger Weaving
    Inspiration
    Instruction
    Loom Weaving
    Media
    Military Sash
    Museum Replica
    Museum Visit
    No Frame Sprang
    No-frame Sprang
    Patterns
    Privite Commissinons
    Publications
    Research
    S And Z
    Sash Dance
    Sprang
    Sprang Bonnets
    Sprang Bonnets Of The 1500s
    Sprang Bonnets Of The 16th Century
    Sprang Bonnets Of The Renaissance
    Sprang Clothing
    Sprang Frame
    Sprang History
    Sprang Lace
    Sprang Leggings
    Sprang Patterns
    Sprang Twining
    Student Pieces
    Tablet Weaving
    Tips-and-tricks
    Travel
    Weaving
    Website
    Workshops

    Archives

    March 2023
    February 2023
    August 2022
    June 2022
    July 2021
    June 2021
    April 2021
    February 2021
    January 2021
    December 2020
    August 2020
    May 2020
    April 2020
    March 2020
    February 2020
    January 2020
    December 2019
    October 2019
    August 2019
    June 2019
    May 2019
    April 2019
    March 2019
    February 2019
    January 2019
    November 2018
    October 2018
    August 2018
    July 2018
    June 2018
    May 2018
    March 2018
    February 2018
    December 2017
    November 2017
    October 2017
    September 2017
    August 2017
    June 2017
    May 2017
    April 2017
    March 2017
    February 2017
    November 2016
    August 2016
    March 2016
    February 2016
    November 2015
    October 2015
    August 2015
    June 2015
    April 2015
    March 2015
    December 2014
    November 2014
    September 2014
    August 2014
    July 2014
    May 2014
    April 2014
    March 2014
    February 2014
    December 2013
    November 2013
    October 2013
    September 2013
    August 2013
    March 2013
    February 2013
    December 2012
    November 2012
    October 2012
    September 2012
    August 2012
    July 2012
    June 2012
    May 2012
    April 2012
    March 2012
    February 2012
    January 2012
    December 2011
    November 2011
    October 2011
    September 2011
    August 2011
    July 2011
    June 2011
    May 2011
    February 2011
    November 2010
    October 2010
    August 2010
    July 2010
    June 2010
    May 2010
    April 2010
    March 2010
    February 2010
    August 2009
    July 2009
    May 2009
    April 2009
    February 2009
    January 2009
    December 2008
    November 2008
    October 2008
    September 2008
    August 2008
    July 2008
    June 2008
    May 2008
    March 2008

    Categories

    All
    Arizona Openwork Shirt
    Art
    Book Reviews
    Books
    Braddock Sash
    Ceinture Fleche
    Clothing
    Demonstration
    Dying
    Easily Transported Work
    Exhibit
    Exploration
    Fashion Show
    Fashion Sow
    Finger Weaving
    Inspiration
    Instruction
    Loom Weaving
    Media
    Military Sash
    Museum Replica
    Museum Visit
    No Frame Sprang
    No-frame Sprang
    Patterns
    Privite Commissinons
    Publications
    Research
    S And Z
    Sash Dance
    Sprang
    Sprang Bonnets
    Sprang Bonnets Of The 1500s
    Sprang Bonnets Of The 16th Century
    Sprang Bonnets Of The Renaissance
    Sprang Clothing
    Sprang Frame
    Sprang History
    Sprang Lace
    Sprang Leggings
    Sprang Patterns
    Sprang Twining
    Student Pieces
    Tablet Weaving
    Tips-and-tricks
    Travel
    Weaving
    Website
    Workshops

Contact Carol

Store

FAQ

Privacy policy
Carol acknowledges that we are on Treaty 1 territory, the traditional gathering place of the Anishinaabe, Cree, Oji-Cree, Dakota and Dene people and the traditional homeland of the Métis people. Carol also acknowledges that sprang is part a meany indigenous tradition and fuond in various forms all over the world. Let us re-discover this tecking together.
© COPYRIGHT 2022. ALL RIGHTS RESERVED.
  • Home
  • About the artist
    • Gallery
  • Store
  • Sprang
  • Fingerweaving
  • Virtual Class Room
  • Contact me
  • Blog