SashWeaver
  • Home
  • About the artist
    • Gallery
  • Store
  • Sprang
  • Fingerweaving
  • Virtual Class Room
  • Contact me
  • Blog

Blog

Jacob Fugger's bonnet (SPRANG BONNETS PART 4)

3/11/2023

0 Comments

 
SPRANG BONNETS PART 1
SPRANG BONNETS PART 3
Picture
Jacob Fugger as portrayed by Albrecht DrĂ¼rer
Picture
My version of the bonnet
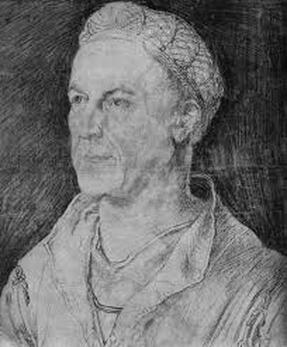
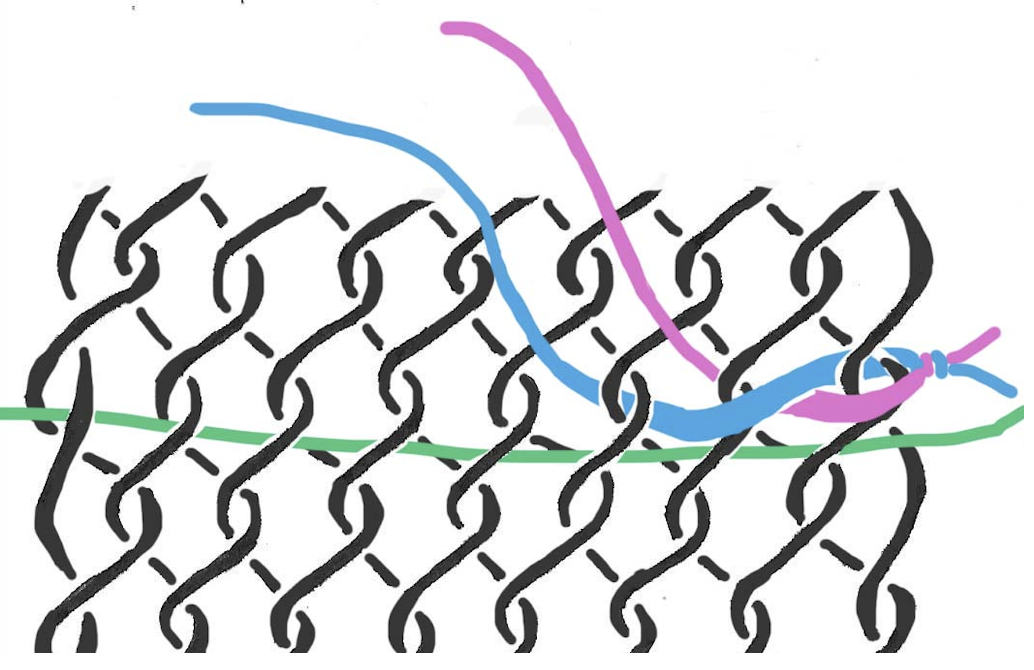
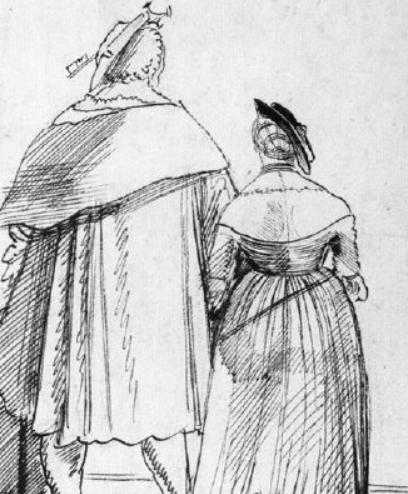
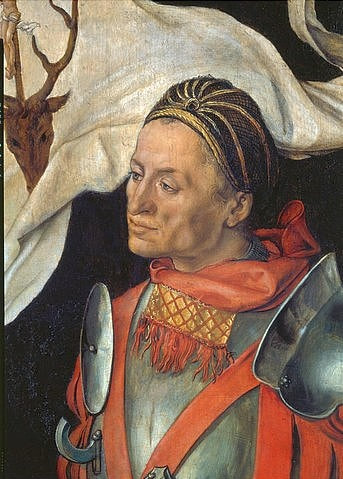
The portrayal of Jacob Fugger by Albrecht Drürer leads me to think that Mr Fugger wore a sprang bonnet. I tried to make a similar bonnet.
I interpreted the heavy lines in the bonnet as lines of horizontal twining in a sprang bonnet. When I tried this myself I found that there may be a reason for the twining in the sprang bonnet, as you will see.
Picture
Picture
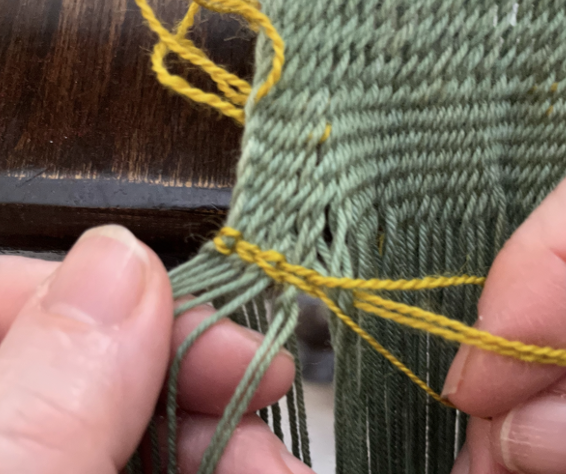
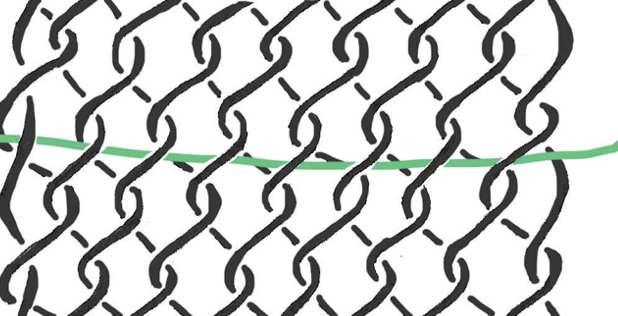
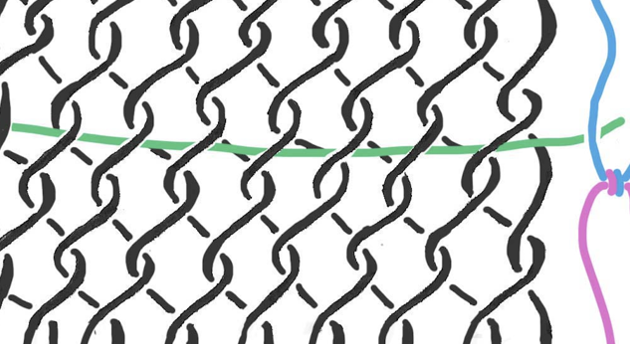
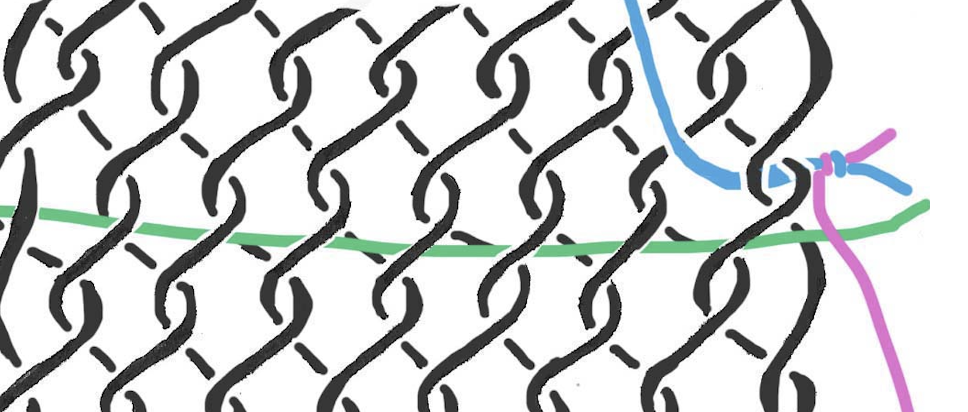
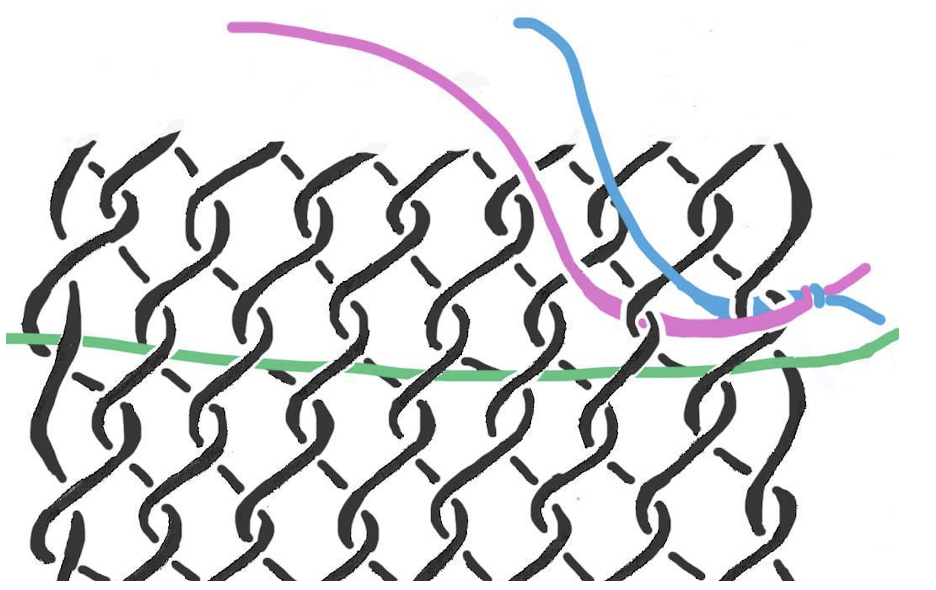
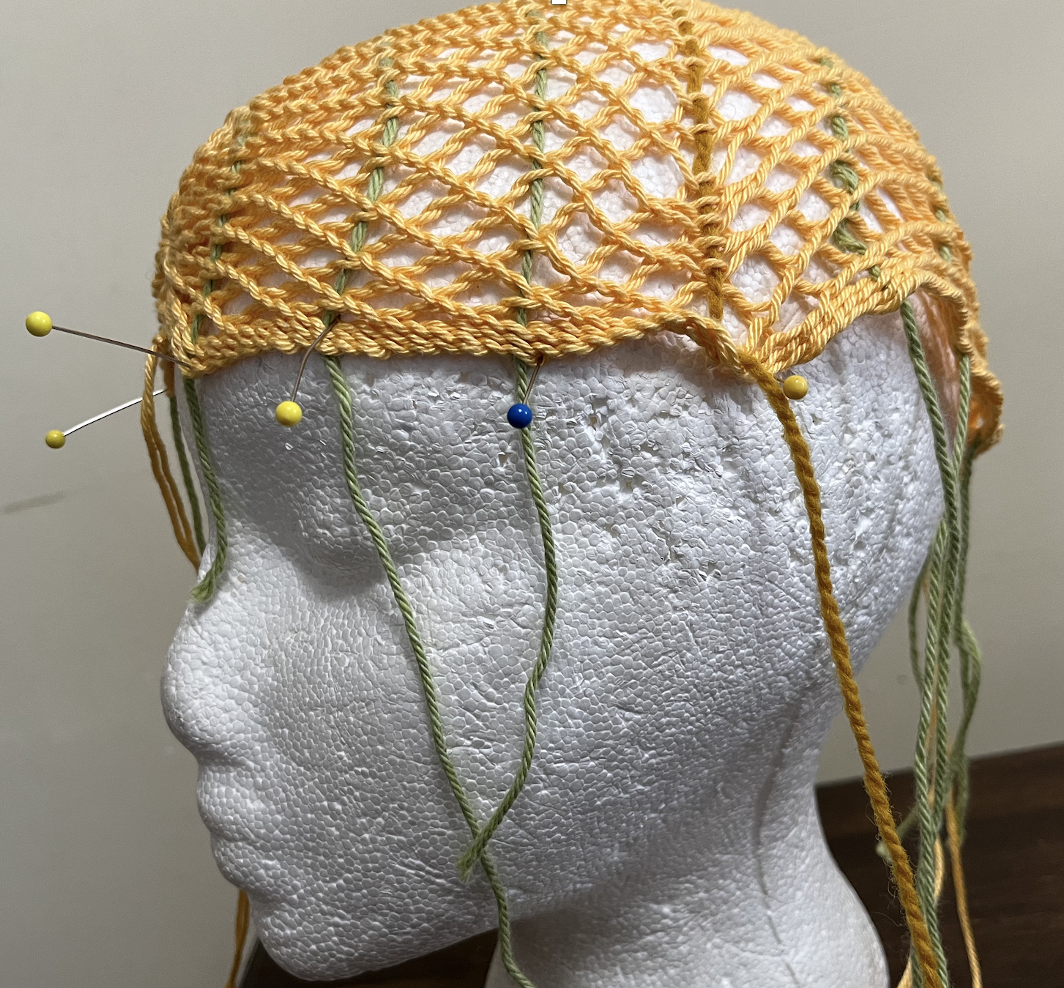
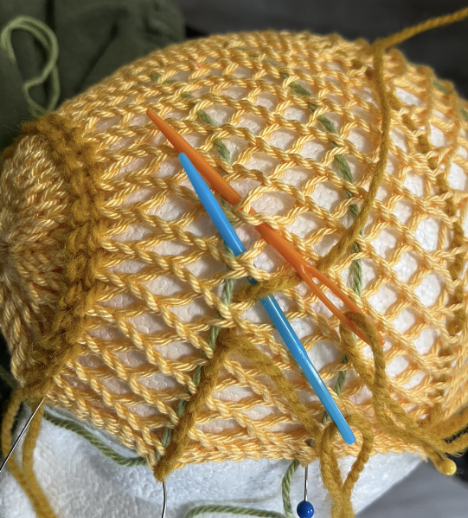
Thinking about approaches to incorporate horizontal twining into the sprang cloth, I thought of two ways to do this. One way (method #1) is to create a line of weft twining as I created the cloth. The other way (method #2) is to add the twining stitches after completing the sprang. The twining stitch does not have the stretch of the sprang cloth. Maybe, indeed, this was the whole idea of the twining line. This risk of method #1 is that the line of twining is too narrow for the desired width of the bonnet. I found method #2 to be more effective, in that I could place the sprang cloth on a head shape (styrofoam head) and then work the twining stitch at the desired tension, creating the desired width of the cloth, fitting the bonnet to the head.
How did I work the twining stitch?
Picture
1. I placed a safety cord in the rows where I anticipated later adding the twining .... OK, two safety cords each time, one on the Z-side of the cloth, and one on the S-side of the cloth.
Picture
2. In my drawing I use two colors of thread, so you can better see what is happening.
Picture
3. The blue thread passes behind the first stitch of the sprang cloth.
Picture
4. The pink thread passes in front of the first sprang stitch, and behind the 2nd sprang stitch.
Picture
5. The blue thread passes in front of the pink thread, in front of the 2nd sprang stitch and behind the 3rd sprang stitch.
Picture
6. The pink thread passes in front of the blue thread, in front of the 3rd sprang stitch, and behind the 4th sprang stitch.
With this in mind, I set up a warp. I used a cotton yarn (Berroco Pima 100), and set on a 12 inch (30 cm) long warp of  44 loops (88 threads).
Picture
I worked the doubles grid stitch (you might see the instructions I gave for Mrs Luther's bonnet for more information about the doubles grid ... or check out Sprang Unsprung).
Picture

I placed a safety line in both the S-side and the Z-side at intervals, as guide lines for the twining stitches to be added later.


When the two sides met, I inserted a string in the last row.
Picture
I removed the cloth from the frame.

I slid the loops at the top of the cloth onto 3 separate strings. 
The first 4 loops went onto thread #1.
The next 36 loops went onto thread #2.
​The last 4 loops went onto thread #3.
Picture
I set the cloth onto my head-shaped styrofoam mold.
Picture
I cinched the 36 loops at the centre into a tight loop and tied a knot.
Using the tails from that knot, I stitched together the 8 remaining loops, 4 on one side, 4 on the other side.
Picture
Cinching the loops together into a ring begins to bring the sprang rectangle into ah hat shape.

Note the edges of the cloth at the front of the head sit tightly against the head. 
 
​The edge of the cloth near the back of the head is loose, rather ruffled.

Picture
How to finish the back of the bonnet? ​How are the other loops finished?
This drawing, done in 1514 by Urs Gra gives me an idea.
 
The figure at the right may be wearing such a bonnet seen from the back side.


Picture
When I gather the loops at the other side of the cloth, forming a ring at the back of the head, that ruffling along the edges disappears.
Picture
​I worked a twining stitch along the guide lines.  This stabilized the width of the bonnet.
Picture
​The rectangular shape of the cloth takes on a very nice bonnet shape.
Picture
Picture
​I created a woven band using a tape loom, and stitched the band to the edge of the rim of the sprang bonnet.
Picture
I stitched the band to the rim of the bonnet, leaving the band not attached at the back of the head. This will make it easier to put the bonnet on, and will allow for the bonnet to be tightened to sit snugly on the head.
Picture
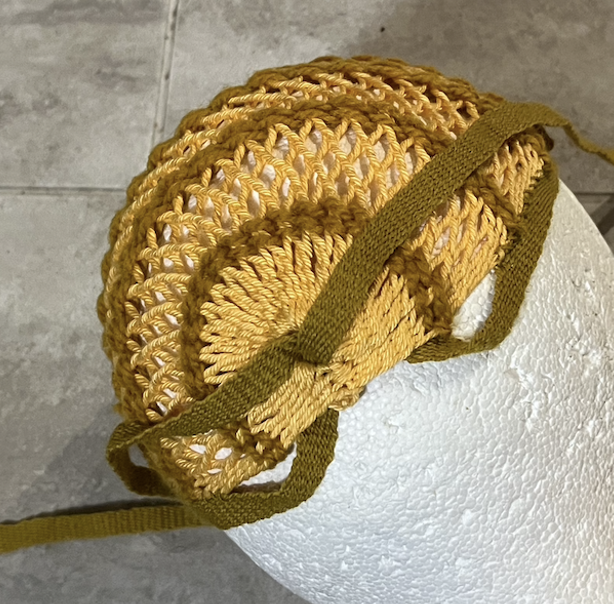
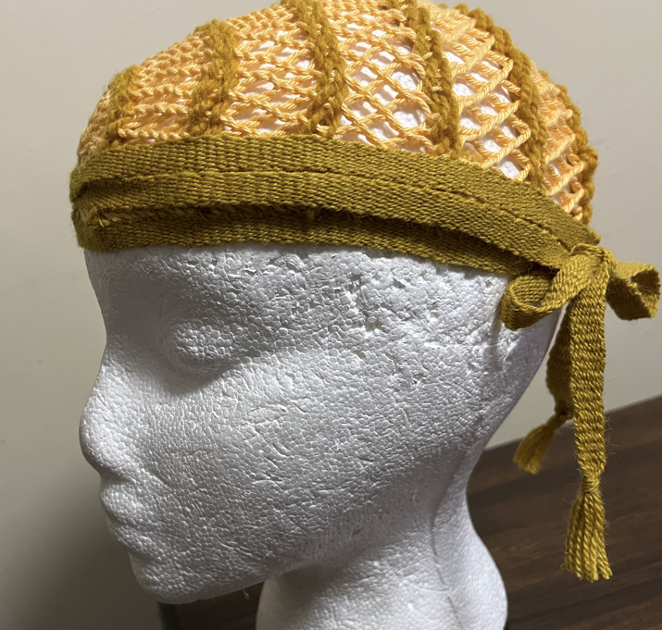
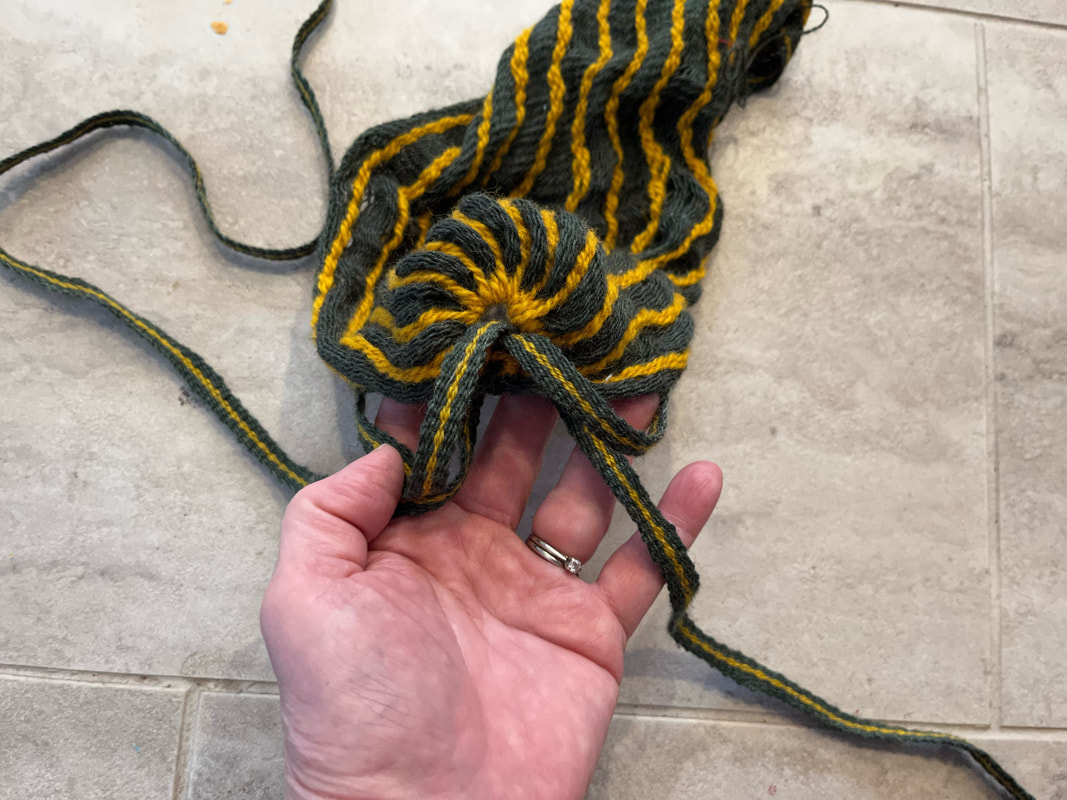
How do you tie the bonnet on the head?
Two approaches come to my mind.
One approach is to pass one end of the head band through the circle at the back of the head, and tie it to the other end of the head band.
This is the method if your band is short, and/or if you do not want the band to pass all the way around the head.
Picture
If you want the ends of the band to pass all the way around the head, then I would pass both ends through the circle at the back of the head.
Picture
Picture
0 Comments

Creating long, wide braided bands

3/3/2023

0 Comments

 
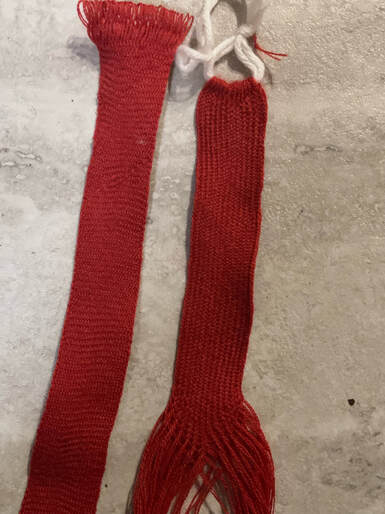
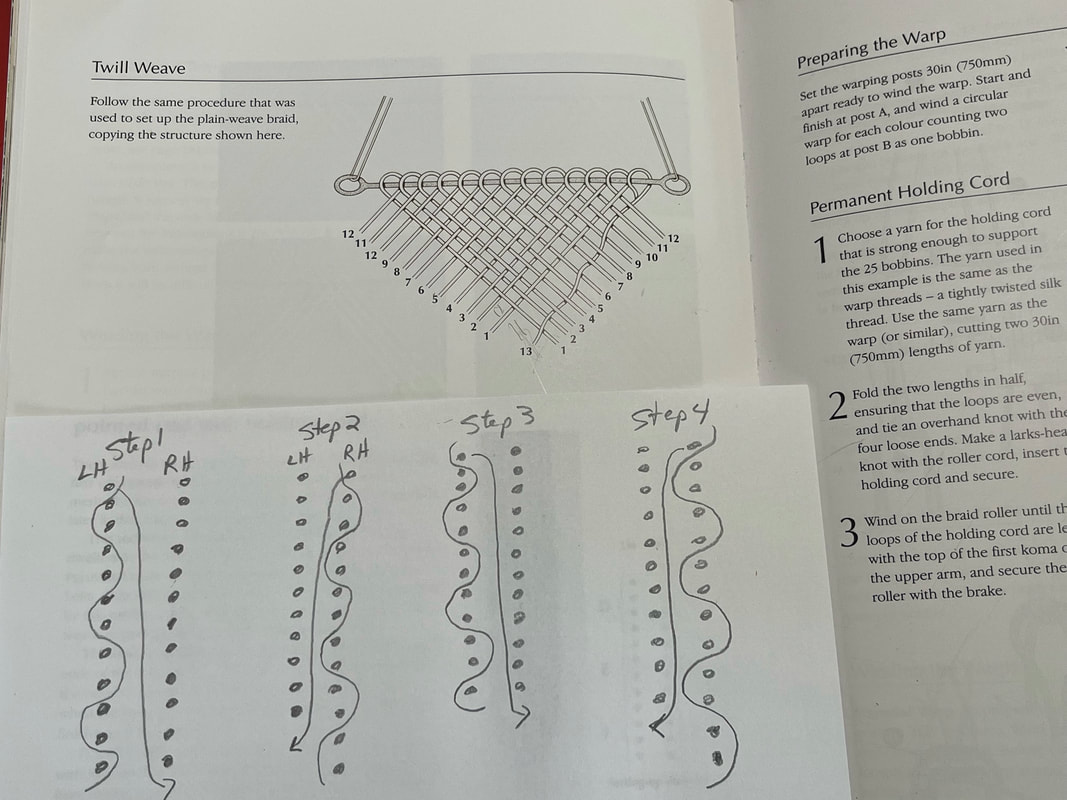
​The German Archaeology Institute in Berlin, and in particular individuals working on their Silk Road Fashion Project have invited me to work with them in the past. My job has been to create braided bands. In 2016 I assisted with the project recreating the outfit worn with the world’s oldest known pair of trousers.
Check out
https://www.youtube.com/watch?v=Pl7siWwzibs
 
More recently I was asked to create braided bands of a structure that is a 2-2 twill with a vertical rib. The desired length for the bands varied from some 1.3 meters to 11 meters long. 
Initially ​ I thought I could create the shorter bands using circular warp sprang. I have successfully worked 2-2 twill with horizontal ribs using the sprang technique and found that the line between the work and the mirror-image section is almost impossible to detect. Experiments to use circular warp to create the 2-2 twill structure with vertical ribs always had an irregularity between the cloth and it’s mirror-image cloth. Trying to work the initial row several different ways, I always came up with the same result, a flaw in the cloth where the work met the mirror image.
Picture
sample of 2-2 interlace, vertical ribs, circular warp. Note the irregularity in a line at the centre of the work.
 I then tried to set up the cloth with horizontal ribs, and then switch to the vertical ribs. I mistakenly thought that the difference is a matter of tension. It is not. The difference between 2-2 horizontal ribs and 2-2 vertical ribs is a structural difference. The way to shift from one to the other requires a structural change … hence that “flaw” in the cloth. Reflecting on Jacqui Carey’s method to chart braided structures confirmed this structural difference.
Picture
Horizontal ribs on the left, vertical ribs on the right.
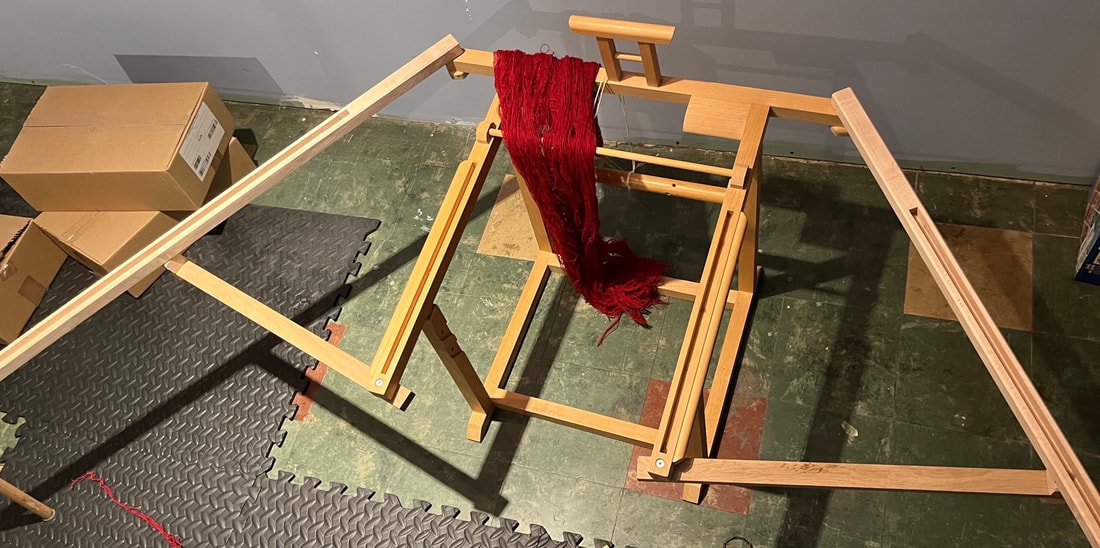
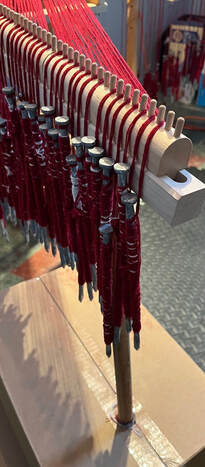
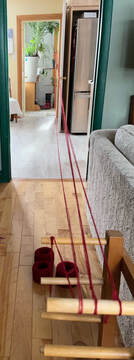
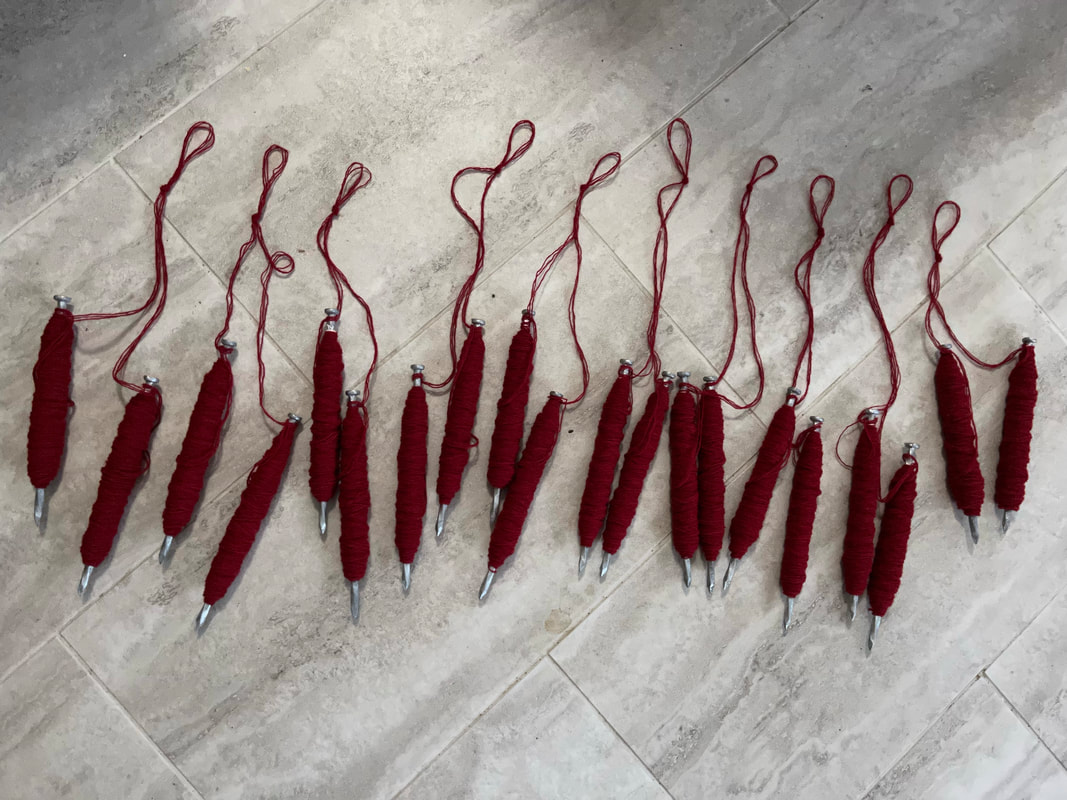
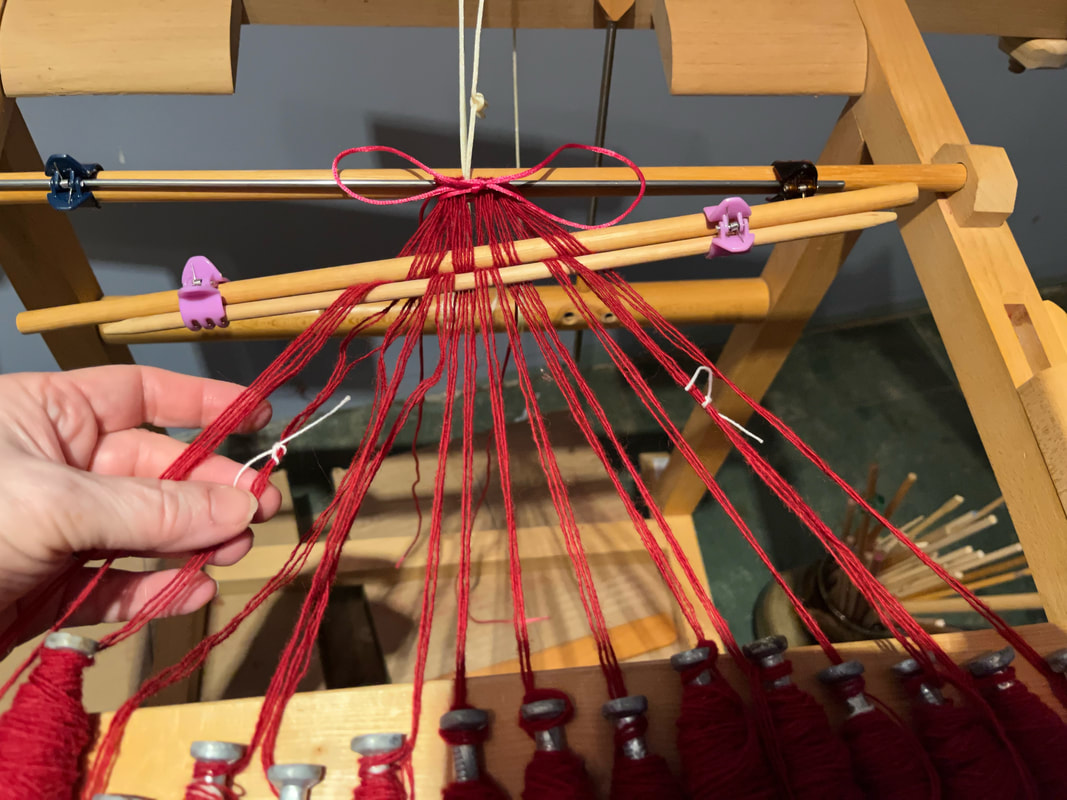
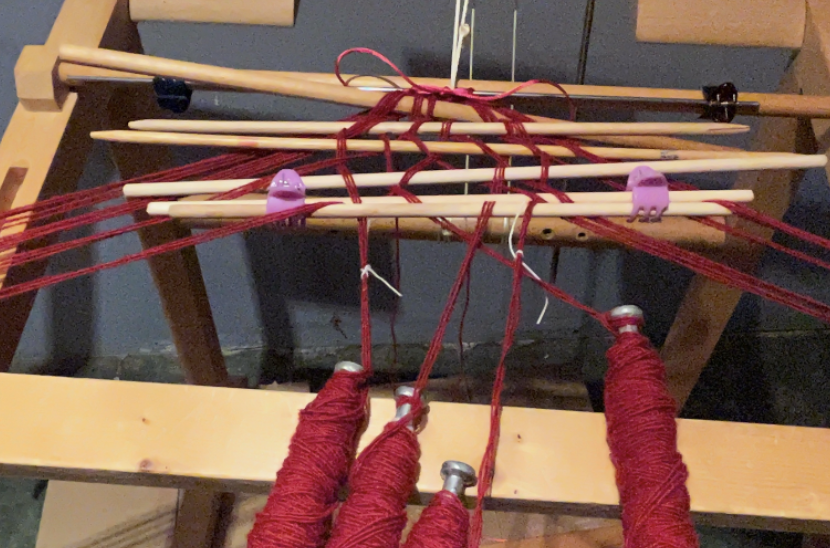
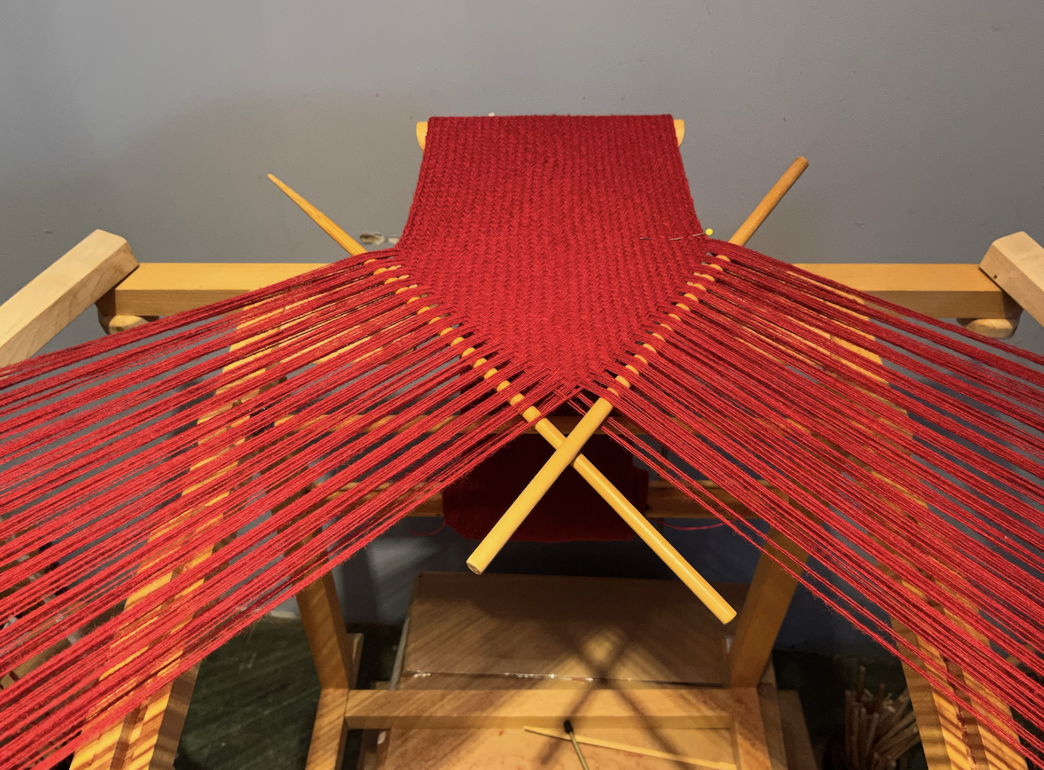
The result of this was the decision to create all the braids using a takadai, a Japanese braiding table. The takadai has the weaver set up the threads on bobbins, and the bobbins are placed around the takadai. The weaver manipulates the threads by moving the bobbins. The takadai facilitates the weaving by holding the bobbins in place. 
​Making samples, I realized that the common modern takadai does not have the capacity for the great number of threads I would require for some of the bands. One of the bands required some 184 bobbins. This lead me to solicit the services of a local woodworker, who made longer arms for my takadai.
Picture
Local woodworker Paul Shipman modified my takadai to accommodate the project.
Working to create a sample of the wider piece, I found that the longer arms needed to be splayed out at an angle.


Picture
Picture
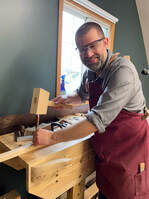
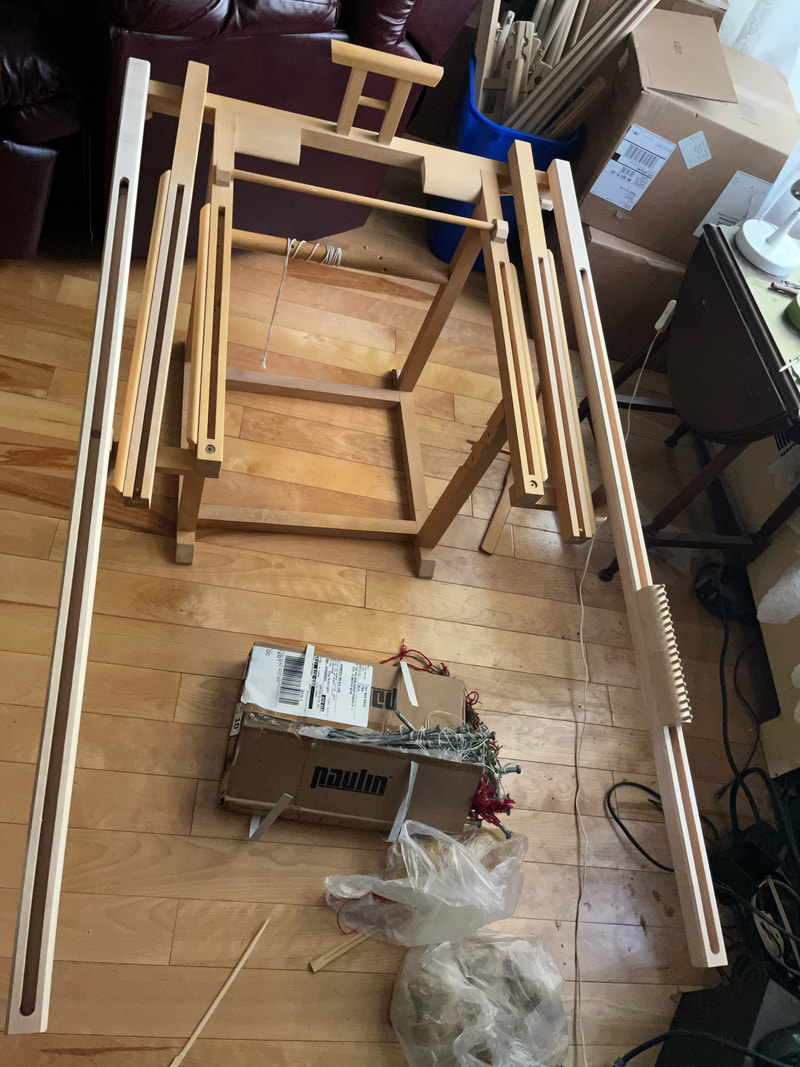
Back to Paul Shipman for adjustments to the longer arms.
Picture
Longer arms seemed to want to be splayed out to get the correct angle along the fell line.
Picture
Takadai arms now spayed to accommodate the angle of the fell line of the fabric.
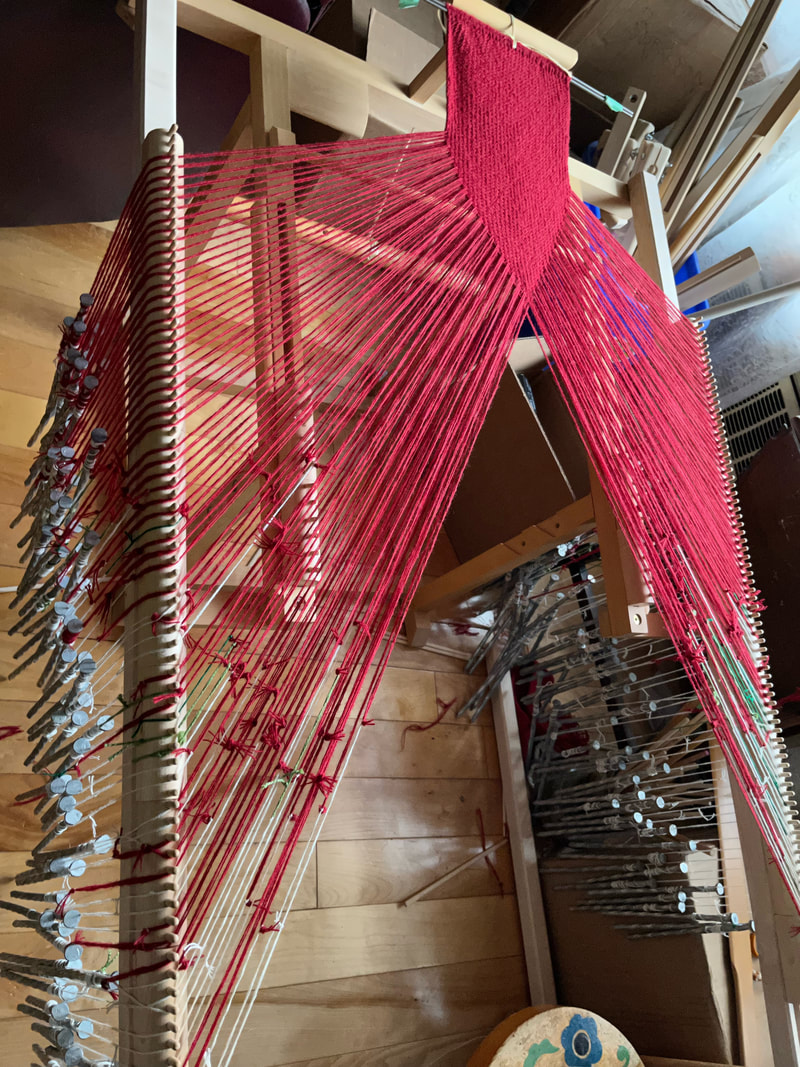
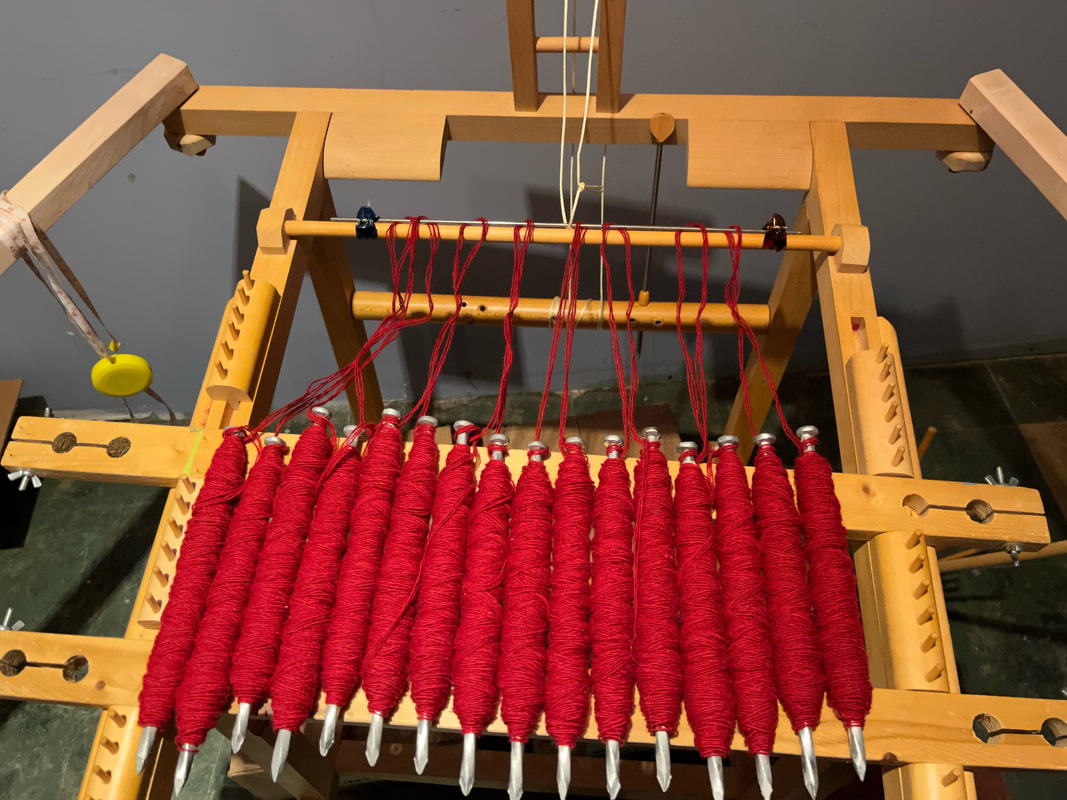
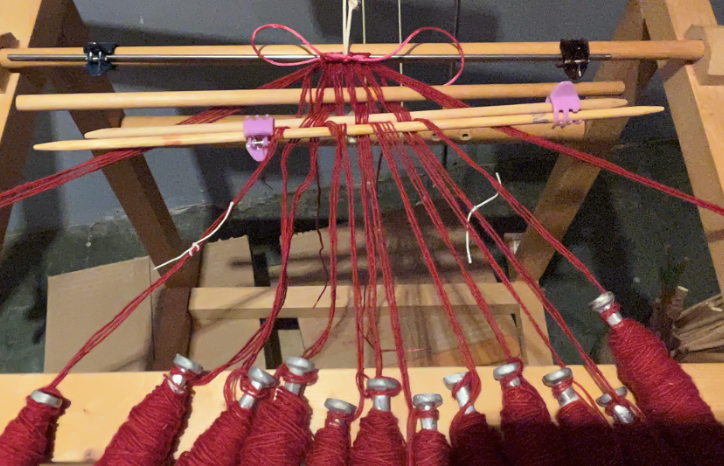
The longer arms, loaded with 92 bobbins, caused the takadai to tip over. This meant that I fitted the far ends of the long arms with legs, and it worked nicely.
​The great number of bobbins meant that each koma travelled a significant distance before moving to the bottom of the row. This meant that each bobbin descended a significant distance before passing as weft. All this resulted in a need to mount the takadai on boxes to allow for the space for the bobbins to descend.
Picture
The large number of bobbins required for one of the bands created the need for an extra pair of legs on the takadai
Picture
I fit the far end of each outer rail with a foot, and raised the height with boxes.
​The frame that I have for measuring out warp for other weaving projects would have me wrap the threads around a number of times to make up the length required for the 11 meters of cloth. My samples gave me to calculate that I needed  to begin with 18 meters of warp in order to end up with 11 meters of cloth. That seemed to me to be a great number of times around my warping mill, and I was concerned that I might miscount now and then, resulting in some of the threads being too short. I then opted to measure out the distance across my house, and measured out in that manner.
Picture
​Normally takadai bobbins are 2-3 inches long. For the yardage of warp required for the 11 meters of cloth, I needed far larger bobbins. The bobbins, needing to sit close together, a long, thin shape seemed reasonable. I went to my hardware store and selected bolts of the right weight for the shorter bands, and 8 inch long galvanized nails (they have a large head) to accommodate the warp for the longer bands.
 
I used an electric drill to wind the bobbins
Picture
​The next challenge was to create that flat start to the cloth. Initially I followed the instructions in the book by Rodrick Owen, I set up the threads as in the drawing. Then following the structure I derived the track plan in the pencil drawing. 
Picture
​This gave me horizontal ribs … not the vertical ribs that I wanted.
Picture
Picture
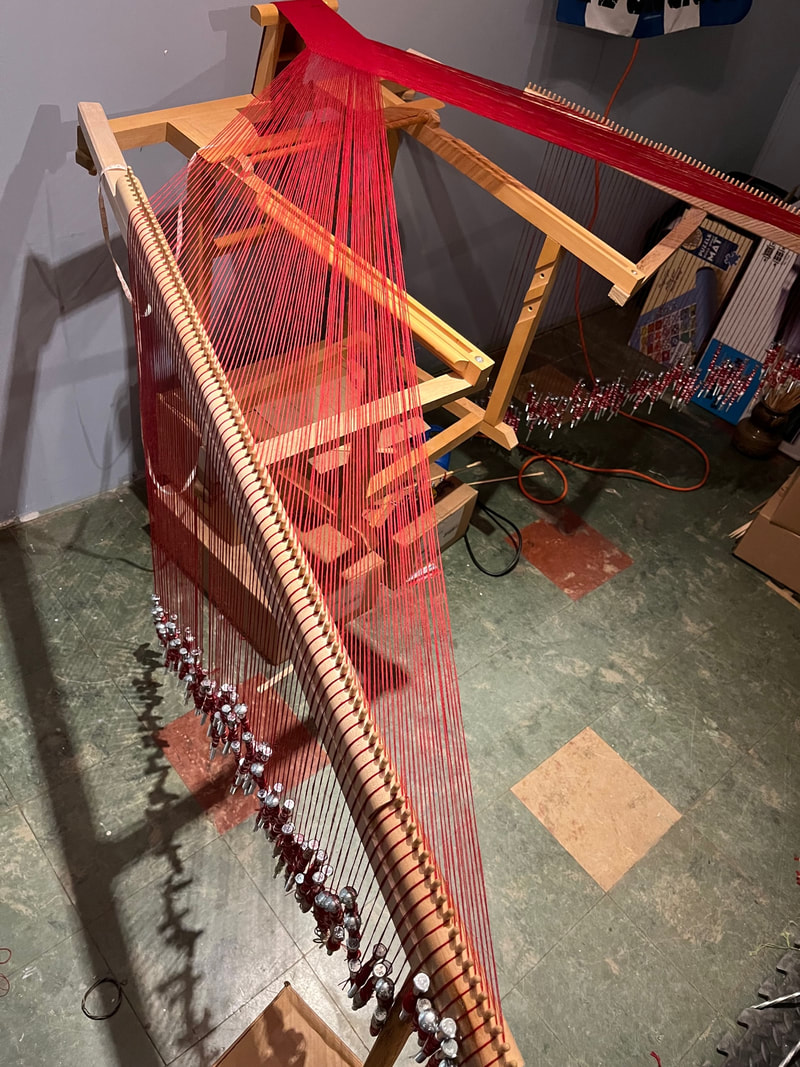
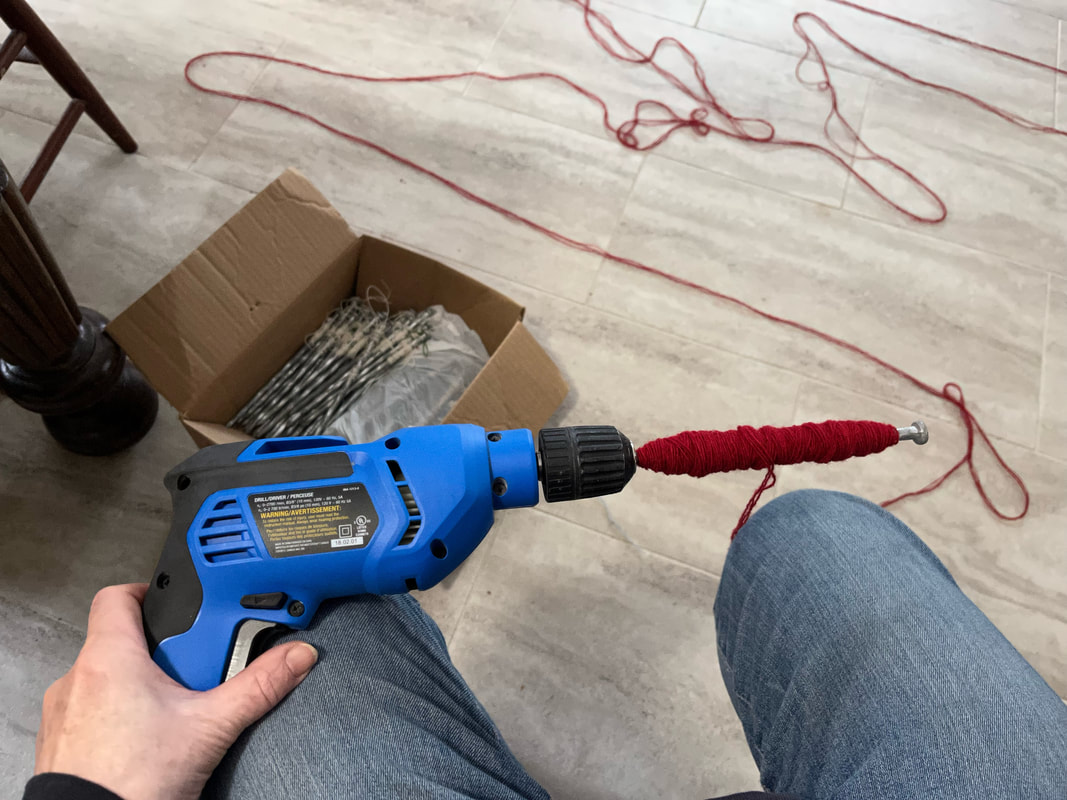
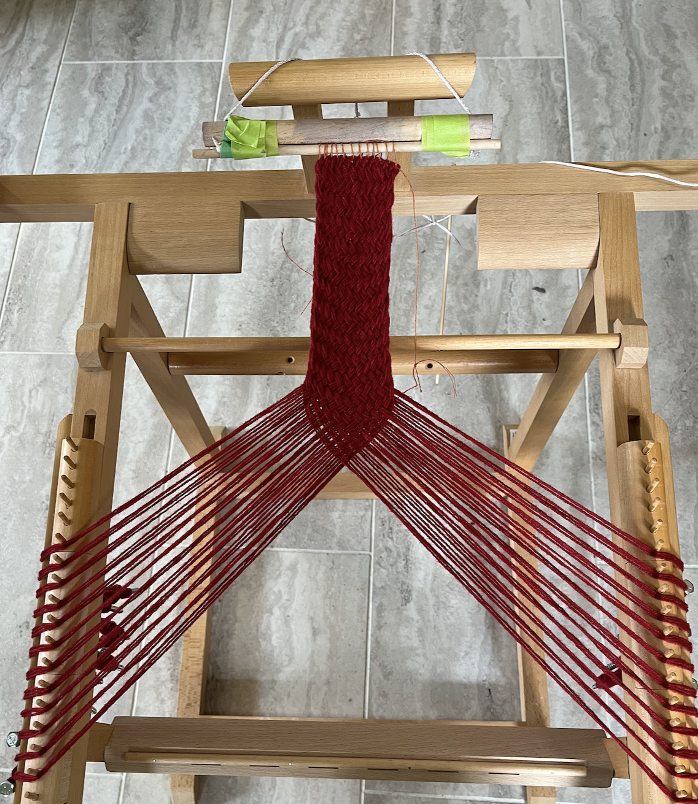
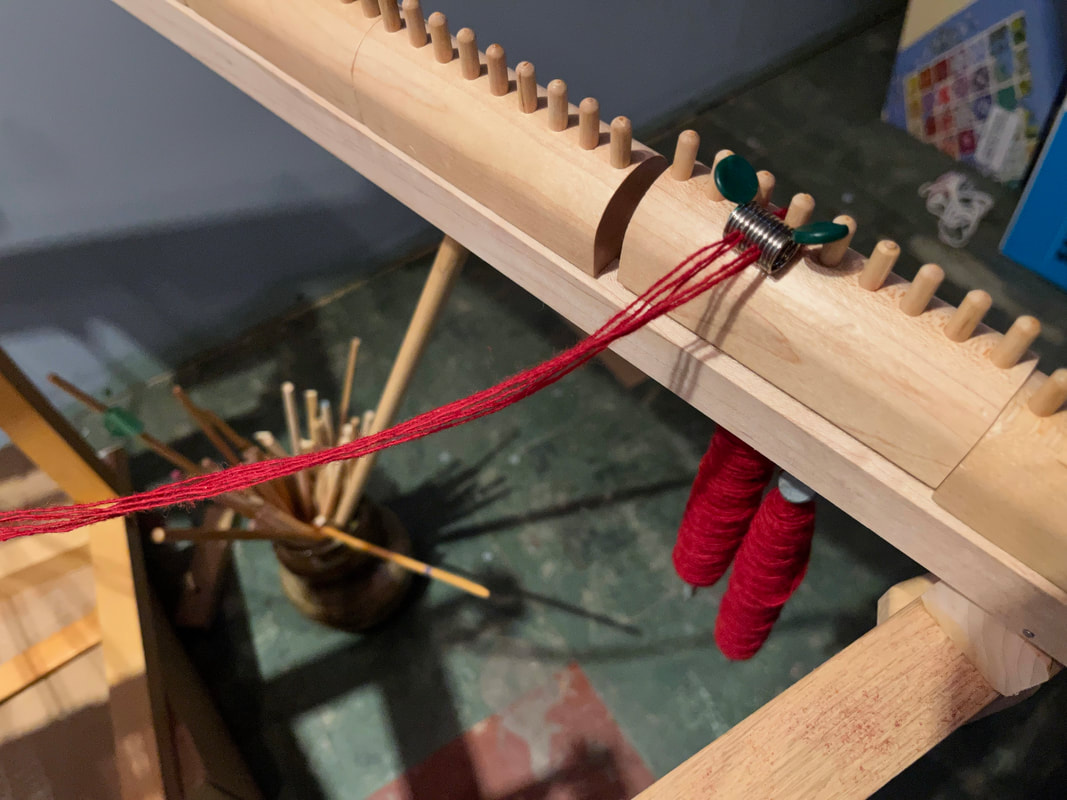
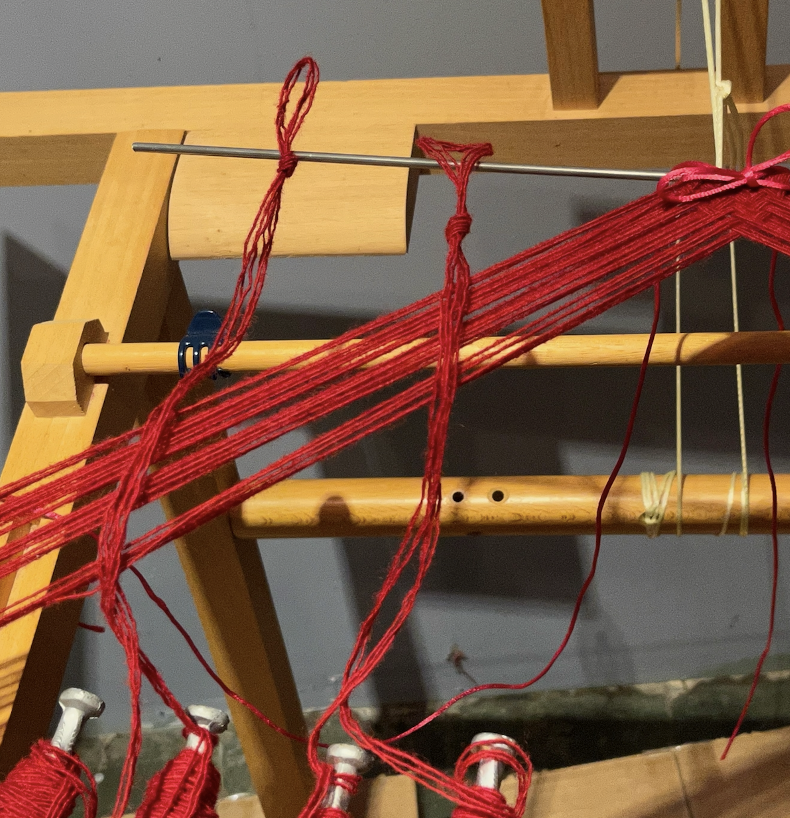
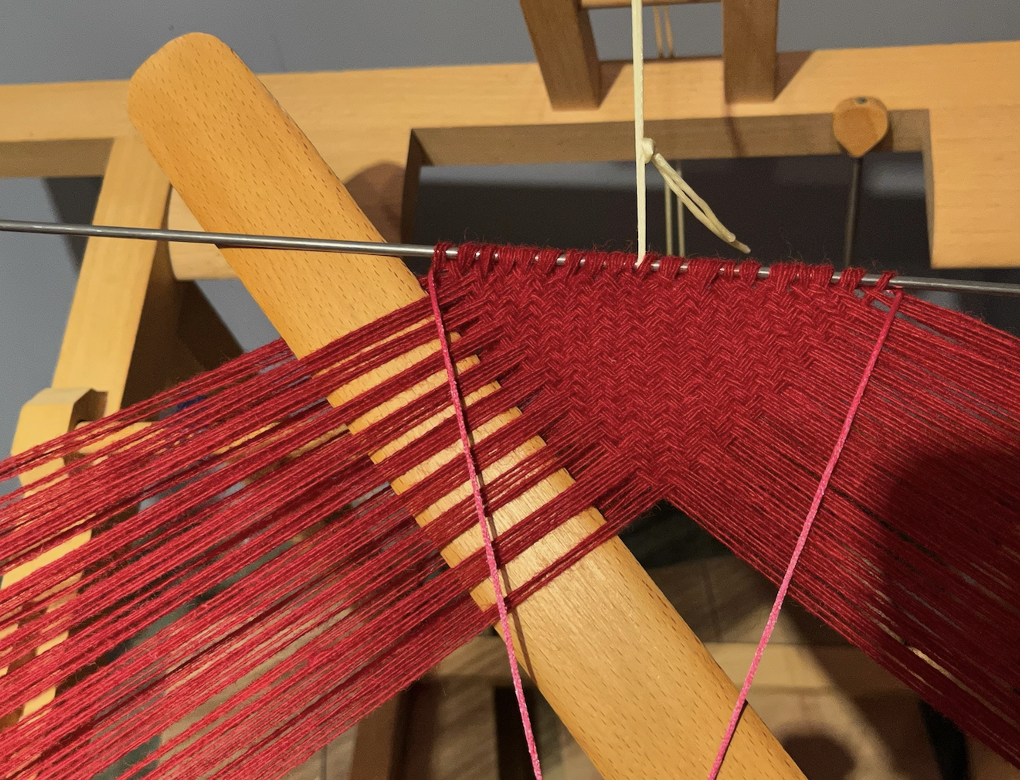
​In the end I realized that I need to set up the warp using the rules for the Vertical Ribs.
​I measure out the warp threads two at a time. I mark the center of the two warp threads by tying a large loop.
 
In this manner I begin with a set of pairs of bobbins.
Picture
Picture
​ I place a tie around the loops on the rod at the top of the structure. I work first row of 2-2 interlacing, vertical ribs. This means move 2 front threads to back position, and two back threads to front position, all the way across the row. 

After each successive addition of bobbins, I will re-tie the string to include the added bobbins loops.
Picture
With each successive row, as I create the initial triangle, threads will pass to the sides, and out of the braid. To keep track of the triangle at the centre, I decided to tie a white thread to the red threads that will run along the sides of that initial triangle.
The threads that move to the side pull on the triangle, and this creates the risk of a loose structure.
Picture
​To counteract this tendency to loosen, I use a spring clip to prevent the most recent pair of bobbins from pulling on the structure. As pairs of warp bobbins move to the side of the takadai, I move the spring clip to hold that most recent warp thread pair. 
Picture
I add pairs of bobbins to either side, and I then work another row: 1 thread off to the right, then 1 back thread moves to the front. Then 2 front threads move to the back, and 2 front threads move to the front.
Repeat: 2 front threads move to the back, 2 front threads move to the front, all the way across the row, ending with one to the front, and two threads to the back.
Picture
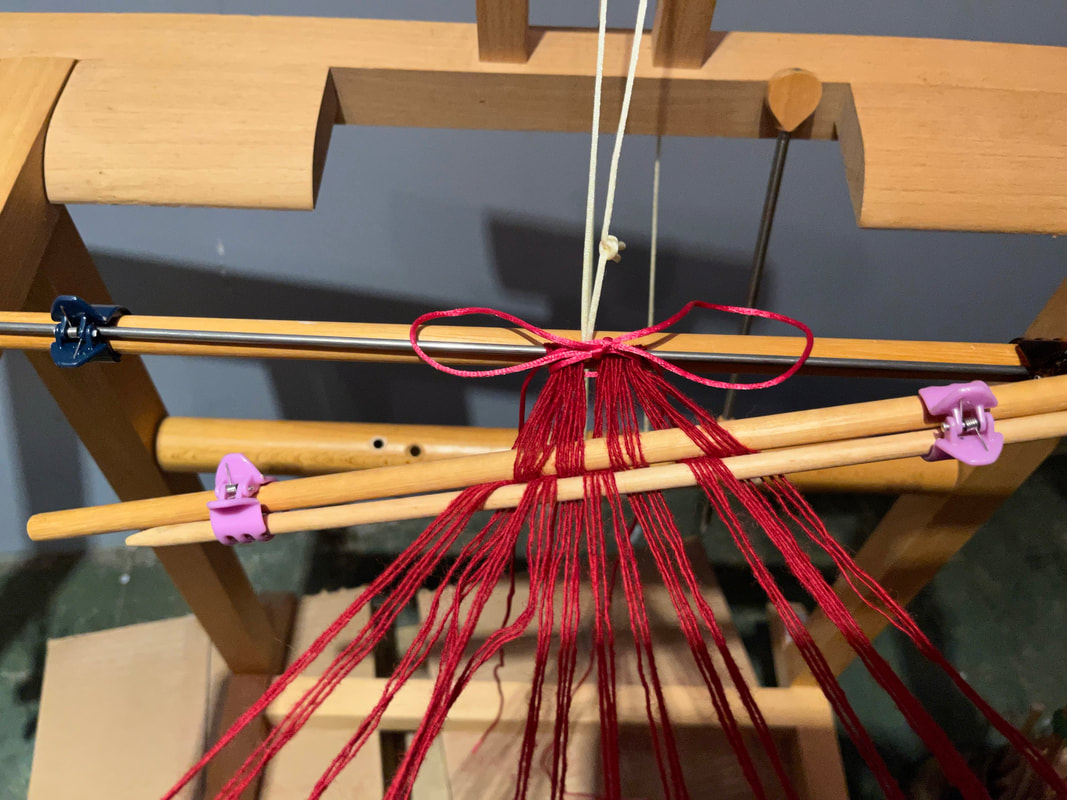
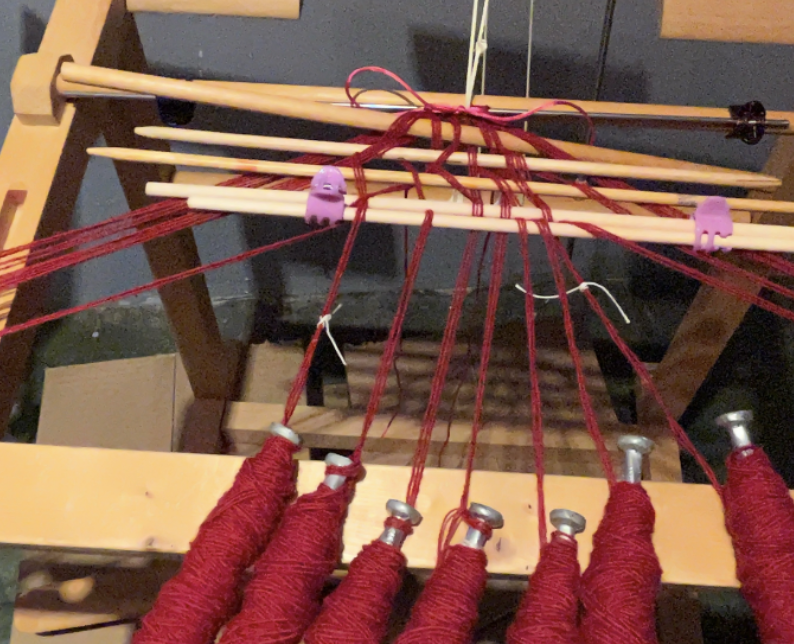
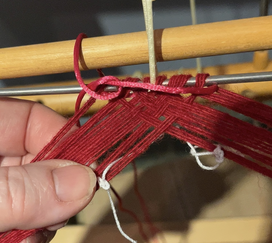
​After each row of manipulation
-Re-arrange the bobbins
-Take the threads that have passed the triangle margin (white marked thread) off to the side
​The triangle grows, 
according to the rules 
of vertical rib 2-2 interlace
Picture
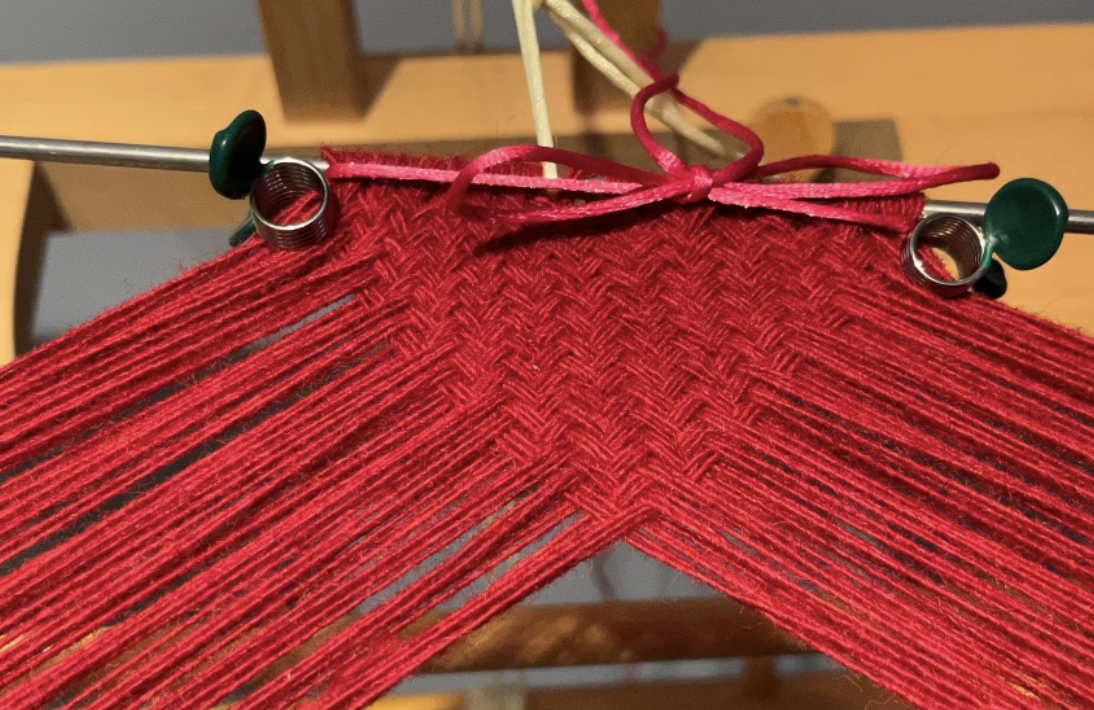
​When the margin threads (white marked threads) meet at the middle, your initial triangle is complete, and the structure has been established.
Picture
Picture
​Now the challenge is to add bobbins until the structure achieves the desired width.
I add bobbins in groups of 4 (two loops), one set of 4 to the left side, then a set of 4 threads (two loops) to the right side.
Picture
​The knotted loop marks the center of the warp, between the two bobbins.
 
Each pair of bobbins will have one bobbin going off to the side, and the other bobbin thread entering the structure.
Picture
jFind the entry path for the bobbin by tracing the path of the bobbin that is the 4th from the edge.

Here a thread added to the right side of the triangle will follow the path of the thread marked with the arrow.
Beginning at the point of the cloth triangle,
 the new thread will enter the structure by passing under 2, 
then it will follow an over 2, under 2 path, until reaching the rod along the top.
Picture
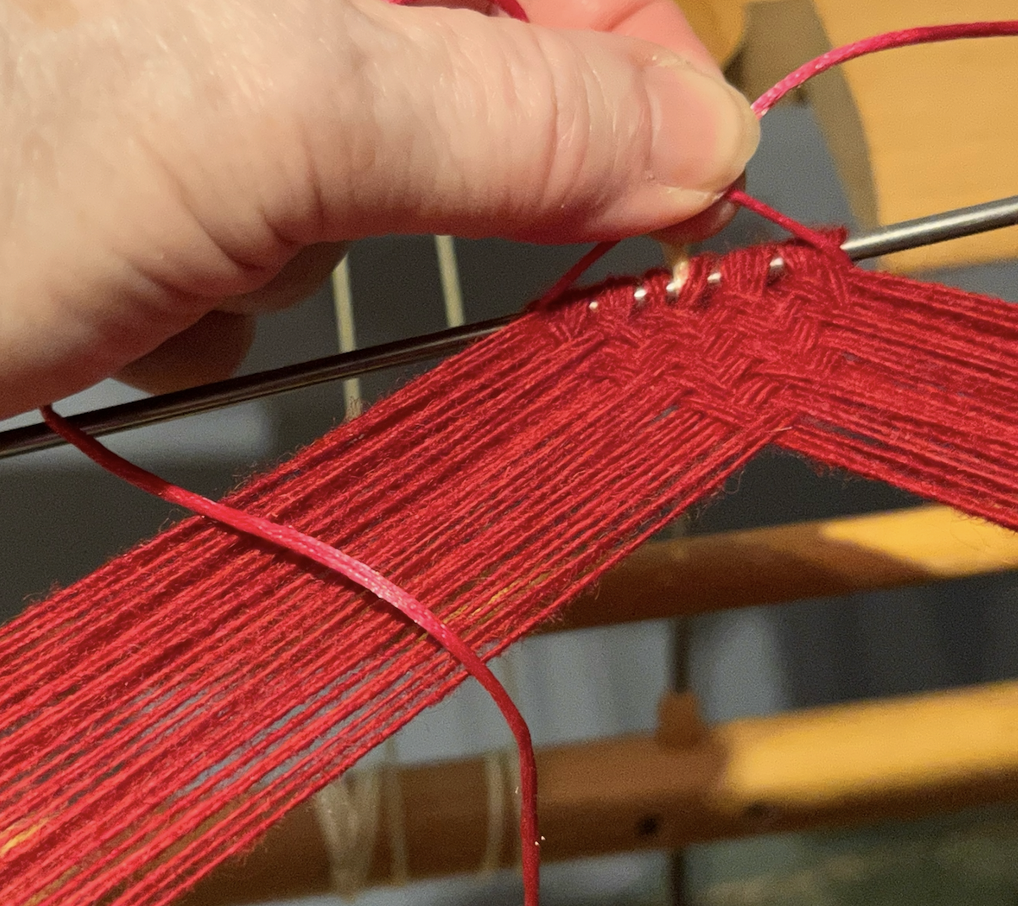
​The next added thread will enter the cloth by passing under 1, then follow an over 2, under 2 path.
​Pack each added thread tightly, using the sword.
Picture
​Untie and re-tie the cord holding the loops 
(the pink cord in the photo) to keep the loops compacted against each other, to help maintain a tightly braided structure.
Picture
​ 
Continue adding threads.
 
Pack each added thread using the sword.
 
 
Un-tie and re-tie the cord holding the loops along the bar at the top of the triangle
Picture
​To step away from the work I further stabilized the triangle using another pair of those spring clips at the upper corners of the triangle.
Picture
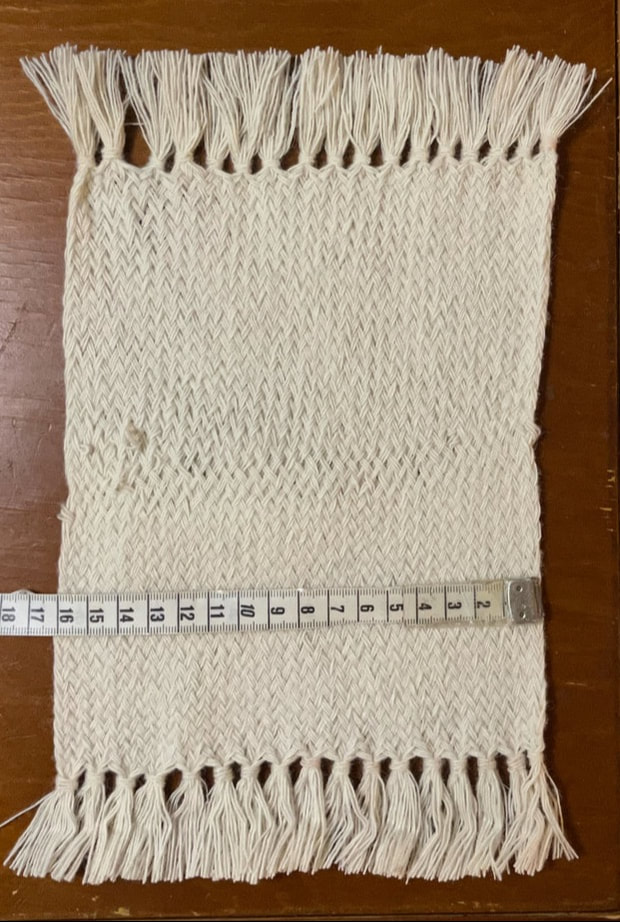
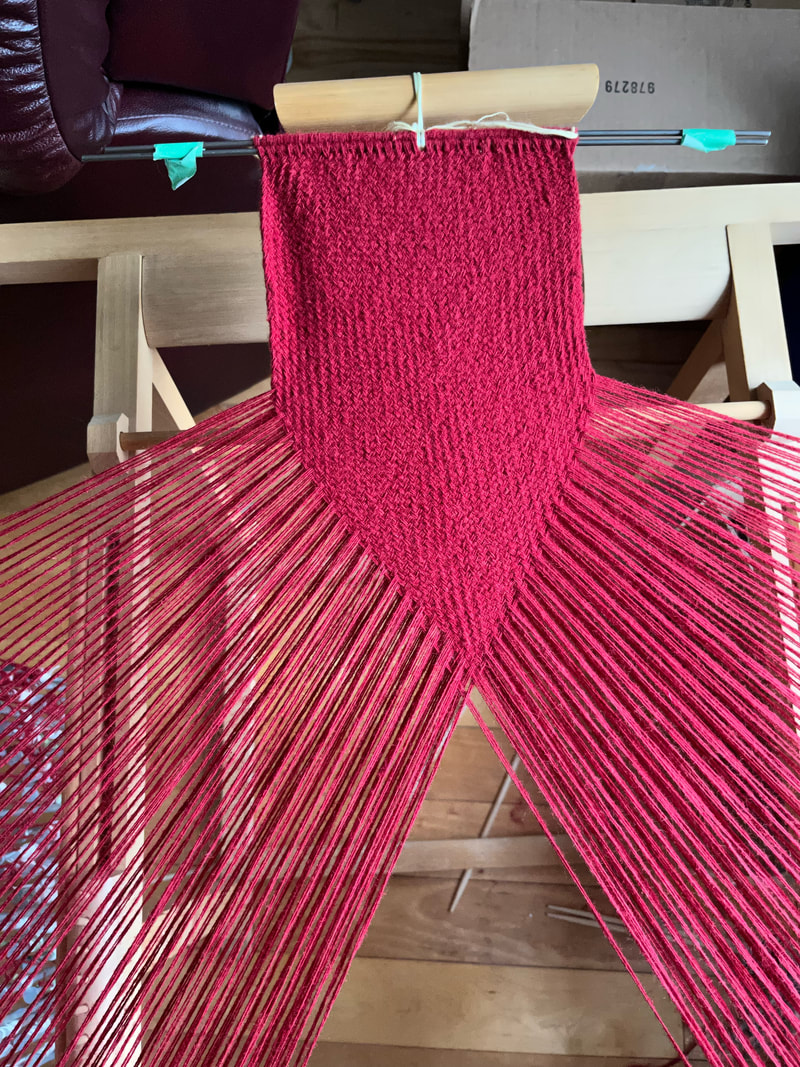
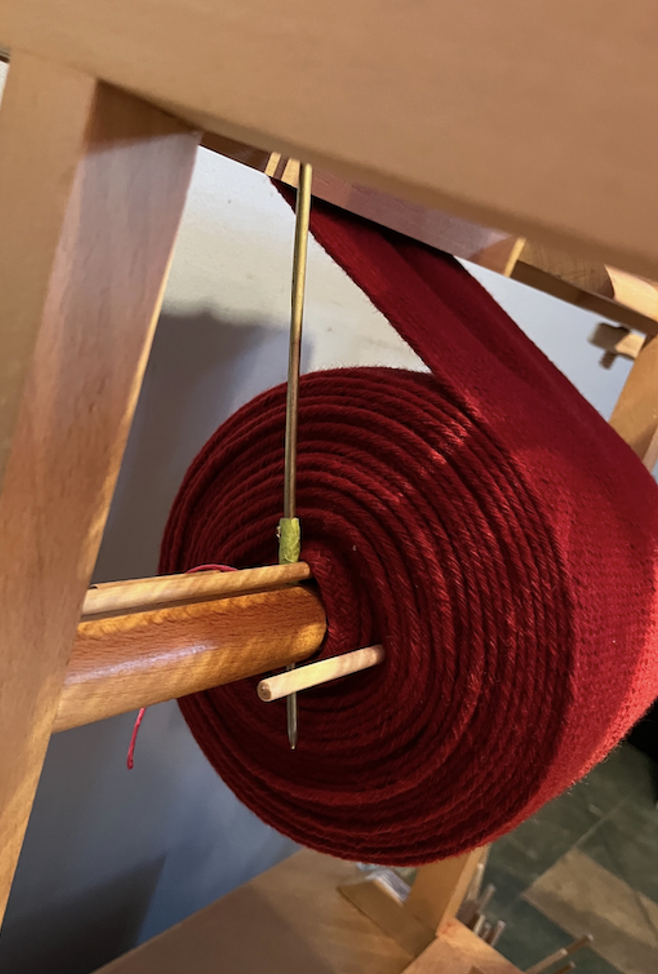
​Once the desired width was reached, it was a matter of putting in the time necessary to create the desired length. I needed to learn to check each row for accuracy. Common errors were inaccurate over-2-under-2, and Due to the fact that each bobbin holds three threads, another common error was splitting the 3 threads from a bobbin.  The other challenge was to pack each row consistently. Beyond that it was a matter of working a couple of hours each day .... for several weeks ... to achieve the desired 11 meter length.
​I found that the stretch of the cloth caused a bit of sagging at the center of the cloth. I noted a slight ruffling of the center of the cloth between the tori and where it winds up at the back of the takadai. To minimize this I decided that I needed to support the cloth when winding on. To prepare for winding the cloth onto the back of the frame each time I inserted a stick into the current shed on either side of the cloth. I used these sticks to push upwards (towards the tori) on the cloth at the same time as I wound the cloth onto the back of the takadai. This minimized the amount of sagging at the center of the cloth as it wound onto the back of the frame.
Picture
Picture
0 Comments

St eustachius' bonnet (Sprang Bonnets part 3)

3/2/2023

0 Comments

 
Part 1 of sprang bonnets starts here
Part 2 of sprang bonnets starts here
Picture

The right side of the Paumgartner alter gives us an image of St Eustachius, in military uniform, and weaving what could be a sprang bonnet.

The painting was done by Albrecht Drurer, an artist of some repute, in the early 1500s.
​
I am thinking that the bonnet could contain the padding wanted if you are going to wear a metal helmet.

Looking at the bonnet, I am thinking that the dark cloth could represent the netted structure of sprang. The yellow stripes are smooth, vertical stripes. This to me would indicate what I call vertical twining.
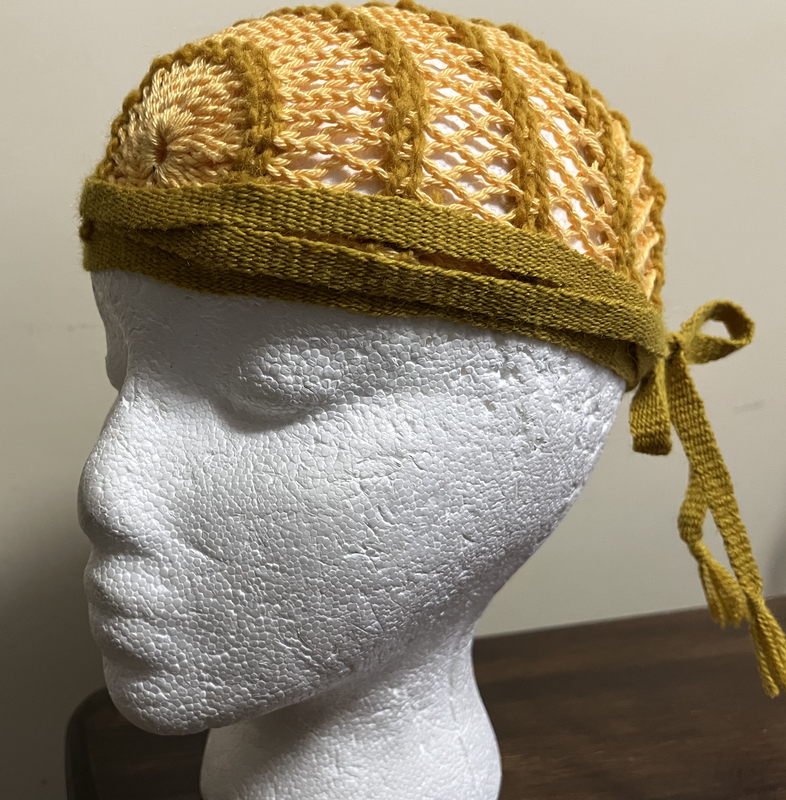
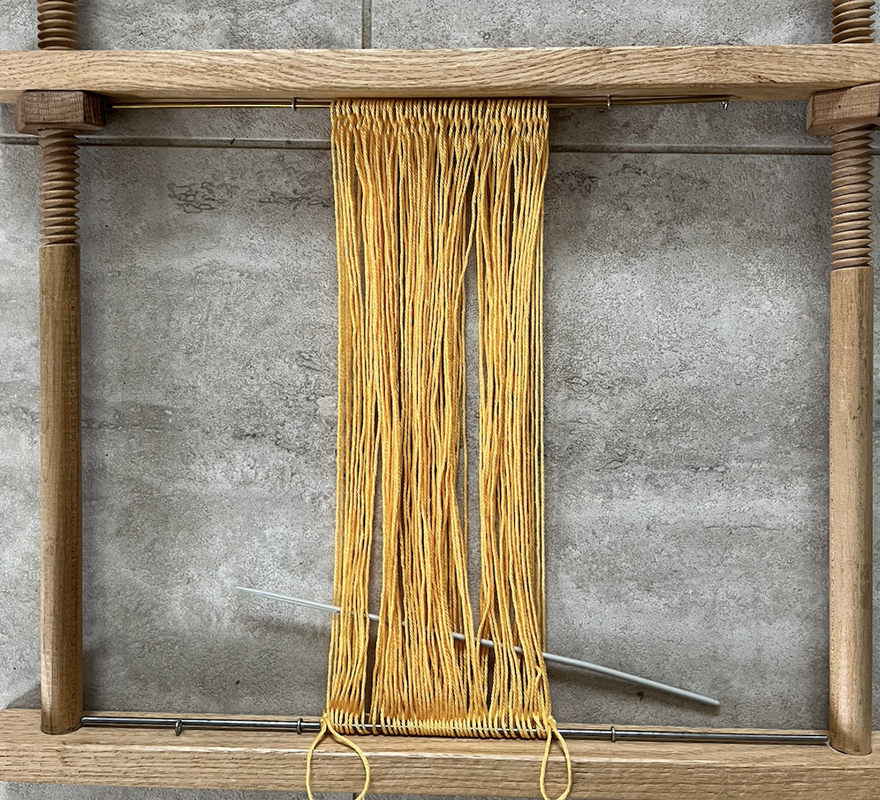
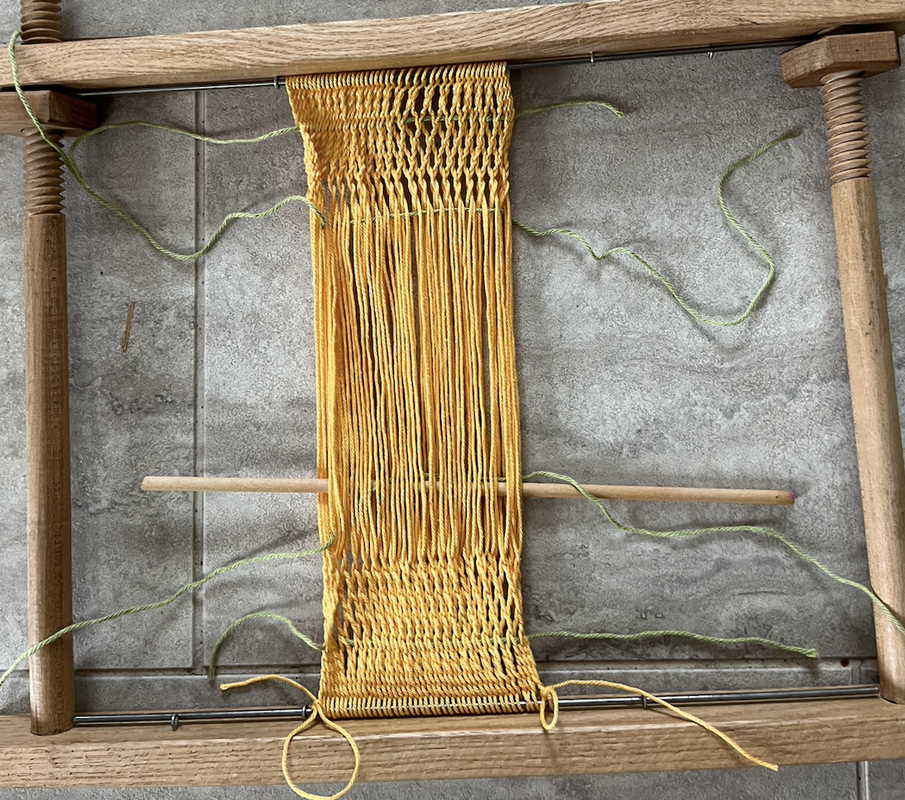
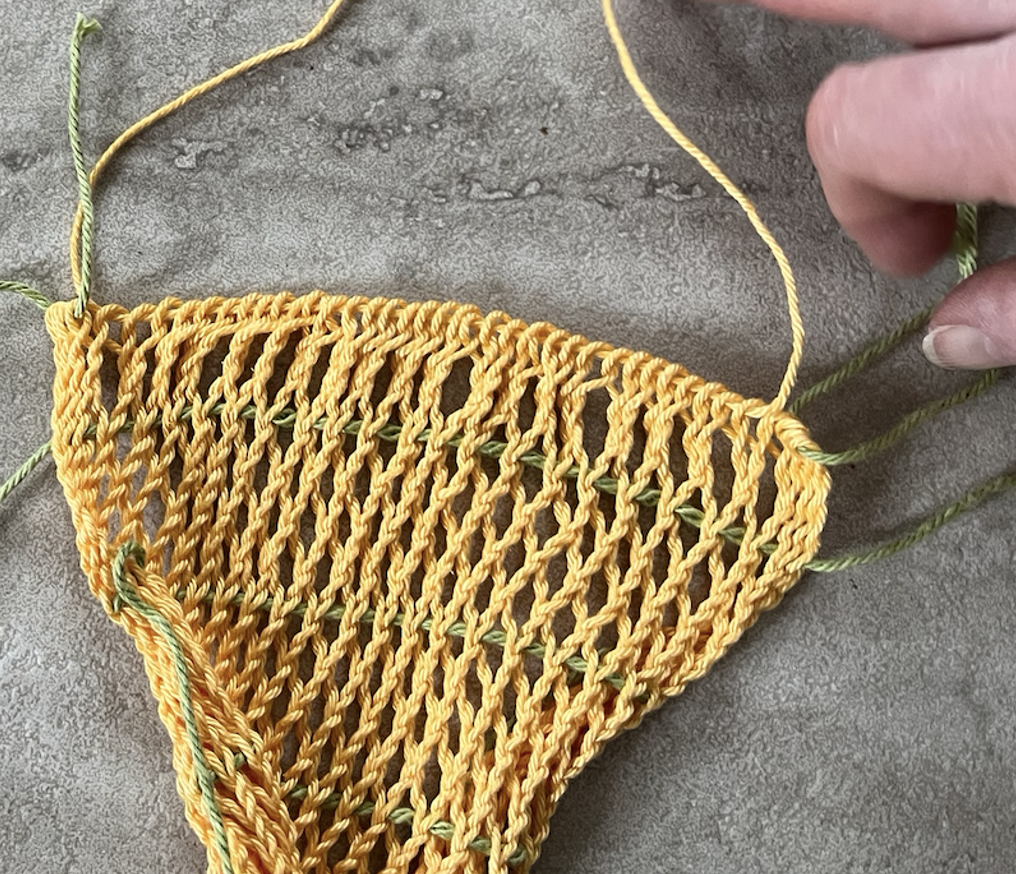
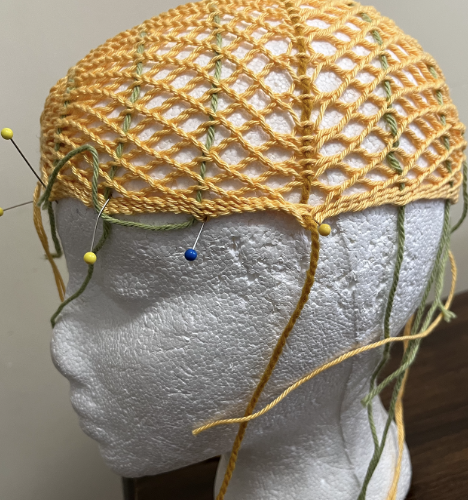
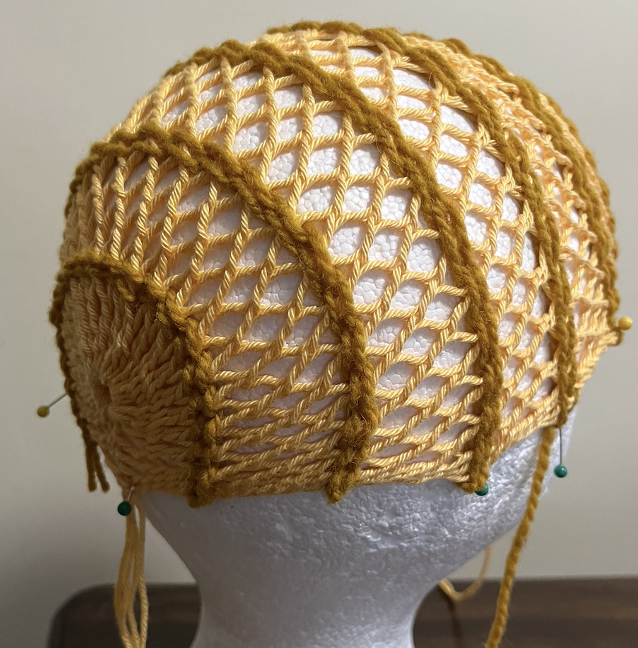
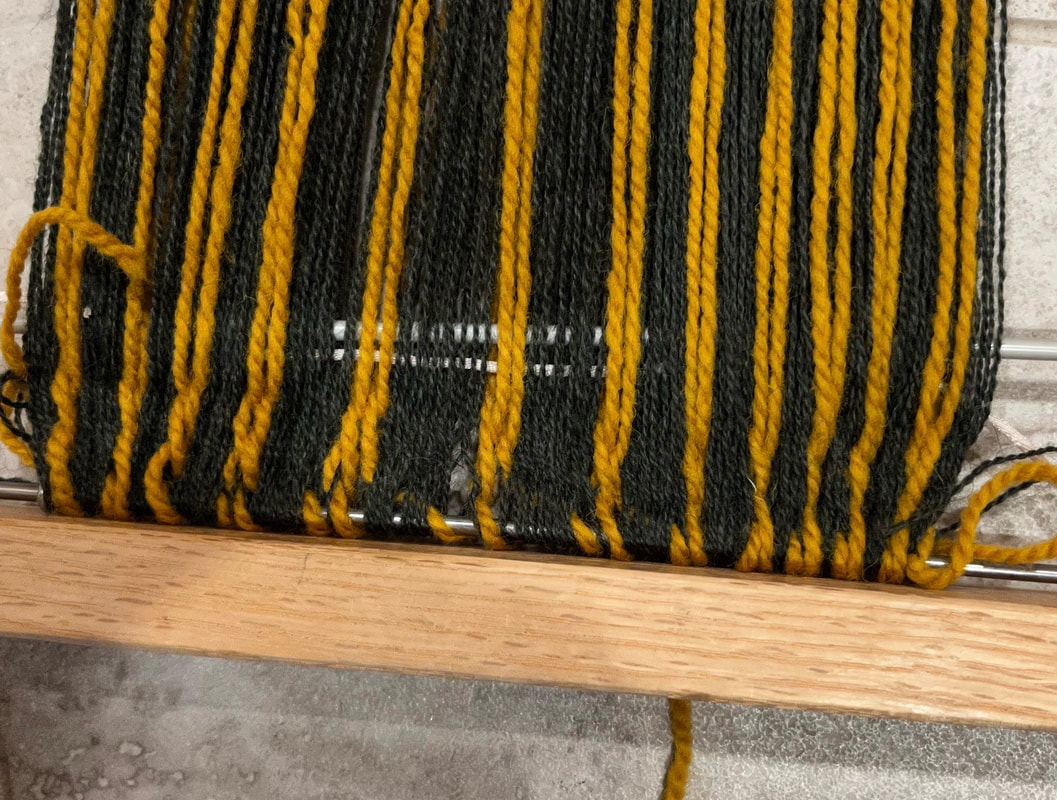
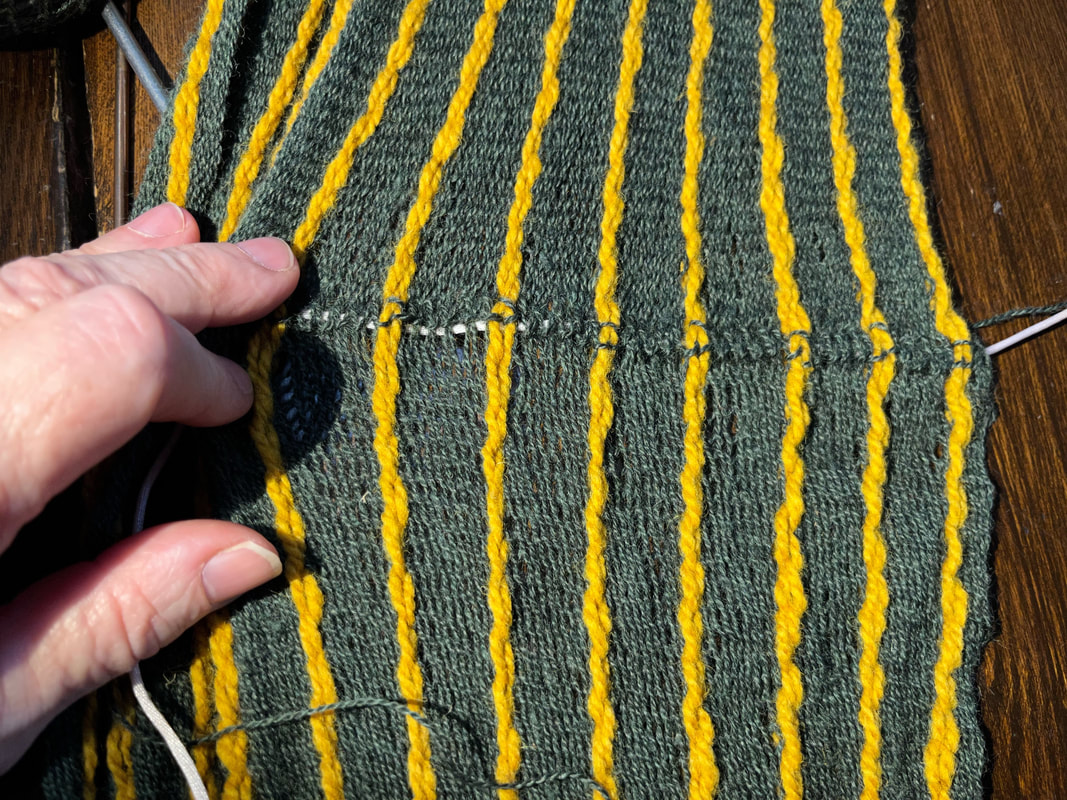
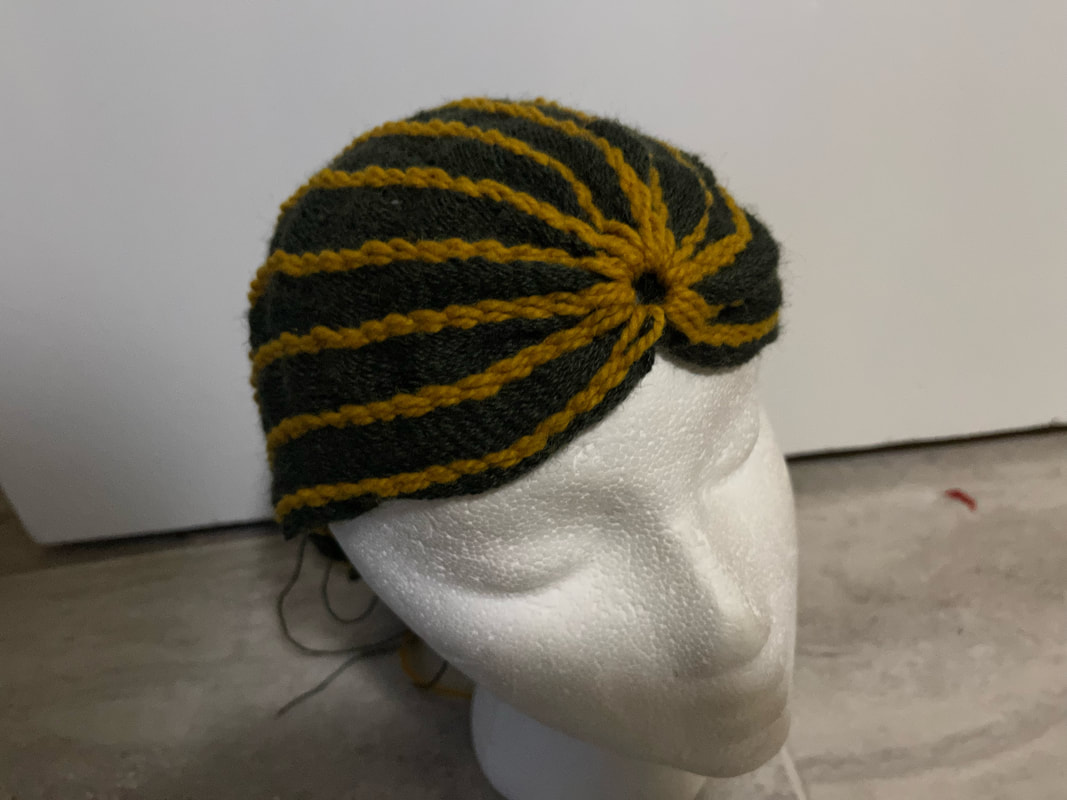
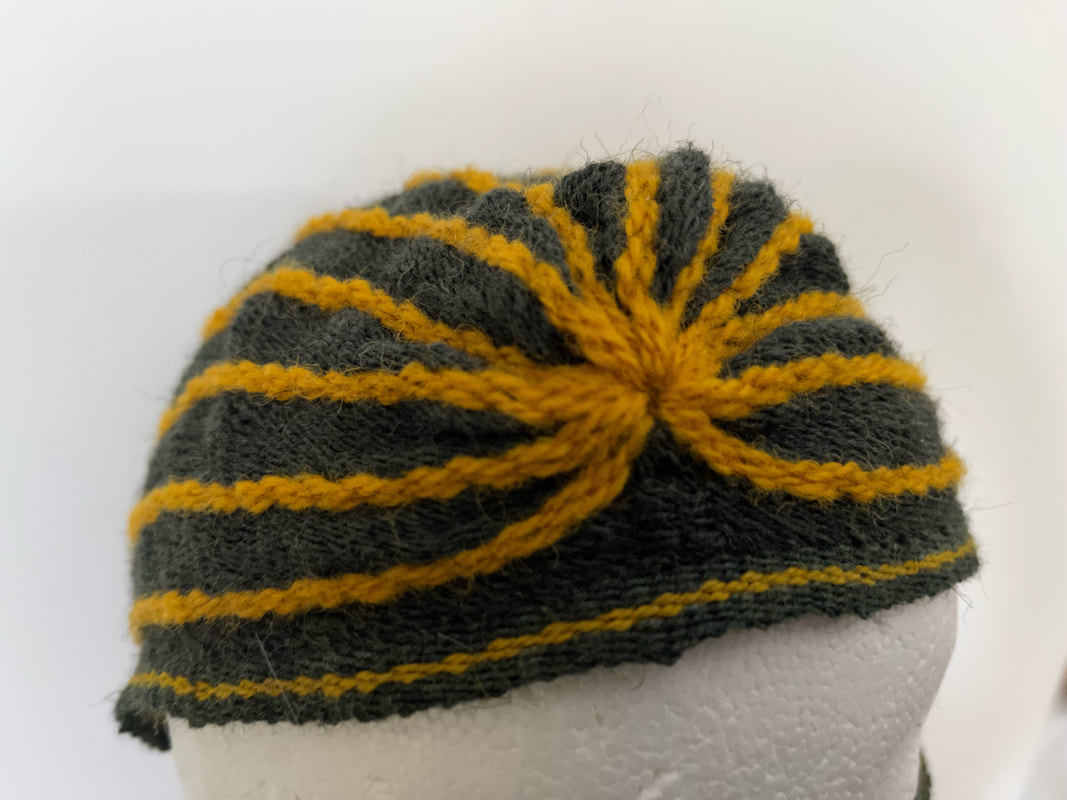
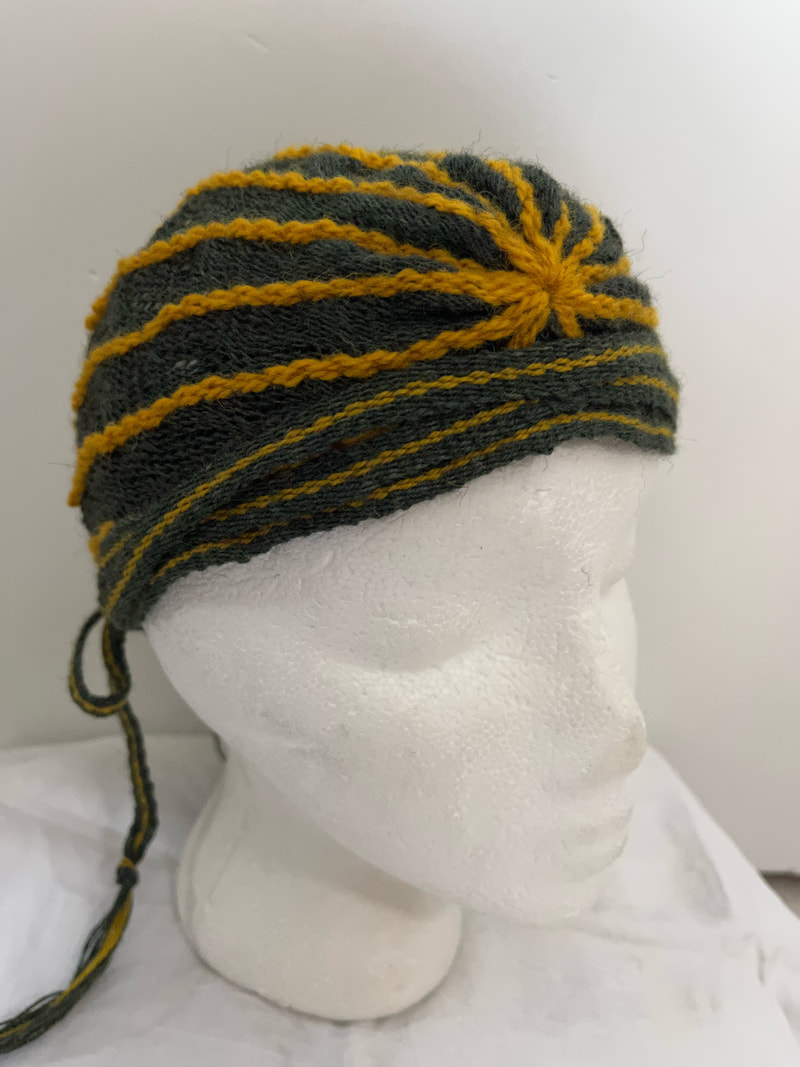
To make such a bonnet, I set up a 16 inch long (41cm) warp of a dark green 2/8 wool and a worsted weight yellow, alternating 10 green and 2 yellow, ending with 10 green. 
Picture
Picture
Along the lower loops, I passed the yellow threads through the green loops, and the green threads through the yellow loops.
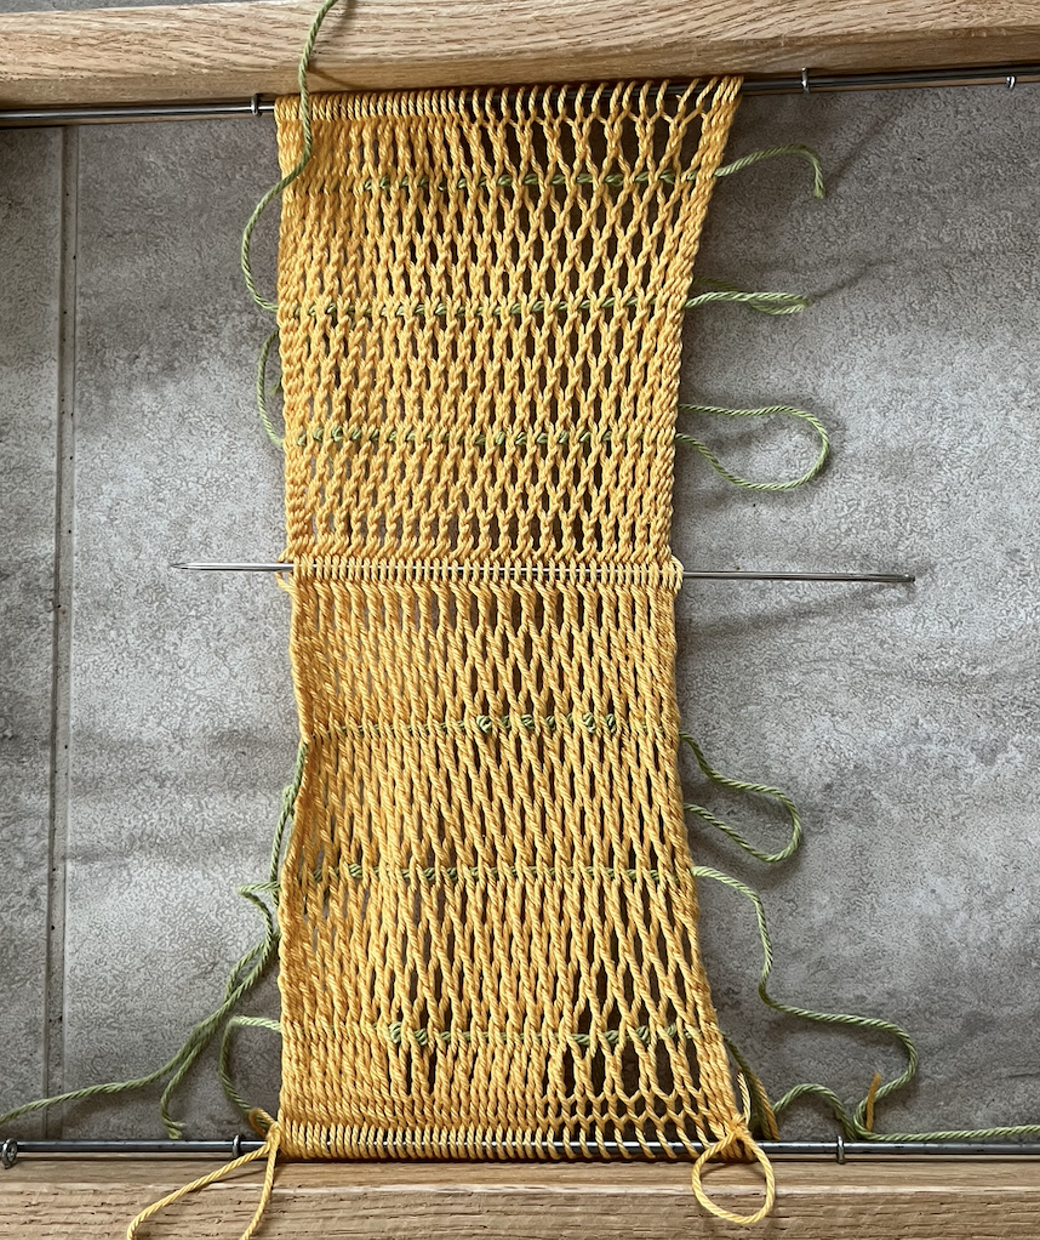
I worked the green threads in an interlinking stitch, and the yellow threads in a vertical twining stitch. I described the vertical twining in my post of Feb 2, 2023.
Picture
At the centre, I chained the green threads, to stabilise the cloth. I planned that the chain would sit on the inside of the cap.
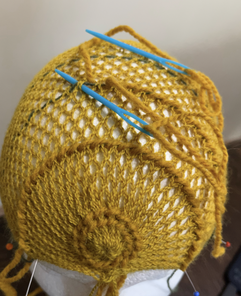
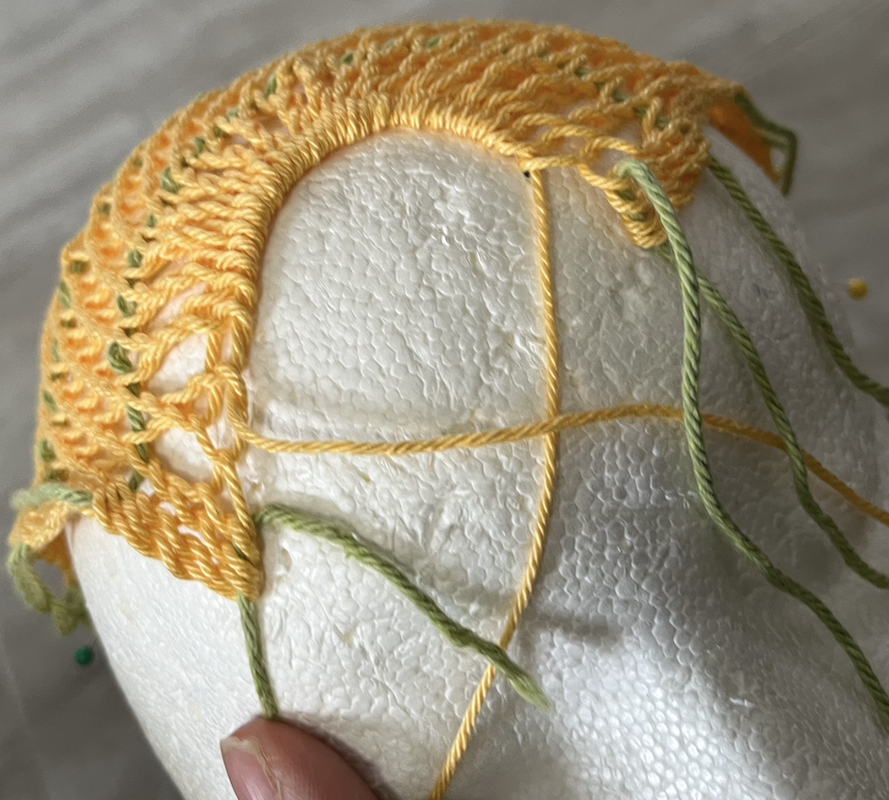
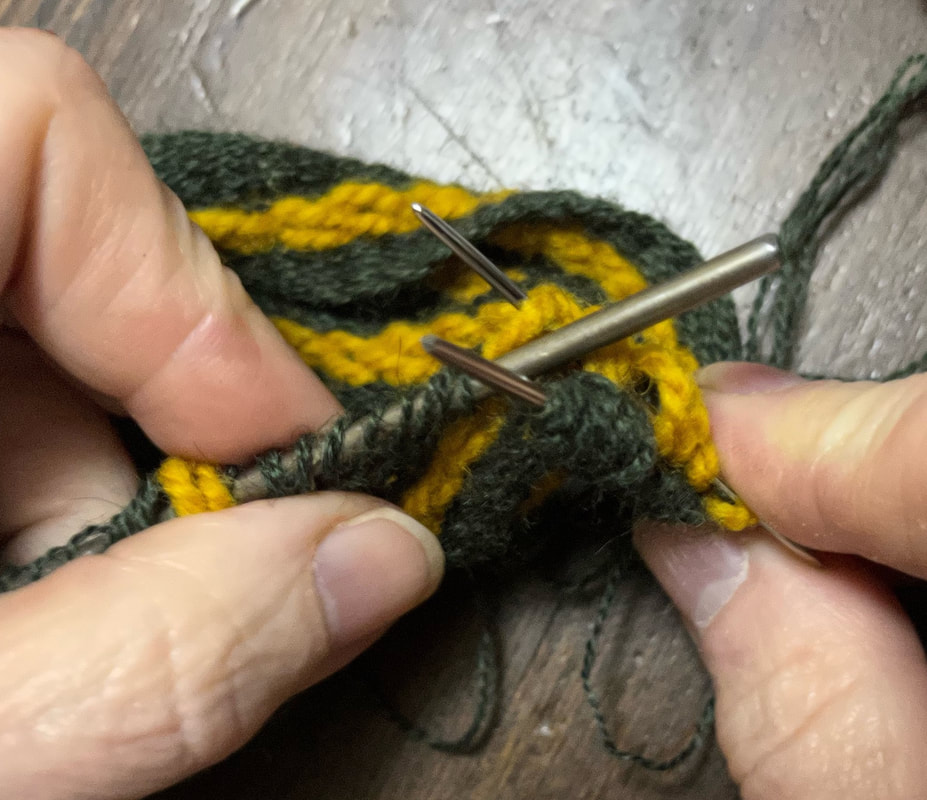
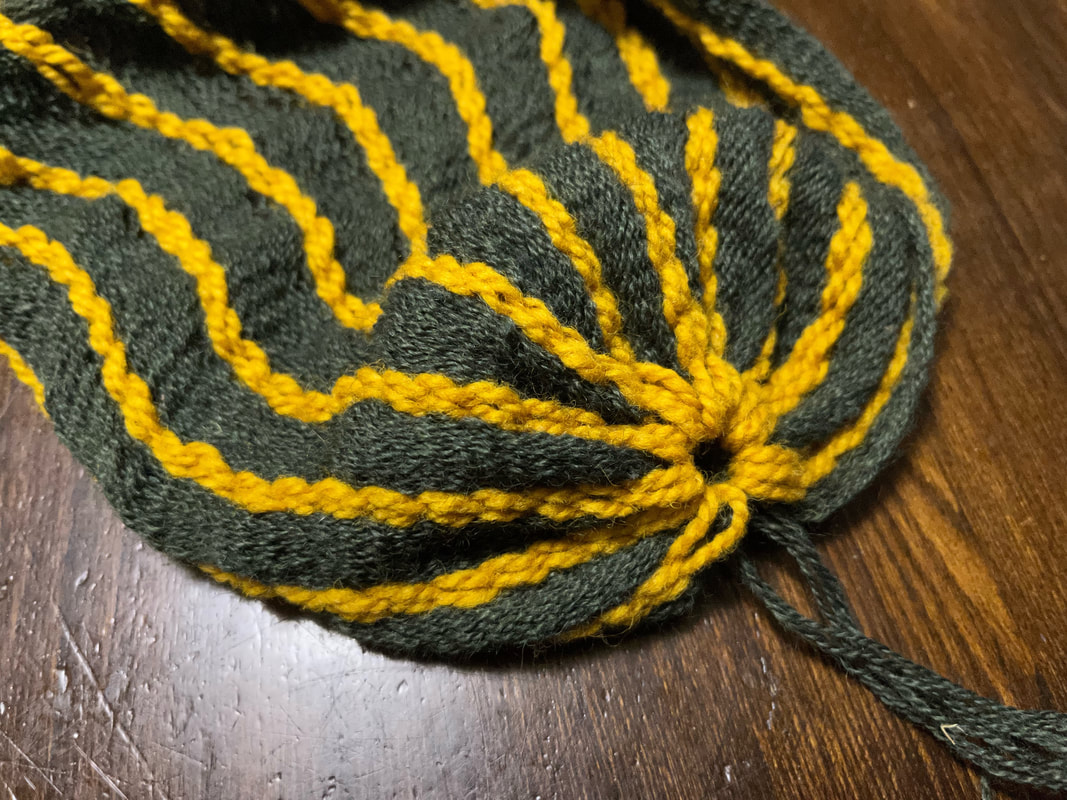
To gather the end loops, I divided the end loops into two groups, separated by color. I slid one color of loops on one blunt sewing needle, and the other color of loops onto the other blunt sewing needle.
Picture
Picture
Dividing the loops in this manner allows me to snug the loops into a far smaller circle.
Picture
Picture
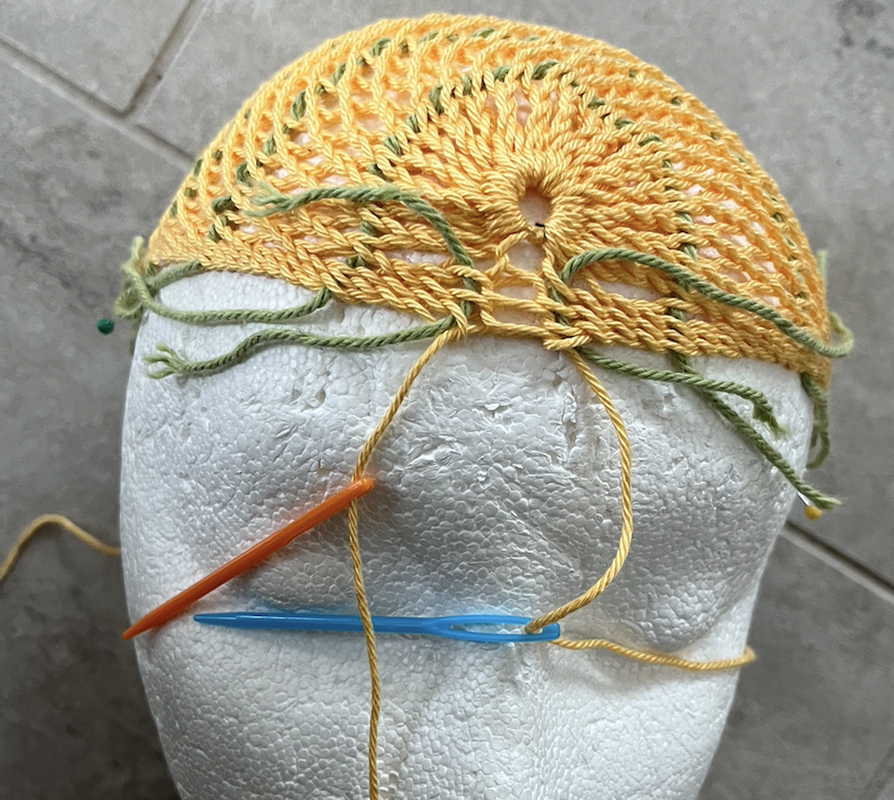
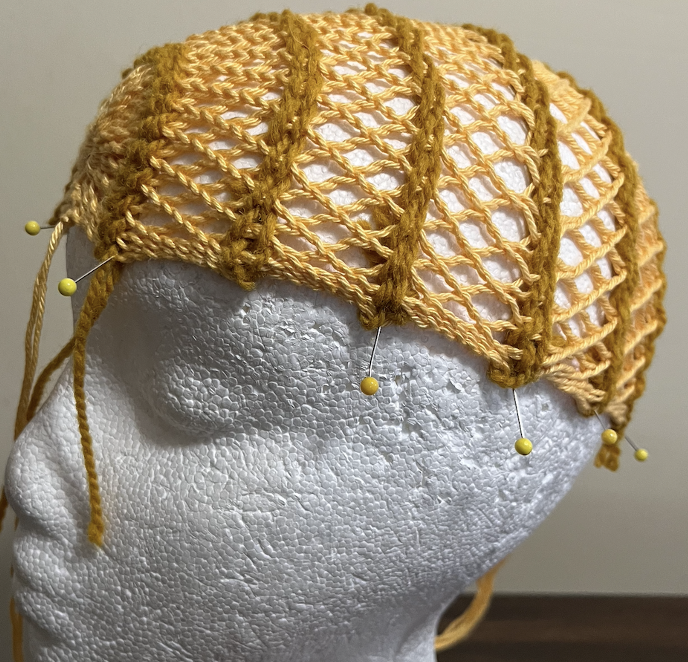
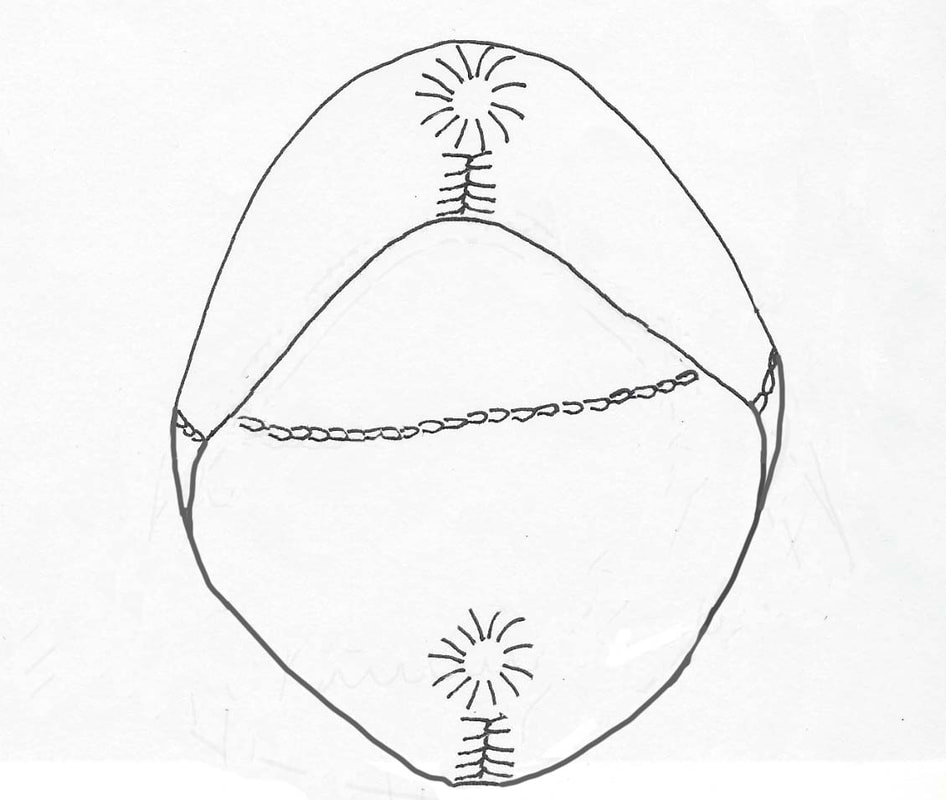
When the loops are tightly gathered there is a reverse-widow's-peak in the centre of the forehead.
To avoid this reverse widow's peak, I reserved the dark loops at either edge, did not include them in the gathering. Instead I stitched them together in a tight seam at the centre front of the bonnet. 
Picture
Picture
Picture
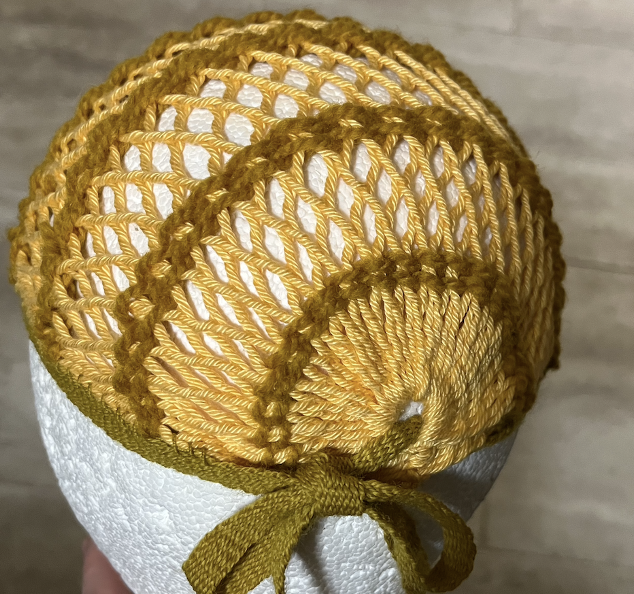
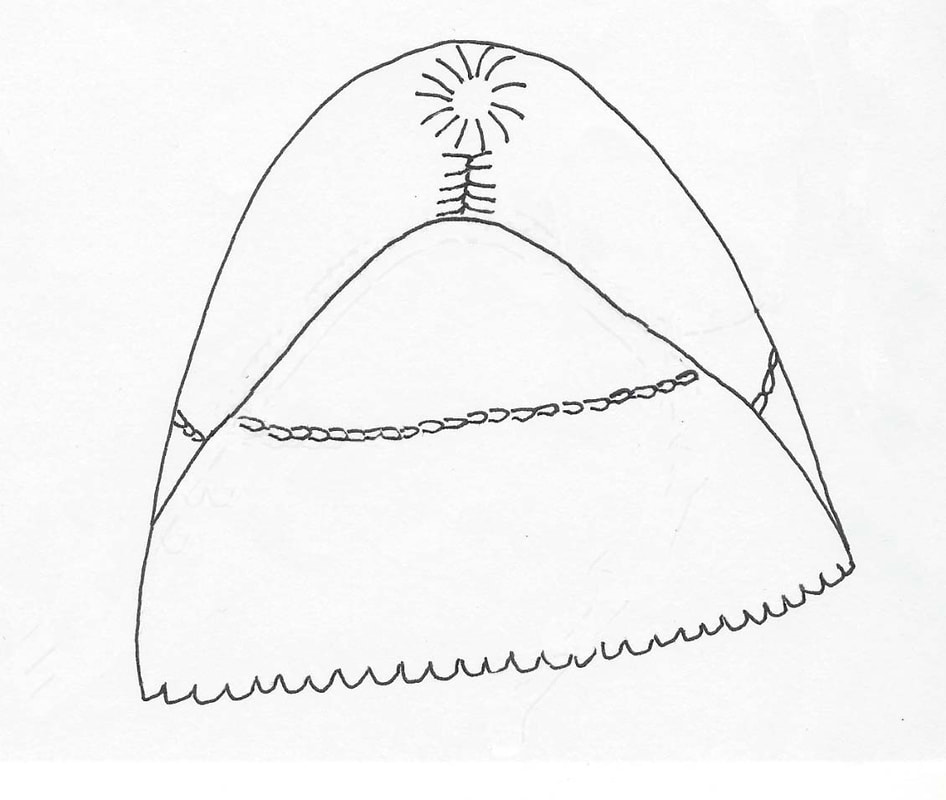
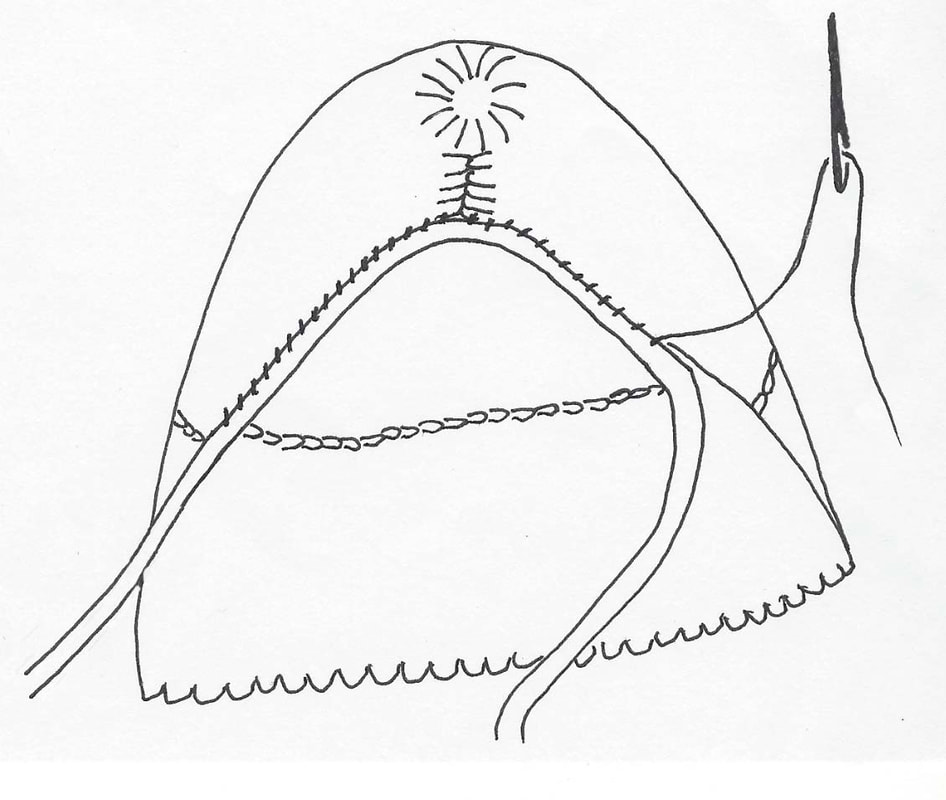
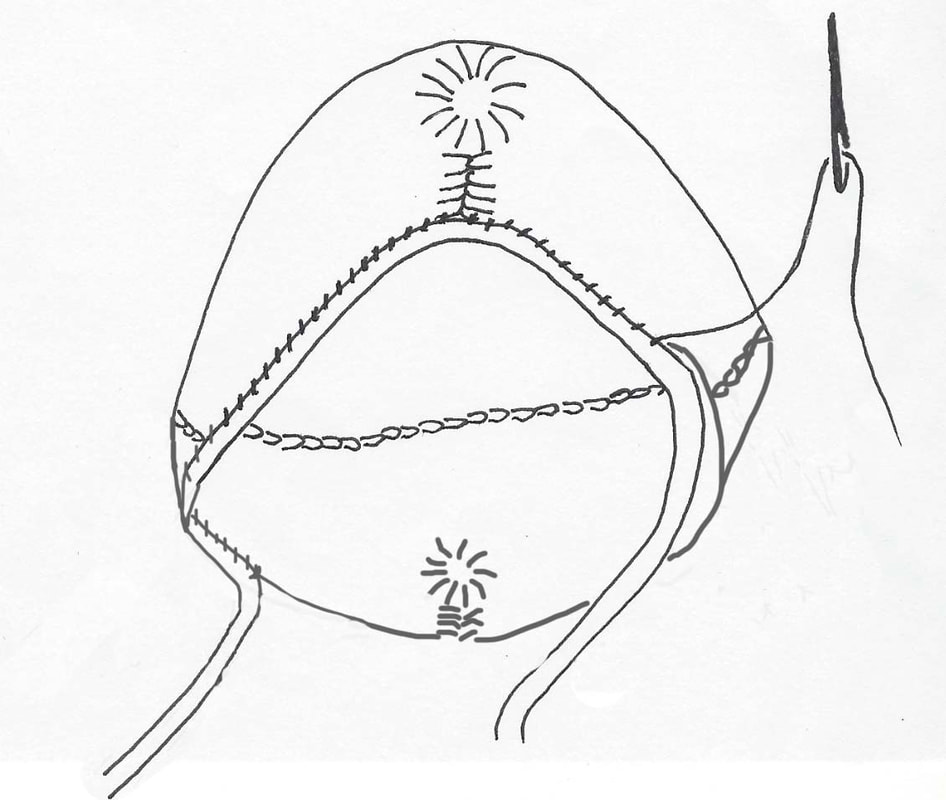
The reserved dark loops, sewn together at the forehead, make for a smoother line to which I could attach a brow band. The brow band is a length of weaving, made on a tape loom.
I gathered the loops at the back of the bonnet in a fashion similar to the treatment of the loops at the front of the bonnet..
Picture
Picture
I stitched the brow band to the front 3/4 of the bonnet, leaving the band free at the very back of the bonnet.
I thought that a person will want to be able to expand and contract the circumference of the bonnet. I pulled the un-attached ends of the brow band through the hole so that the brow band anchors the back of the hat to the head.
Picture
Picture
The brow band was made long enough to go around the head 3 times, and tie at the back. The ends of the brow band come out of the hole at the back of the bonnet, go around the head, and can be tied snugly at the back of the bonnet

I am curious to hear how such a bonnet works for people who actually wear 16th century armour and metal helmets. 
SPRANG BONNETS PART 4
0 Comments
    Carol's blog archive

    RSS Feed

    Categories

    All
    Arizona Openwork Shirt
    Art
    Book Reviews
    Books
    Braddock Sash
    Ceinture Fleche
    Clothing
    Demonstration
    Dying
    Easily Transported Work
    Exhibit
    Exploration
    Fashion Show
    Fashion Sow
    Finger Weaving
    Inspiration
    Instruction
    Loom Weaving
    Media
    Military Sash
    Museum Replica
    Museum Visit
    No Frame Sprang
    No-frame Sprang
    Patterns
    Privite Commissinons
    Publications
    Research
    S And Z
    Sash Dance
    Sprang
    Sprang Bonnets
    Sprang Bonnets Of The 1500s
    Sprang Bonnets Of The 16th Century
    Sprang Bonnets Of The Renaissance
    Sprang Clothing
    Sprang Frame
    Sprang History
    Sprang Lace
    Sprang Leggings
    Sprang Patterns
    Sprang Twining
    Student Pieces
    Tablet Weaving
    Tips-and-tricks
    Travel
    Weaving
    Website
    Workshops

    Archives

    March 2023
    February 2023
    August 2022
    June 2022
    July 2021
    June 2021
    April 2021
    February 2021
    January 2021
    December 2020
    August 2020
    May 2020
    April 2020
    March 2020
    February 2020
    January 2020
    December 2019
    October 2019
    August 2019
    June 2019
    May 2019
    April 2019
    March 2019
    February 2019
    January 2019
    November 2018
    October 2018
    August 2018
    July 2018
    June 2018
    May 2018
    March 2018
    February 2018
    December 2017
    November 2017
    October 2017
    September 2017
    August 2017
    June 2017
    May 2017
    April 2017
    March 2017
    February 2017
    November 2016
    August 2016
    March 2016
    February 2016
    November 2015
    October 2015
    August 2015
    June 2015
    April 2015
    March 2015
    December 2014
    November 2014
    September 2014
    August 2014
    July 2014
    May 2014
    April 2014
    March 2014
    February 2014
    December 2013
    November 2013
    October 2013
    September 2013
    August 2013
    March 2013
    February 2013
    December 2012
    November 2012
    October 2012
    September 2012
    August 2012
    July 2012
    June 2012
    May 2012
    April 2012
    March 2012
    February 2012
    January 2012
    December 2011
    November 2011
    October 2011
    September 2011
    August 2011
    July 2011
    June 2011
    May 2011
    February 2011
    November 2010
    October 2010
    August 2010
    July 2010
    June 2010
    May 2010
    April 2010
    March 2010
    February 2010
    August 2009
    July 2009
    May 2009
    April 2009
    February 2009
    January 2009
    December 2008
    November 2008
    October 2008
    September 2008
    August 2008
    July 2008
    June 2008
    May 2008
    March 2008

    Categories

    All
    Arizona Openwork Shirt
    Art
    Book Reviews
    Books
    Braddock Sash
    Ceinture Fleche
    Clothing
    Demonstration
    Dying
    Easily Transported Work
    Exhibit
    Exploration
    Fashion Show
    Fashion Sow
    Finger Weaving
    Inspiration
    Instruction
    Loom Weaving
    Media
    Military Sash
    Museum Replica
    Museum Visit
    No Frame Sprang
    No-frame Sprang
    Patterns
    Privite Commissinons
    Publications
    Research
    S And Z
    Sash Dance
    Sprang
    Sprang Bonnets
    Sprang Bonnets Of The 1500s
    Sprang Bonnets Of The 16th Century
    Sprang Bonnets Of The Renaissance
    Sprang Clothing
    Sprang Frame
    Sprang History
    Sprang Lace
    Sprang Leggings
    Sprang Patterns
    Sprang Twining
    Student Pieces
    Tablet Weaving
    Tips-and-tricks
    Travel
    Weaving
    Website
    Workshops

Contact Carol

Store

FAQ

Privacy policy
Carol acknowledges that we are on Treaty 1 territory, the traditional gathering place of the Anishinaabe, Cree, Oji-Cree, Dakota and Dene people and the traditional homeland of the Métis people. Carol also acknowledges that sprang is part a meany indigenous tradition and fuond in various forms all over the world. Let us re-discover this tecking together.
© COPYRIGHT 2022. ALL RIGHTS RESERVED.
  • Home
  • About the artist
    • Gallery
  • Store
  • Sprang
  • Fingerweaving
  • Virtual Class Room
  • Contact me
  • Blog