|
It's been a while since I last posted. I've not been idle. I've been working my way through some very different territory. I last posted about some sprang lace patterns. Work on those continues. I believe I've written over 300 ... but it depends on how you count ... when I write patterns for alphabet letters, does that count as a single large one, or 26 (or is it 52 because there are capital and lower case)? A big Thanks to Ria Hooghiemstra and Debbie McClelland who have made numerous samples, caught countless errors, and made superbe suggestions. And then there's the editorial work of organizing the patterns with some kind of consistency so that others can use them. Big Thanks to Ruth Temple who is helping out on that score.
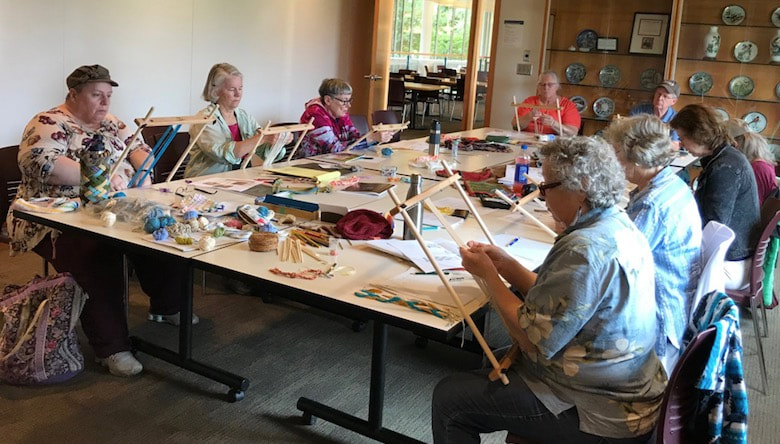
I've also been exploring ways to teach on-line. I've written out a number of new instruction sheets, and have set up a couple of pilot projects to test out ways to teach by Zoom. Very important is to figure out how to place cameras, where to sit, where to place the lights .... all necessary to get a good focus on my fingers to communicate to you how to work the stitches. A long time ago I used to teach knitting. It was a six week course to give a class the basics, develop the skills to start to feel independent with the technique. My instinct is that learning sprang is the same thing. The problem is that guilds invite me to travel to teach in their town. A six week long, once-a week class is just not in the discussions. But now that I'm thinking about teaching on-line .... And yet another project (after much encouragement from my excellent daughter Claire) has me looking at a subscription based do-a-long. I have heard from many students, yes, they took the class, and yes they felt they learned a great deal in the class, but sitting here with a ball of yarn in one hand, a sprang frame in the other, and an idea in the head, and just can't seem to get to making it all happen. More than one former student has described this state to me. I put it back to the crash course I've always taught ... a class that is extended over weeks, would give time to absorb information better ... nevertheless what to do for people who had to endure a crash course. I've been hearing that you can sign up for a year's worth of cross stitch patterns, or knitting patterns, or quilting patterns. My daughter has encouraged me to design a program for those of you interested in exploring sprang. The key to making something that ends up the size you want is, to start by making a swatch. I'm working on a series of twelve different sprang stitches, each with a swatch.
Membership in my at-present-theoretical sprang subscription would give you support to try a new stitch each month, make a swatch, and then make a neckscarf based on that swatch. Yes, there's a pattern for a Mobius scarf, as well as for a hat, and another pattern for mittens included in the membership.
You could have a whole series of swatches. If you use the same yarn and the same number of stitches, you will have a document of different stitches and their various gauges with that yarn. You could also have a lovely collection of neckscarves of a variety of stitch patterns. I am thinking I could also add some Zoom meetings for Question and Answer sessions as part of the subscription. I want to get people to use the sprang technique. For now, my website has a button on the top, allowing you to "login". Just now that puts you on a mailing list, and you'll be sure to hear from me when this subscription thing really happens ... hopefully by mid-January 2021. If you're interested, login. And one more thing. As a member of The Braid Society who is also an instructor, I'm offering an on-line tutorial on the subject of sprang starting January 4, 2021. If you're interested, sign in to the discussion group that is braids and bands.io or https://groups.io/g/braidsandbands/ The tutorial will feature the very basics of sprang ... no frame needed ... and it's free for all those participating in that group.
0 Comments
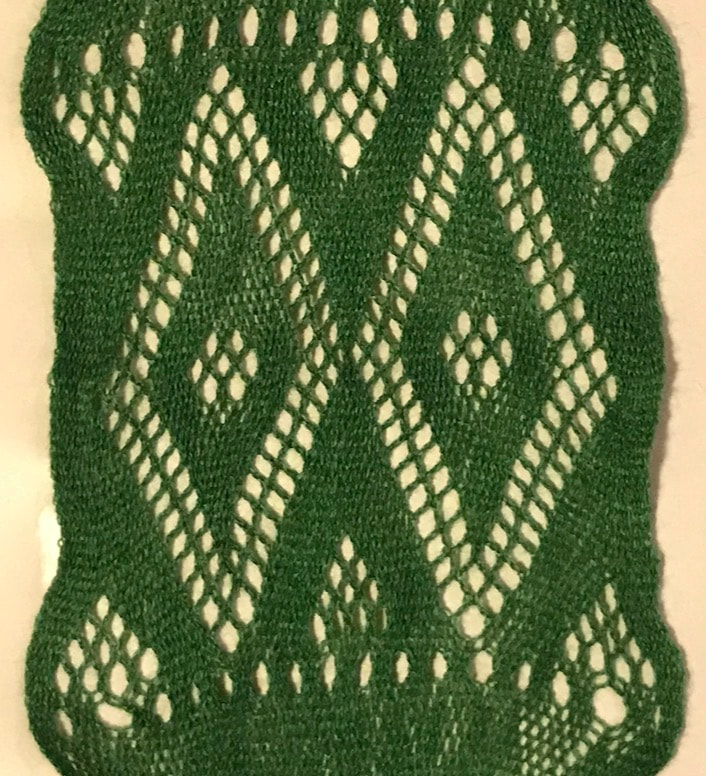
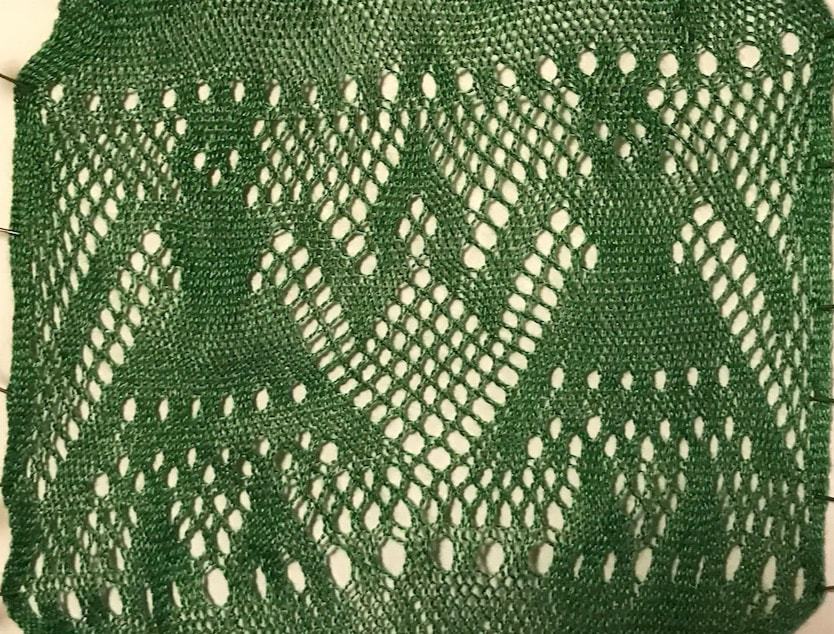
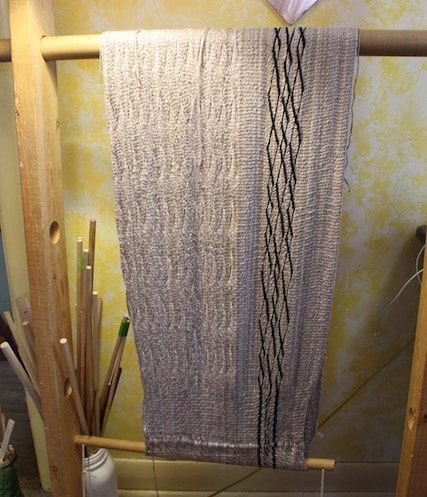
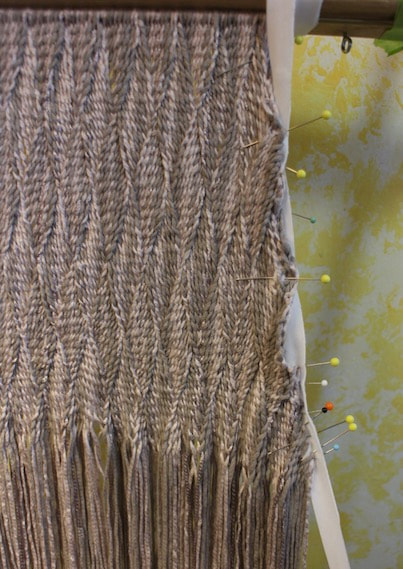
Since I've got time on my hands, all travel plans cancelled, I figured I should put my efforts to a project worthy of a great deal of time ... all those lace patterns. I've seen sprang lace in a number of collections, have photographed them, and have made some samples. Now is the time to sit myself down and to go through these, one by one, and render patterns that will be read-able to others. 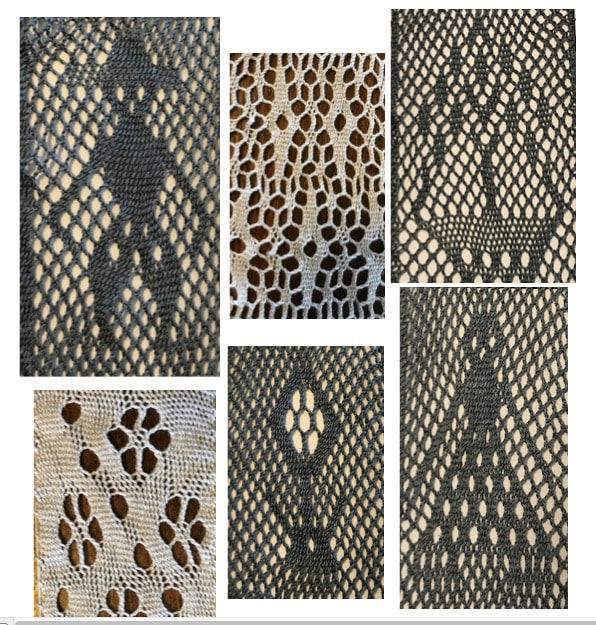 The inspiration for these patterns come from several sources. There's that book of sprang sashes, repaired by Coby Reijndeers-Baas, sashes with all manner of designs, people, boats, deer, mermaids, and a variety of geometric designs. Then there is that collection of lace from the Cinquantenaire Museum in Brussels that I visited back in 2013. Other lace patterns come from pieces in the British Museum, the Victoria and Albert Museum, the Petri Museum, and assorted other collections.
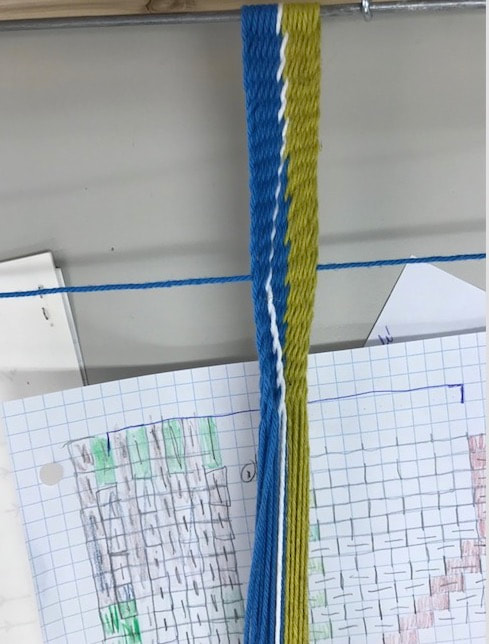
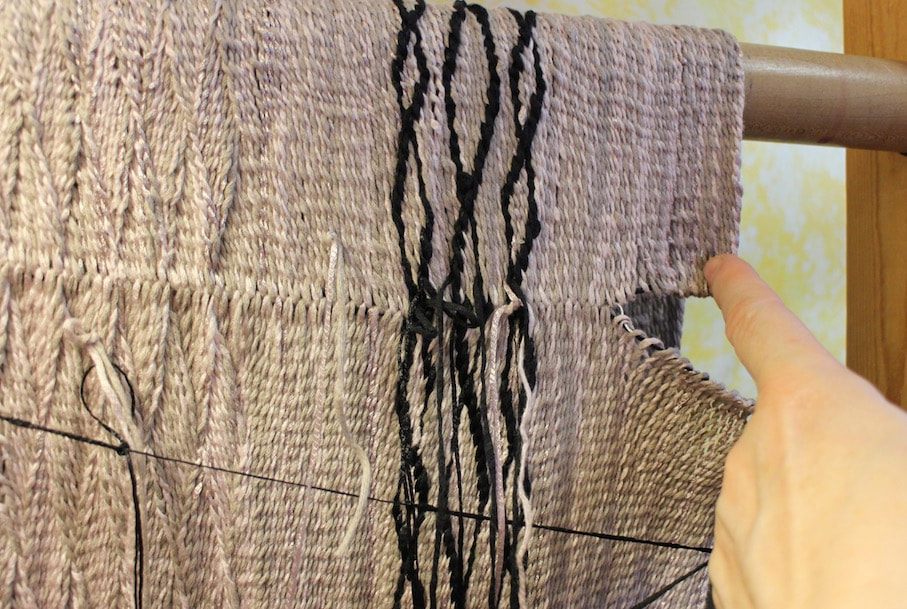
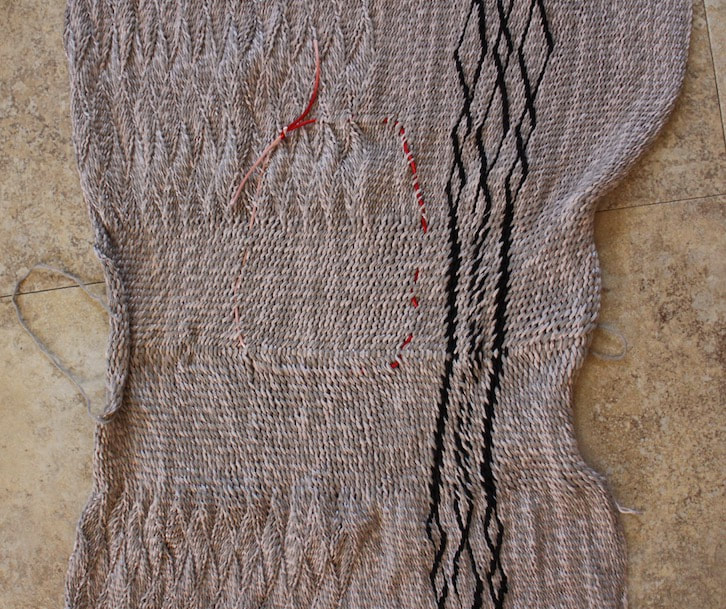
I'm working on putting the patterns onto a grid, so you'll have a grid pattern. From that grid, I'm deriving a "written pattern" that will read "right-edge stitch, 3 plain stitches, left-edge stitch". Having done that, I then set up a warp and make an actual sample, to check my pattern, and to be reasonably sure that the pattern is correct. I'd be very happy to have others check these patterns. If you're interested, send me a message by commenting on this blog, or to the "contact me" on this website.
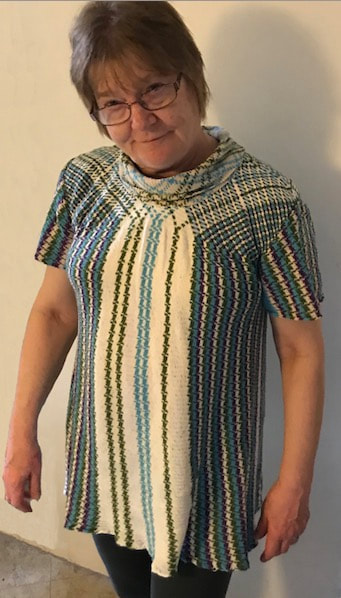
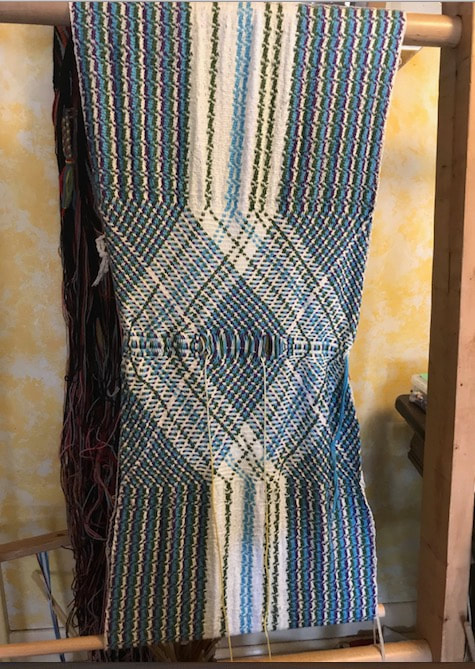
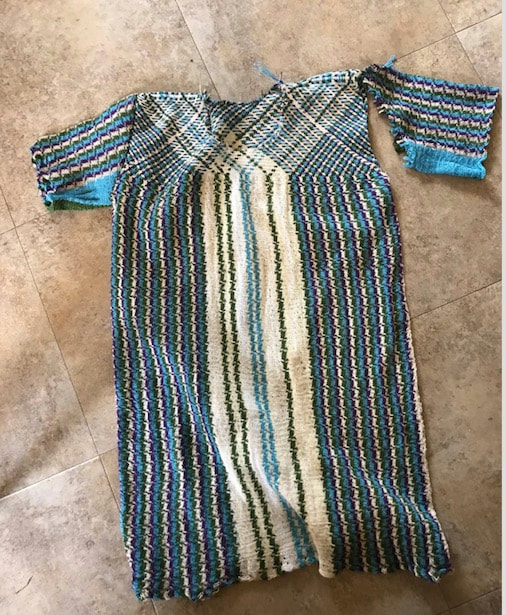
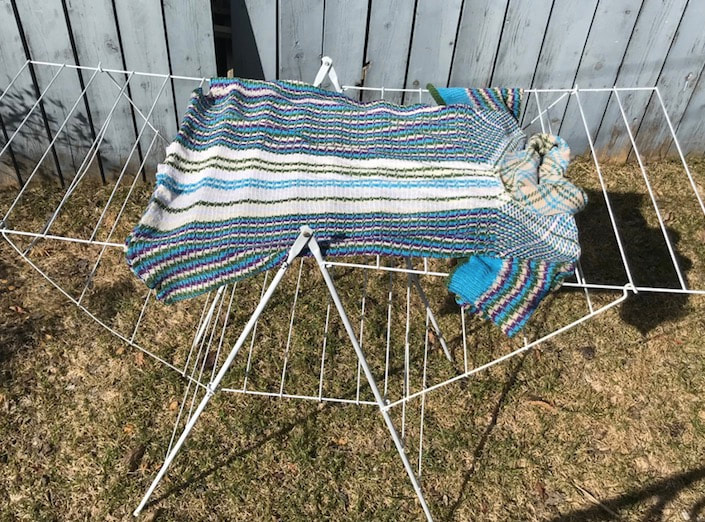
I made myself a new sprang shirt, using a 5/2 mercerized cotton from Lunatic Fringe, leftovers from other projects. Inspired by the stitch pattern in a Ukranian belt, I made vertical stripes in the body. In essence the pattern is two rows of interlinking and one of interlacing ... that means, for example, two rows of Z, and one row of S, then another 2 rows of Z, and one row of S.
The body began as a 7 ft warp, some 300 loops (600 threads). I set it up as a false-circular warp, working from hem towards the shoulders. Just beyond the armpit level, I switched to 2/2 interlacing. The interlacing is less stretchy, quite appropriate to the yoke of the shirt. Because I also doubled the threads, it created a slight gathering, meaning the yoke is narrower than the body of the shirt. I made the two sleeves at the same time, cutting threads to create the desired shape.
The collar is a piece of circular-warp sprang. I calculated that I needed some 24 inches of collar, and started with a 32 inch long circular warp.
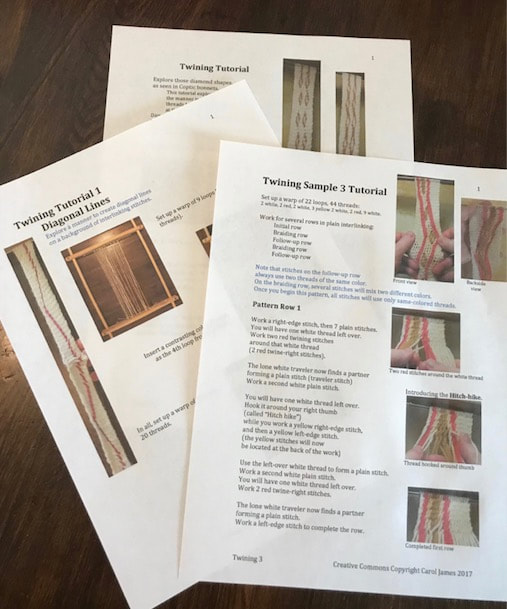
.I've been travelling, teaching in Quebec and Iowa. It's lovely to meet people, share what I know, and learn from so many talented people. As a consequence I've updated the contents of the twining patterns on my website, tweaking the directions, hopefully making them easier to understand.
The Midwest Handweavers Conference took place in Grinnell, Iowa recently, and I had the privilege of sharing with several very talented people. One of them, Jason, made it all the way through my twining patterns, and gave me some excellent suggestions. I've now edited those twining patterns on my website. Anyone who has already downloaded them, and who wants an update ... please contact me and I'll send you the new-and-improved version.
I taught sprang at the assembly of Quebec Handweavers in St George, Quebec. There I met some extraordinary fingerweavers.
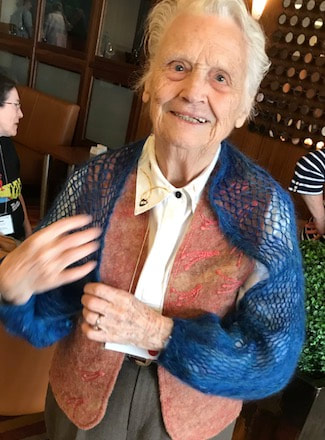
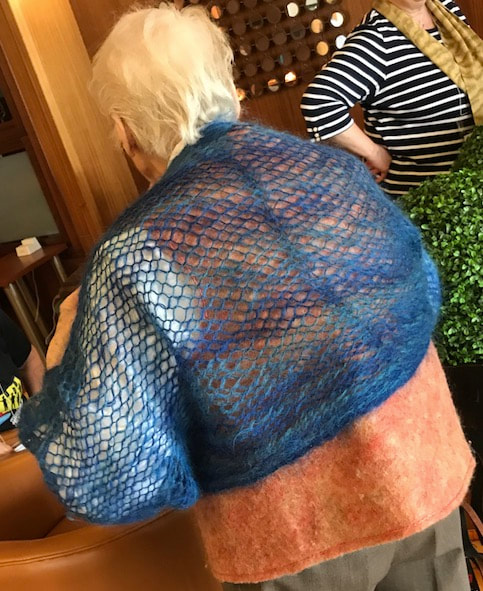
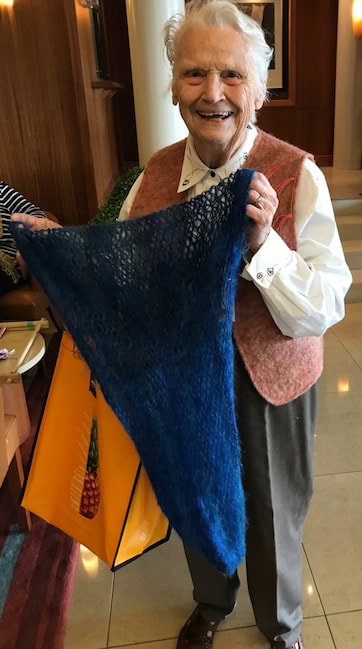
I also met Monique Dumas, who had taken a sprang class from Peter Collingwood years ago (her first encounter with someone speaking with a British accent), and who went on to be the very first to teach sprang at the Maison Routhier. She showed me her lovely sprang shrug.
My students at my class at Maison Routhier did me proud.
Lovely meeting every one of you. I wish you many happy hours of sprang.
I was talking today with members of a Colorado-based sprang study group. They had some questions, and I was wanting to refer them to a blog post of mine ... and then I realized that I never posted those pictures, never told that story on my blog. So here it is, the making of that shirt that was on display at HGA's Convergence last summer.
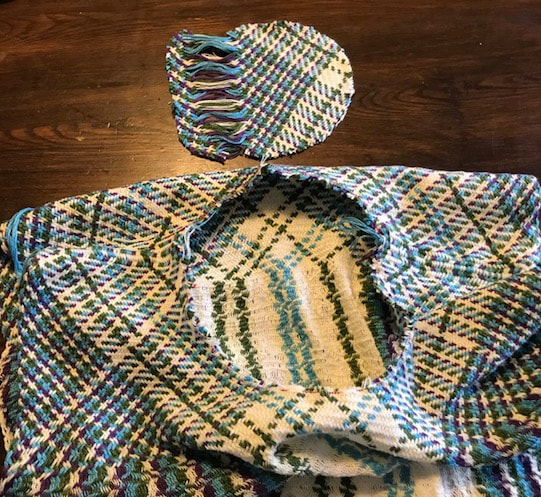
I have been exploring different ways to create a sprang shirt. The obvious way to create the neckline is to make a slit for a V-neckline. When I did this, I found that there is stress on the stitch at the bottom of that V, and it does not look nice. Because of this, I have begun to look for other ways to create that neckline. This pullover began with a false-circular warp to create a large rectangle for the front and back. The loops will sit near the hem of the garment. There is a chain line at the shoulders.
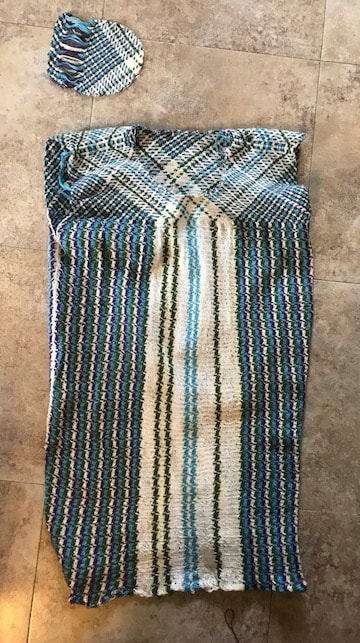
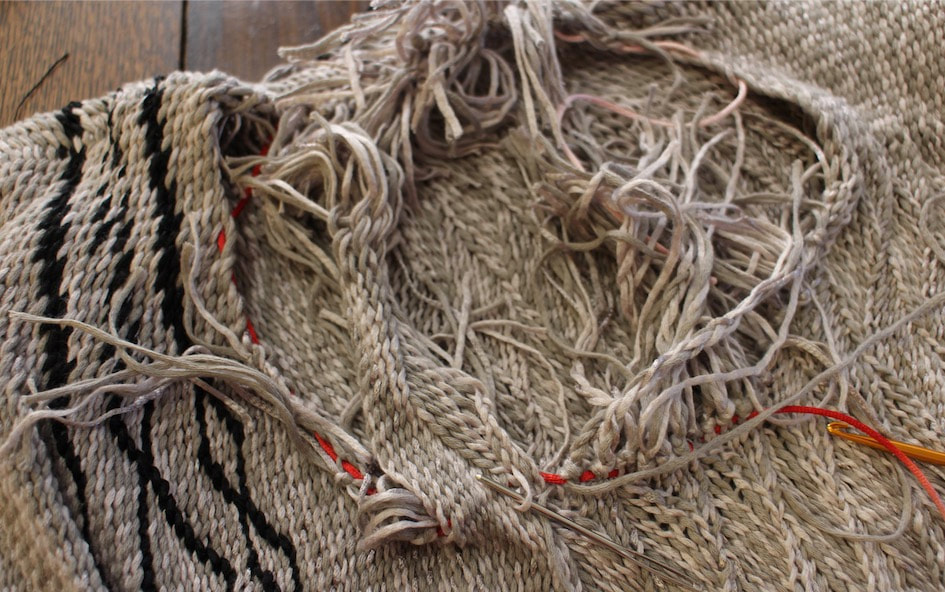
I laid the piece out flat, and traced a circle (basting stitch) with a red thread at the place that I thought should be the hole for the neck. The hole must be as large as the circumference of my head. I then cut across the stitches inside this hole, being careful to leave threads long enough to tie knots. I unravelled the stitches to the place of the red thread, and tied knots. This gave me a neck opening, with unsightly knots all around. I covered the knots with a collar.
The collar started out as a long flat warp. I chose a 2-2 interlacing stitch for the collar. For the sleeves, I wanted to try making them narrower at the wrist, wider at the shoulder. To make the cloth wider, you must add threads.
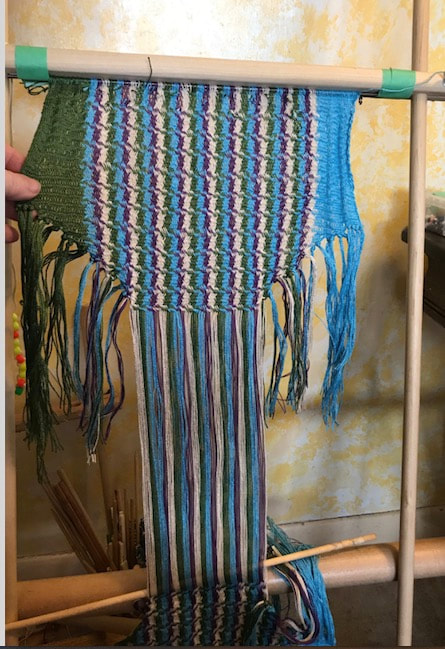
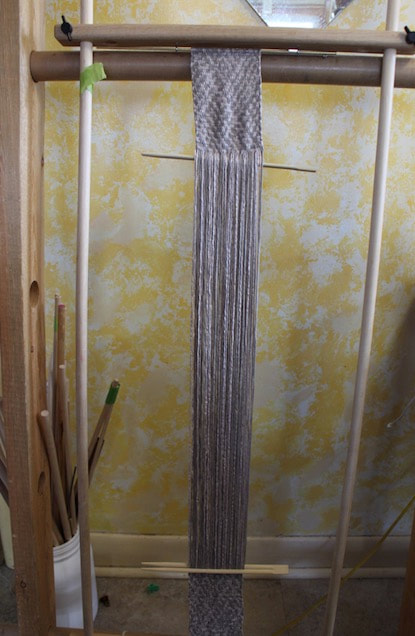
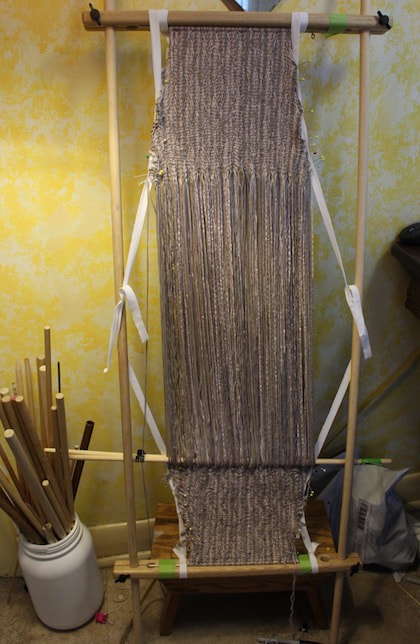
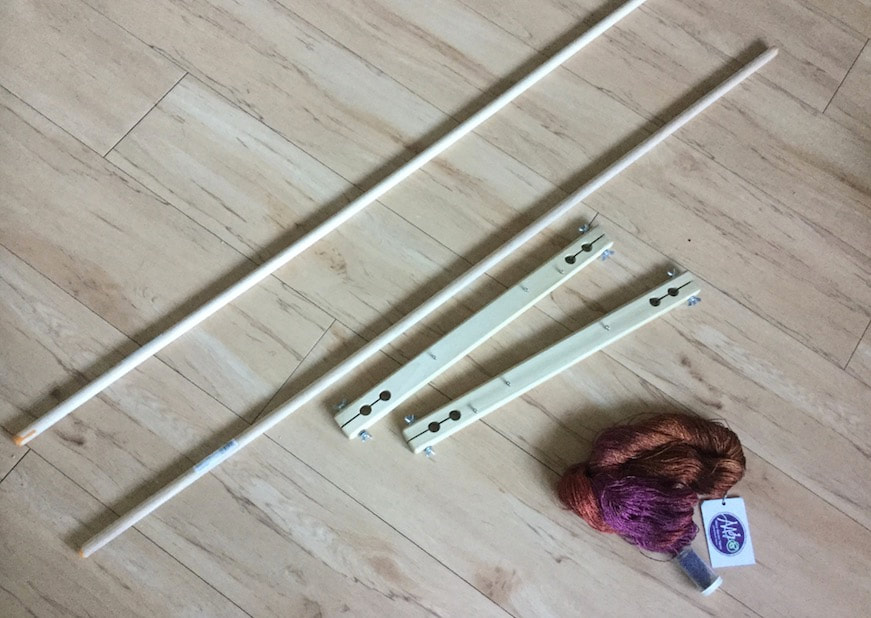
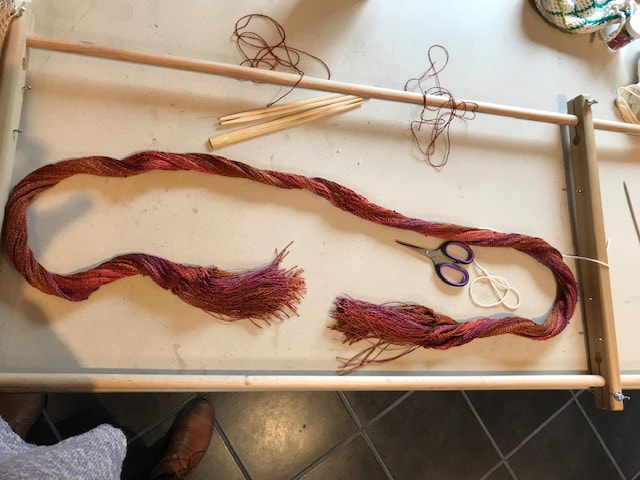
I added a loop of yarn every second row. This gave me two sleeves, that are wider at the shoulder, narrower at the wrist. I cut the sleeves apart, and tied knots. The knots are hidden on the inside of the garment. The finished pullover was judged worthy of the fashion show at the Handweavers Guild of America conference Convergence in 2018 in Reno, Nevada. 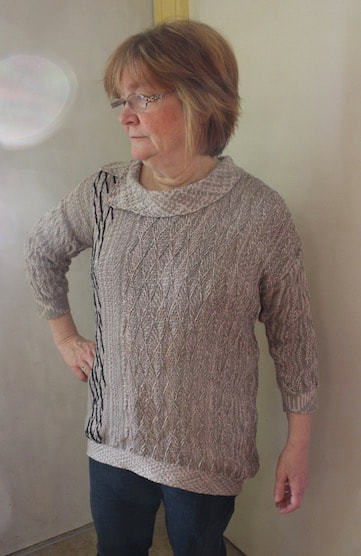 I now find myself at the FibreWorks Gallery near Madiera Park, British Columbia. I've been offered a short residency. This place is also called "The Yurts" because of the buildings that make up the campus. 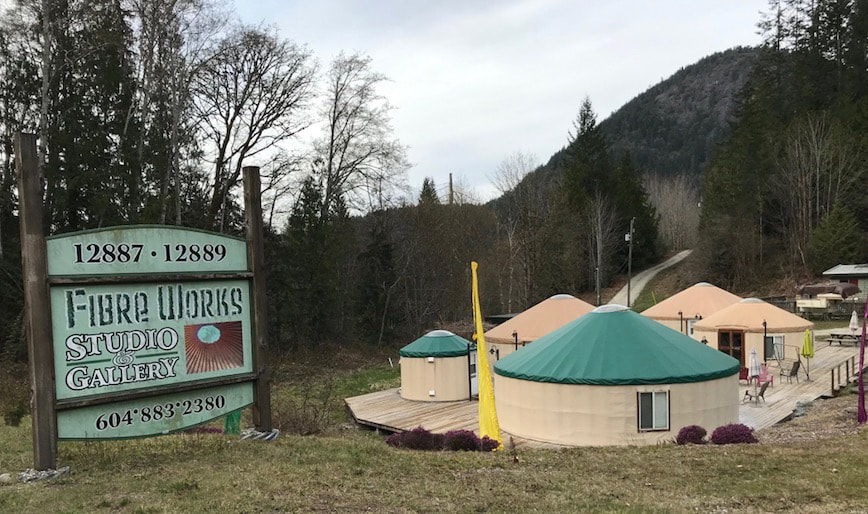 Planning to create a sprang scarf, I brought along yarn, beads, and the top and bottom of my sprang frame. I purchased 4 ft long dowels locally, and set to work.
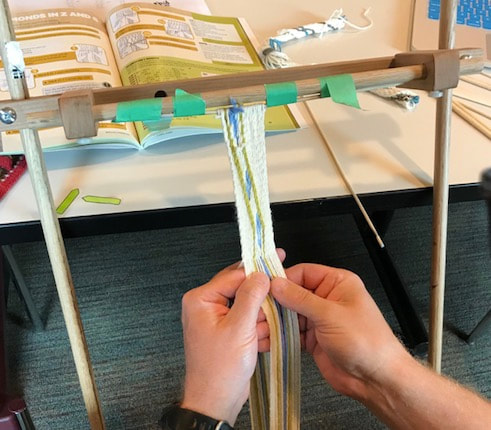
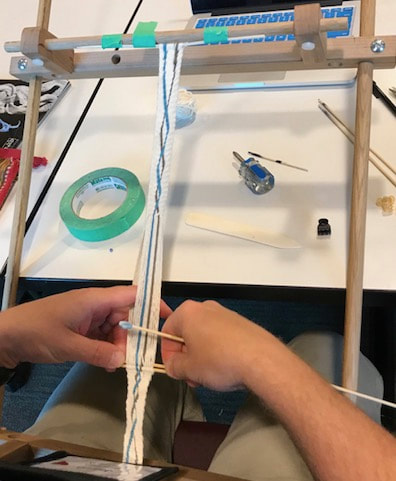
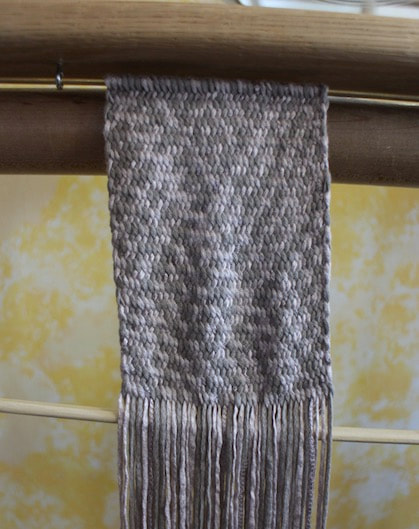
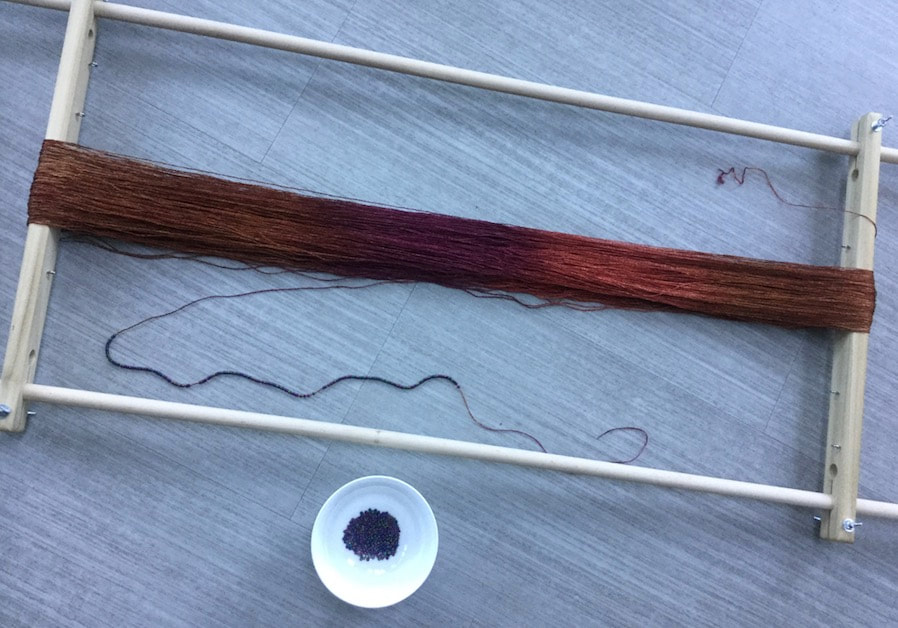
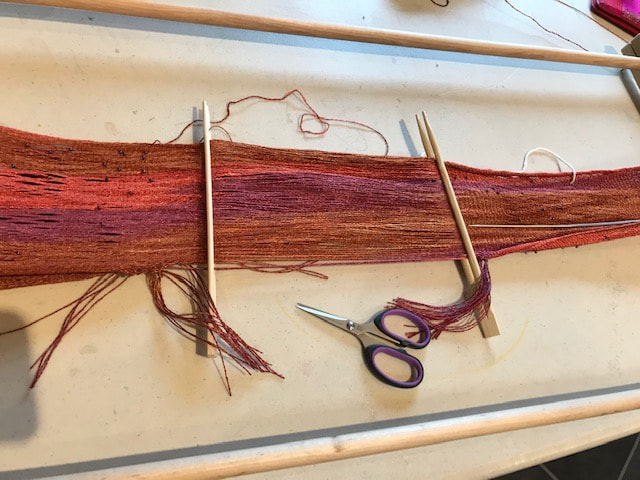
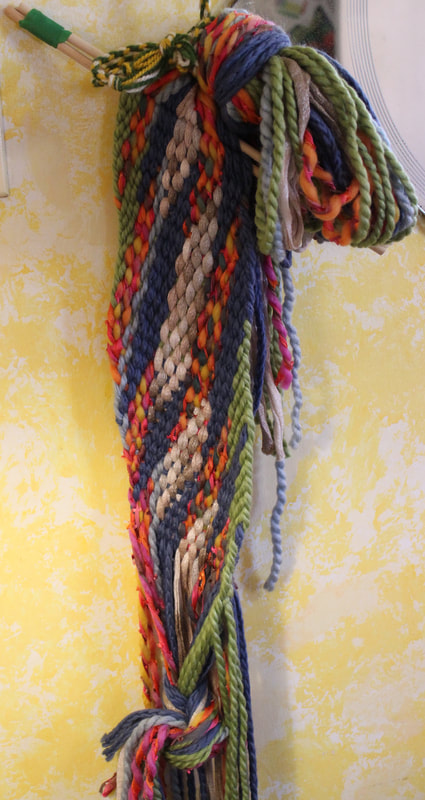
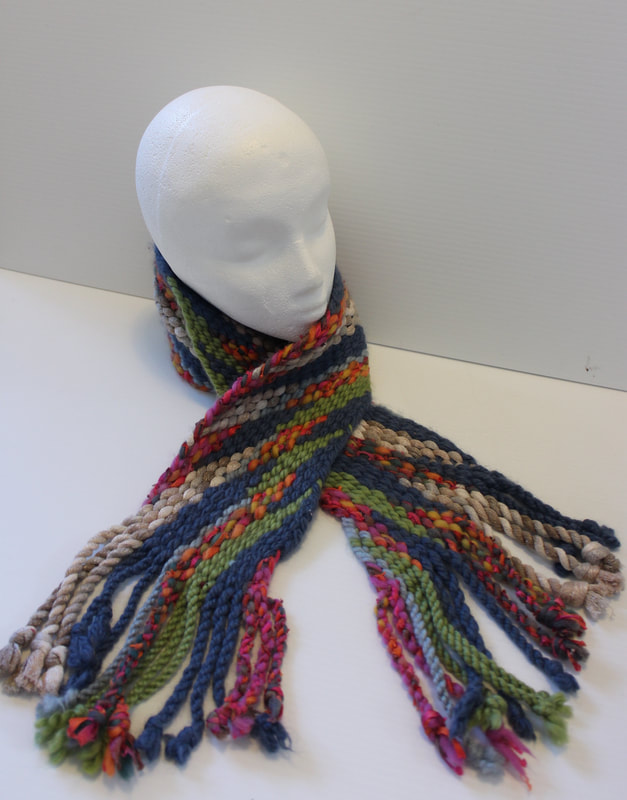
A sprang project needs the yarn mounted on the frame in an orderly fashion ... I needed to organize a first cross in the warp. 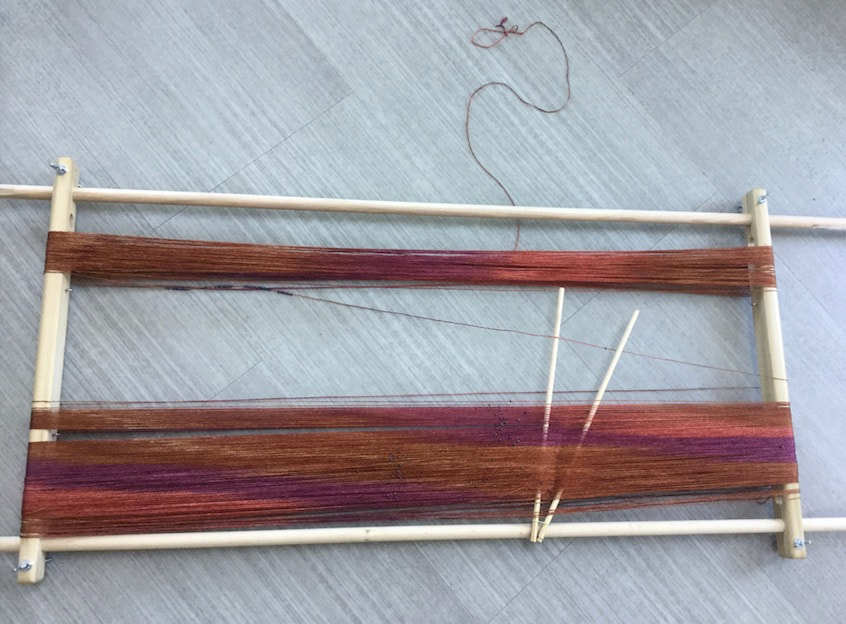 I fixed two sticks to the side of the frame, and proceeded to place the yarn into the sticks, creating the cross.  Ready to work. Ready to work. The weather was pleasant, I sat outside the FibreWorks Workshop Yurt, and worked. My pattern is inspired by pieces I saw at the Vesterheim Norwegian-American Museum in Decorah, Iowa. 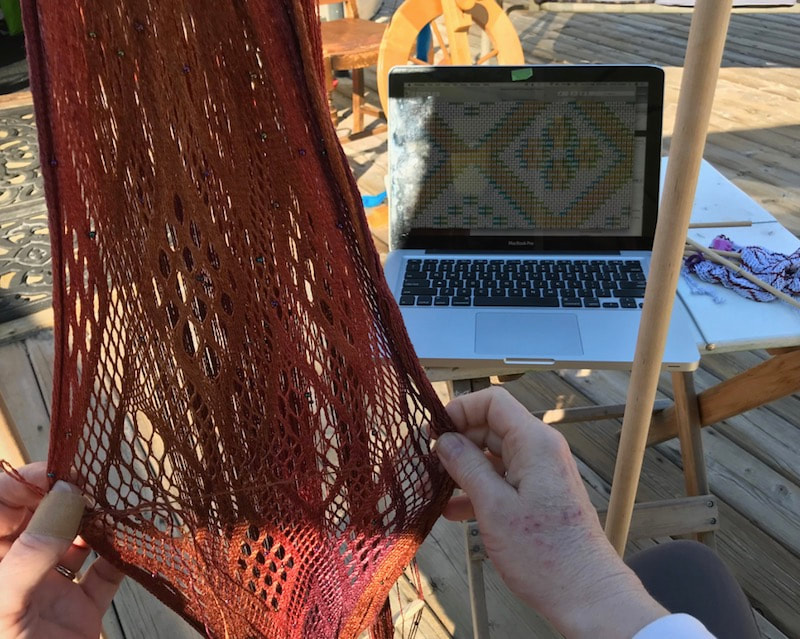 On Monday, FibreWorks was closed. I went along to speak to a spinners' guild, bringing them the good news of sprang. I worked on the shawl on Tuesday, and finished it by Thursday afternoon. The Weavers Circle meets at the FibreWorks Gallery on Thursdays, they watched as I cut the fringes, and tied the knots.
 Two more rows of knots.  I wet the shawl, and laid it out to dry. No more curling.
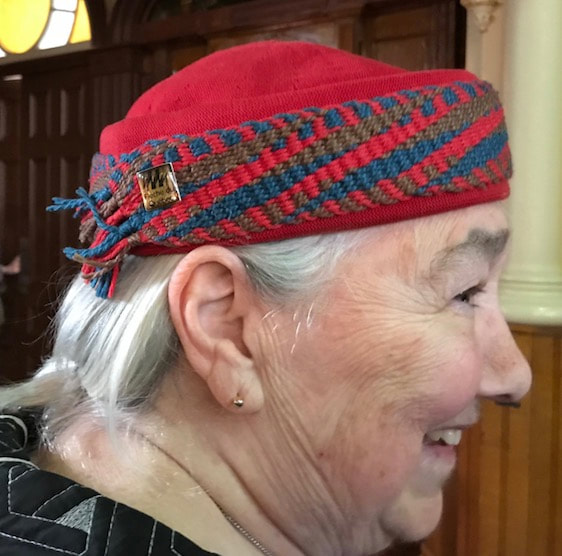
I visited the Kelsey Museum collection in the spring of 2016, went home and worked out the pattern for this hat, and then came back in the summer of 2017. At the occasion of my second visit, I took a photo of my replica beside the original. Actually I took two photos. In one of them, my replica is inside-out.  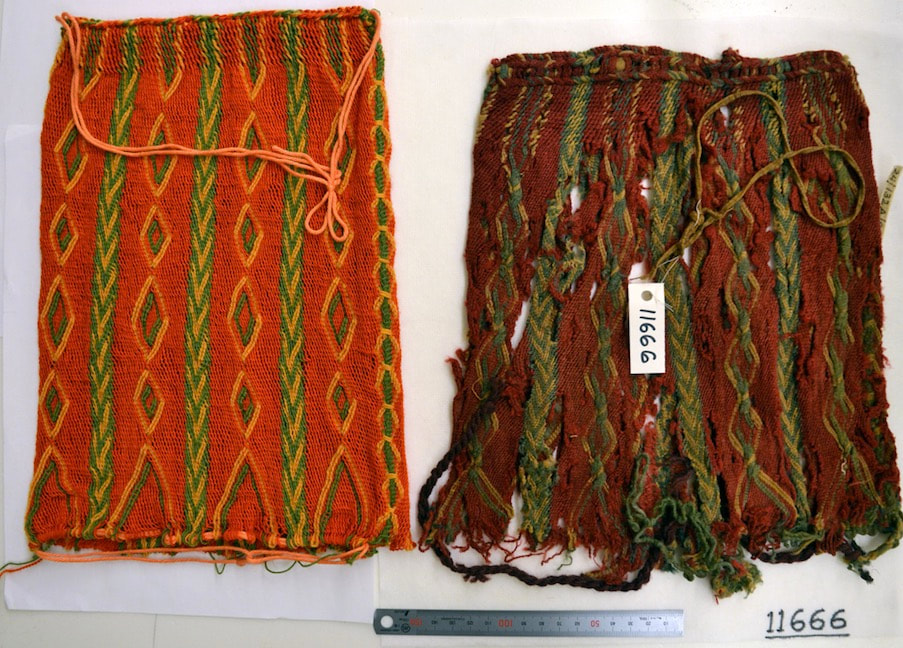 If anyone is interested, my SprangLady website contains three tutorials that take you step-by-step, showing you how to do this twining technique on a background of interlinking. And I do still have the specific pattern for this bonnet.
I set out to make a new sprang top. In the past I'd say the choices are a V-neck, a boat-neck, or you cut out a hole for the neck. Last spring I made a shirt comprised of ten separate pieces of sprang. I was using 'estate yarn' (yarn of an unknown age and unknown fibre content). 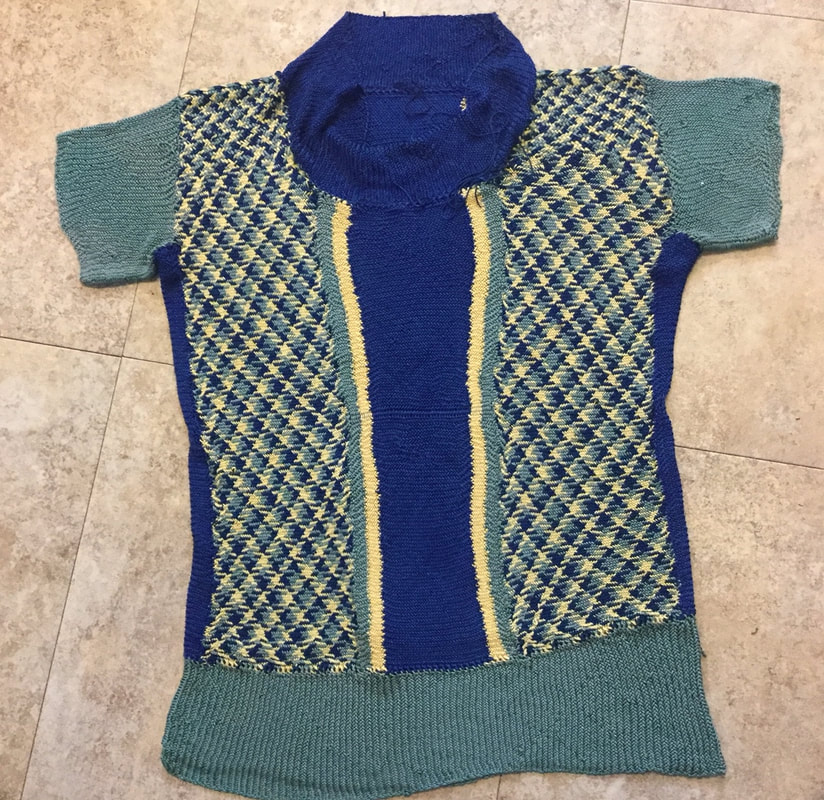 While I like the shirt, some of the threads are shattering ... the shirt is not standing up to wear. So I need another one. I purchased new yarn, nine skeins of Berroco Mixer, and made up nine pieces for this new shirt. 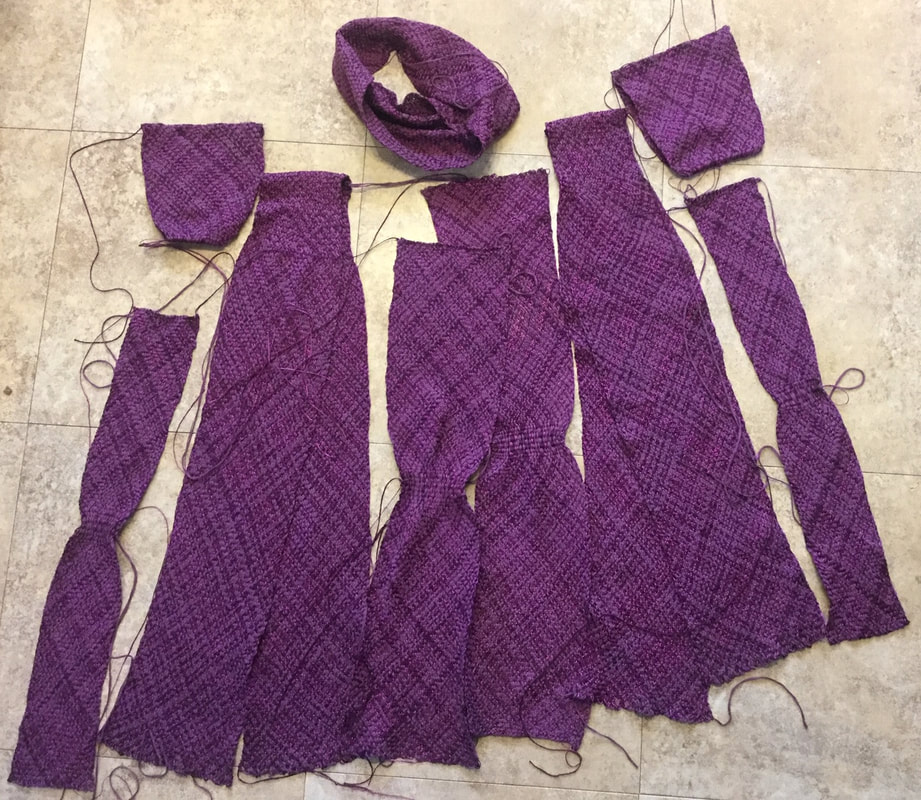 Although it might seem overwhelming to set out to make nine pieces, it's no worse than knitting a sweater. I made a center-front piece and a center-back piece. These pieces start at neckline and hem, and work to a place somewhere near the waist. There are two pieces that go over the shoulder, working from hem to hem, and meeting at the shoulder. I also made two pieces, one to go under each armpit ... worked from armpit and hem towards the waist. These pieces were all flat warp. There are three circular warp pieces, two sleeves and a collar. Assembled together, they make a shirt. 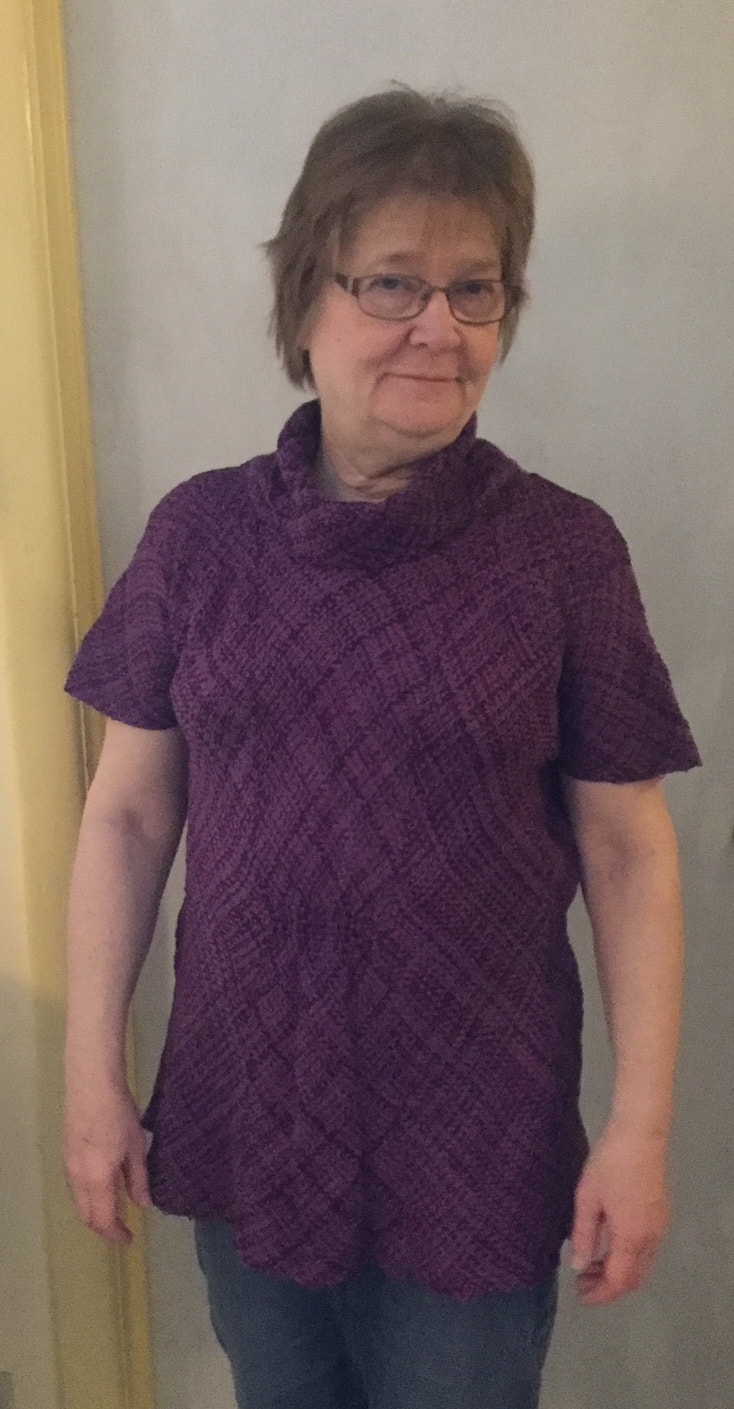 The basic stitch is a 2-2 twill, it has a comfortable amount of stretch. The Berroco is a mix of cotton, polyester, viscose and nylon, so I'm hoping it will stand up to washing and wearing. 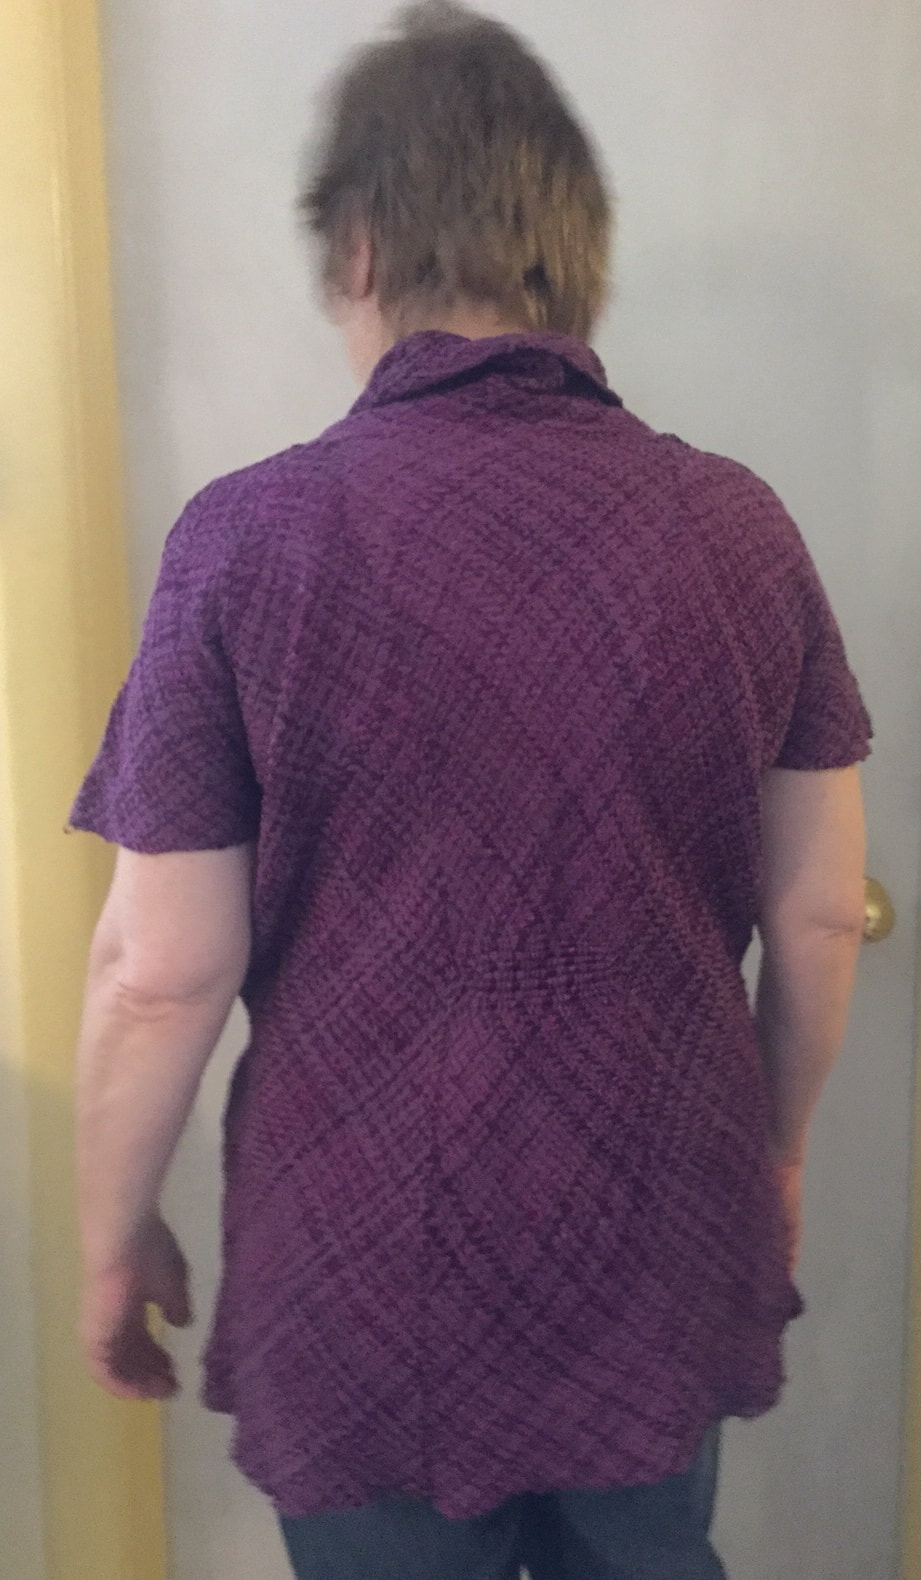 No need to hem this material. The pieces have selvedges all around.
Still working on those sprang patterns. I sent out drafts to friends and former students. They’ve given me some great feedback. Presently I’m updating the patterns, making them easier to use, and hope to start posting them soon. Made another pair of sprang gloves, this time with a thumb. 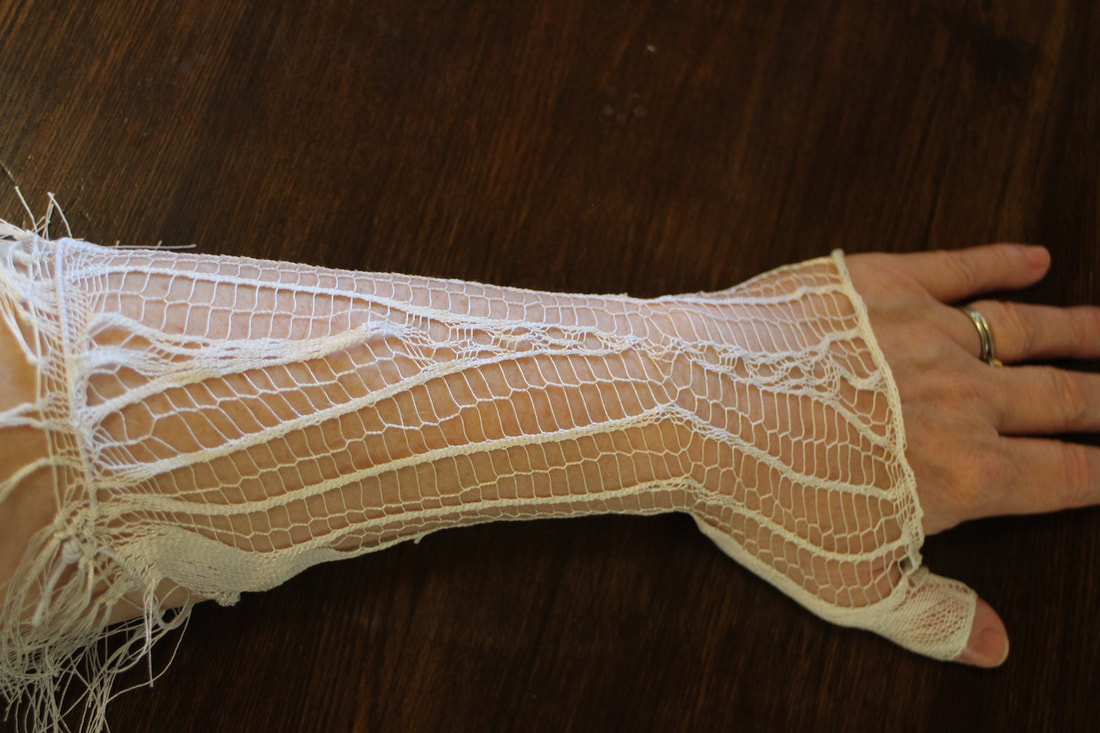 A sprang glove, pattern inspired by a Coptic bonnet in the collection of the Krefeld Textile Museum Yes, you can make sprang gloves with fingers. The deal is that you create the cloth with an eye to the size and shape of the intended garment. Have a look at a pair of gloves made out of leather or cloth. There are little strips of cloth between the fingers. That’s what I think will be the easiest way to make sprang gloves. I made a short thin piece to go along the webbing of my hand between index and thumb. 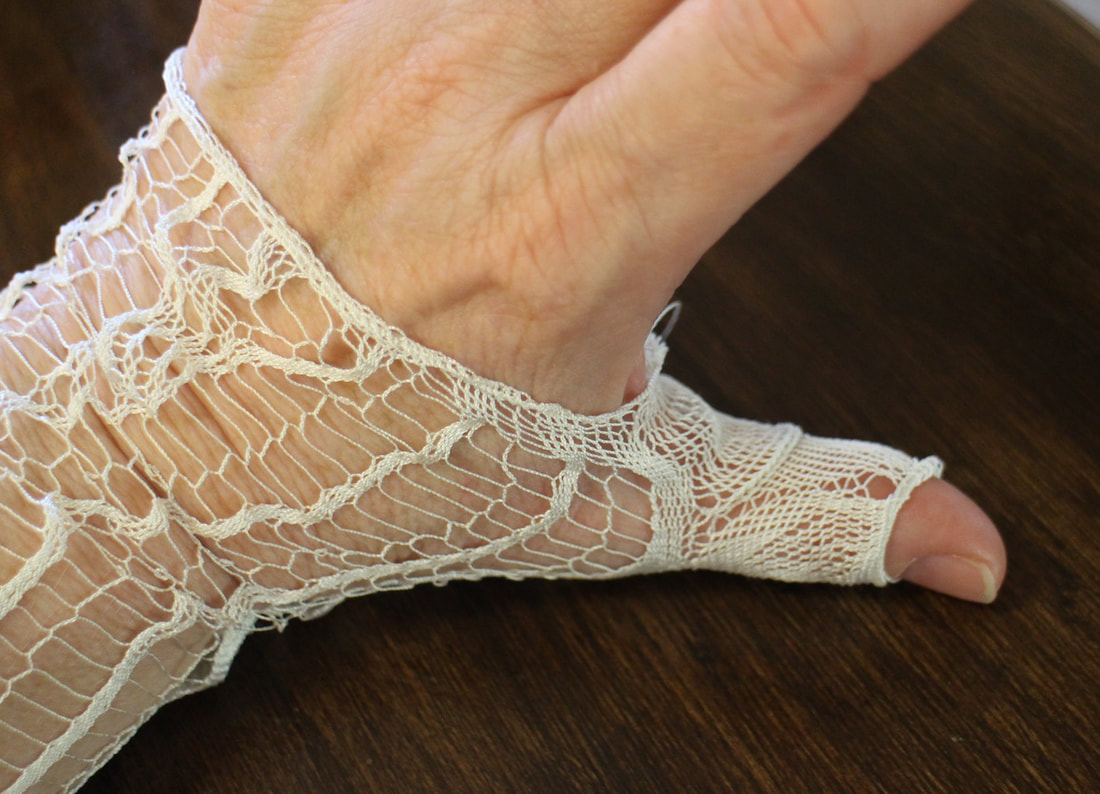 Detail of the thumb gusset. The glove is inside-out so you can see the chain line at the midline of the gusset piece. Getting ready for a series of teaching engagements. I’ll be at the London Knit and Stitch show on Thursday, Oct 9, showing the world how to finger weave. In honour of this event, I’ve set up a warp for a neck scarf.
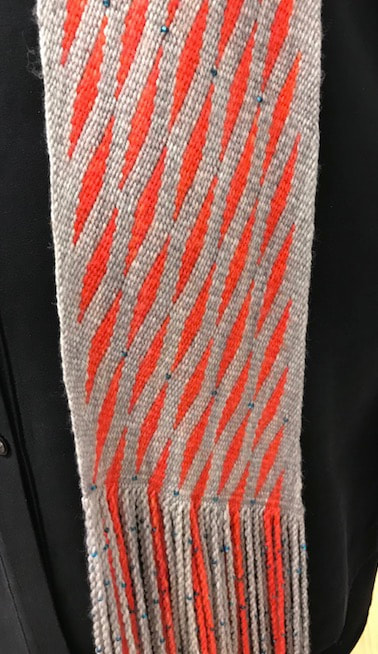
I’ve completed another pair of sprang leggings, this one inspired by another portrait in Dagmar Drinkler’s research. I’ll bring them to the ETSG conference on October 10-11.
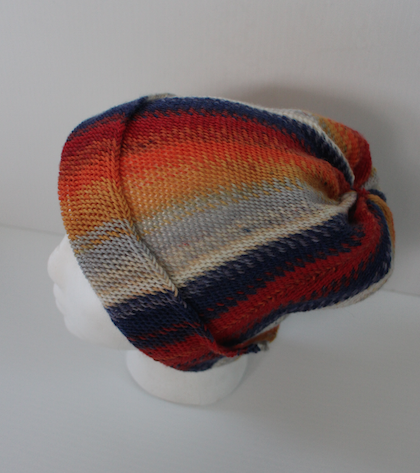
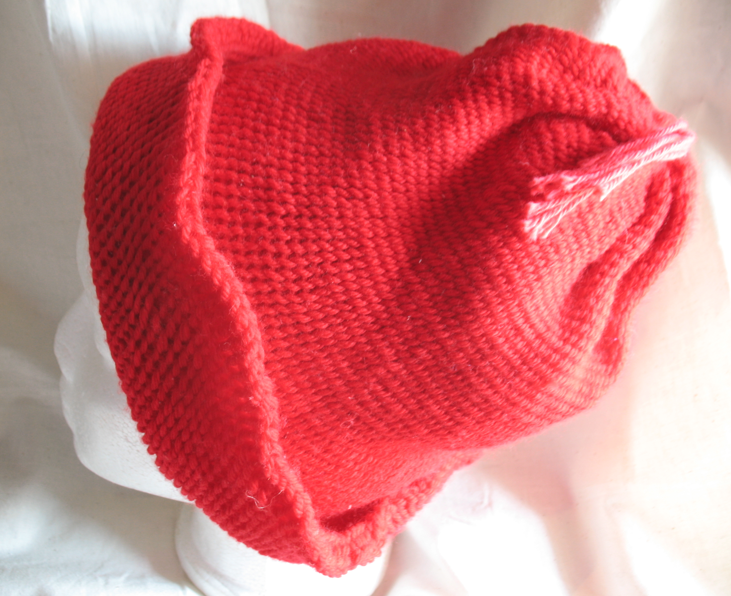
I’m working on a series of sprang patterns. Some people have commented that they need a bit more information than what is in my book. Maybe what people need is something like what has already been done for knitting and crochet, books of patterns for hats, vests, scarves and the like. I’ve gone back to the hats in my book as a starting point, describing the ‘how-to’ of these hats in greater detail. Now, just how much detail do people need? That’s the question. Here are three basic shapes of hats. I’m starting with a rather detailed step-by-step describing the making of these three.
Once I’ve written out the basic instructions for these three hats, then there can be variations. For example, working a lace pattern on the tam, you get a lacy tam.  A lacy tam OK, so I’m needing to write something about how you get the lace pattern, and then how to work the lace pattern onto that tam. I’m needing to do a similar thing for S and Z patterns. That’s this green hat. 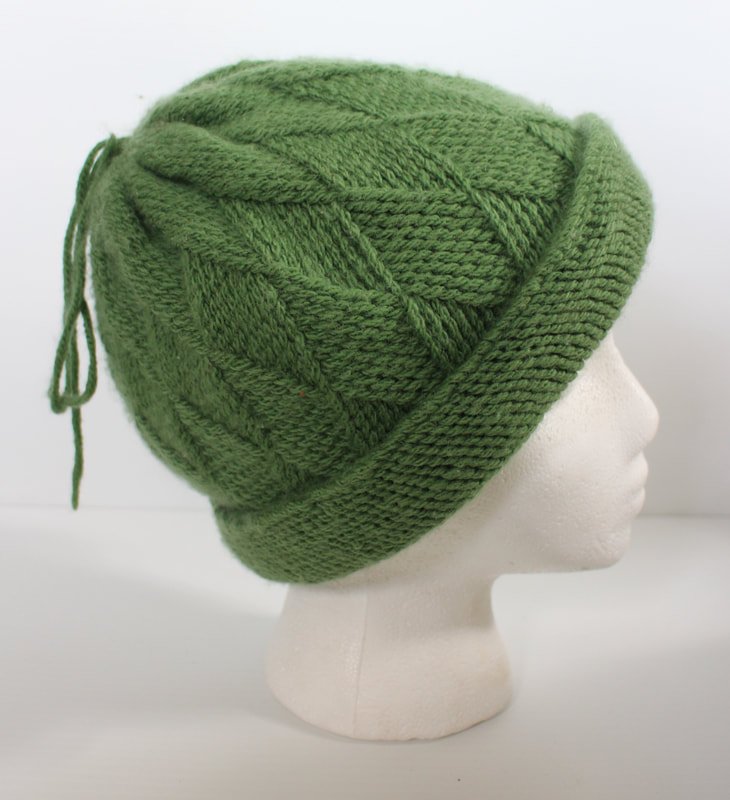 Diamond pattern, worked in S and Z interlinking I’m open to suggestions for patterns.
|
Categories
All
Archives
May 2023
Categories
All
|


 RSS Feed