|
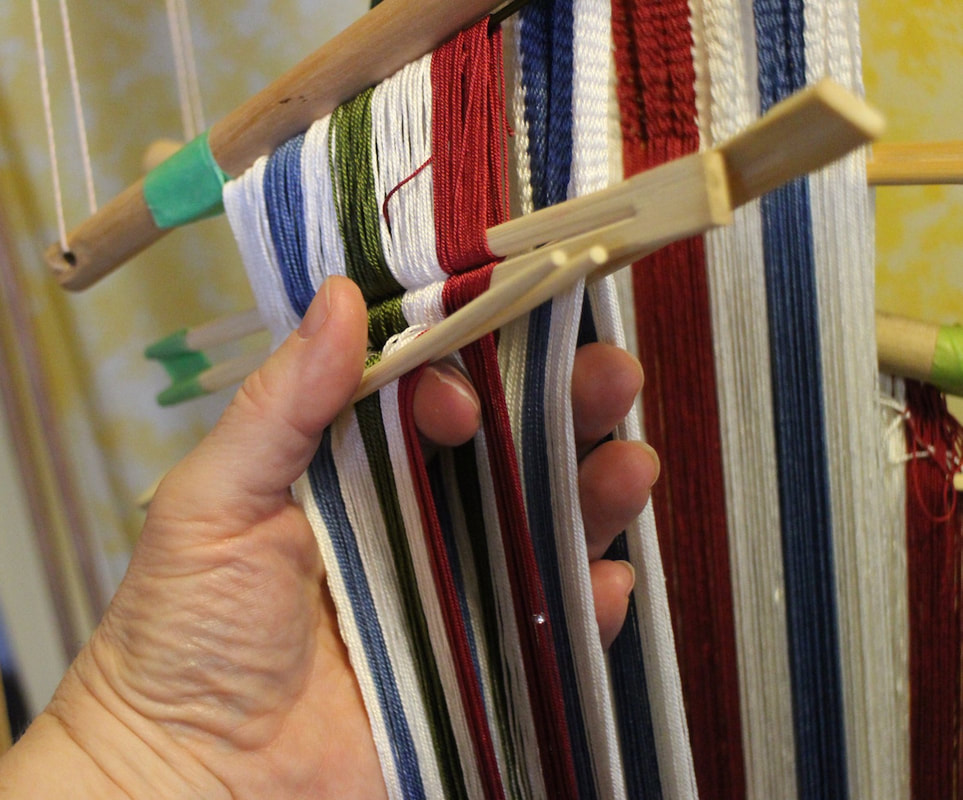
I always learn things from my students. Today Janet taught me about dealing with sticky warps. She is exploring the circular warp technique, and set on a warp using her very own handspun. All by herself she came up with a great technique. I had recommended spacing the threads out sideways. She decided to take the shed sticks and push them two at a time. That way they stay spread out as she moves them around. Here are some photos of the technique in action. 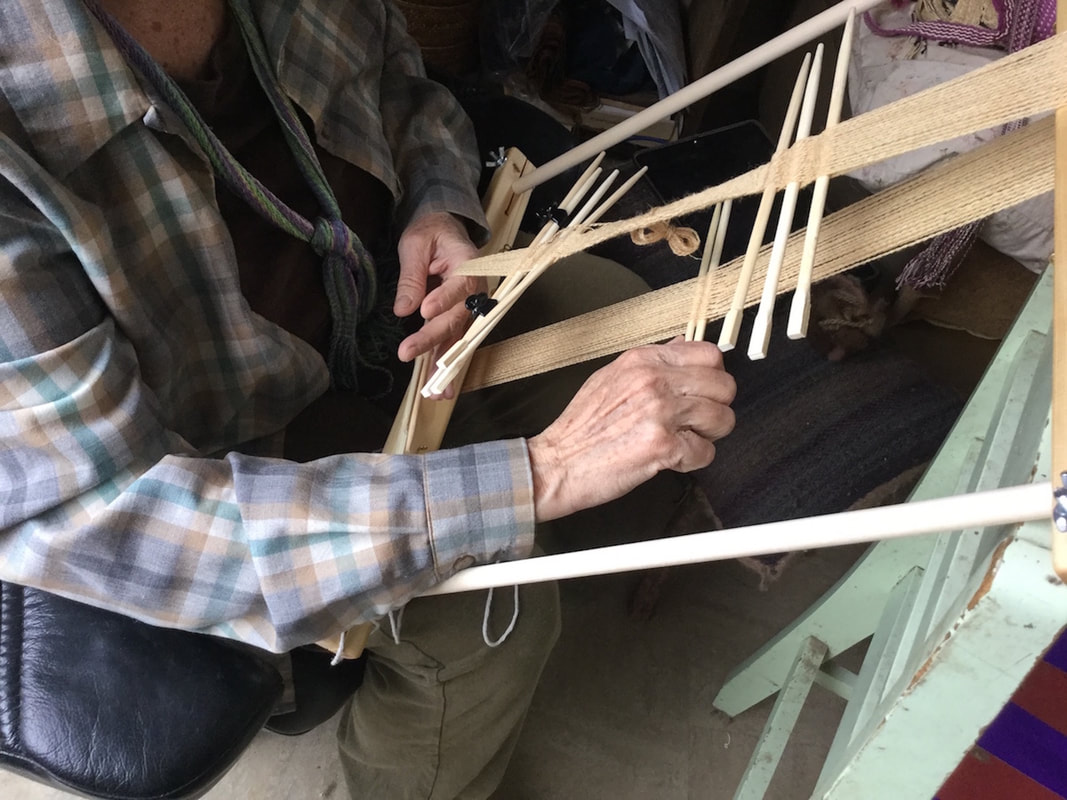 Pushing the pair of sticks up  Pushing further up the back side 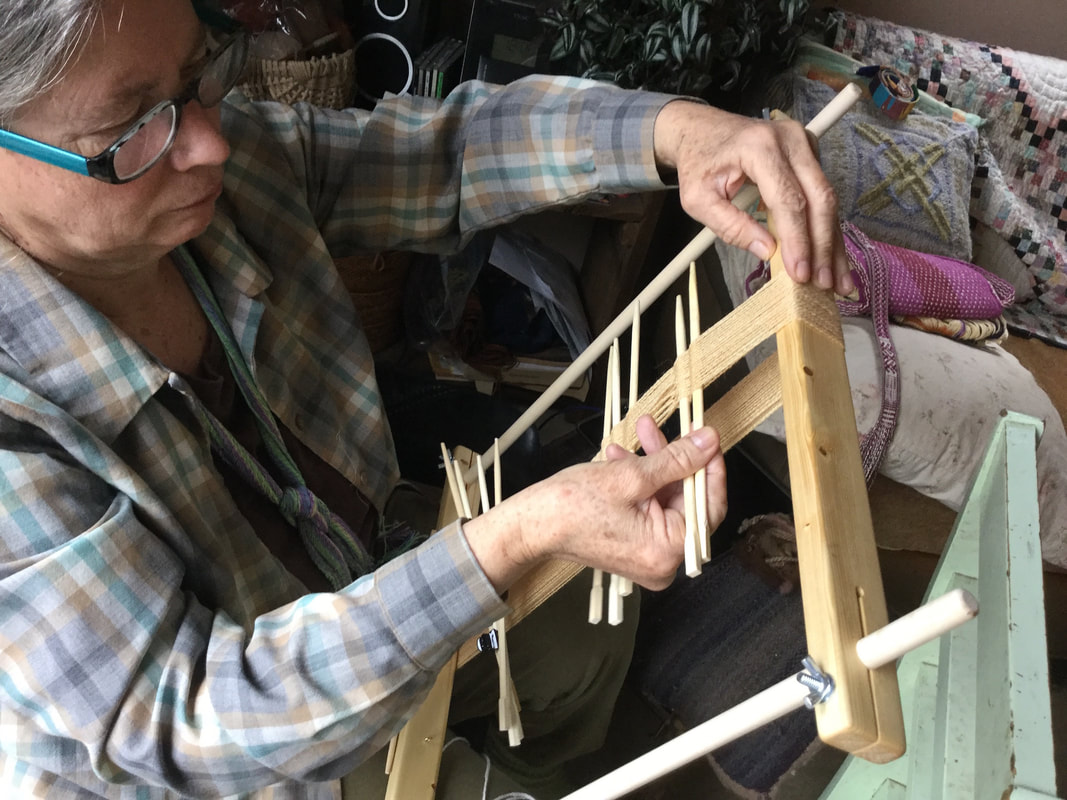 And over the top. Smooth as silk. We will call this the Janet Finch technique for dealing with sticky warps.
0 Comments
Here I am back in California in February. I started out at the Lacis Museum of Lace in Berkeley. I hung out there for two days, teaching. I then travelled to Aptos, where I met with the Santa Cruz Handweavers. Some of the students from last year wanted more. Some were new to finger weaving and sprang. Here are photos of some of what they produced during the workshop: 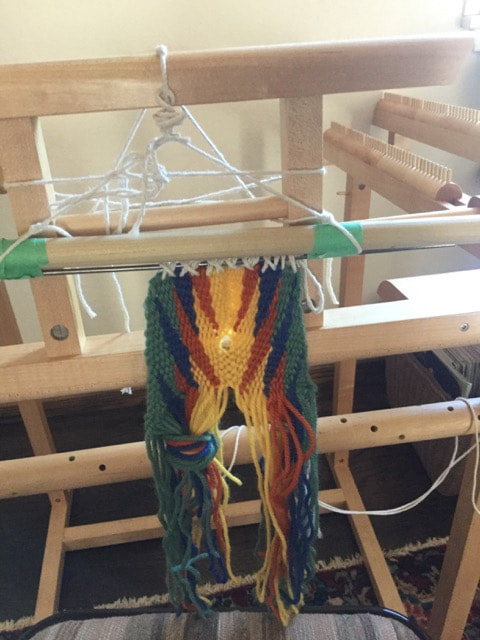 fingerwoven bag, in progress  fingerwoven strap and belt, in progress 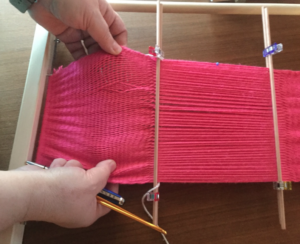 sprang bonnet, with diamond S&Z design, bonnet in progress 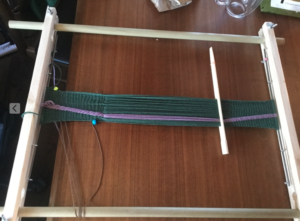 sprang, exploring twining, diagonal lines 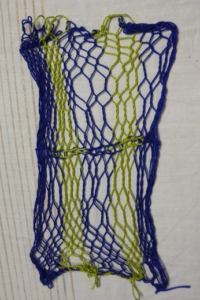 A sampler, completed by a student on her first day of sprang class. Well done! Such a pleasure to be working with individuals so eager to learn and spread the good word about these amazing techniques. In my spare time between teaching engagements here in California, I continue to work on mapping out the patterns in those pieces I saw at the Kelsey Museum, in Ann Arbor, Mi, last May. IMAGe(Twined patterns from the collection at the Kelsey Museum, in Ann Arbor, Michigan) Hoping to publish a set of twined patterns, following up in the idea of the sprang lace book of last year. Sprang is such an amazing, adaptable textile technique. The historic record is exceedingly rich in ideas.
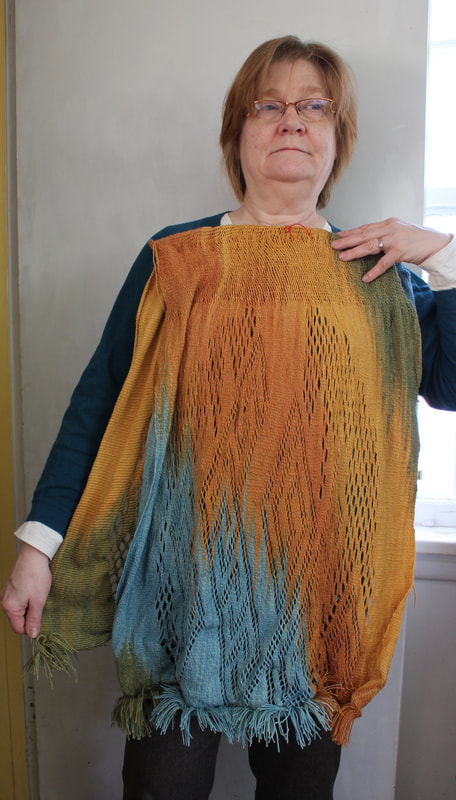
My project for this holiday season is a bit of ‘clear out the stash before the new year’. I’ve selected a project that was planned in the Summer of 2012. I had access (thanks to Glenna) to industrial amounts of white sock yarn. Planning a garment of a size to fit me, I measured out rather long hanks (3 ft diameter). Glenna helped me to a rainbow dye job for this yarn. At the beginning of the holiday season, to keep me from overdoing it on the cookie-baking, I set up a warp.  Setting up a warp, re-distributing the dye-job. I tied a red thread around the centre of the warp to mark the neck opening, more about this later. For this to work properly, you have to use the circular warp technique. This means that the first rows of work are on either side of the centre of the piece. The first rows of work here are the shoulders. Inspired by the work of a Dutch sprang expert, Coby, I decided to double up the threads at the shoulder, switch to single threads below the yoke of the sweater. 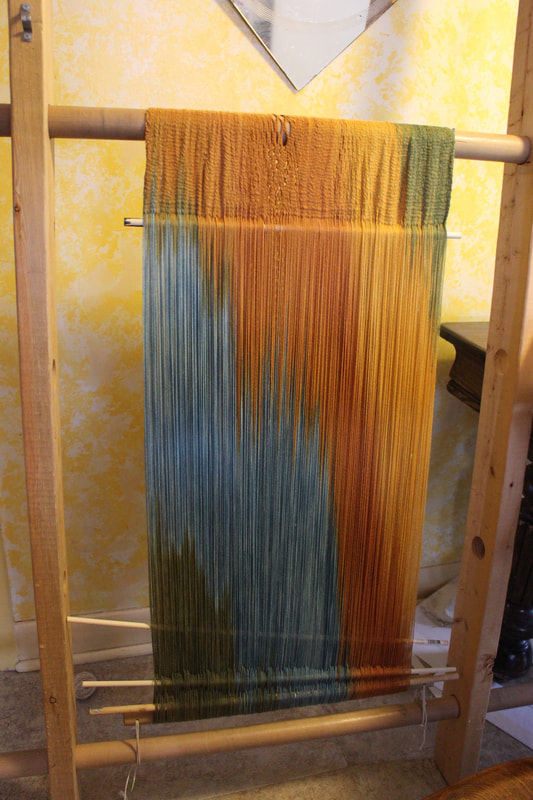 The garment begins to appear. The secret to being able to push the false weave around is adequate width. I found that long shed sticks, spreading out the warp, moving the threads in sections was the key. Weaving progressed, here I am getting near the finish: the two ends approach. 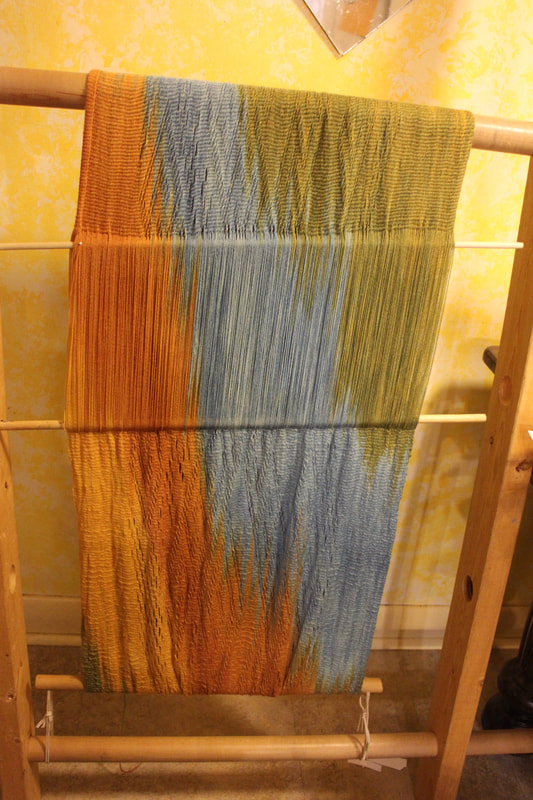 The end is near. When only 5 inches was left between the two ends of cloth, it was time to cut the threads. I cut them 3 at a time, and tied an overhand knot, pushing the knot up to the cloth, working my way across the warp. 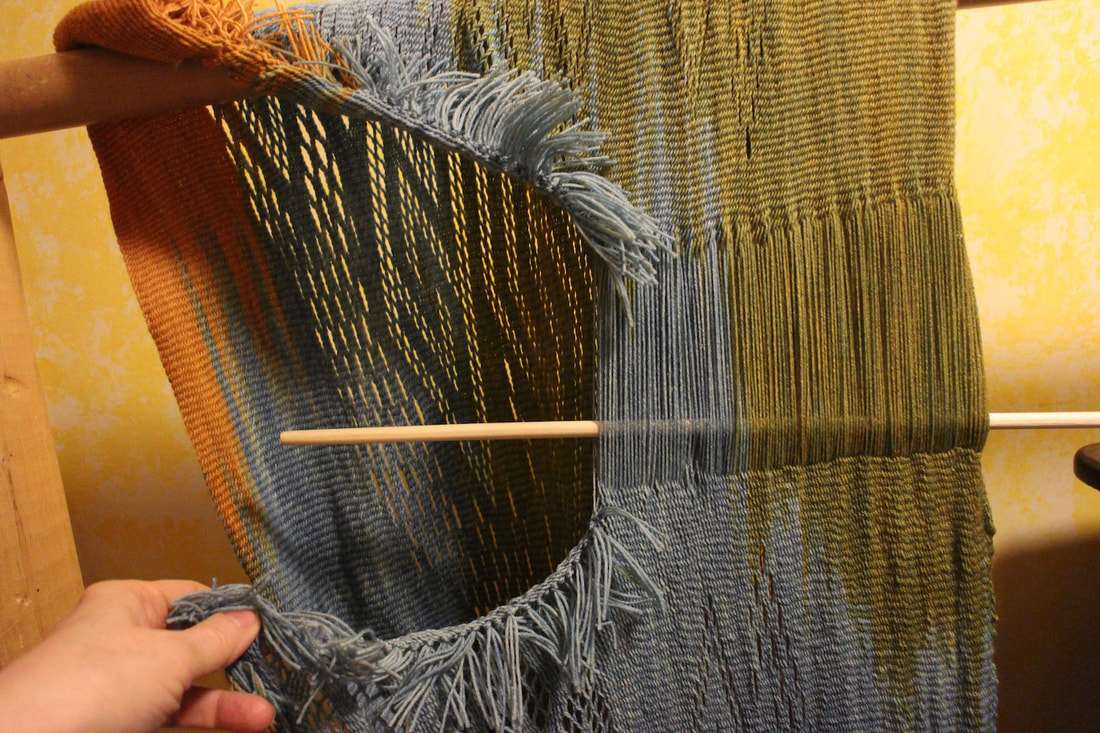 separating the cloth at what will become the waistline Now I have to decide which side is front:
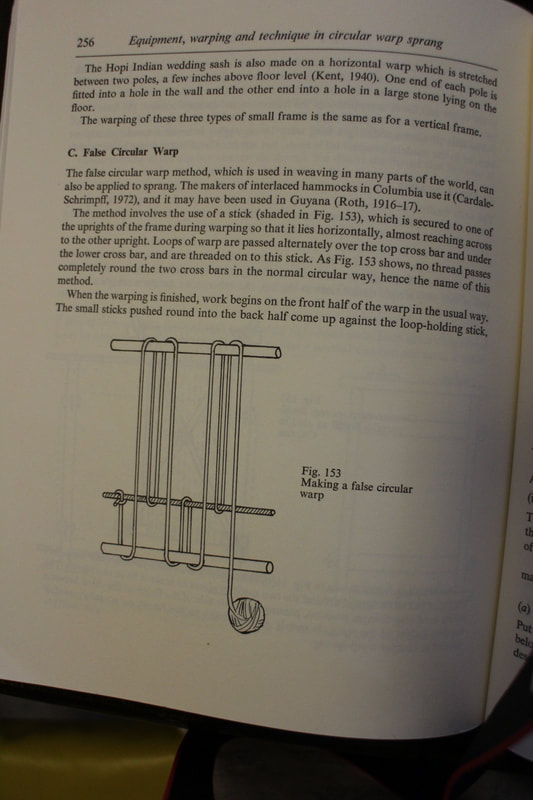
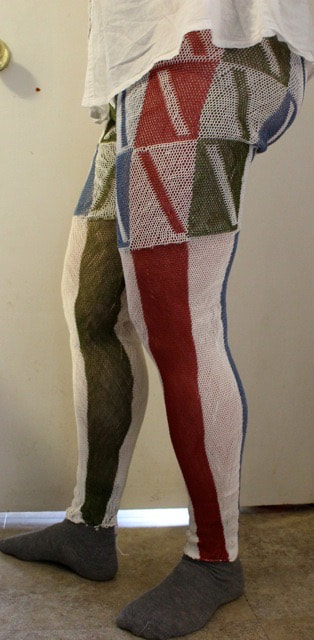 The finished second pair of sprang pants! This is how I did it. Inspired by the work of Dagmar Drinkler, I made a pair of sprang pants. Difficulties encountered had me reflecting on how I could do things differently, and this meant making a second pair of pants. The difficulties centered around three major problems: 1) My technique in adding those extra threads at the thigh left me with quite a sniggle-heap on the first pair. I was sure I could manage that addition better. 2) The crotch needed shaping. I had the opportunity to meet Dagmar Drinkler in person and the crotch shaping was one of the points I wanted to discuss with her. She said that she did not do any special shaping for the crotch of the pants she made for the mannequins, left them open a bit at the meeting point . I decided that, despite the amazing stretch that is natural to interlinking sprang, I did need to do some shaping for the pants to fit my shape. 3) I was unsatisfied with the waistband on the first pair, knew I could do better All this in mind, I set up a new warp. Reading in Peter Collingwood’s Techniques of Sprang, I found the perfect way to set up my warp.
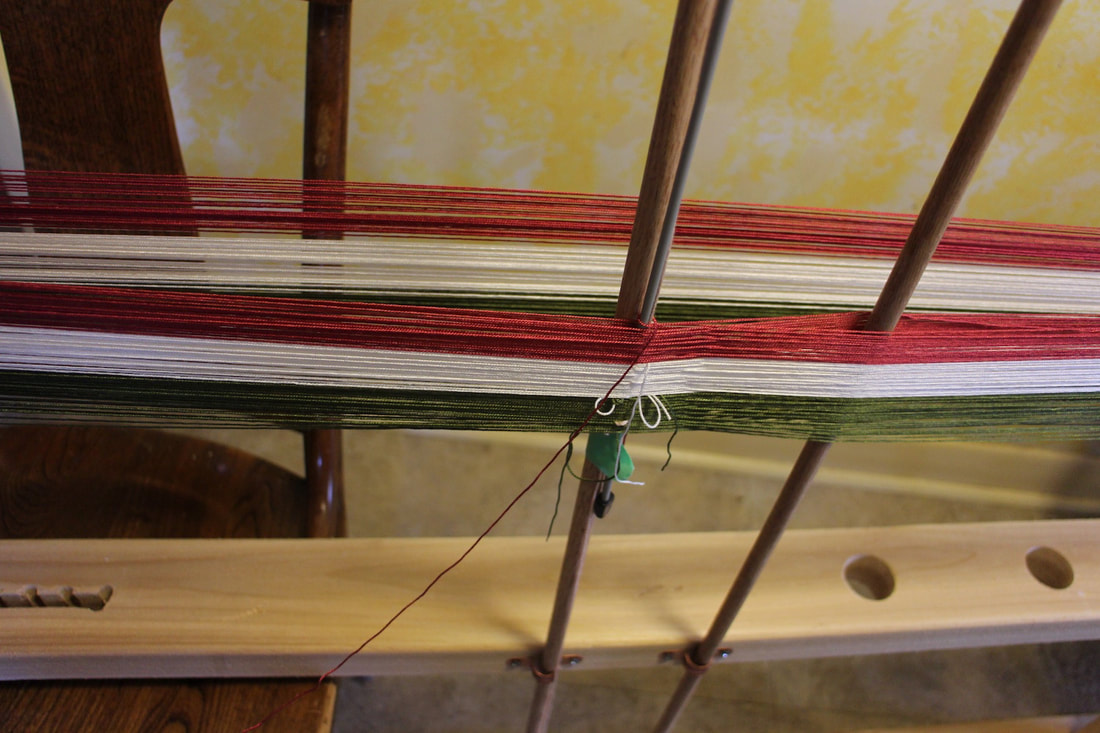 Close up of the two ends of the warp. The meeting of the two ends of the warp happens around that knitting needle, taped to the dowel on the left. This is what I used for the dowel in the middle of Peter Collingwood’s design. The dowel on the right creates a shed for my first row. 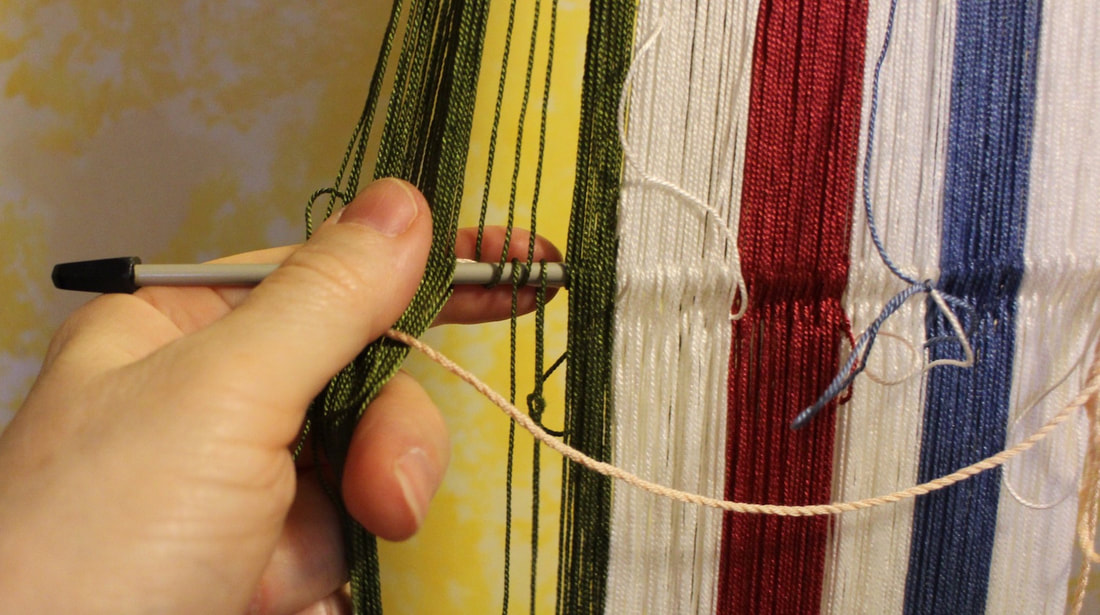 Checking the cross, I detected an error. Horrors! One thread had gone across the meeting point, instead of around and doubling back. Rather than unwind and re-do this, I added another thread. I then clipped the place of the error and tied two knots. This short-cut worked just fine. Work progressed on the warp nicely. The first few rows formed the ankles, and work progressed up the calf of the pants towards the knee. At about mid-thigh, I measured out another warp of threads exactly the same length of the as the yet-unsprung-warp. 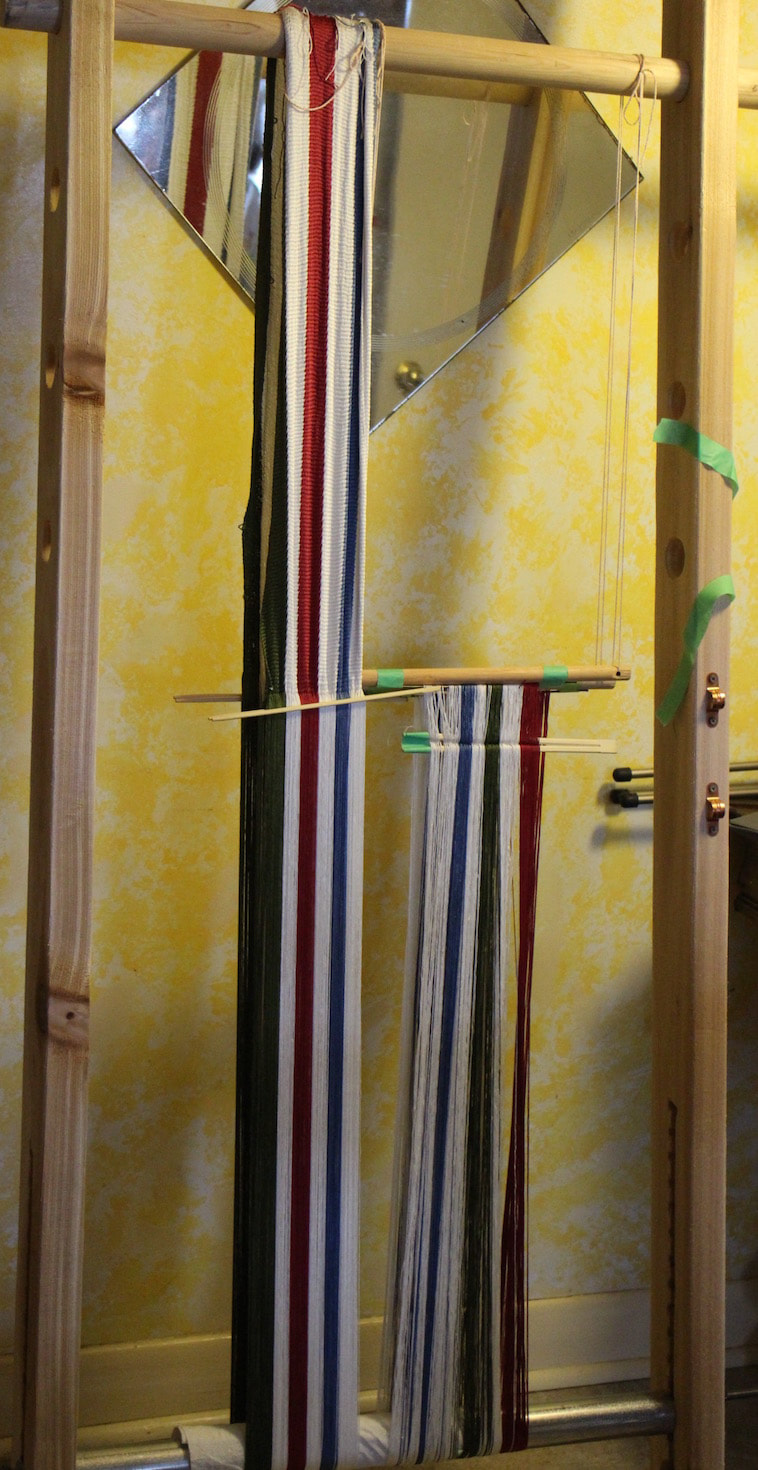 Adding threads at the mid-thigh line I found it was important that this new warp has its own independent suspension system. I’m not always successful at creating a perfectly even warp. This always causes me a bit of trouble over the first few inches of sprang work, until the un-evenness works itself out. This was the case again here. There was a slight unevenness between the two warps, as well as within the new warp. A very tight tension on the new warp when pushing the Z work to the S place helped. It was a couple of inches of work before things settled in. The two warps had been placed one on top of the other, and worked as double-cloth (Collingwood 167-173).
The double layer of threads opens the opportunity to a wide variety of color designs. It also allows the piece to widen … a good idea for people whose thighs have a greater circumference than the ankles. You’d think that the double layer, one sitting on top of the other, that there would not be much difference in the width of the cloth, but my experience has it that this addition does widen the cloth considerably, especially when the threads are held together and worked in the same shed. 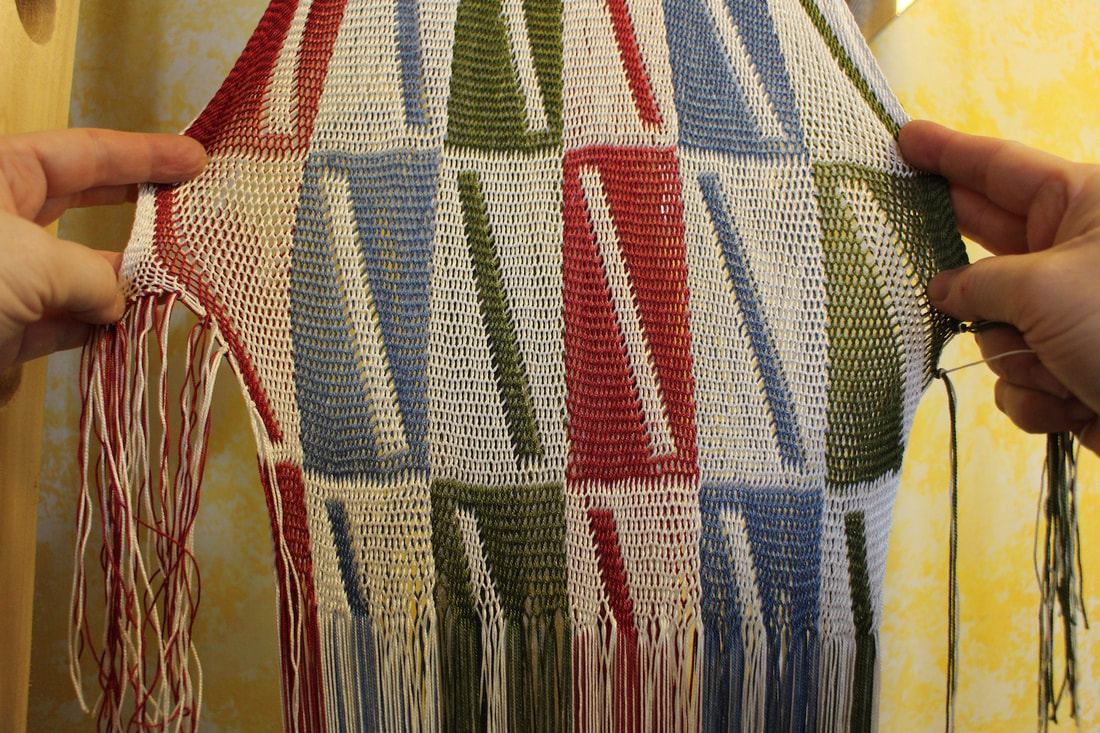 To shape the crotch I tied off warp threads on either edge of the warp. Rather than cutting a finished rectangle of sprang, I dipped into my knitting experience, and decided to create exactly the shape I needed for the pants. I tied off threads to form that shape. How many threads did I tie off? Well, I guessed, based on my sewing experience, trying for the shape in a pair of stretch pants. Threads were cut, and then tied at both S and Z pieces. Getting to the waistline area, I worked to make the back of the pants a bit longer than the front of the pants.
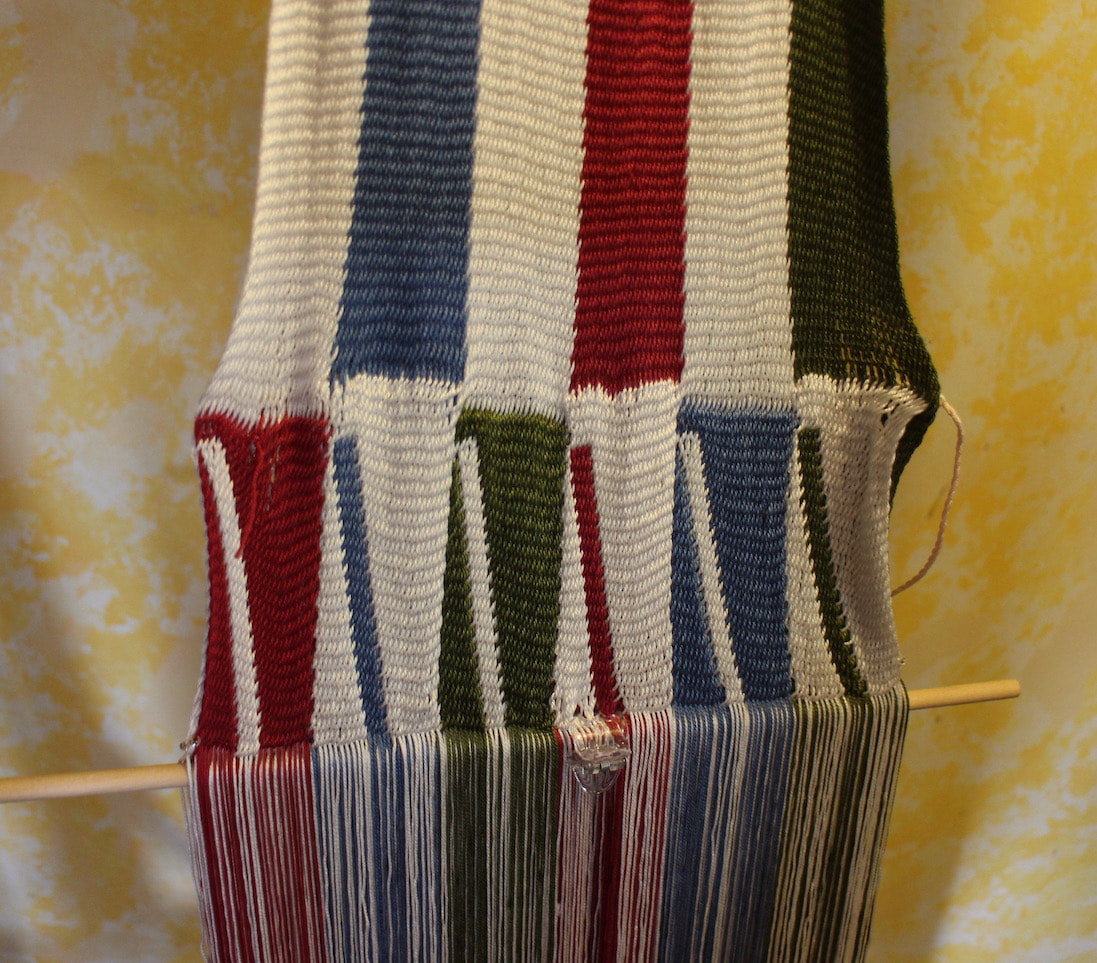
This would allow me to form a waistband casing. The knots could be located on the inside of the waistband. 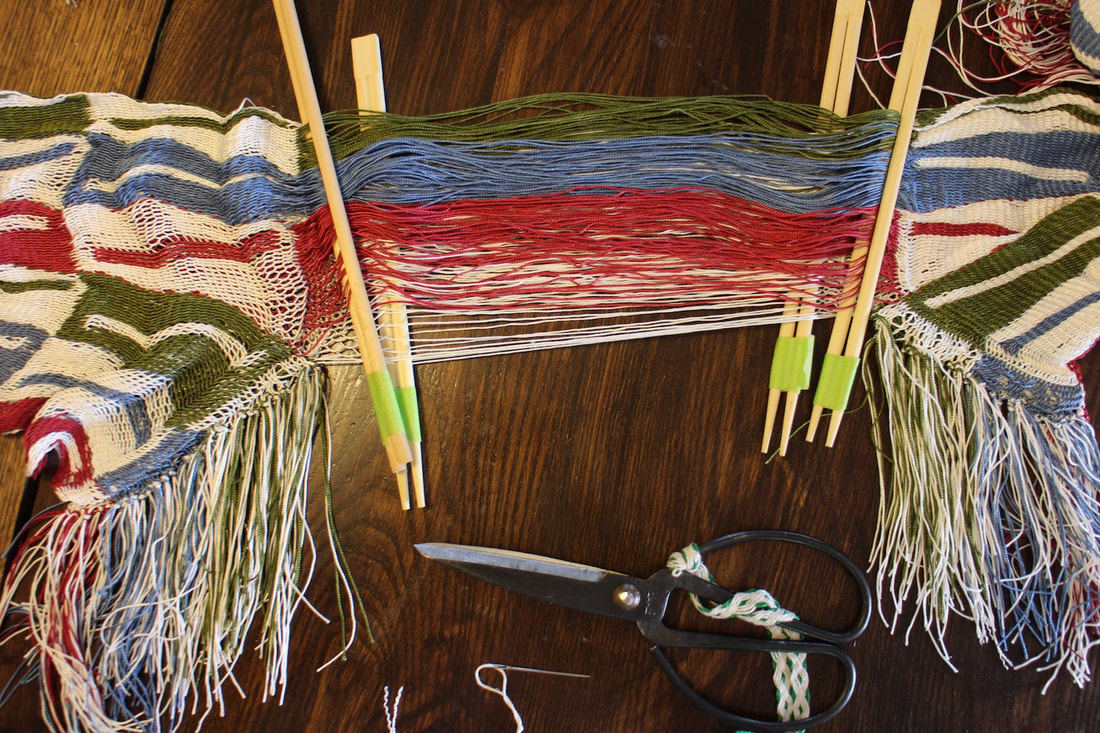 Time to separate the legs of the pants at the waistline. Threads were cut a couple at a time, and immediately tied off on right leg and then on left leg, closing in the waistband casing. Now it was time to go back to the very first rows, and pull out the thread that joined the two pieces there. This became the ankles. 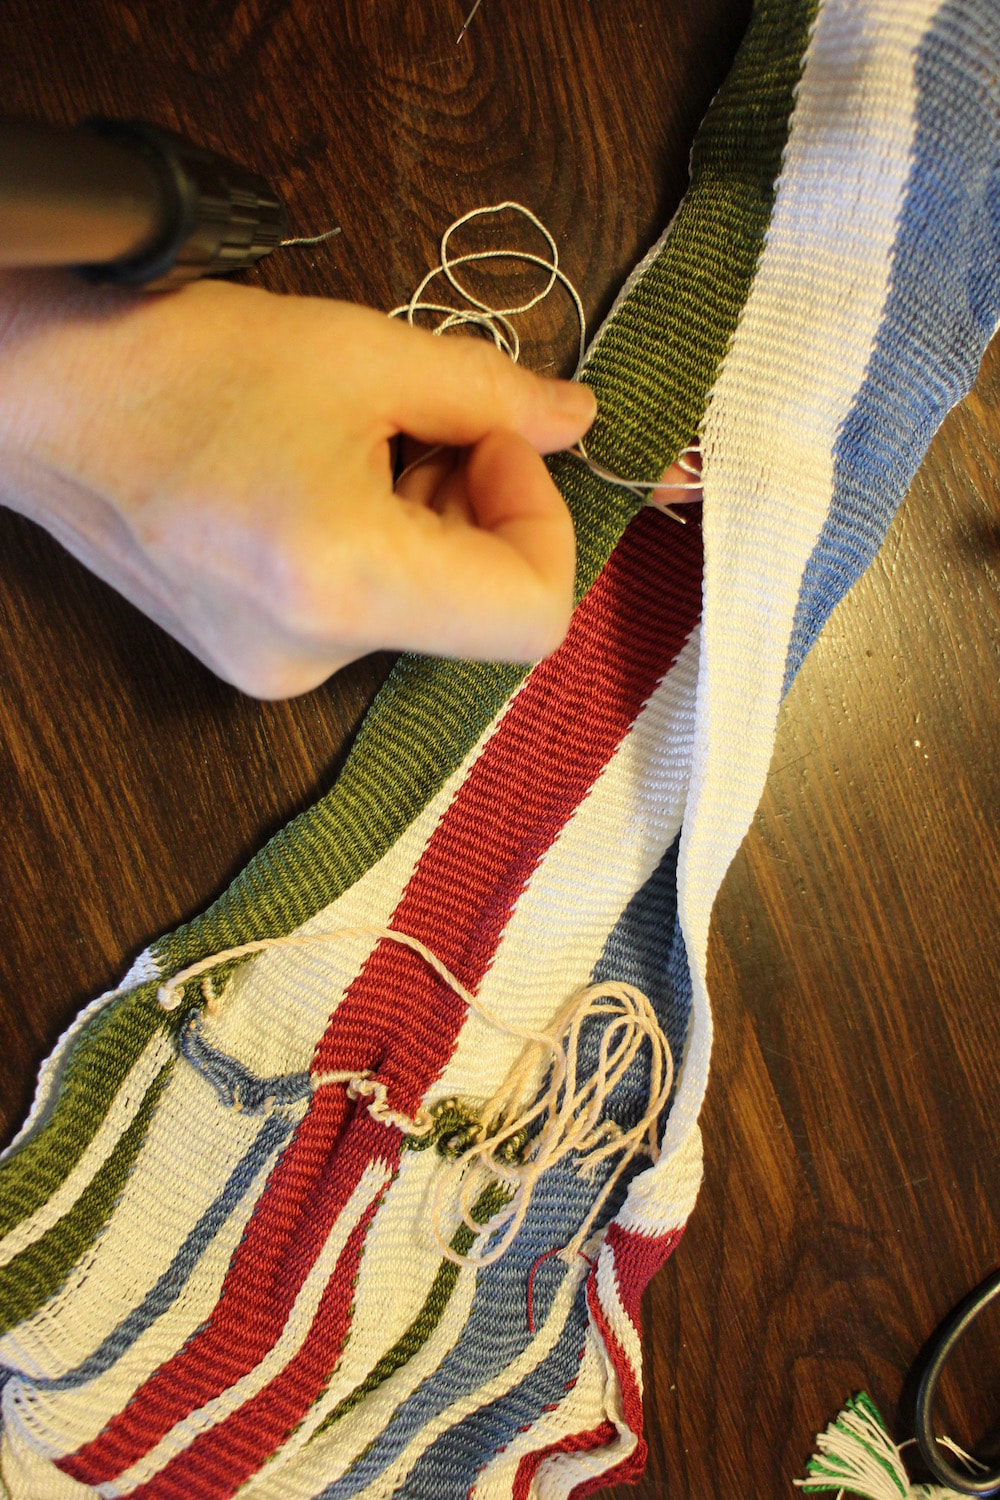 Sewing up the inside seam on the leg. In interlinking sprang, if you are careful to keep the edge thread at the edge, you can create an invisible seam. Imitate the interlinking stitch with your sewingup thread. I sewed the pants from ankle to crotch. 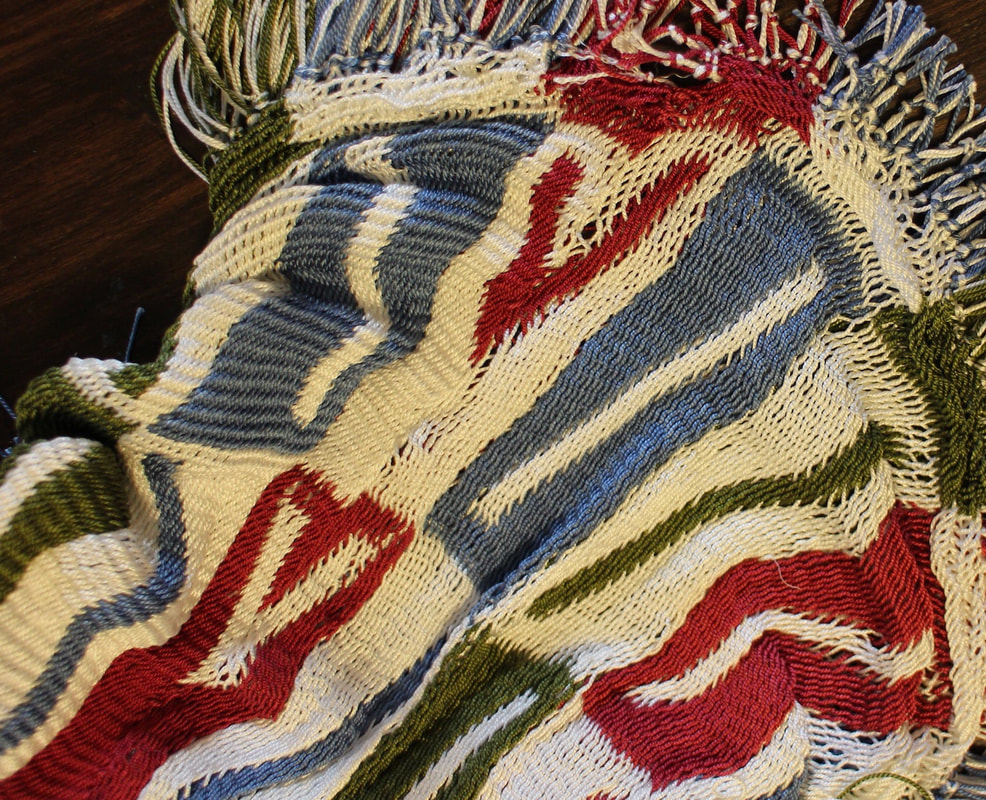 The seam at the front of the pants imitated the interlinking stitch. Sewing the crotch required a bit of creativity, keeping the knots to the inside, and trying to imitate the interlinking stitch on the outside … but then, I’m hoping people will not be looking at my crotch too closely.  The finished second pair of sprang pants! This sash is certainly teaching me alot. It has been my custom in sprang to work several rows, placing sticks in each the shed, completing several rows before getting up and moving all those sheds, one after another, into the mirror-image position. This sash, as with many historic sashes from the 1700s, was created using more than one very fine thread. I’ve got multiple strands. Just like embroidery floss that comes in 6 strands, that’s how these sashes are made: multiple strands, unplied. Now the problem happens when I am not 100% accurate, and wrongly group a thread. When I go to push it into the mirror-image section, that mis-grouping causes a snag. Mostly I notice that it’s really hard pushing, check the culprit thread, and find the mistake. Sometimes, however, it’s only in examining the fresh row on the mirror image. 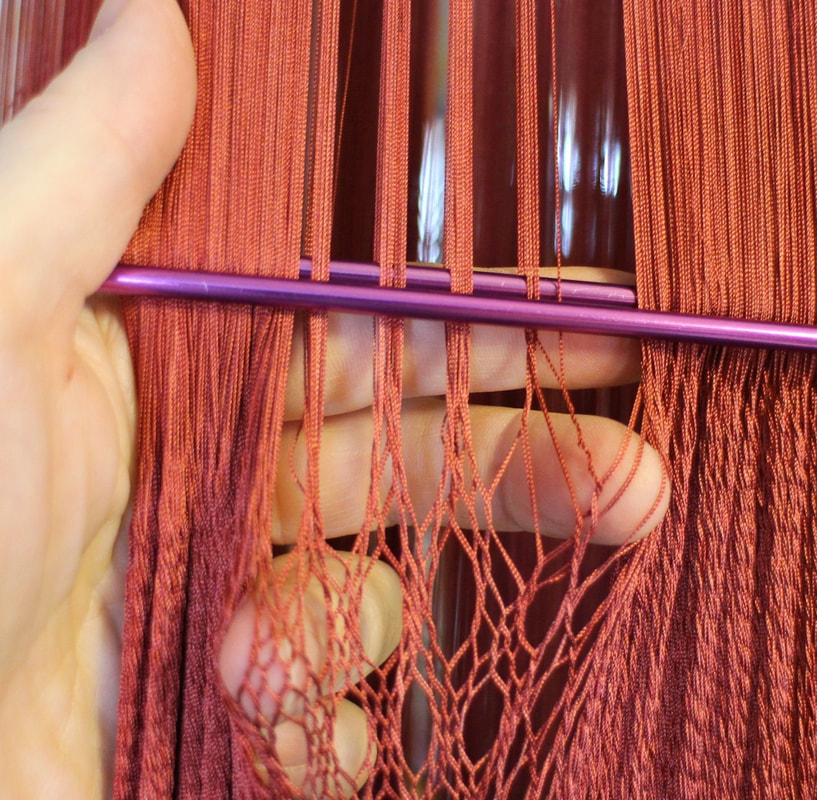 Thread grouping error The error shows up as an imperfection in the mirror image. I am finding that it’s best to catch these errors right away, like, catching it as soon as it happens. I’ve given up on this multi-row efficiency. I stand up after each row, move the row, and check. It seems the only way to assure all is well. Another issue has developed concerning thread tension. My initial warp was not 100% even, and I had to deal with that. Things have been quite smooth since …. until lately. I’ve noticed that there is another couple of threads loose lately, causing troubles. I’ve identified them as the threads at the very edge. This happens every time, indeed makes sense. The edge thread, the thread involved in that three-thread edge stitch on the plait row, makes only half the number of rotations as all the other threads. Uptake is less for this thread. I’ve resolved the issue with this thread being longer. 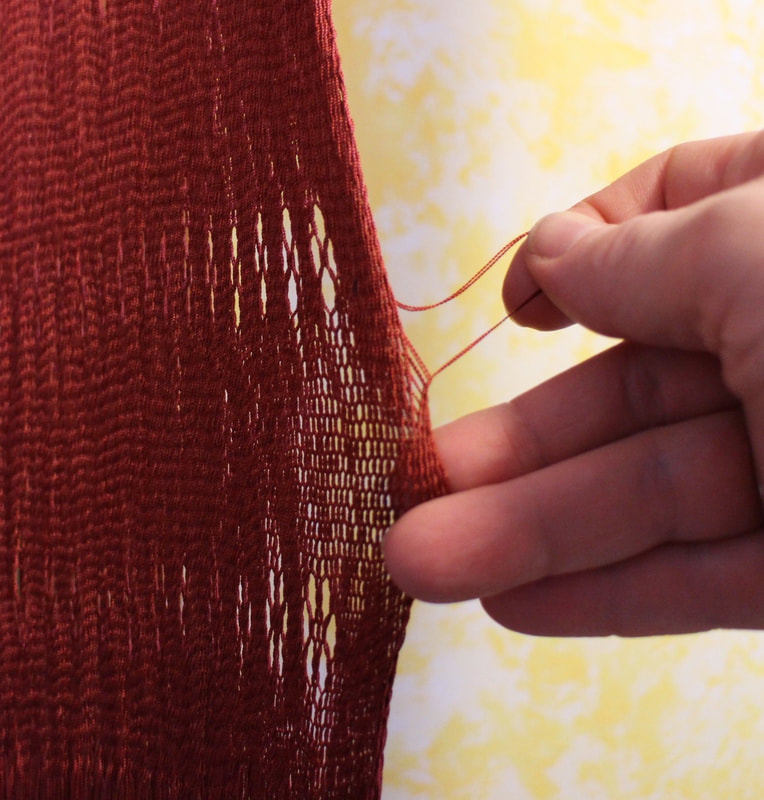 I pulled that extra thread up, leaving a loop off the edge of the cloth. I will try to remember to pull on that loop thread before the final finishing, completely erasing all evidence of this problem.
While on the subject of yarn uptake, with this very fine silk I’m noting an uptake of one inch per foot. When I work on wool sashes with a much thicker yarn, the uptake can be around 3-4 inches per foot. Tension in sprang is always a question. How tight should I keep my warp? Too tight and it is hard to get your hands in there to work, and strings break. Too loose and it becomes impossible to move the row just worked to the mirror image portion of the cloth. I am finding that tension also plays a role in the ‘rows per inch’ of the finished cloth. Oddly enough, a very tight tension prevents a tightly packed cloth. High tension will ‘loosen’ the cloth as you weave the next row.
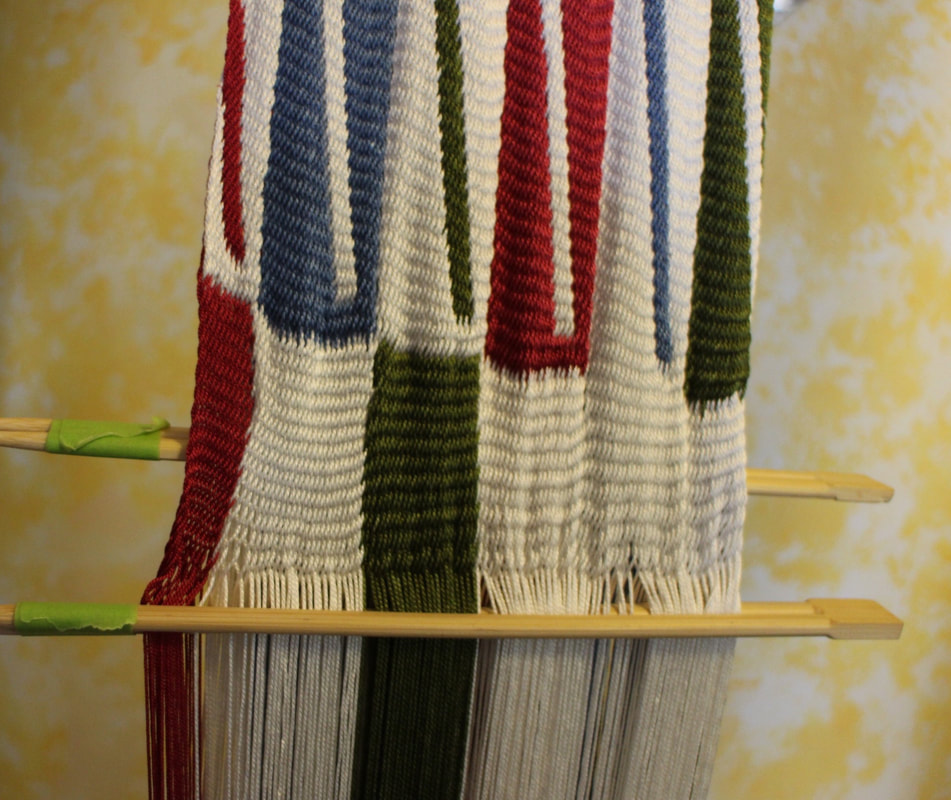
Preparation work for this massive replica project included the creation of samples, using the threads that seemed right for the project. Those samples were narrower and much shorter than the finished product. Finishing the samples, and comparing them to measurements of the original sash I was concerned. The number of rows per inch was much higher in the samples than in the larger sash. Now that I am working with a 15 ft warp, I find that high tension is mandatory. It is my only hope for keeping the threads in order, and pushing the work around to the mirror-image side. Interestingly, without working at it, the number of rows-per-inch seems to be coming out just exactly right. The amount of tension required to manage such a long warp is exactly the amount of tension to give me the right rows-per-inch. It’s looser than my sample pieces, but correct for my measurements. Go figure! It’s minus 14 outside today, and there’s a fresh blanket of snow. Time for serious winter clothes. I set me a figure-8 warp, 30 inches long (70cm) and wove until it met at the middle. OK, I added some S and Z design to keep things interesting. 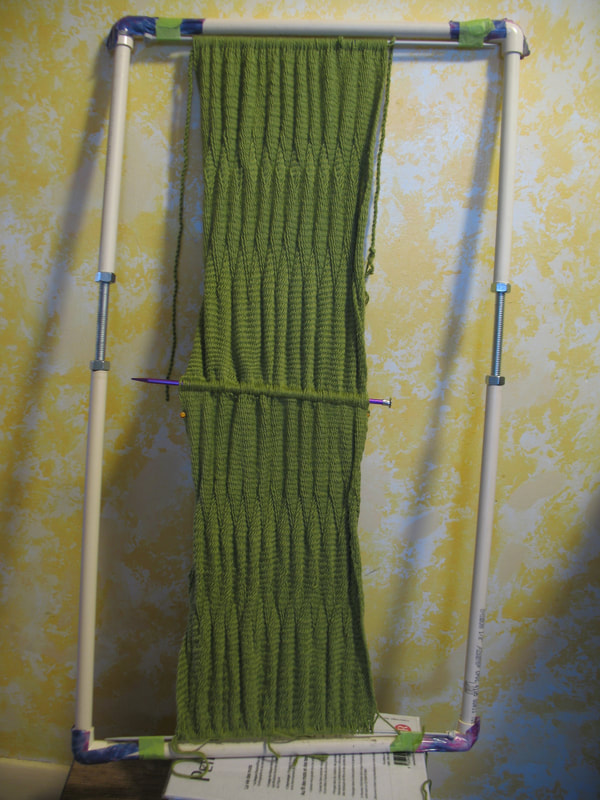 Figure-8 warp sprang I chained across the meeting line. 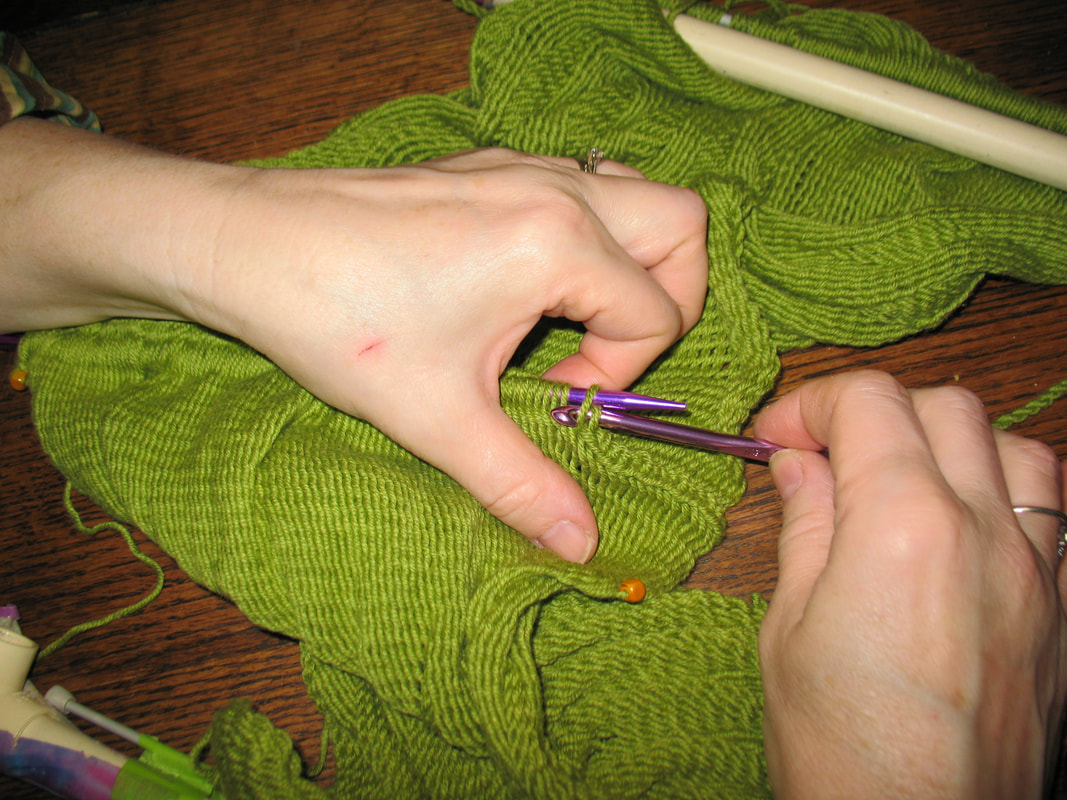 chaining across the center join line The loop ends were gathered together, and I sewed the whole thing into a long tube or football shape. 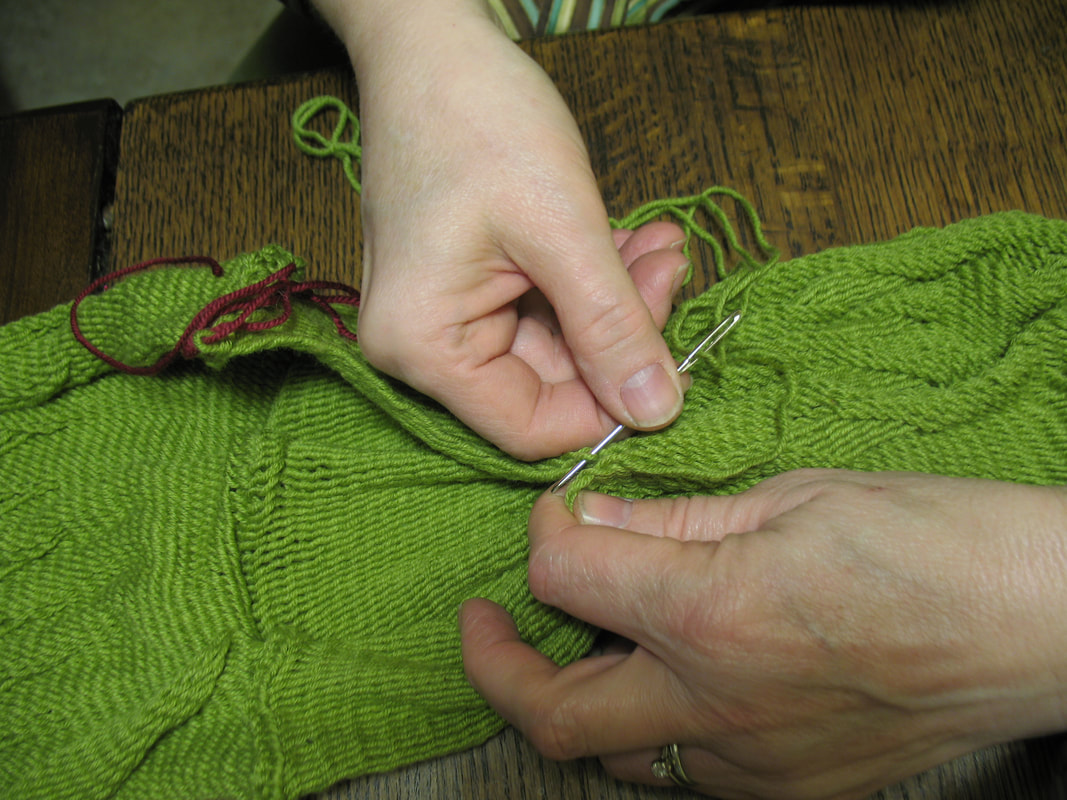 Sewing up the side Check to prevent the needle from snagging the back side of the hat One end of the ‘football’ was tucked into the other end. 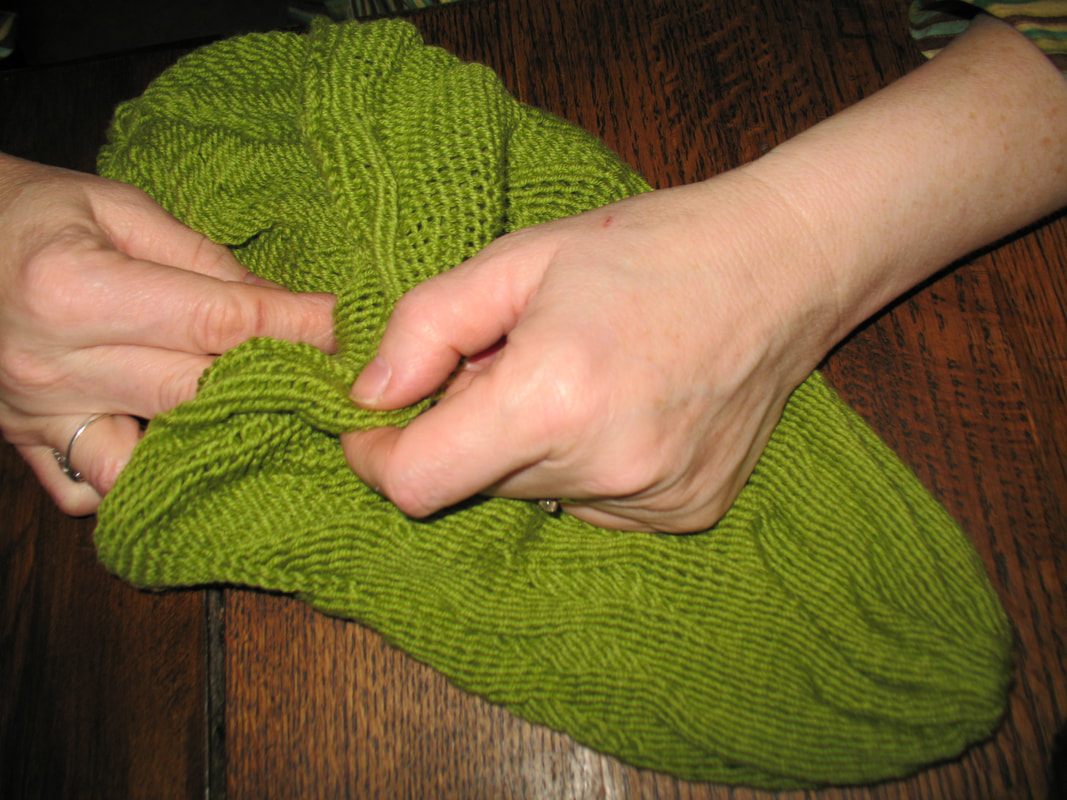 Tuck one end into the other to form a really warm, double-walled hat The finished hat!  Double-walled sprang hat I’ve been working in a local school. Younger children have been learning about three-strand or four-strand braiding. For those in grade 4 and 5 I brought along rigid heddles and had them weave strips or “sashes”. Here are some patterns you can make with a rigid heddle loom. Now, if you have all threads of the same color, you get a solid colored cloth. A single thread of a contrasting color makes a broken line. 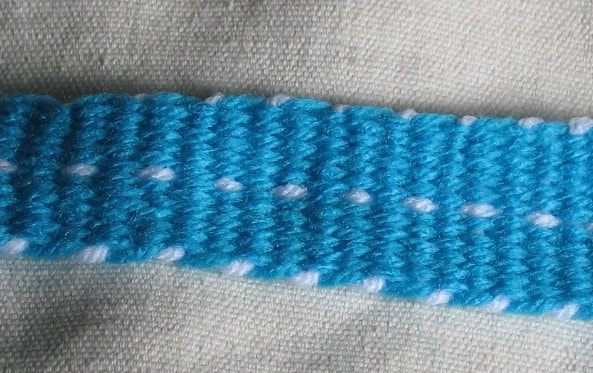 single thread makes a broken line OK, I had blue threads and a single white thread in the warp and then used white in the weft. What happens when I use two contrasting threads on that blue background? 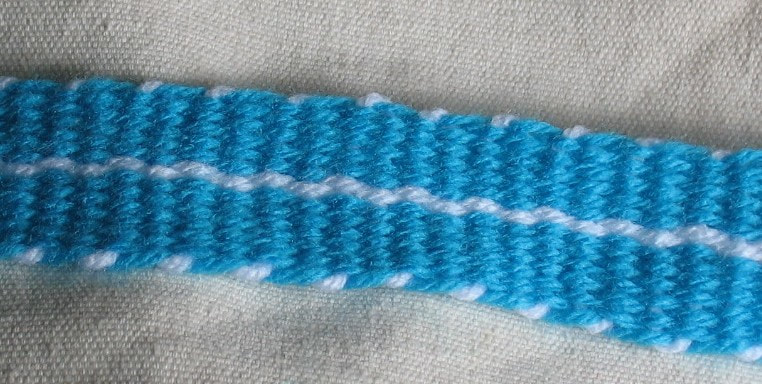 Two contrasting threads Two contrasting threads makes a solid vertical line. What happens when I use three contrasting threads? 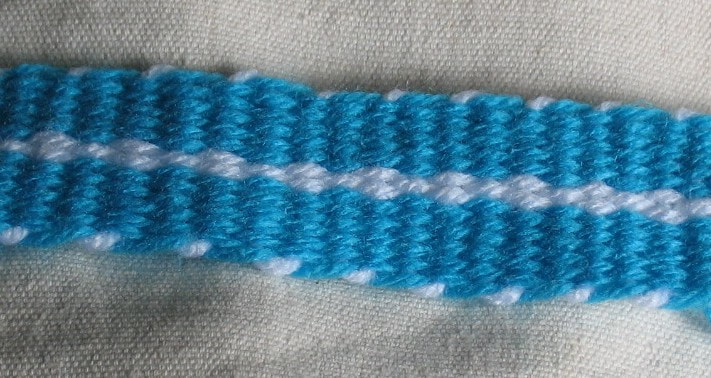 Three contrasting threads Three contrasting threads make a line that is fat-skinny-fat-skinny. Now for four threads. 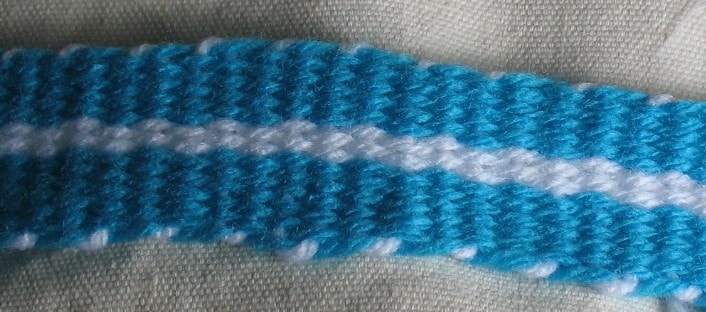 Four contrasting threads Four threads of a contrasting color make a solid line, a bit fatter solid line than the two threads. What happens when I use five contrasting threads? 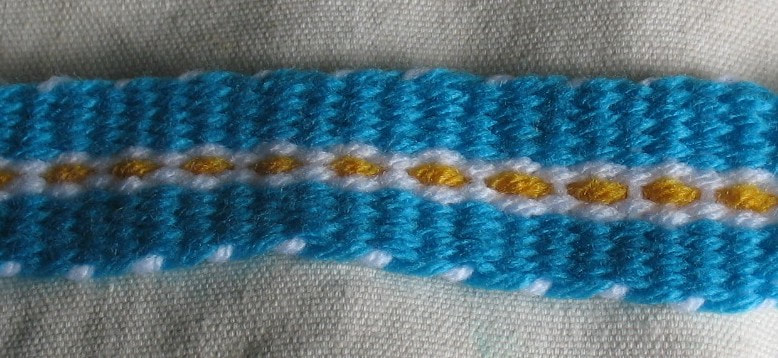 Five threads of contrasting color OK this was really two white, one yellow, and two white. Since 2+1+2=5 this is five contrasting threads on a field of blue. It makes kind of an interesting pattern. Many more patterns possible with a rigid heddle: 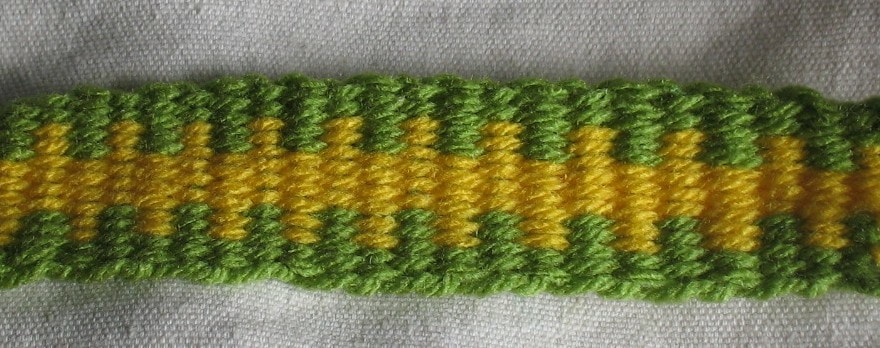 Another pattern All right, here I started with four green threads. Then I put greens in the slits and yellows in the holes for four threads, two of each color. Then I put yellow threads in both slits and holes. Then I put yellow threads in the slits and greens in the holes for four threads. On the other edge I place four greens (slits and holes). When you keep one color in the slits and another in the holes it gives you a horizontal line. Switching colors every four or six threads will give you a checkerboard pattern. 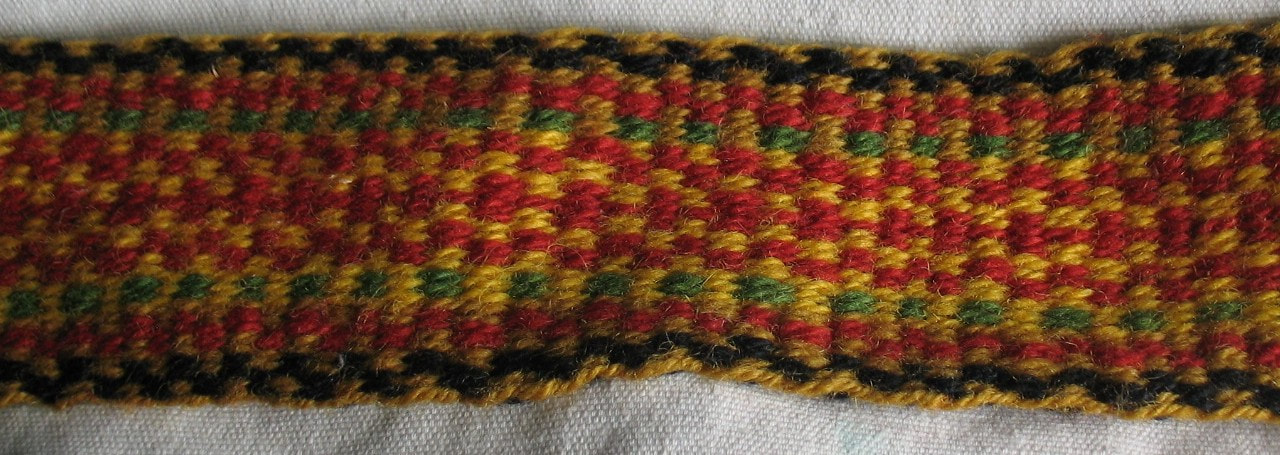 checkered pattern Here are some of the strips woven by fifth graders. 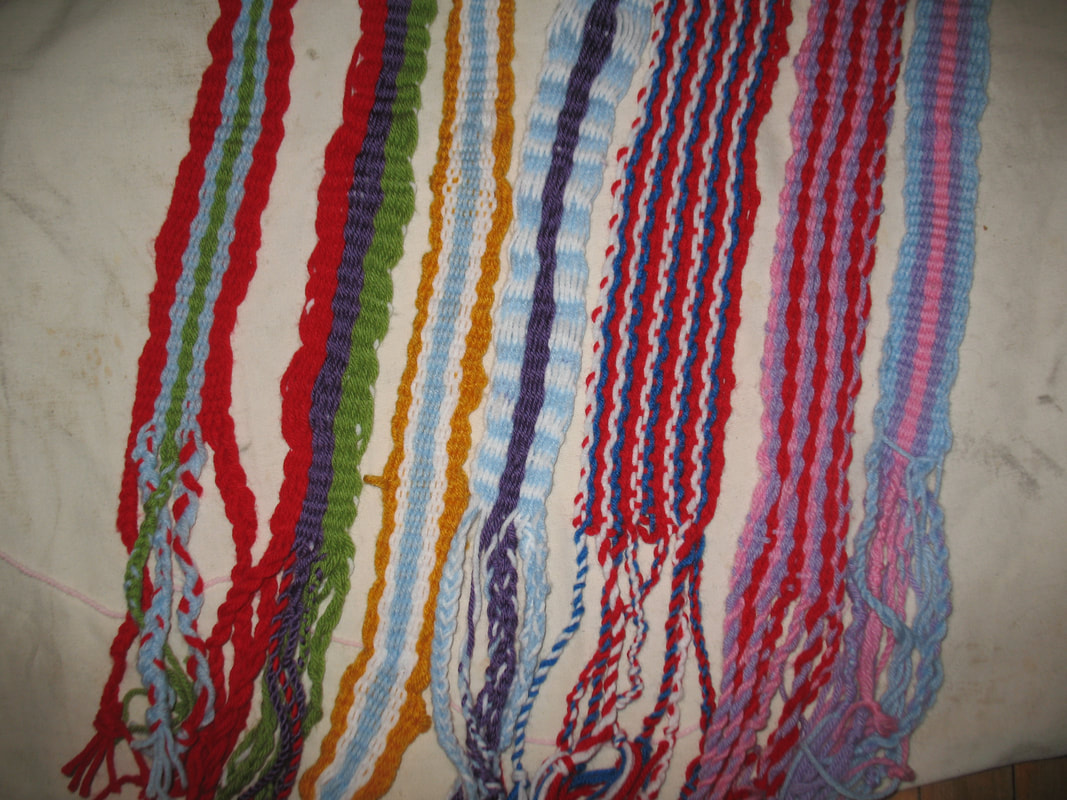 strips woven on a rigid heddle Trying another method for a pair of socks using sprang. Here are the socks: 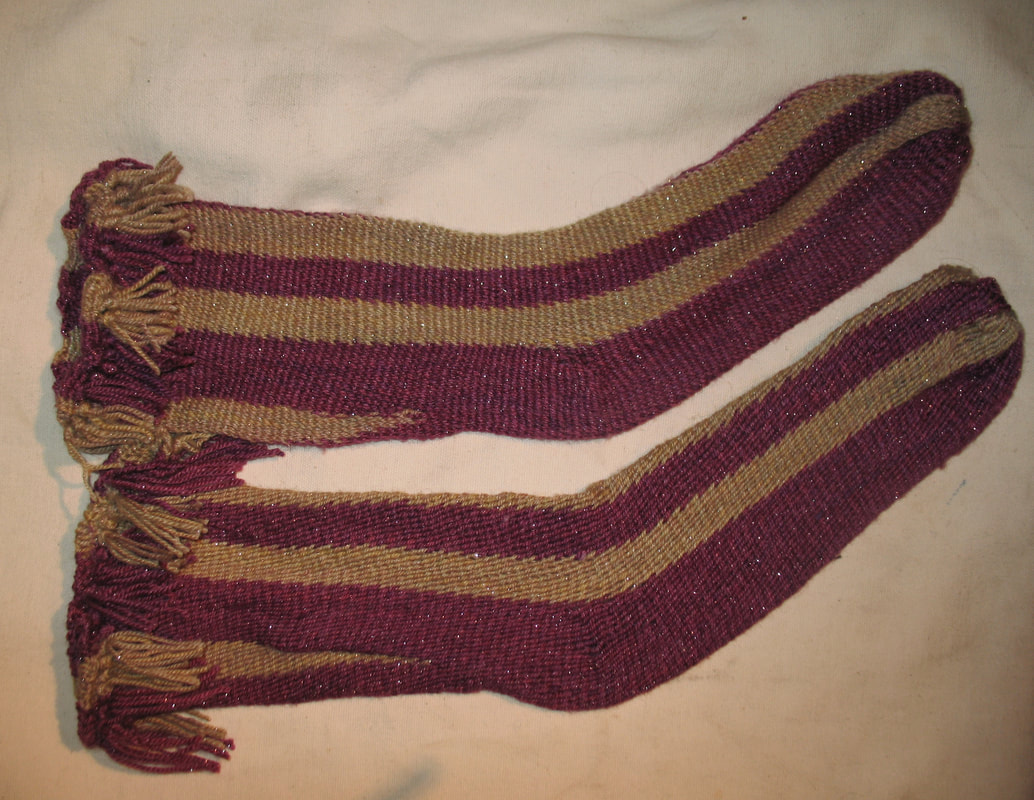 Sprang socks with short row heel How did I do this? I figured I’d measure out a warp with extra length in the strings that would be the sole of the foot, and more importantly, the heel. 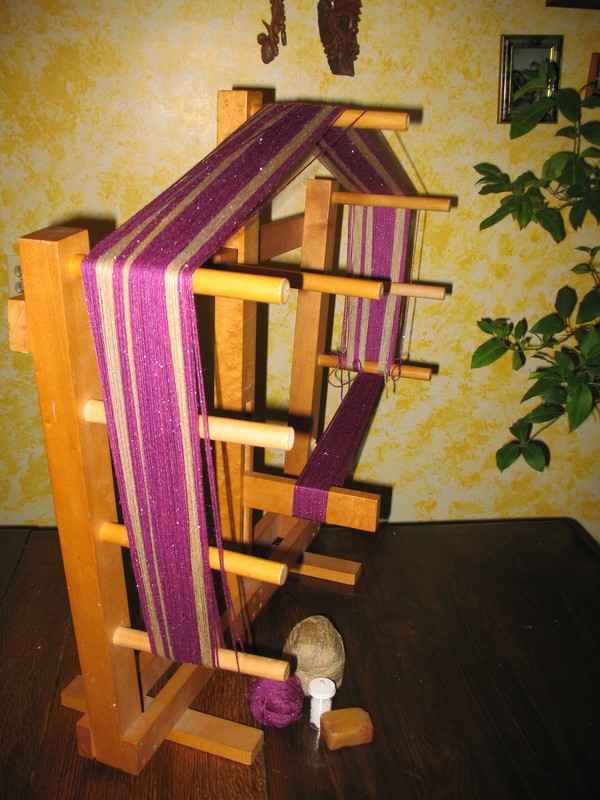 Setting up a warp of uneven lengths I thought I’d just have two passes each time I shoved the shed, once with the shorter strings for the top of the foot, and once for the sole threads. It’s been a real pain to work on this sock. The strings for the top of the foot go just fine. The extra long threads for the sole and heel are a Royal Pain. It’s been all afternoon and I’ve only woven two inches. Now I see that the finished cloth is pretty uneven. 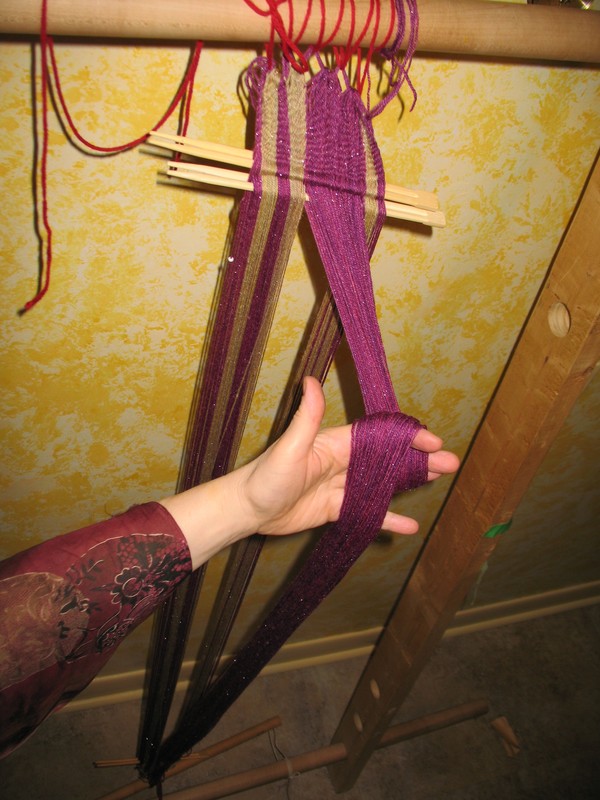 uneven warp for a pair of socks I’m ready to cut this into two, work the socks one-at-a time as free-end sprang.  Foot controlled tension Work went much more smoothly, working ‘free end’. The top is tied to a hook in the wall. I secured the cut ends with a loop knot, and held them down with my foot. Each row, I pulled out the ‘falseweave’. You might be surprised how easy this is. And voilà, the completed sock: 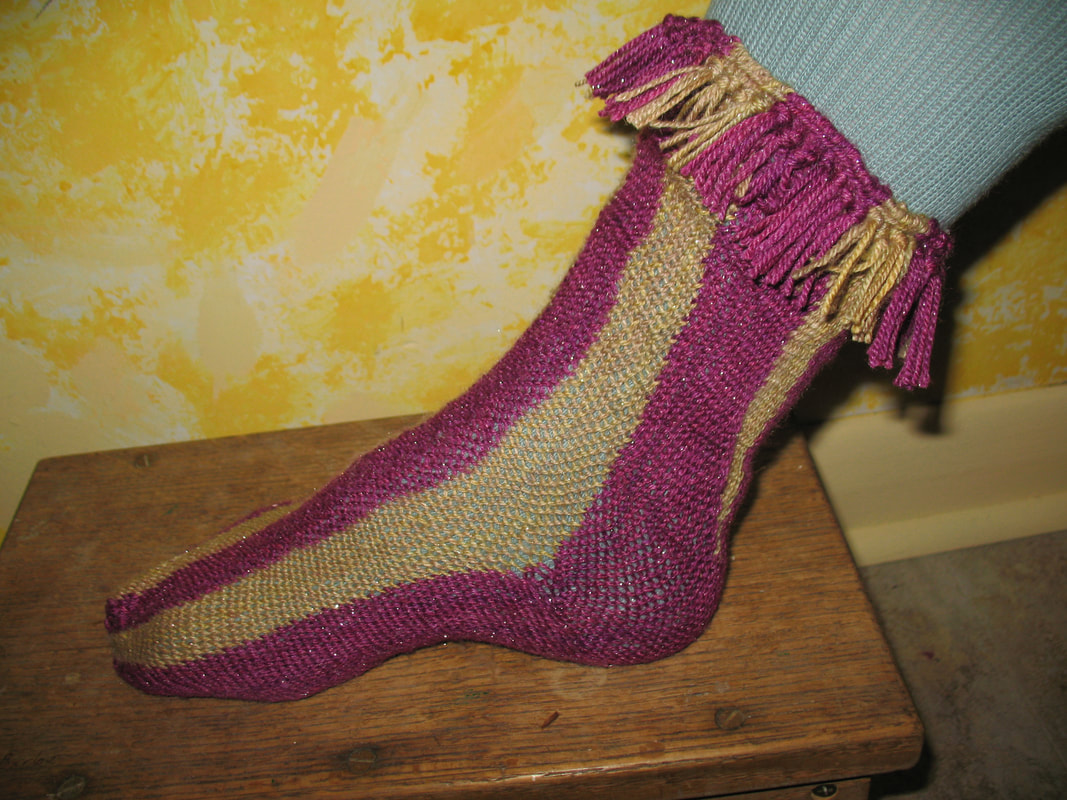 Vertical stripe sprang sock For those who want to know, I used a wool blend ‘sock yarn’. Knitters will understand the concept of ‘short rows’ to form the heel. In this piece I also explored adding strands at the ankle, at the back of the leg. Yes, sprang is stretchy, but I figure that if I’m eventually going to make a sock that goes up to the knee, I might want to add strands to allow for the difference in circumference ankle to calf.
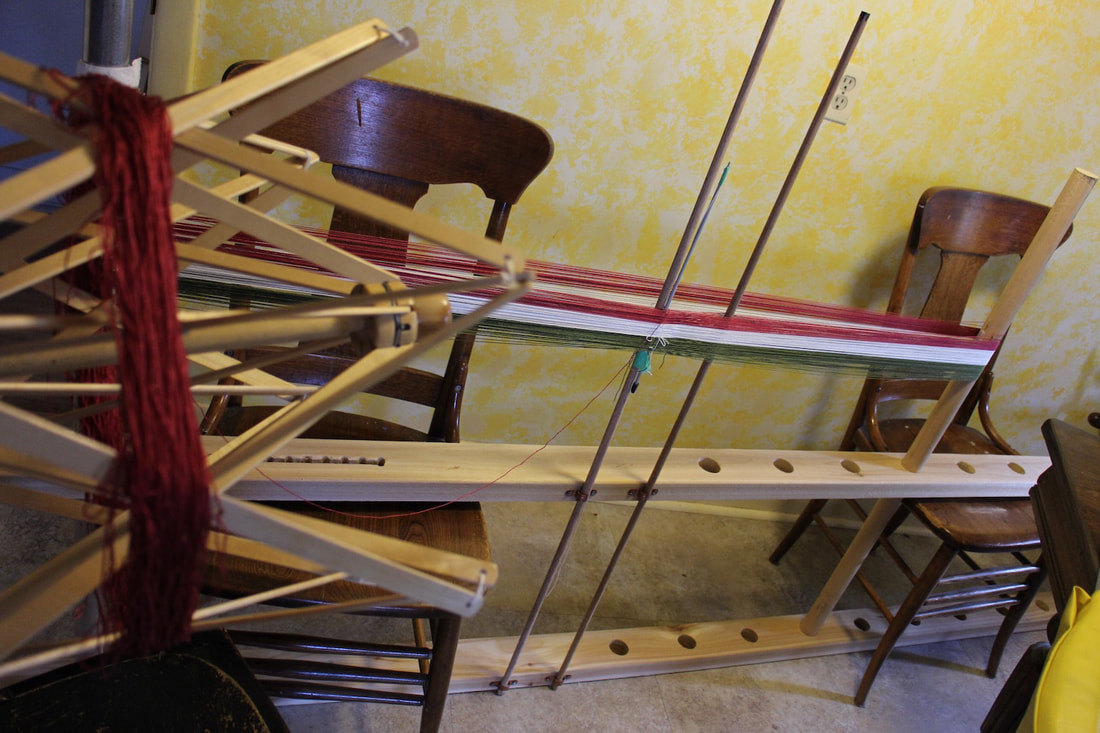
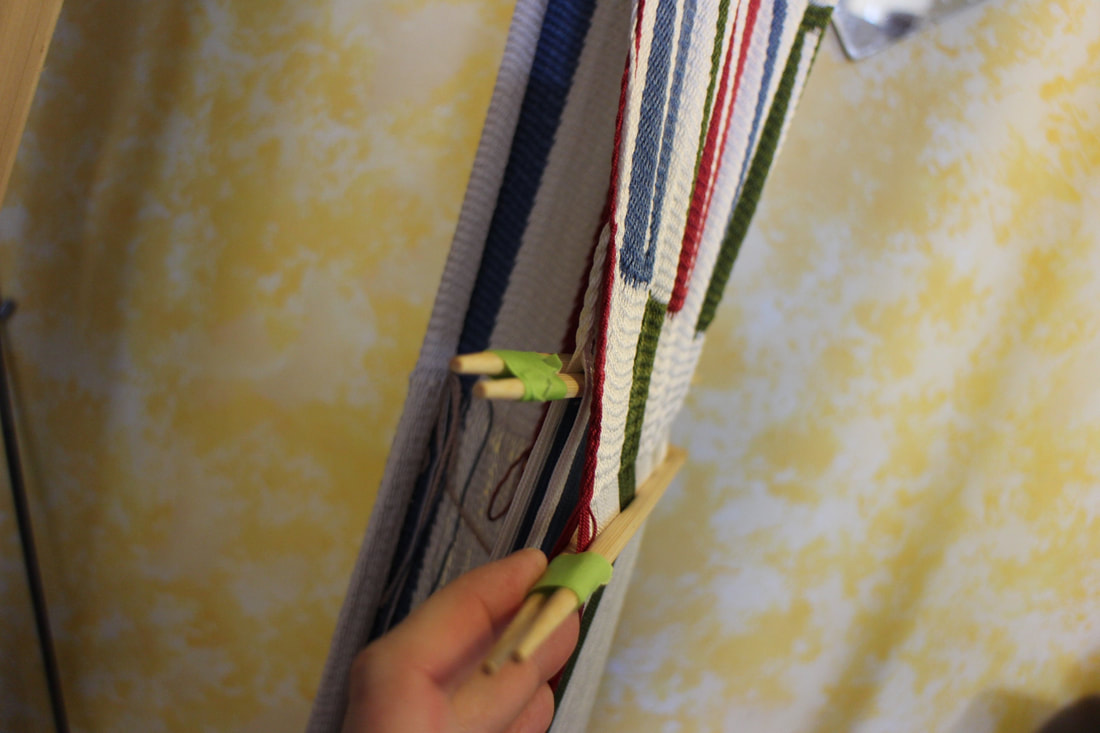
Interested in more details? How do you do sprang? What’s this loop knot? How do you get the colors to work? How do you do the heel? It’s hard to answer just one question. Best to start at the beginning and work all the way through. Know that I’m writing a how-to book, step-by-step from the beginning. There will be Lots of detailed patterns. The first draft is already making its way through layout. I’m bound and determined to have this book in print by April 2011. At the same time I’m still open to comments, requests on what you really need to have explained. The classic method for finger weaving is that you attaching the work to a nail in the wall, and tie the lower end to your chairleg. Many people describe their circumstances to me, where putting a nail in the wall is NOT permitted. This might just be the solution: A new weaver sends me this image, a nice idea for attaching your sash. 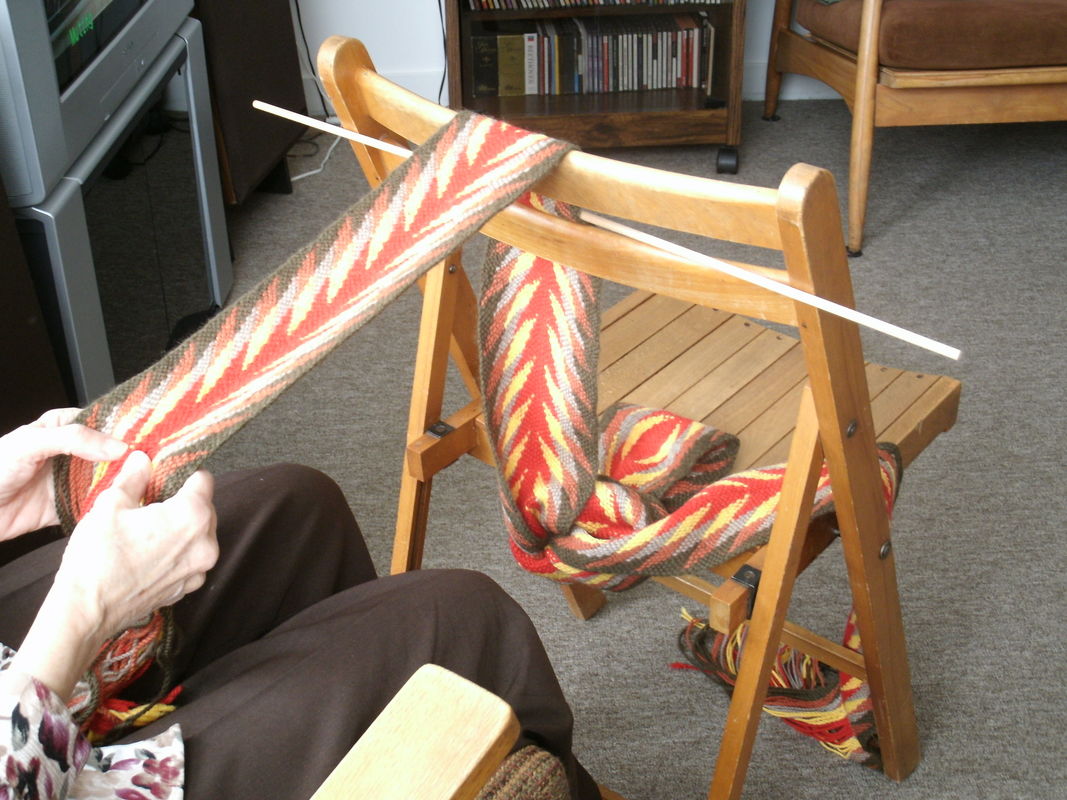 Alternative to a nail in the wall ... a chairback and in greater detail 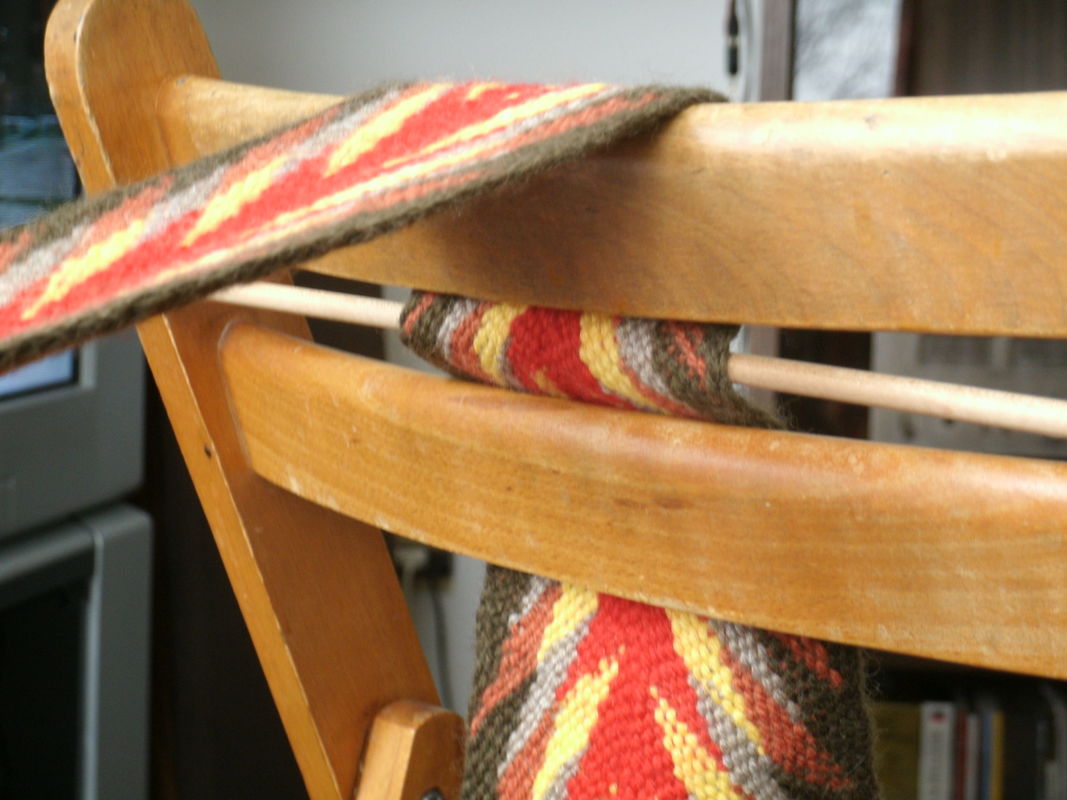 detail of chair tension |
Categories
All
Archives
May 2023
Categories
All
|

 RSS Feed