SashWeaver
  • Home
  • About the artist
    • Gallery
  • Store
  • Sprang
  • Virtual Class Room
  • Contact me
  • Blog

Blog

Jacob Fugger's bonnet (SPRANG BONNETS PART 4)

3/11/2023

0 Comments

 
SPRANG BONNETS PART 1
SPRANG BONNETS PART 3
Picture
Jacob Fugger as portrayed by Albrecht Drürer
Picture
My version of the bonnet
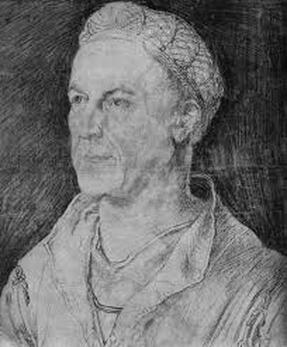
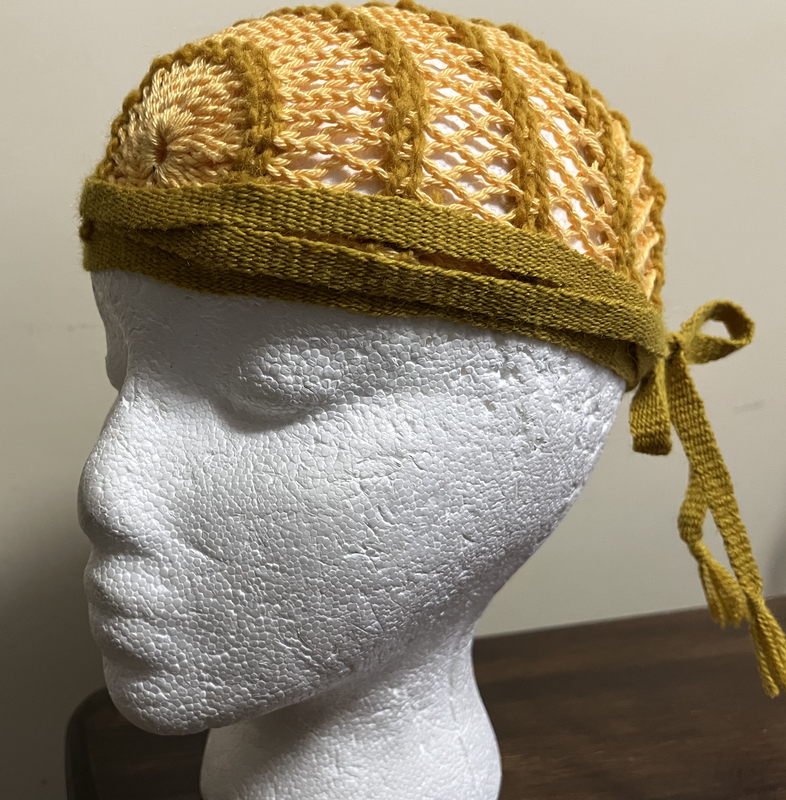
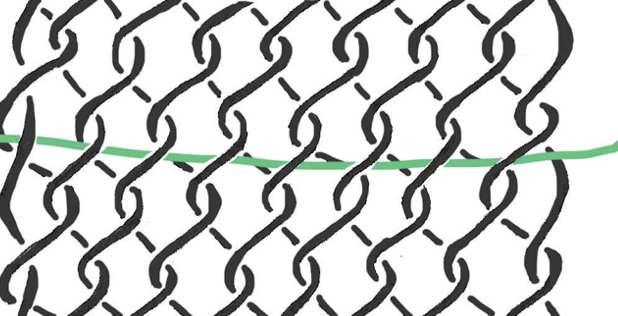
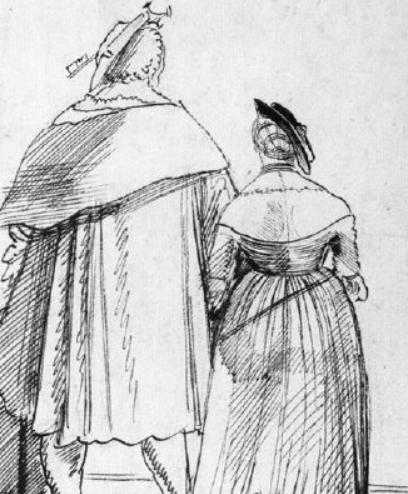
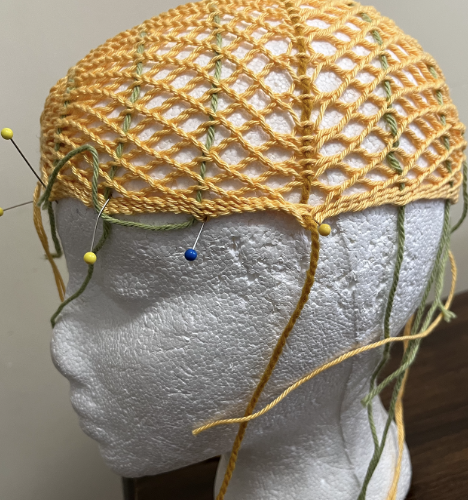
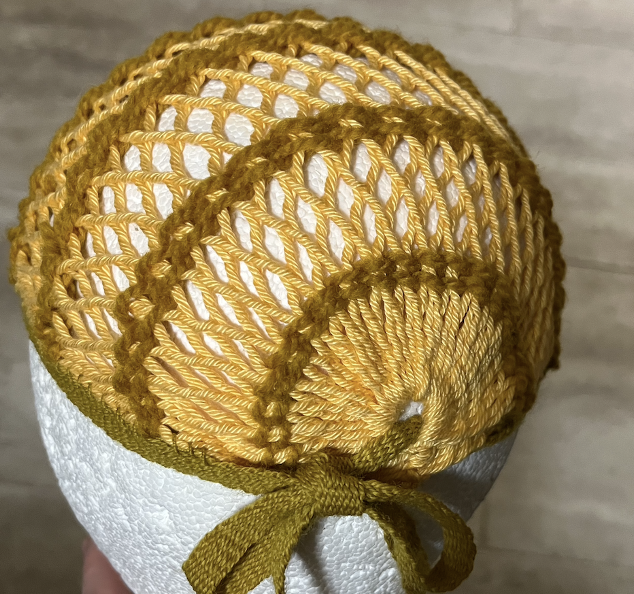
The portrayal of Jacob Fugger by Albrecht Drürer leads me to think that Mr Fugger wore a sprang bonnet. I tried to make a similar bonnet.
I interpreted the heavy lines in the bonnet as lines of horizontal twining in a sprang bonnet. When I tried this myself I found that there may be a reason for the twining in the sprang bonnet, as you will see.
Picture
Picture
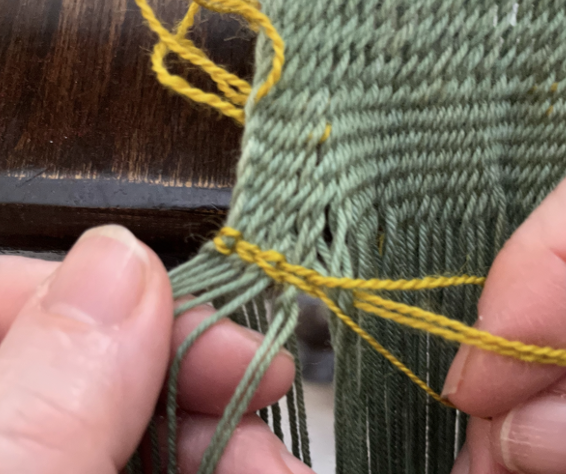
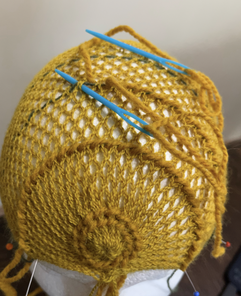
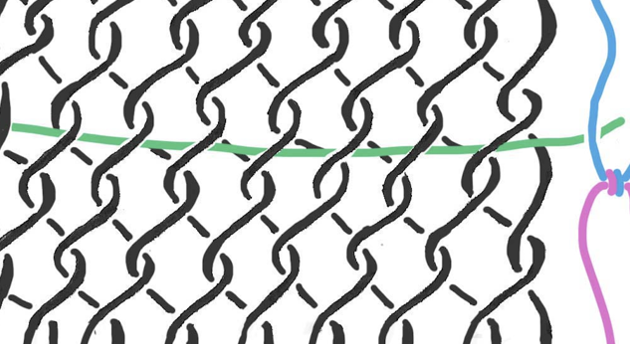
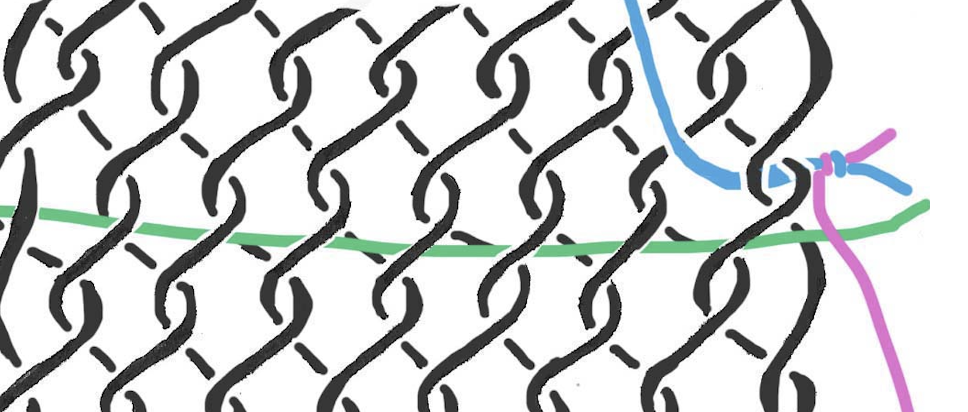
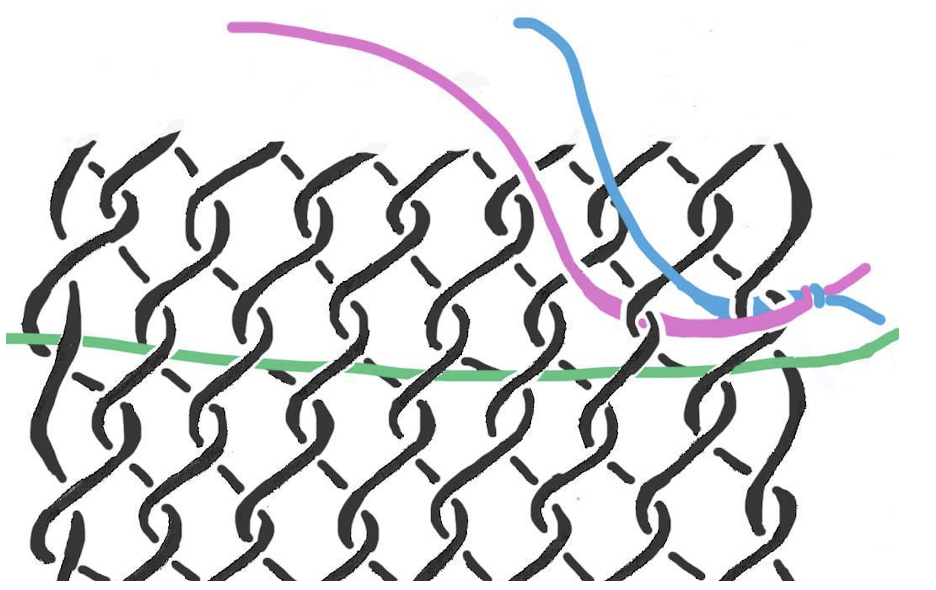
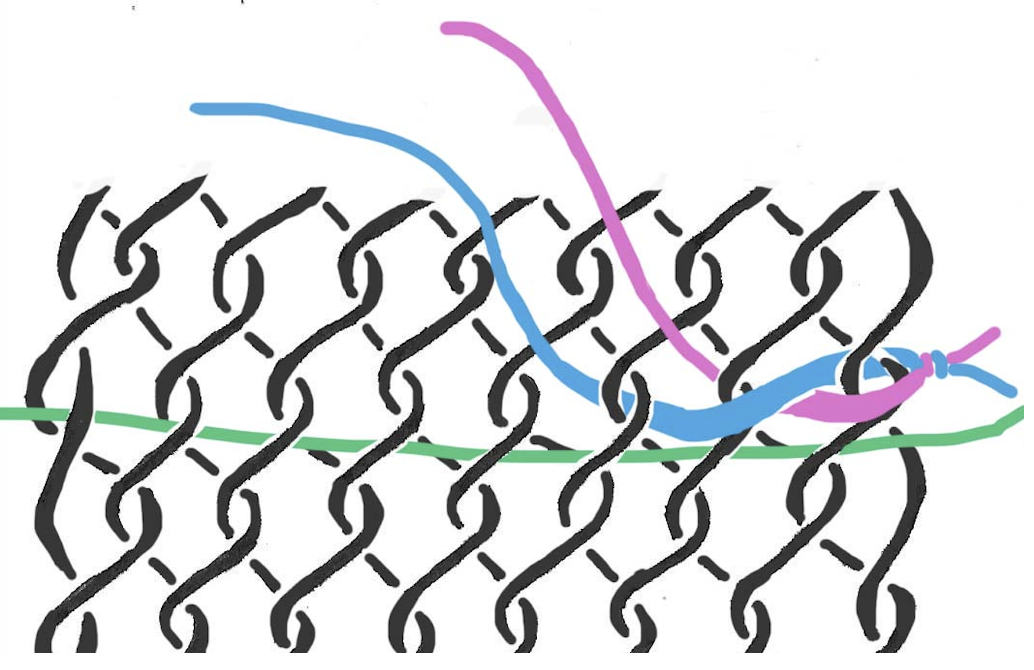
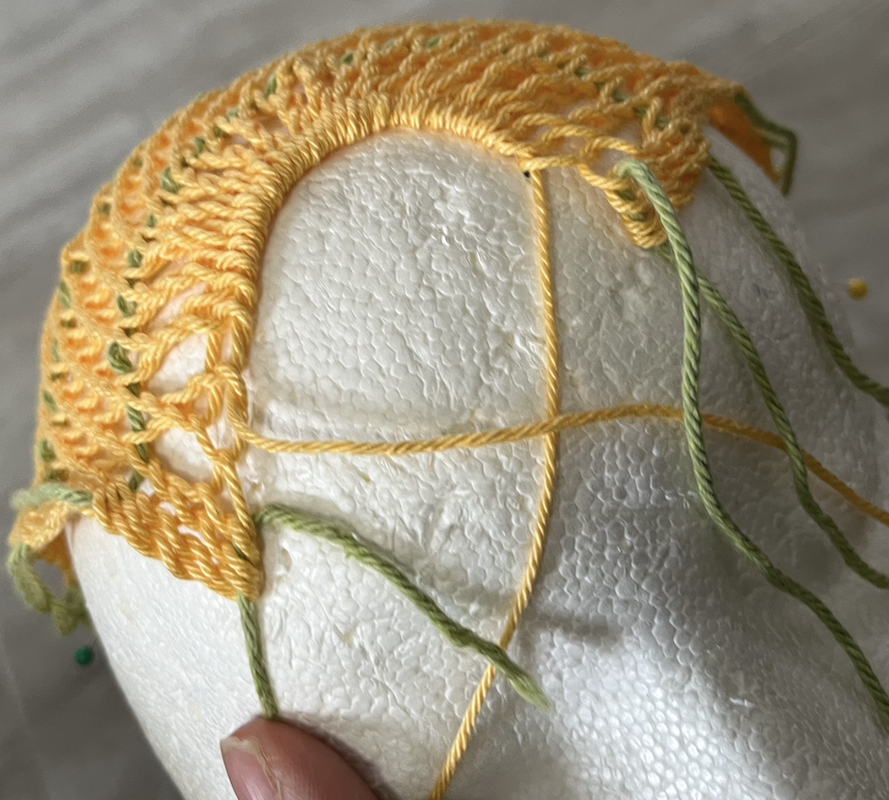
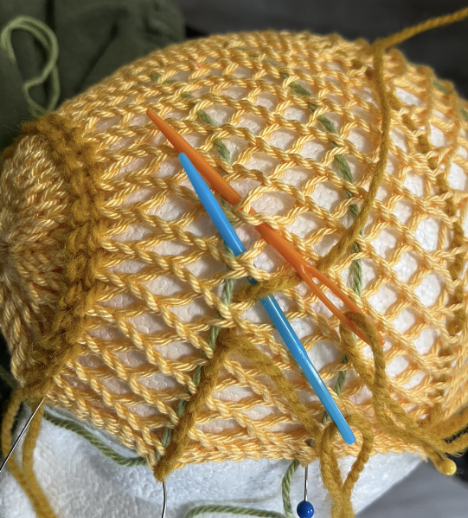
Thinking about approaches to incorporate horizontal twining into the sprang cloth, I thought of two ways to do this. One way (method #1) is to create a line of weft twining as I created the cloth. The other way (method #2) is to add the twining stitches after completing the sprang. The twining stitch does not have the stretch of the sprang cloth. Maybe, indeed, this was the whole idea of the twining line. This risk of method #1 is that the line of twining is too narrow for the desired width of the bonnet. I found method #2 to be more effective, in that I could place the sprang cloth on a head shape (styrofoam head) and then work the twining stitch at the desired tension, creating the desired width of the cloth, fitting the bonnet to the head.
How did I work the twining stitch?
Picture
1. I placed a safety cord in the rows where I anticipated later adding the twining .... OK, two safety cords each time, one on the Z-side of the cloth, and one on the S-side of the cloth.
Picture
2. In my drawing I use two colors of thread, so you can better see what is happening.
Picture
3. The blue thread passes behind the first stitch of the sprang cloth.
Picture
4. The pink thread passes in front of the first sprang stitch, and behind the 2nd sprang stitch.
Picture
5. The blue thread passes in front of the pink thread, in front of the 2nd sprang stitch and behind the 3rd sprang stitch.
Picture
6. The pink thread passes in front of the blue thread, in front of the 3rd sprang stitch, and behind the 4th sprang stitch.
With this in mind, I set up a warp. I used a cotton yarn (Berroco Pima 100), and set on a 12 inch (30 cm) long warp of  44 loops (88 threads).
Picture
I worked the doubles grid stitch (you might see the instructions I gave for Mrs Luther's bonnet for more information about the doubles grid ... or check out Sprang Unsprung).
Picture

I placed a safety line in both the S-side and the Z-side at intervals, as guide lines for the twining stitches to be added later.


When the two sides met, I inserted a string in the last row.
Picture
I removed the cloth from the frame.

I slid the loops at the top of the cloth onto 3 separate strings. 
The first 4 loops went onto thread #1.
The next 36 loops went onto thread #2.
​The last 4 loops went onto thread #3.
Picture
I set the cloth onto my head-shaped styrofoam mold.
Picture
I cinched the 36 loops at the centre into a tight loop and tied a knot.
Using the tails from that knot, I stitched together the 8 remaining loops, 4 on one side, 4 on the other side.
Picture
Cinching the loops together into a ring begins to bring the sprang rectangle into ah hat shape.

Note the edges of the cloth at the front of the head sit tightly against the head. 
 
​The edge of the cloth near the back of the head is loose, rather ruffled.

Picture
How to finish the back of the bonnet? ​How are the other loops finished?
This drawing, done in 1514 by Urs Gra gives me an idea.
 
The figure at the right may be wearing such a bonnet seen from the back side.


Picture
When I gather the loops at the other side of the cloth, forming a ring at the back of the head, that ruffling along the edges disappears.
Picture
​I worked a twining stitch along the guide lines.  This stabilized the width of the bonnet.
Picture
​The rectangular shape of the cloth takes on a very nice bonnet shape.
Picture
Picture
​I created a woven band using a tape loom, and stitched the band to the edge of the rim of the sprang bonnet.
Picture
I stitched the band to the rim of the bonnet, leaving the band not attached at the back of the head. This will make it easier to put the bonnet on, and will allow for the bonnet to be tightened to sit snugly on the head.
Picture
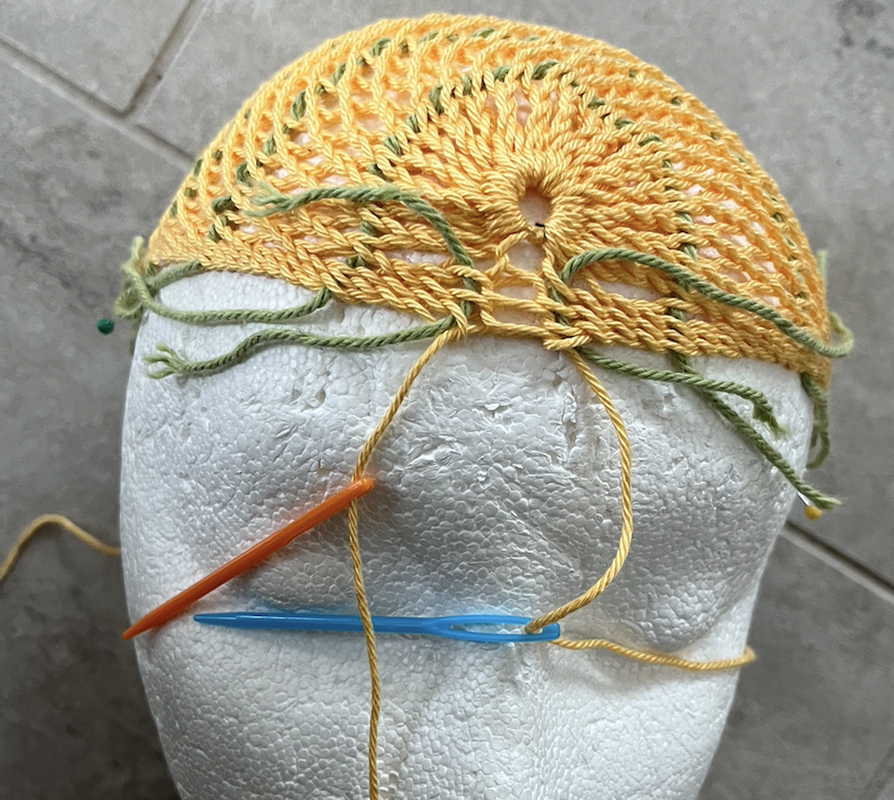
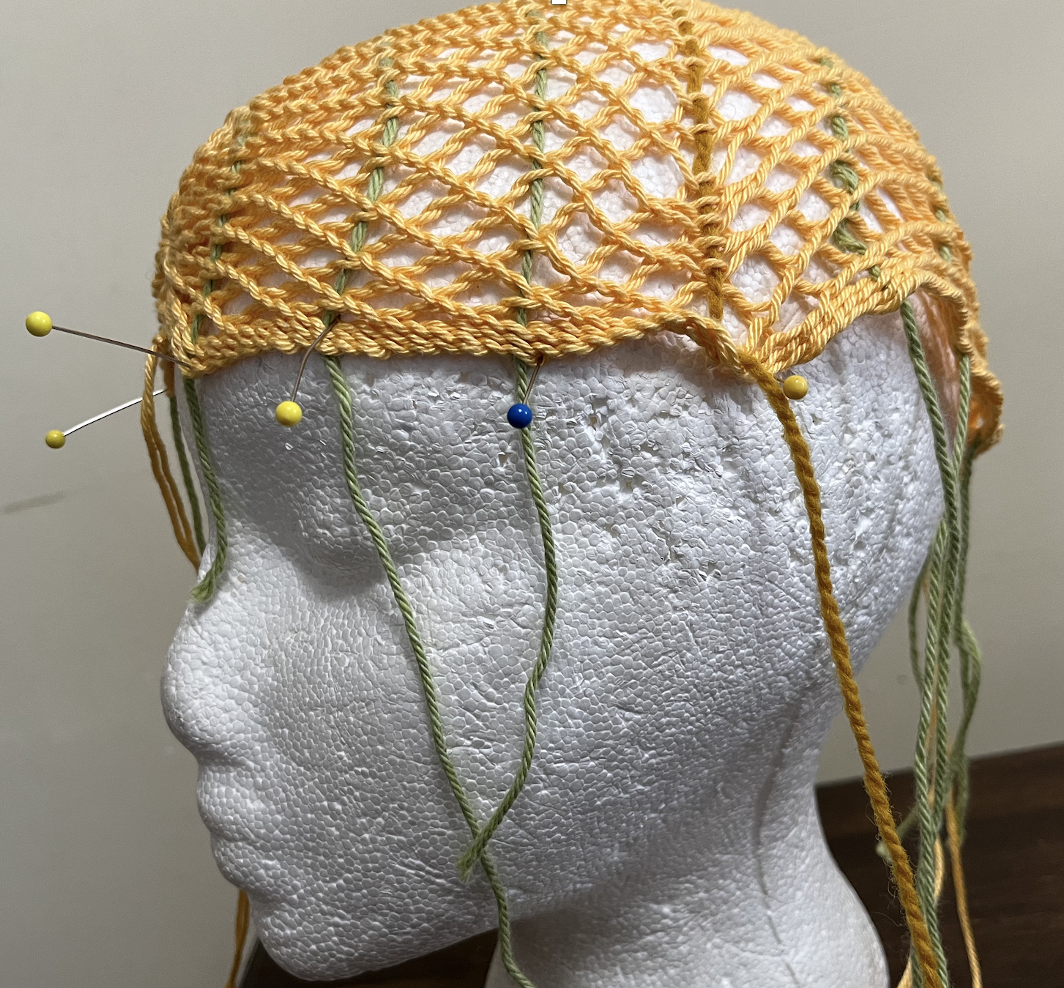
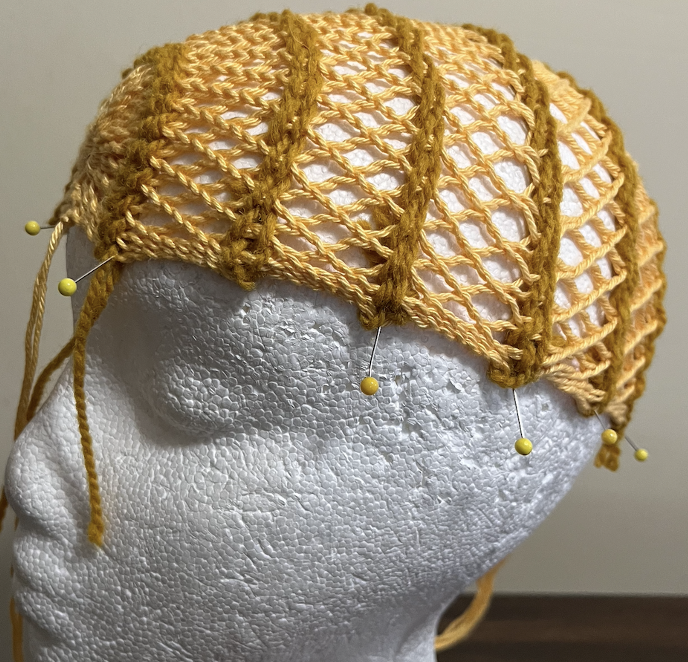
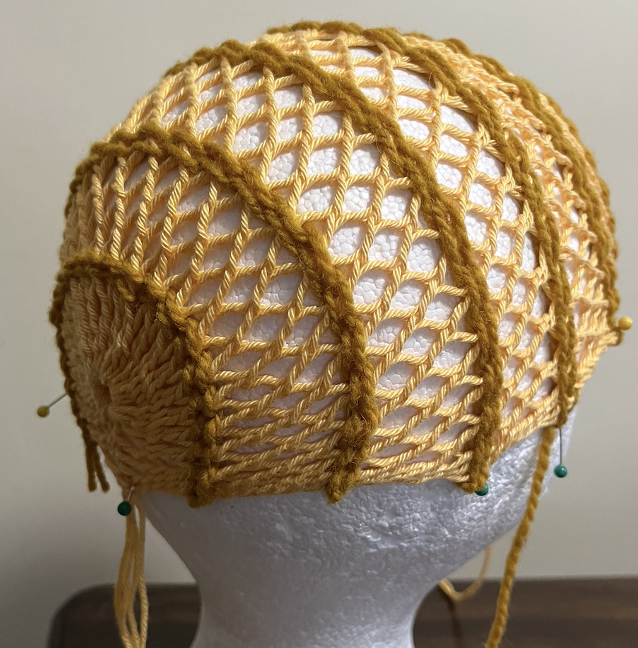
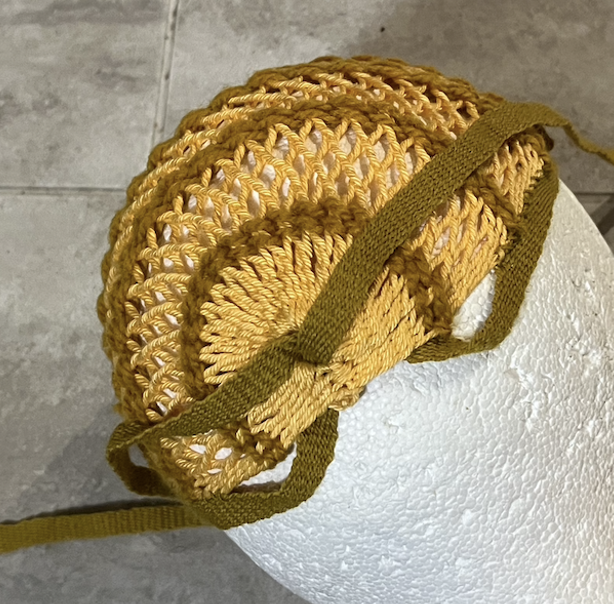
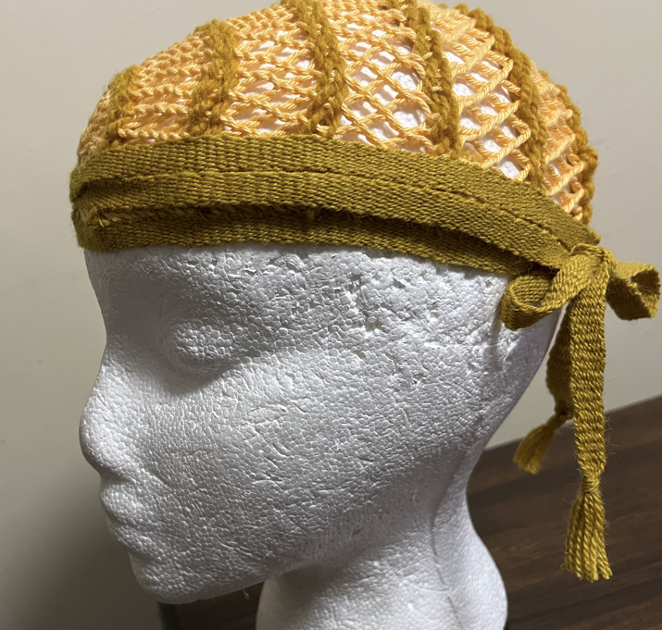
How do you tie the bonnet on the head?
Two approaches come to my mind.
One approach is to pass one end of the head band through the circle at the back of the head, and tie it to the other end of the head band.
This is the method if your band is short, and/or if you do not want the band to pass all the way around the head.
Picture
If you want the ends of the band to pass all the way around the head, then I would pass both ends through the circle at the back of the head.
Picture
Picture
0 Comments

Linen Shirt

5/18/2019

1 Comment

 
Picture
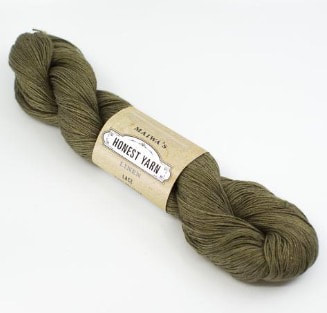
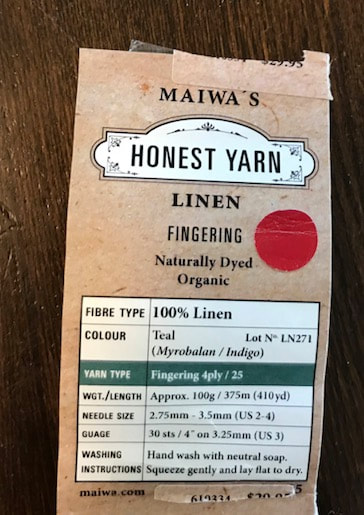
While in Vancouver earlier this year, I stopped in at Maiwa on Granville Island. I will be teaching a sprang class there next year. I wanted to have a look at their yarns, to evaluate their use for my students. I saw some lovely linen yarn.
Picture
Picture
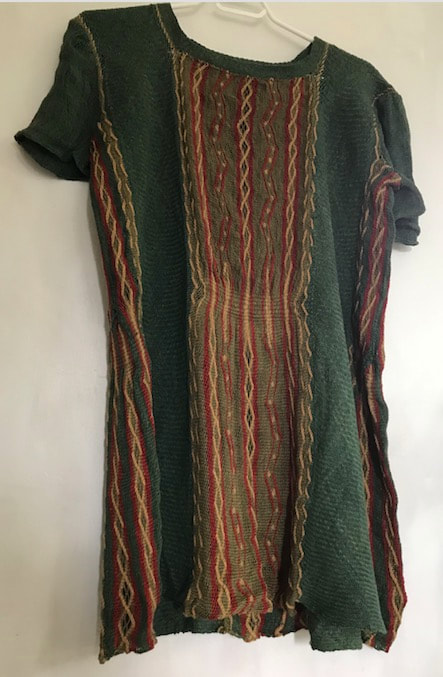
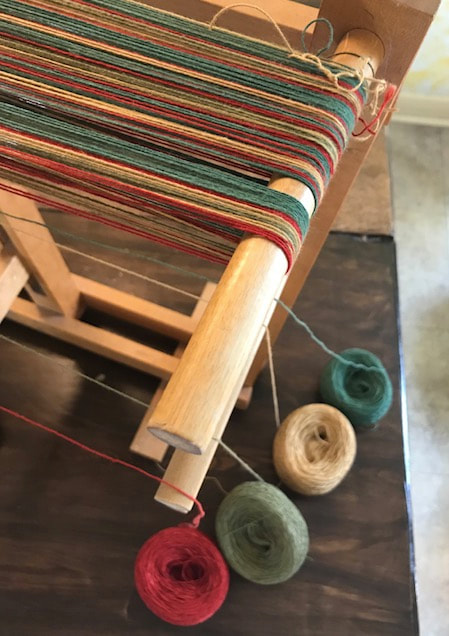
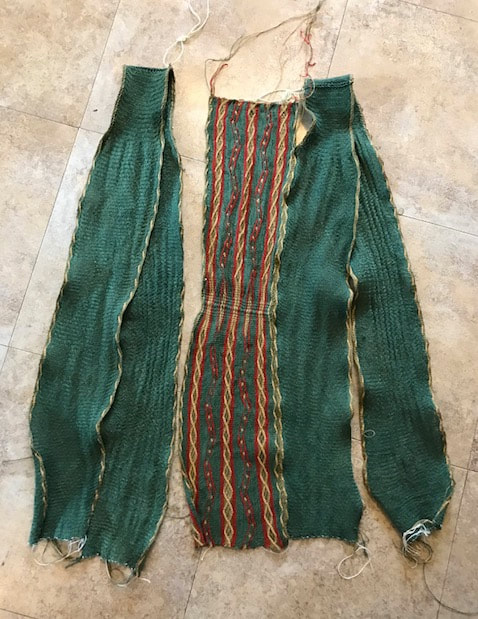
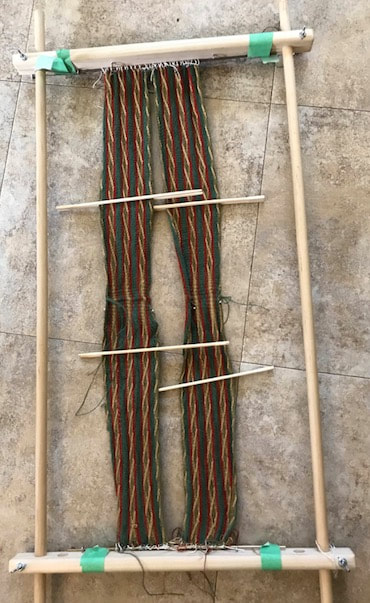
I decided to try to make yet another sprang shirt, using this linen yarn. OK, I purchased seven skeins.
Wanting to use some of those colorful motifs from Coptic bonnets, I set up a multicolored warp.
Picture
Picture
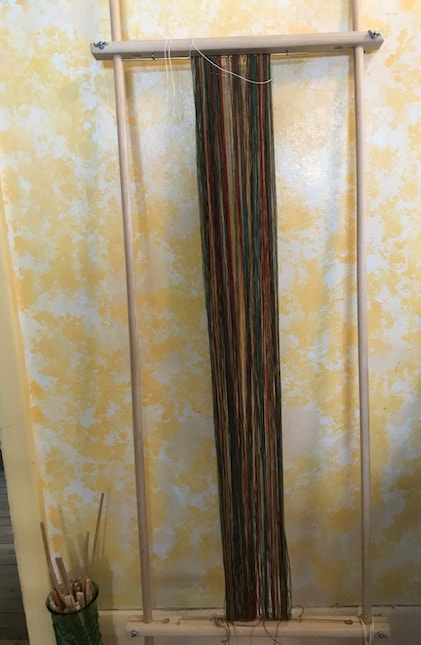
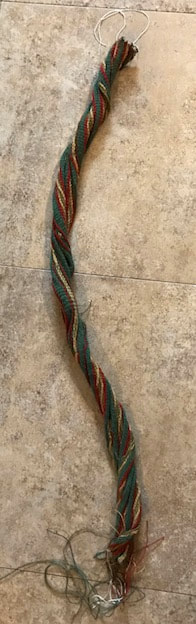
This piece will be the center back of the shirt.
Picture
Right off the frame, the piece curled up.
Picture
To un-curl the piece, I blocked it ... that is, I got it wet, and then pinned it to my ironing board.
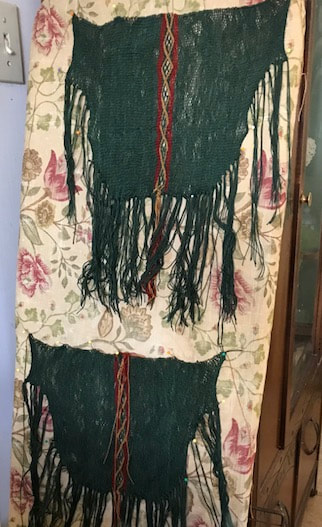
Now for two pieces to go on either side of the center back. These pieces will go over the shoulder, starting and ending at the hem of the shirt.
Picture
I decided these side panels would be a more solid color. And I decided to try an interlacing stitch.
Picture
Starting to assemble the shirt.
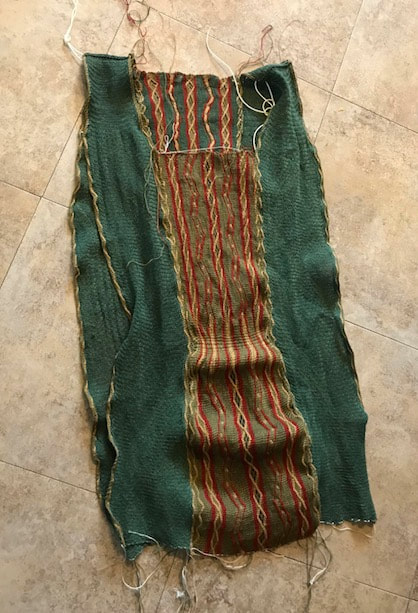
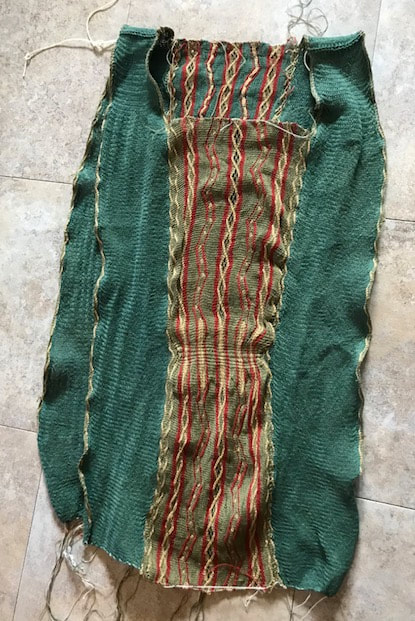
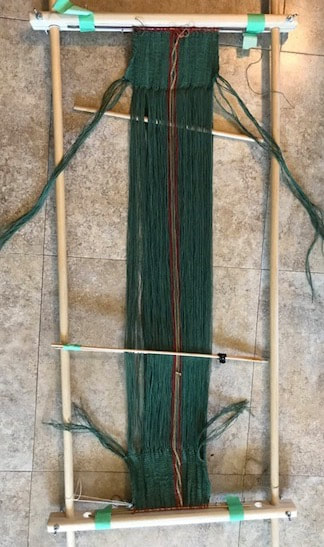
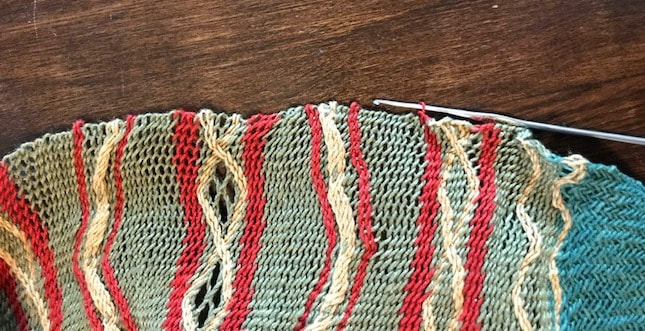
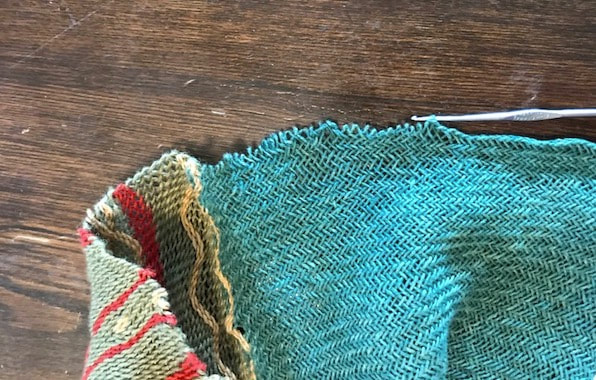
Now for the front of the shirt. I decided to use the lighter green as the background for the front of the shirt. The first time I sewed the front into the shirt, there was a clear difference in tension (rows per inch) between the lower part of the front, and the side pieces. I re-sewed it a couple of times before getting it right.
Picture
The first time I sewed the front panel in, there was unacceptable puckering in the lower half.
Picture
I un-sewed and re-sewed several times, until acceptable. The secret was to disobey those rules about a completely invisible seam ... and not always align up rows, but rather to avoid puckering.
Now for two narrow pieces to go under the arms.
Picture
Two narrow bands, to go along the sides, under the arms.
Picture
The collar is a narrow piece of circular warp.
Picture
And lastly, sleeves. I shaped the sleeves as I went along.
Picture
I made the two sleeves at the same time, one sleeve at the top, the other at the bottom of the frame.
Picture
Once cut apart, I blocked the sleeves before sewing them into the shirt.
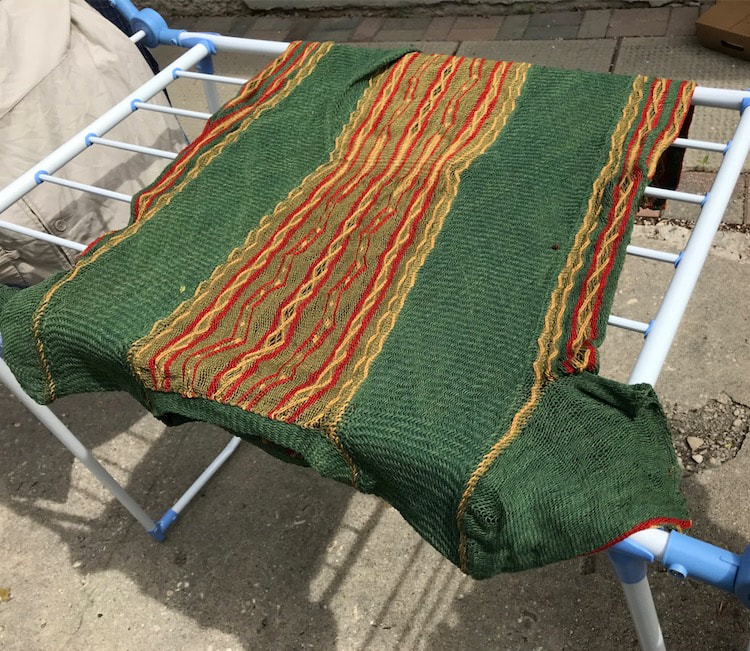
I chained around the hem, to give a firmer edge to the shirt.
Picture
Chaining across the loops at the hem to make it a bit more firm.
Picture
The firmer quality of the hem will mean I will be less likely to snag on things when I wear the shirt.
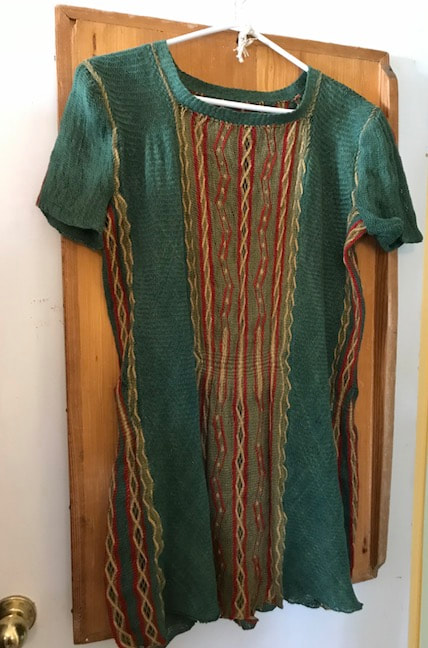
I finished assembling the shirt, and washed it.
Picture
Picture
The shirt, lying flat to dry.
Look for me this summer, sporting my new sprang shirt.
1 Comment

Completed shawl

4/24/2019

1 Comment

 
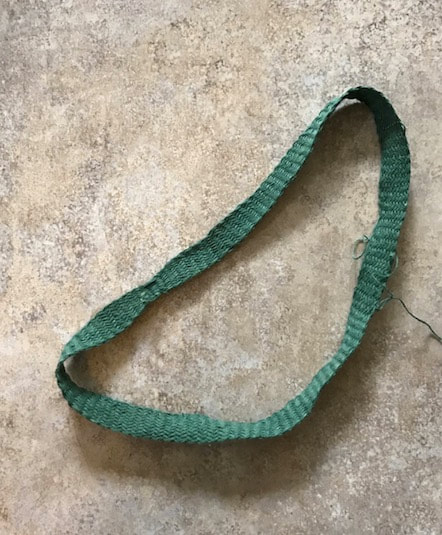
 And here's a better image of that shawl I made last month, demonstrating perhaps some of the drape and flexibility of the fabric
Picture
Photo by Chris Black
1 Comment

April, 2019

4/2/2019

0 Comments

 
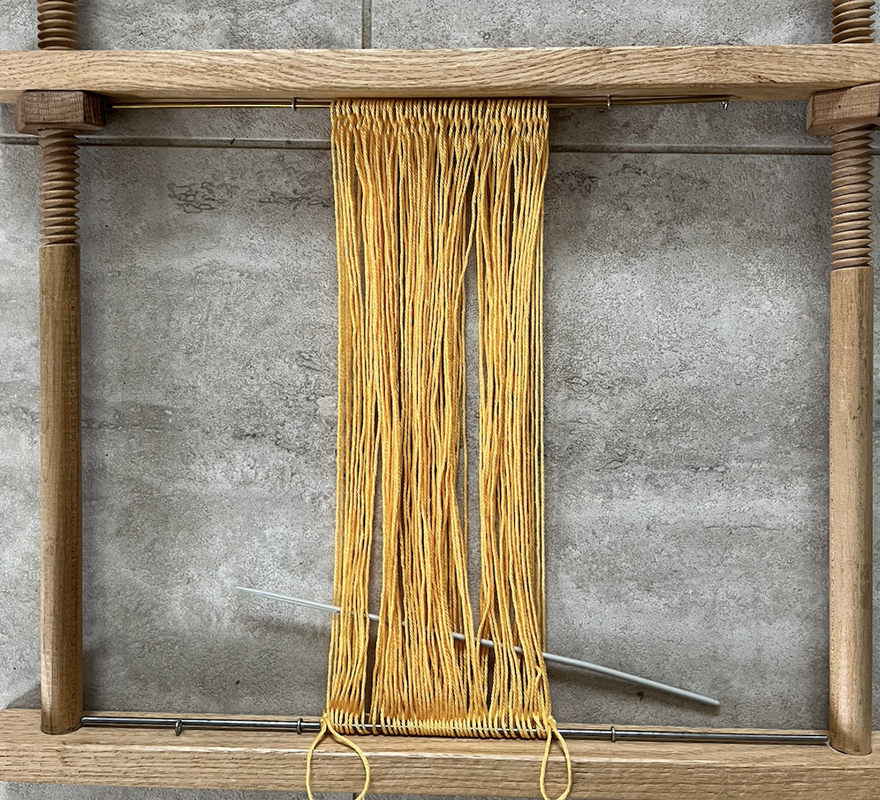
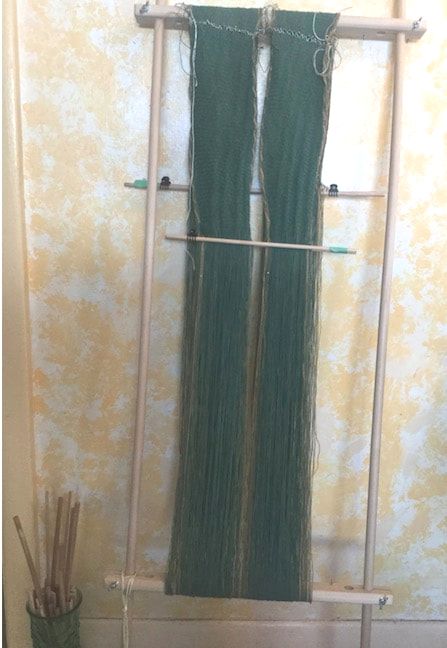
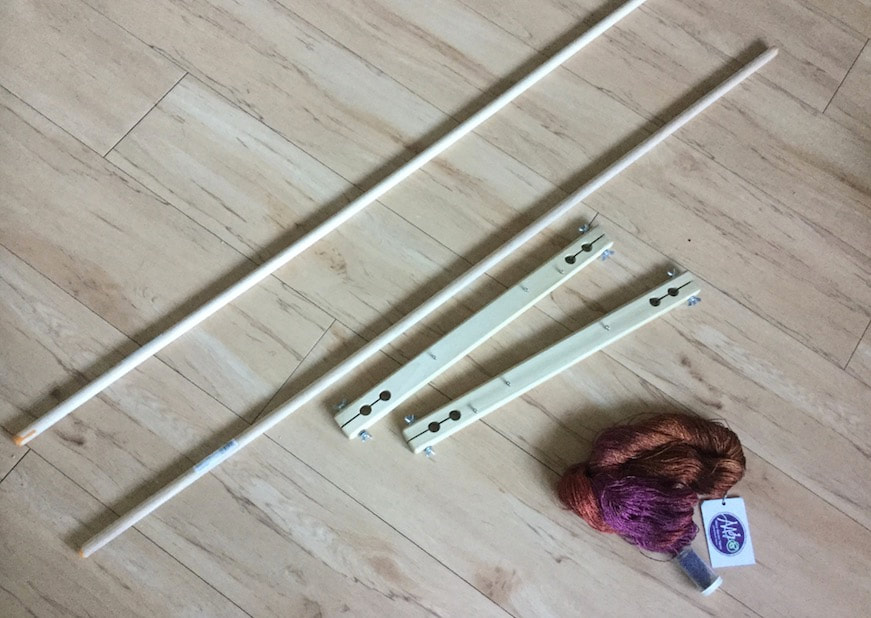
 I now find myself at the FibreWorks Gallery near Madiera Park, British Columbia. I've been offered a short residency. This place is also called "The Yurts" because of the buildings that make up the campus.
Picture
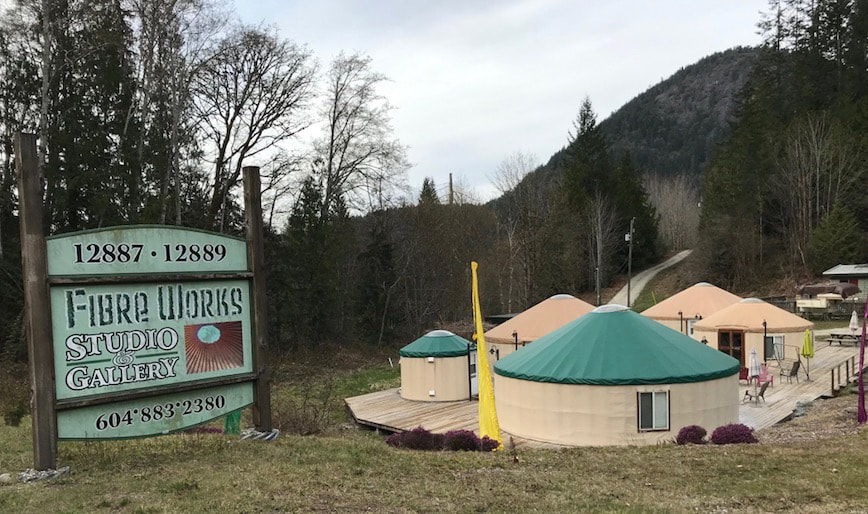
Planning to create a sprang scarf, I brought along yarn, beads, and the top and bottom of my sprang frame. I purchased 4 ft long dowels locally, and set to work.
Picture
Frame pieces, yarn, and beads. The yarn is a rayon-linen weavers skein from Mary Gavan.
Picture
I set the skein of yarn on the frame, and then threaded lots of beads onto the yarn.
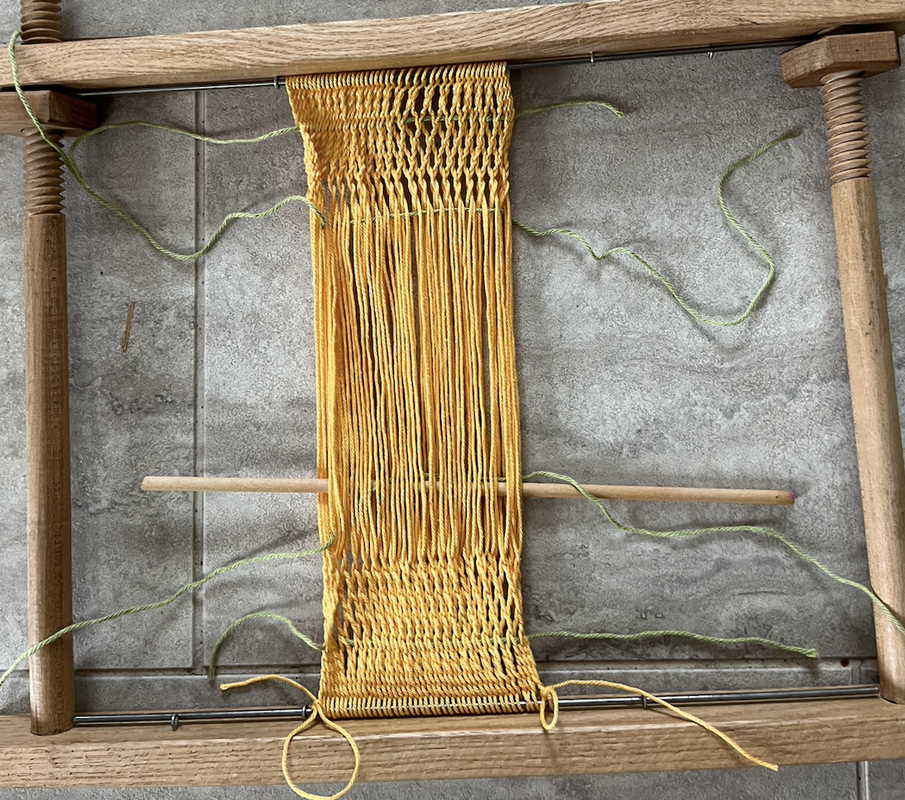
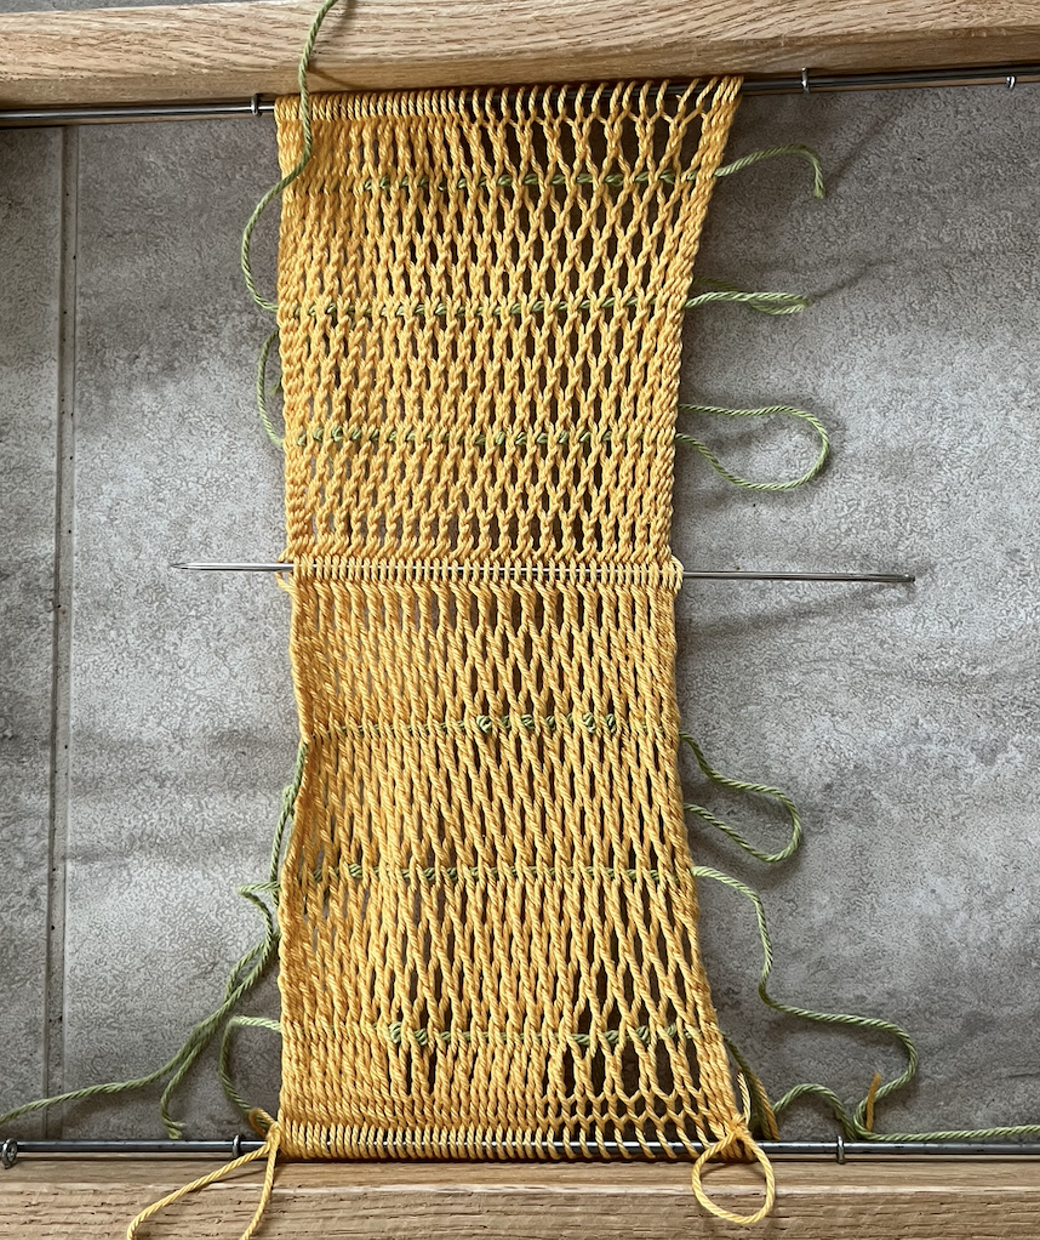
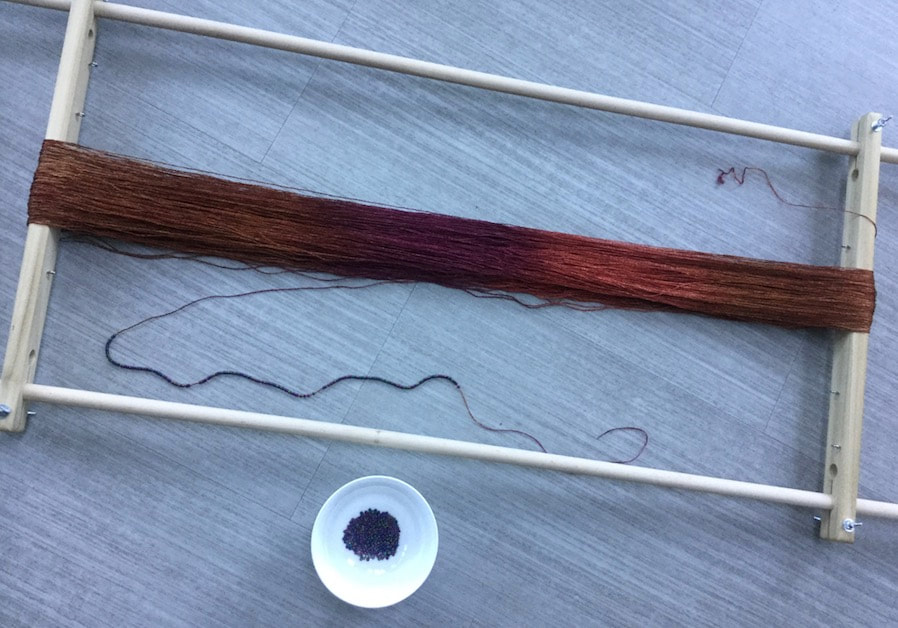
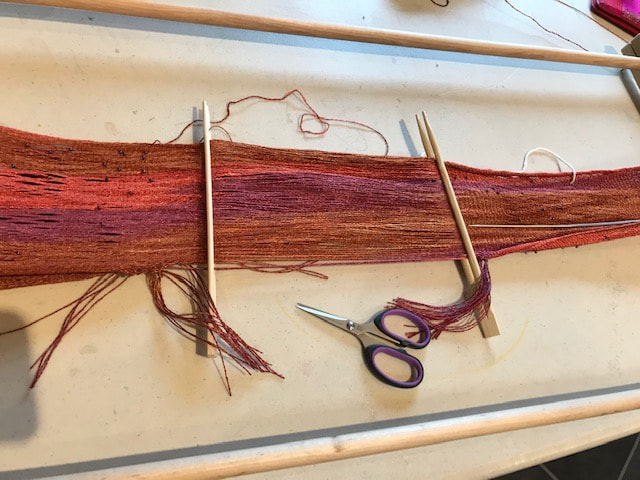
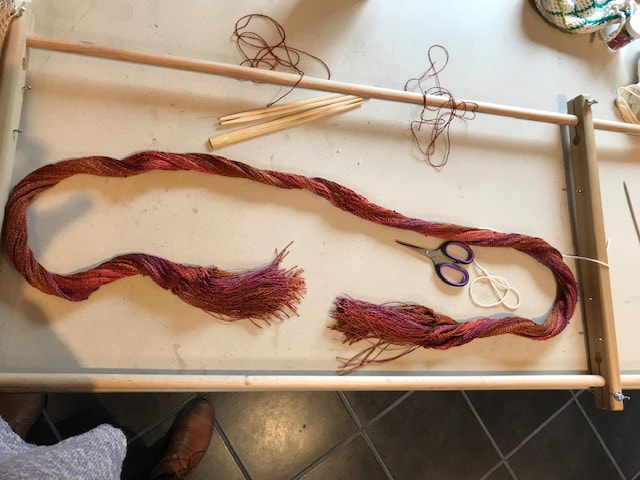
A sprang project needs the yarn mounted on the frame in an orderly fashion ... I needed to organize a first cross in the warp.
Picture
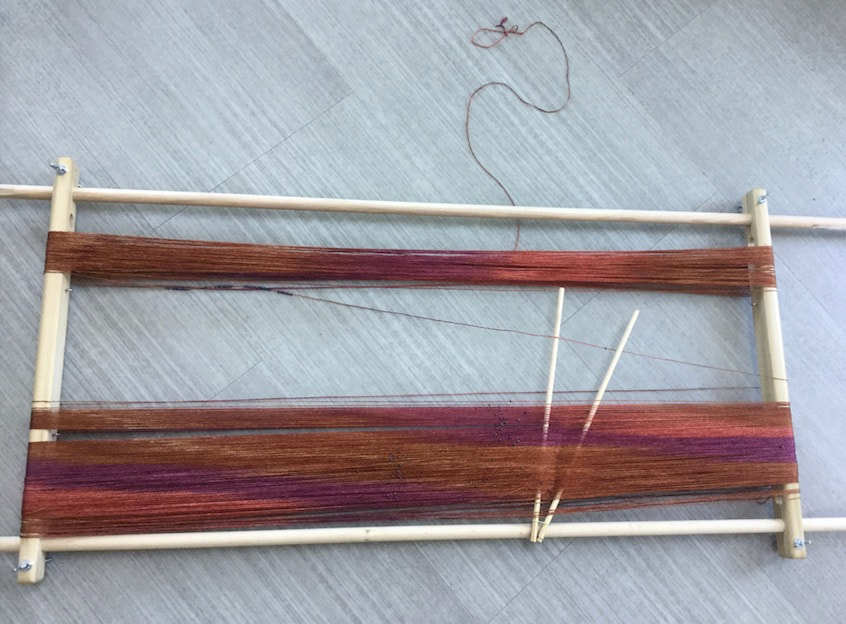
I fixed two sticks to the side of the frame, and proceeded to place the yarn into the sticks, creating the cross.
PictureReady to work.
The weather was pleasant, I sat outside the FibreWorks Workshop Yurt, and worked. My pattern is inspired by pieces I saw at the Vesterheim Norwegian-American Museum in Decorah, Iowa.

Picture
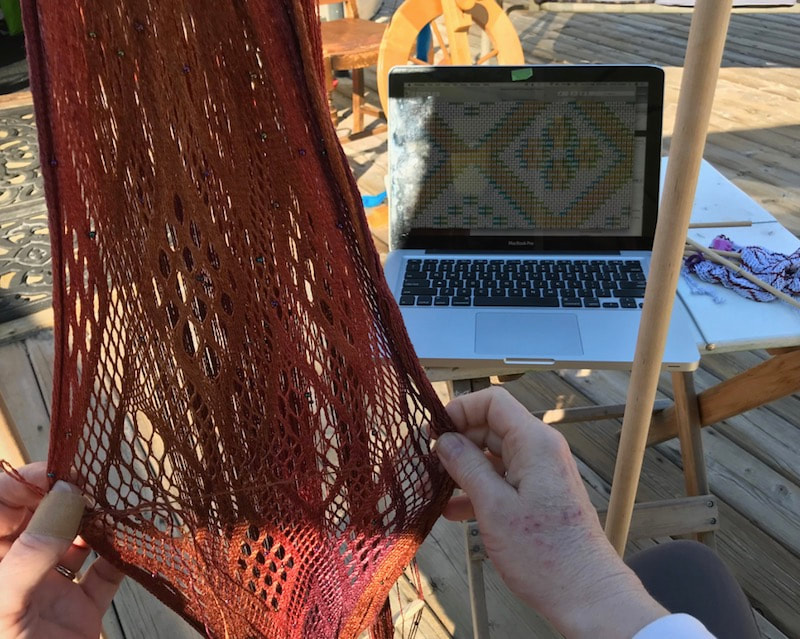
On Monday, FibreWorks was closed. I went along to speak to a spinners' guild, bringing them the good news of sprang.
I worked on the shawl on Tuesday, and finished it by Thursday afternoon.
The Weavers Circle meets at the FibreWorks Gallery on Thursdays, they watched as I cut the fringes, and tied the knots.
Picture
I began cutting the threads in groups of eight, and tying knots at each end of the scarf.
Picture
The threads all cut. The shawl curled tightly, all by itself.
Picture
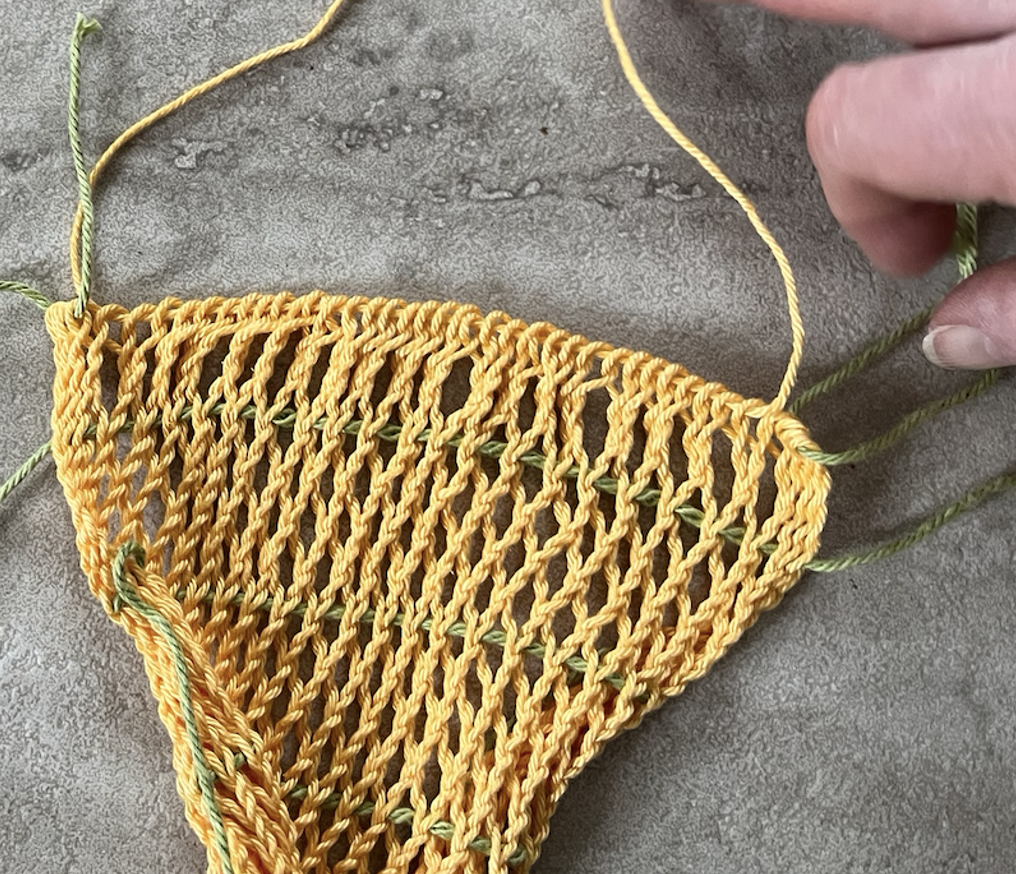
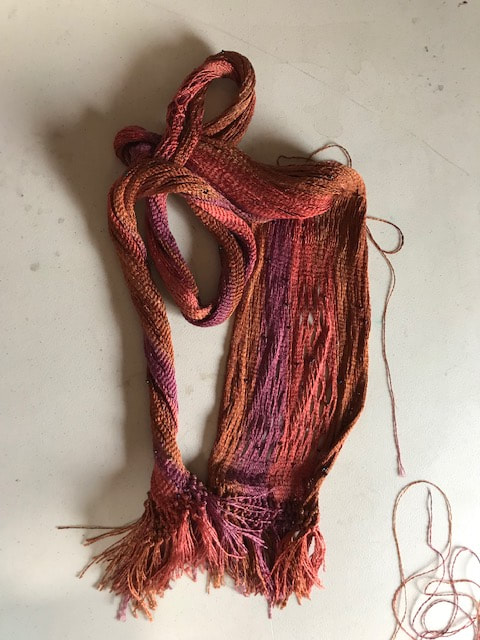
Two more rows of knots.
Picture
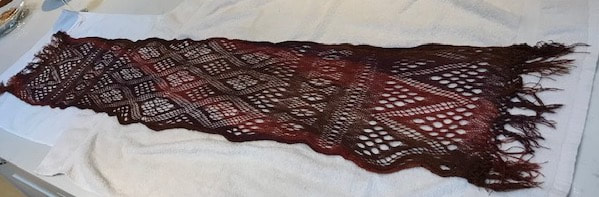
I wet the shawl, and laid it out to dry. No more curling.
0 Comments

Ugly Object

3/19/2019

0 Comments

 
Picture
Depending on your taste and hairstyle the hat could stand upright like this, or it could hang limply like a regular stocking cap or tuque.
 (The Kelsey Museum in Ann Arbor, Michigan, holds an amazing collection of sprang items from a dig at the Karanis site. It has come to my attention that the curator has chosen one of these lovely bonnets as the "Ugly Object of the Month" for March 2019.
Yes, in it's present, tattered state, I do admit it is rather ugly. Nevertheless I had a close look at it a while back, and worked out the pattern, and made a replica.
There is evidence of a woven band across the half of the lip of the bag, and a drawstring across the other lip ... This tends to move my judgement to calling it a hat rather than a bag. I am thinking it has a woven band to go across the forehead, and a drawstring at the back of the head to keep it snug on the head.
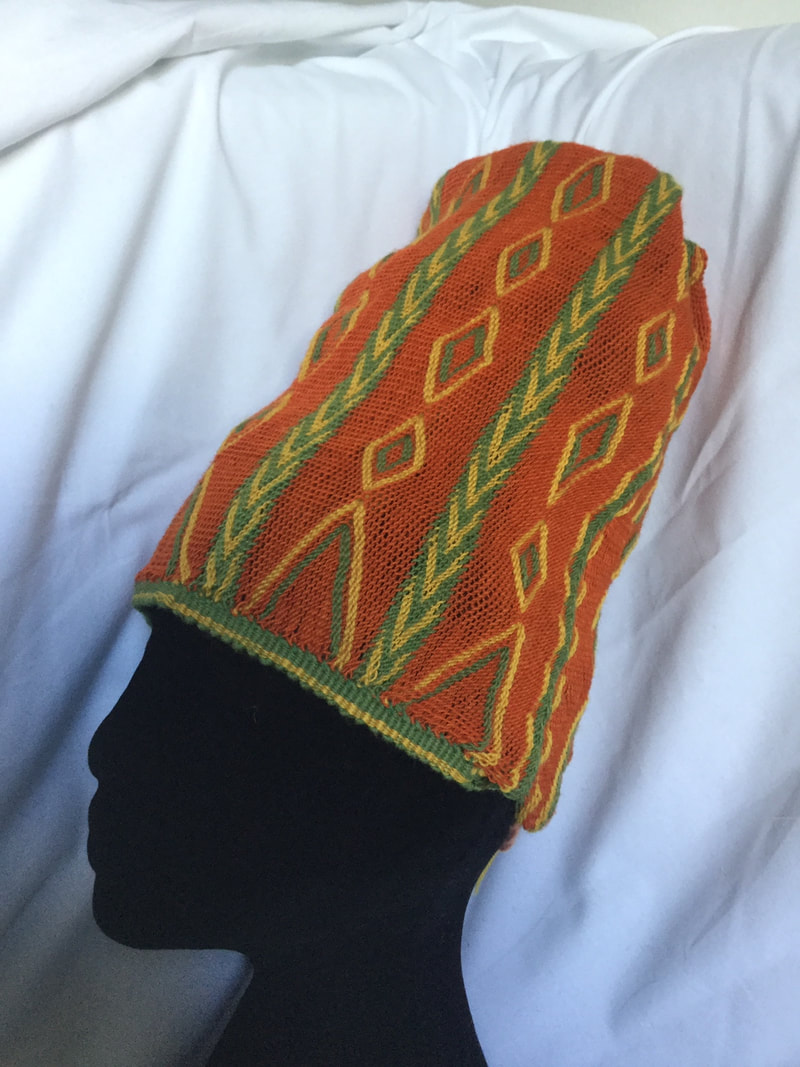
I visited the Kelsey Museum collection in the spring of 2016, went home and worked out the pattern for this hat, and then came back in the summer of 2017. At the occasion of my second visit, I took a photo of my replica beside the original. Actually I took two photos. In one of them, my replica is inside-out.
Picture
Picture
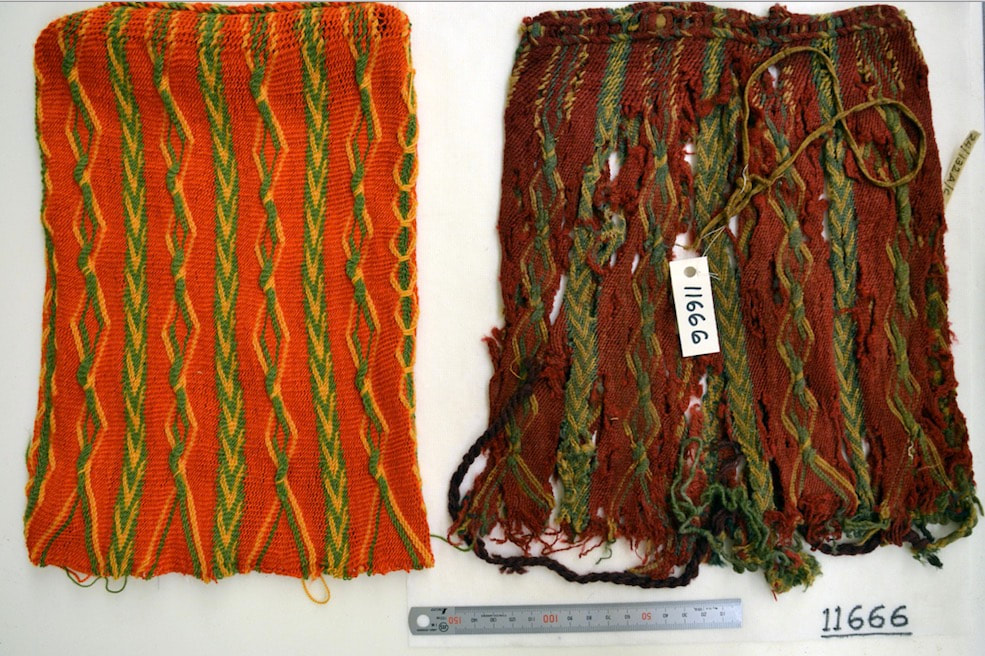
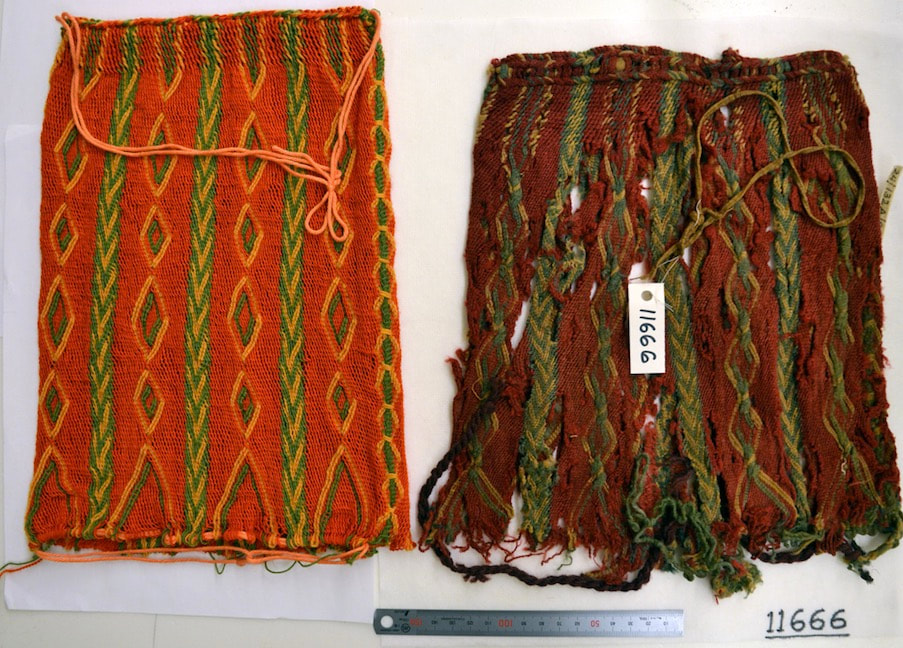
If anyone is interested, my SprangLady website contains three tutorials that take you step-by-step, showing you how to do this twining technique on a background of interlinking. And I do still have the specific pattern for this bonnet.
0 Comments

A new sprang shirt

1/7/2019

0 Comments

 
I set out to make a new sprang top. In the past I'd say the choices are a V-neck, a boat-neck, or you cut out a hole for the neck. Last spring I made a shirt comprised of ten separate pieces of sprang. I was using 'estate yarn' (yarn of an unknown age and unknown fibre content).
Picture
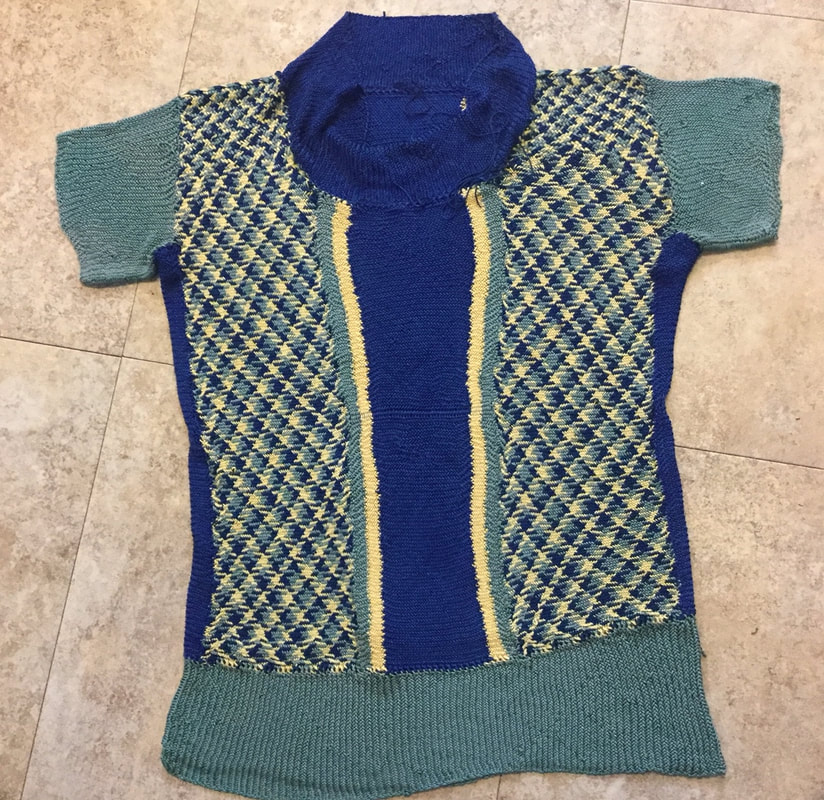
While I like the shirt, some of the threads are shattering ... the shirt is not standing up to wear. So I need another one. I purchased new yarn, nine skeins of Berroco Mixer, and made up nine pieces for this new shirt.
Picture
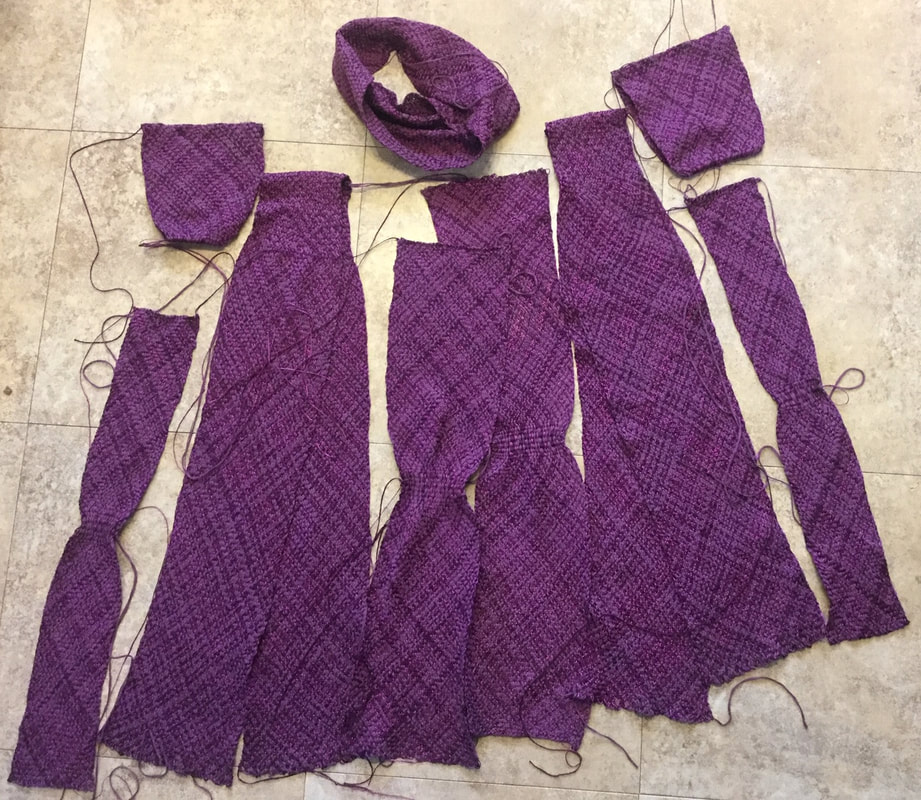
Although it might seem overwhelming to set out to make nine pieces, it's no worse than knitting a sweater. I made a center-front piece and a center-back piece. These pieces start at neckline and hem, and work to a place somewhere near the waist. There are two pieces that go over the shoulder, working from hem to hem, and meeting at the shoulder. I also made two pieces, one to go under each armpit ... worked from armpit and hem towards the waist. These pieces were all flat warp.
There are three circular warp pieces, two sleeves and a collar.
Assembled together, they make a shirt.
Picture
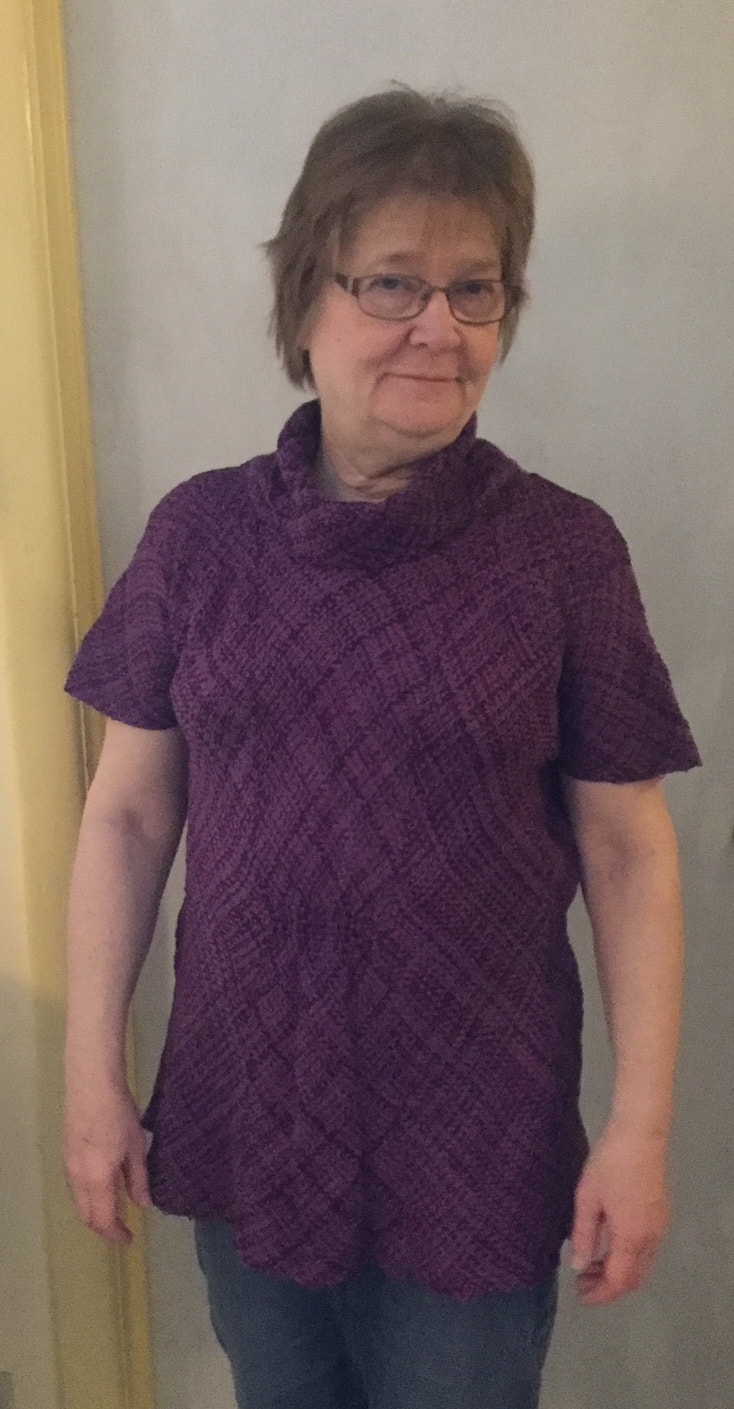
The basic stitch is a 2-2 twill, it has a comfortable amount of stretch. The Berroco is a mix of cotton, polyester, viscose and nylon, so I'm hoping it will stand up to washing and wearing.
Picture
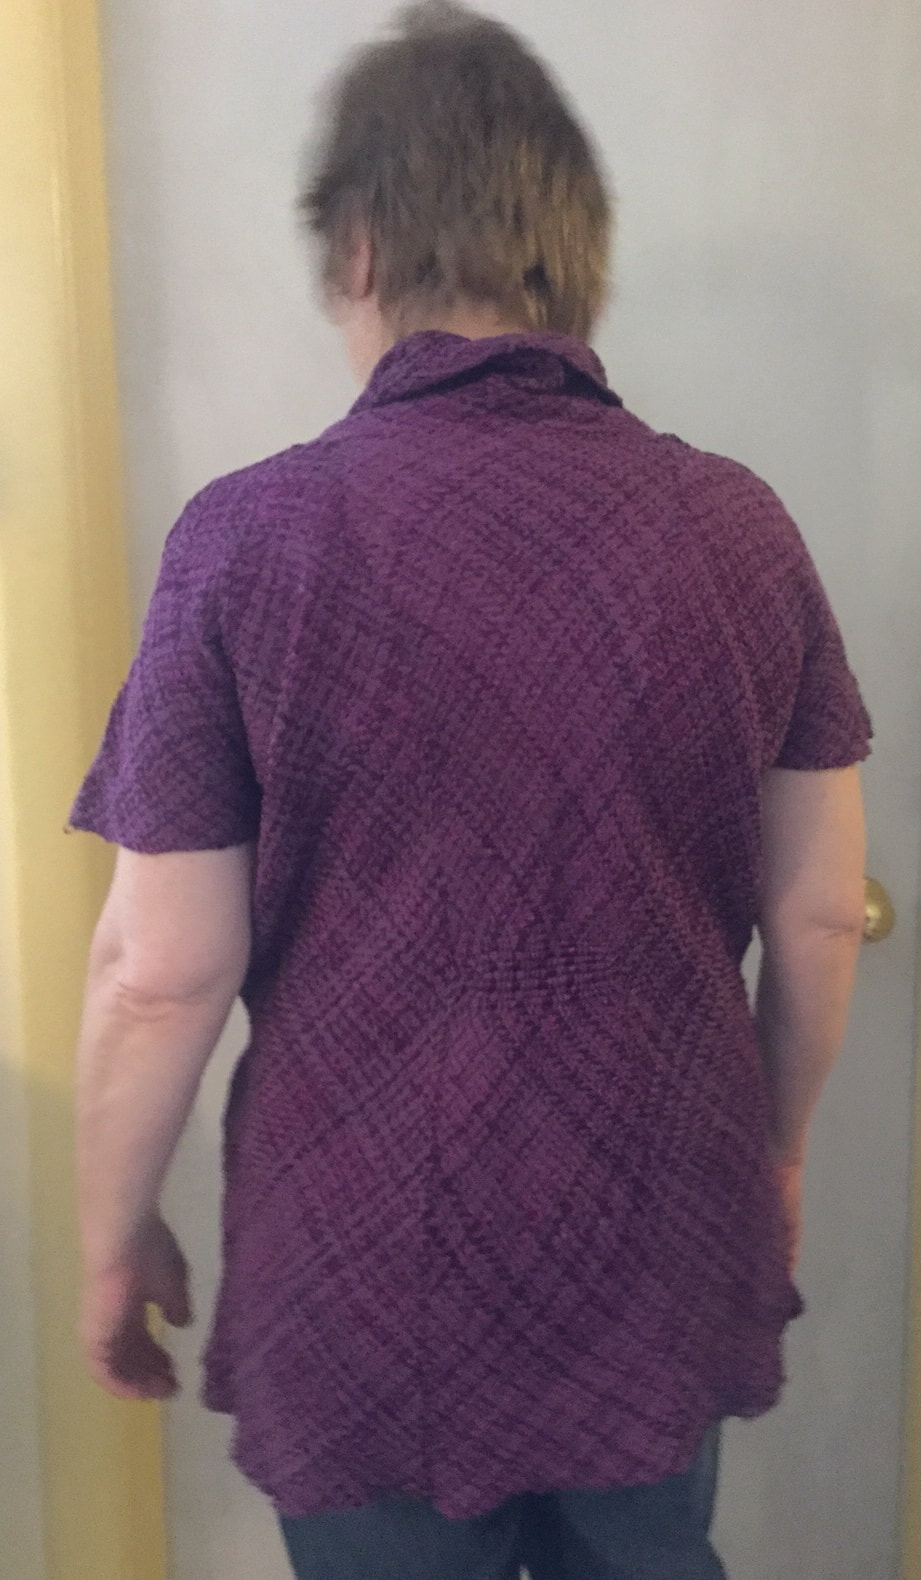
No need to hem this material. The pieces have selvedges all around.
0 Comments

Testing those leggings

10/2/2017

1 Comment

 
 En route to the British Museum, I stopped off to visit a friend who lives near Sheffield. I met Andy and Elaine a few years back. Elaine really wanted to know more about sprang. They were, at that time preparing to participate in an event, re-doing the battle of Marathon in Greece ... he was going to be one of the bad guys. I made him a pair of leggings, appropriate to the time period, and based on research by Dagmar Drinkler.
Picture
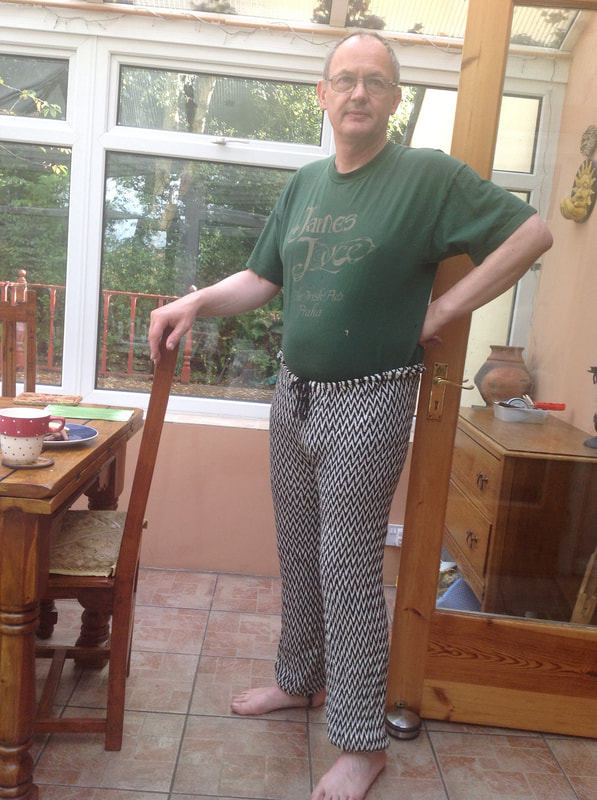
It seems that Andy has worn these leggings to several events. Imagine my surprise when I read on the internet that sprang is not at all suitable for leggings! Andy showed me a post indicating that, with one broken thread, the pants will fall apart. This, I thought, is the perfect moment for a bit of testing, some experimental archaeological if you will.
Andy allowed me to cut a thread in his leggings. To make it a fair test, I cut a thread at the knee, a place that would be affected by movement of the leg.
Picture
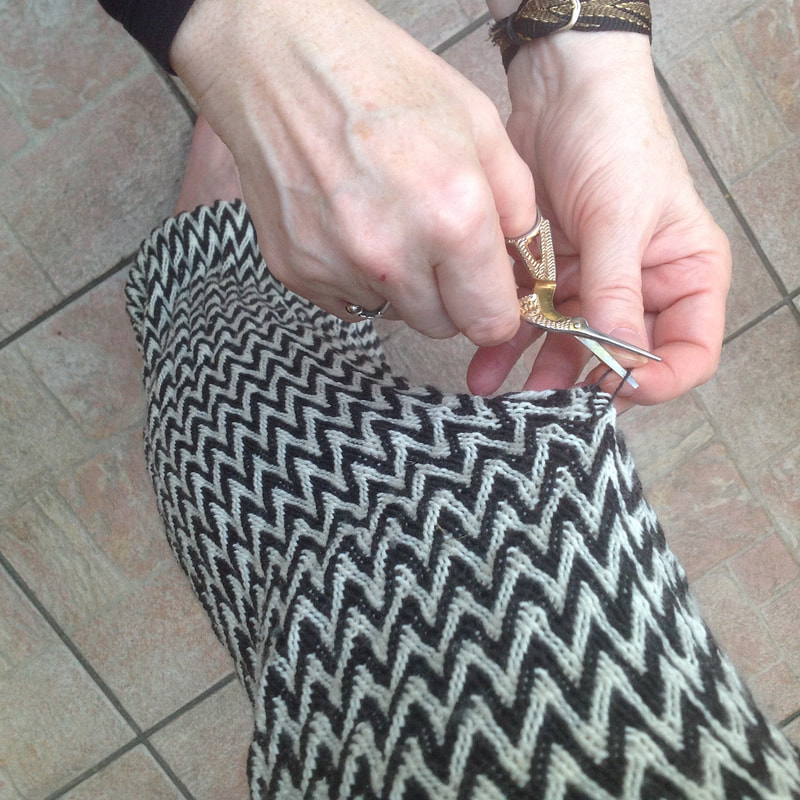
Andy took a picture of me cutting the thread just in front of his left knee.
Picture
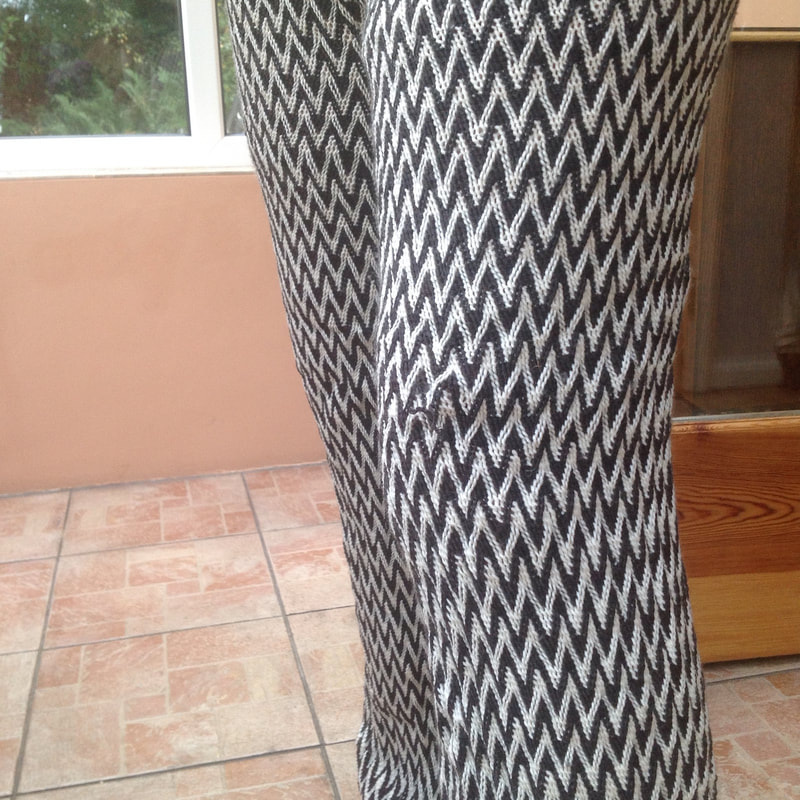
Here you see the broken thread at the left knee.
Andy then went outside to do some work in the yard.
Picture
Picture
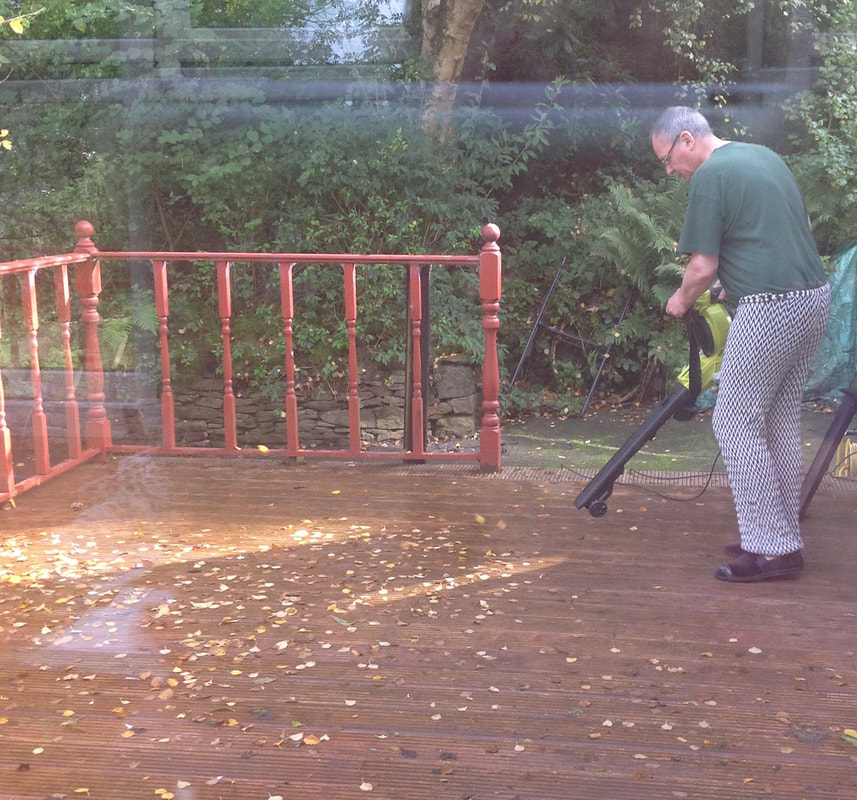
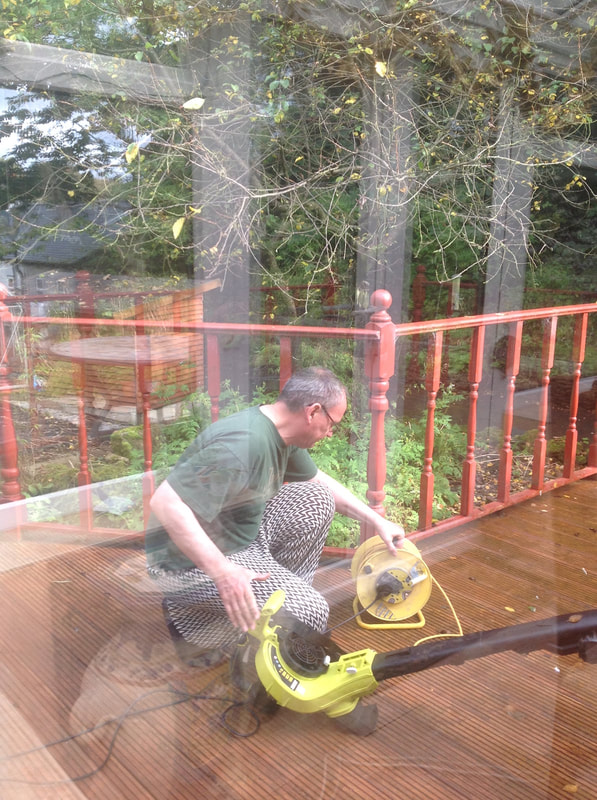
He cleared his deck of the leaves, and tended to his leaf-blowing machine.
His leggings stayed on the entire time ... no falling apart ... no falling off. Indeed no increase in the size of the hole. The wool threads stayed put.
Picture
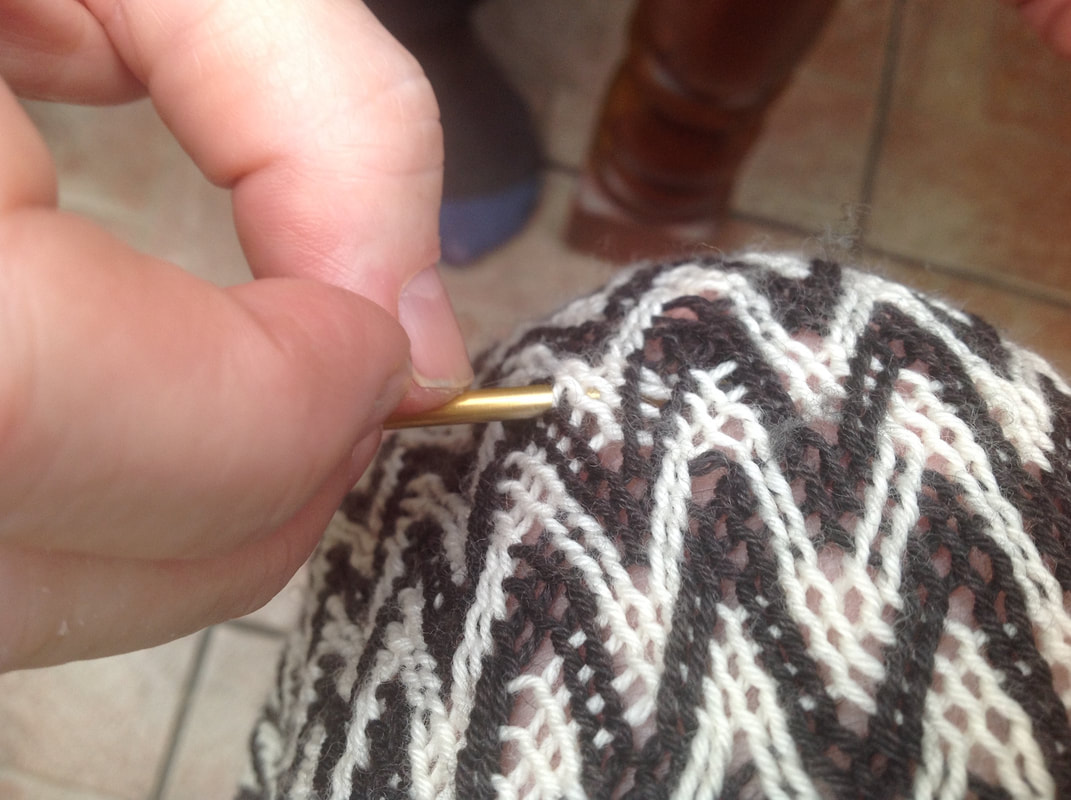
Wool has a certain 'grabbiness' to it's surface, and the wool sock-yarn that I had used to make the leggings is no exception.
Yes, I've seen silk sashes in museum collections with long vertical slits, where a thread broke. The slipperiness of silk as well as the simple interlinking structure would allow a slit to develop ... but the slit will only open up so far. At some point the length of the cut threads will, itself, prevent further un-doing. The structure of the zig-zag pattern in these leggings also helps prevent un-doing.
I repaired the damage I had caused, tied a knot to mend the cut ends, and tucked the knot to the inside of the leggings.
Picture
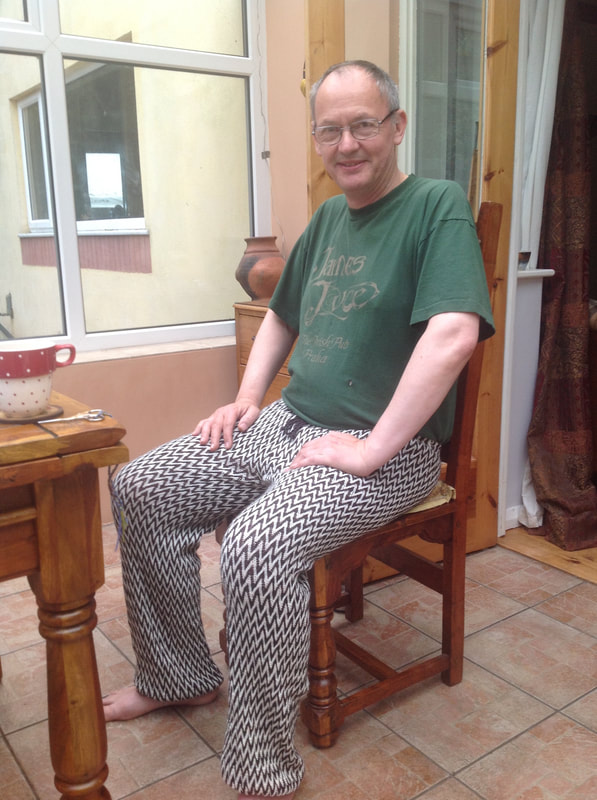
The damage is now repaired, the knot almost imperceptible.
A big Thank You to Andy Cropper for permitting me to carry out this test.
1 Comment

St Petersburg, Russia

9/30/2017

0 Comments

 
I attended the 2017 CIETA conference, held at The Hermitage.
Picture
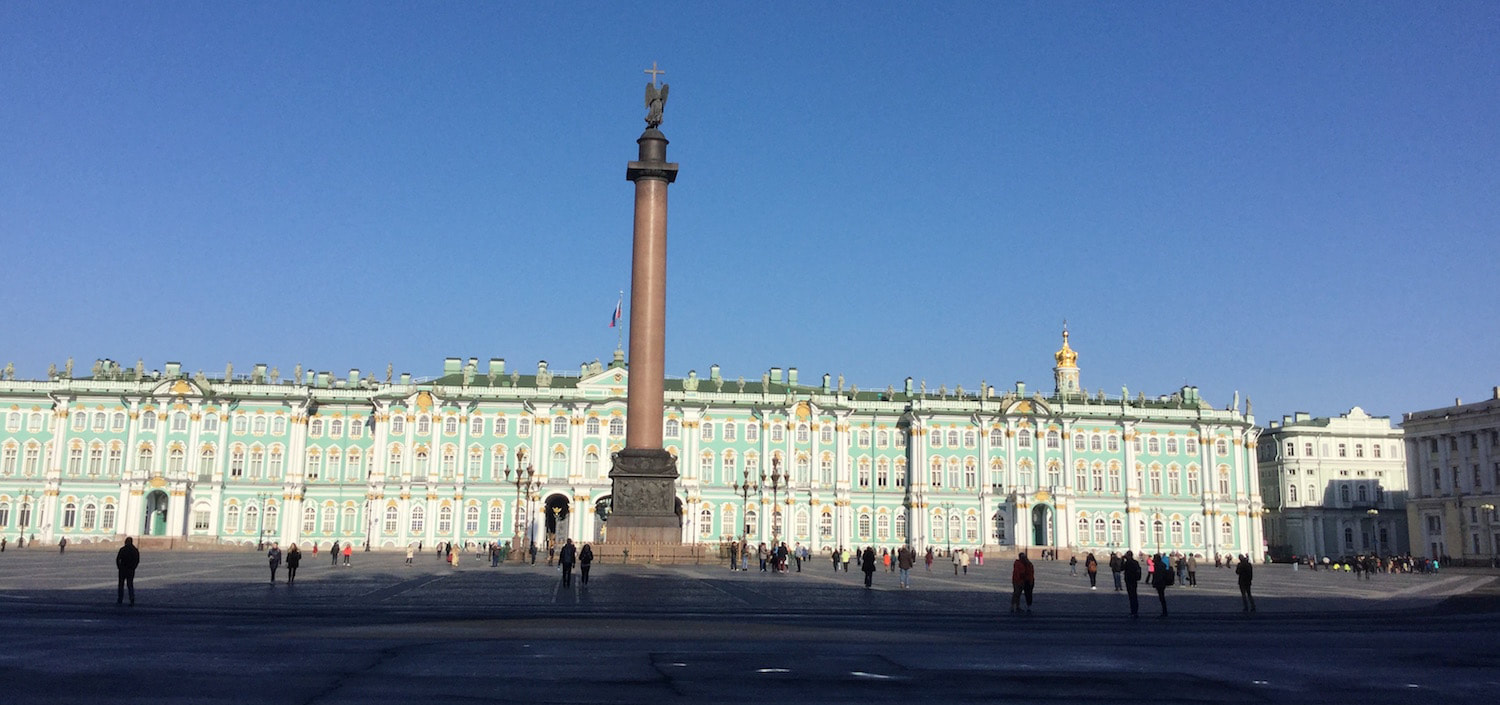
Very interesting discussions of textiles as symbols of power. The Hermitage treated us to a special exhibit of their collections ... including a display featuring garments worn by Peter the Great. His military uniform included a sprang sash.
Picture
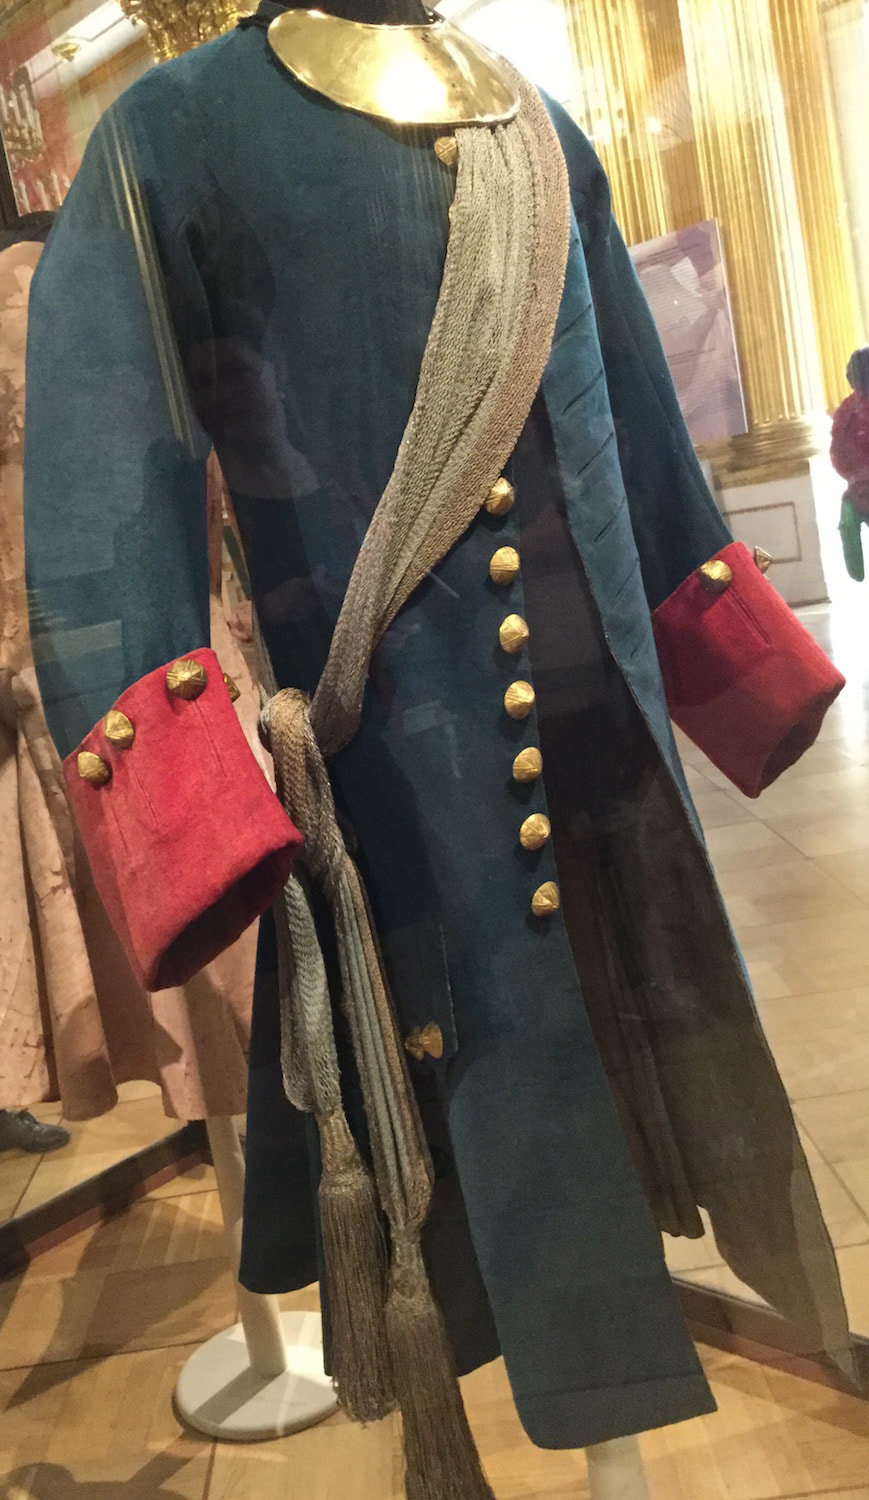
The curator told me that the sash originally was tricolore: red, white, and blue. The fiber is silk with silver threads worked in. You can tell it is sprang, because one side features an S twist to the stitches, the other side features Z twist. There is a line at the shoulder where the S and Z meet.
0 Comments

Sprang Mitts

9/12/2017

1 Comment

 
The idea of sprang mittens has come up ... twice within the last week. A researcher colleague of mine found a pair of sprang mittens at a textile market in Bavaria. The seller had no provenance, but they look like sprang mittens in the collection of the Brussels History Museum, that date to the early 1800s.
Picture
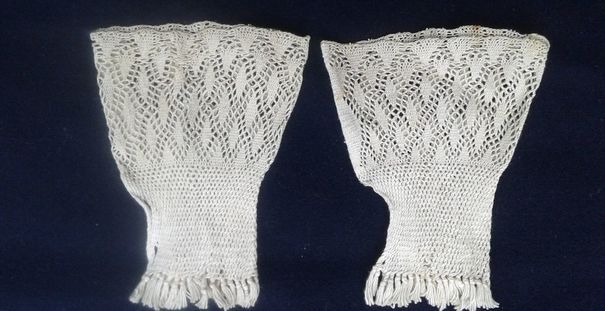
And then and e-mail from someone who took my sprang class earlier this year, Jenny from Regina. She sent me photos of her explorations since that class, including a photo of a lovely sprang mitten.
Picture
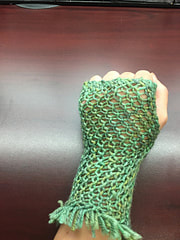
Mittens are a great place to explore sprang. Make two rectangles, cut them apart, tying knots at the cut ends. Sew each piece into a tube, and voila, two fingerless gloves, aka, mittens. Use the opportunity to explore patterns.
1 Comment

June 2015

6/4/2015

0 Comments

 
Back from my recent travels, to Europe, and then to the TNNA conference in Columbus, Ohio.
In Columbus I met yarn store people from all across North America, what a conference!
Maria Freitas of Meridan, Idaho, gave me a set of rayon threads to try in sprang.

Picture
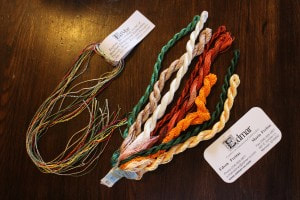
Rayon threads from EdMar
Picture
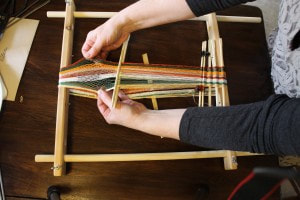
Set up onto my sprang frame
Picture
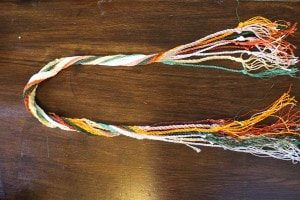
Right off the frame, of course, it curls considerably
Picture
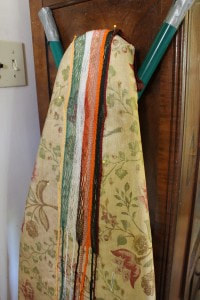
Block it …. that means get it good and wet, then pin it flat to dry … and it will now lie flat.
0 Comments
<<Previous
    Carol's blog archive

    RSS Feed

    Categories

    All
    Arizona Openwork Shirt
    Art
    Book Reviews
    Books
    Braddock Sash
    Ceinture Fleche
    Clothing
    Demonstration
    Dying
    Easily Transported Work
    Exhibit
    Exploration
    Fashion Show
    Fashion Sow
    Finger Weaving
    Inspiration
    Instruction
    Loom Weaving
    Media
    Military Sash
    Museum Replica
    Museum Visit
    No Frame Sprang
    No-frame Sprang
    Patterns
    Privite Commissinons
    Publications
    Research
    S And Z
    Sash Dance
    Sprang
    Sprang Bonnets
    Sprang Bonnets Of The 1500s
    Sprang Bonnets Of The 16th Century
    Sprang Bonnets Of The Renaissance
    Sprang Clothing
    Sprang Frame
    Sprang History
    Sprang Lace
    Sprang Leggings
    Sprang Patterns
    Sprang Twining
    Student Pieces
    Tablet Weaving
    Tips-and-tricks
    Travel
    Weaving
    Website
    Workshops

    Archives

    May 2023
    March 2023
    February 2023
    August 2022
    June 2022
    July 2021
    June 2021
    April 2021
    February 2021
    January 2021
    December 2020
    August 2020
    May 2020
    April 2020
    March 2020
    February 2020
    January 2020
    December 2019
    October 2019
    August 2019
    June 2019
    May 2019
    April 2019
    March 2019
    February 2019
    January 2019
    November 2018
    October 2018
    August 2018
    July 2018
    June 2018
    May 2018
    March 2018
    February 2018
    December 2017
    November 2017
    October 2017
    September 2017
    August 2017
    June 2017
    May 2017
    April 2017
    March 2017
    February 2017
    November 2016
    August 2016
    March 2016
    February 2016
    November 2015
    October 2015
    August 2015
    June 2015
    April 2015
    March 2015
    December 2014
    November 2014
    September 2014
    August 2014
    July 2014
    May 2014
    April 2014
    March 2014
    February 2014
    December 2013
    November 2013
    October 2013
    September 2013
    August 2013
    March 2013
    February 2013
    December 2012
    November 2012
    October 2012
    September 2012
    August 2012
    July 2012
    June 2012
    May 2012
    April 2012
    March 2012
    February 2012
    January 2012
    December 2011
    November 2011
    October 2011
    September 2011
    August 2011
    July 2011
    June 2011
    May 2011
    February 2011
    November 2010
    October 2010
    August 2010
    July 2010
    June 2010
    May 2010
    April 2010
    March 2010
    February 2010
    August 2009
    July 2009
    May 2009
    April 2009
    February 2009
    January 2009
    December 2008
    November 2008
    October 2008
    September 2008
    August 2008
    July 2008
    June 2008
    May 2008
    March 2008

    Categories

    All
    Arizona Openwork Shirt
    Art
    Book Reviews
    Books
    Braddock Sash
    Ceinture Fleche
    Clothing
    Demonstration
    Dying
    Easily Transported Work
    Exhibit
    Exploration
    Fashion Show
    Fashion Sow
    Finger Weaving
    Inspiration
    Instruction
    Loom Weaving
    Media
    Military Sash
    Museum Replica
    Museum Visit
    No Frame Sprang
    No-frame Sprang
    Patterns
    Privite Commissinons
    Publications
    Research
    S And Z
    Sash Dance
    Sprang
    Sprang Bonnets
    Sprang Bonnets Of The 1500s
    Sprang Bonnets Of The 16th Century
    Sprang Bonnets Of The Renaissance
    Sprang Clothing
    Sprang Frame
    Sprang History
    Sprang Lace
    Sprang Leggings
    Sprang Patterns
    Sprang Twining
    Student Pieces
    Tablet Weaving
    Tips-and-tricks
    Travel
    Weaving
    Website
    Workshops

Contact Carol

Store

FAQ

Privacy policy
Carol acknowledges that we are on Treaty 1 territory, the traditional gathering place of the Anishinaabe, Cree, Oji-Cree, Dakota and Dene people and the traditional homeland of the Métis people. Carol also acknowledges that sprang is part of many  indigenous traditions  and found in various forms all over the world. Let us re-discover this technique together.
© COPYRIGHT 2022. ALL RIGHTS RESERVED.
  • Home
  • About the artist
    • Gallery
  • Store
  • Sprang
  • Virtual Class Room
  • Contact me
  • Blog