|
I’ve been doing some research. Frances Densmore, writing in the book Chippewa Customs, describes the work of a woman creating a sprang sash, working around stakes in the ground. I followed her directions and found the technique to work quite well. I created a bag, photographing the process. OK, now I’m going to retract a bit. Technically this is NOT sprang, as you get but one row of cloth for every row worked. The technique to be described is what I’m now calling ‘unsprung sprang’, that is, the simple interlinking technique. Interlinking is a stepping stone to sprang. True sprang uses the tangled mass, trapping it at the bottom of a frame … nevertheless, the following is as accurate as I can make out to the technique described by Densmore and her observations of the Ojibwa in the early 1900s. This is the bag I made. 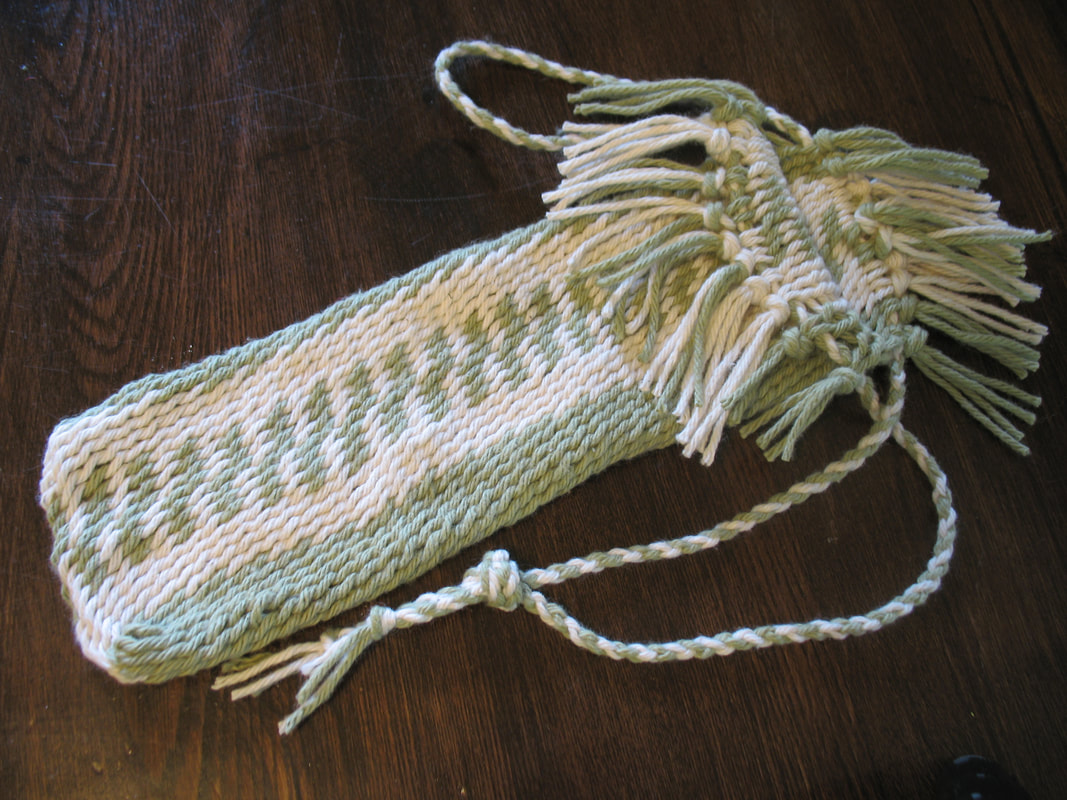 Bag created without the use of a frame The bag is worked in a long skinny rectangle. Starting at the bottom of the bag, you sprang towards the string ends, then return to the bottom and sprang in the other direction, up the other side of the bag. Finally you attach the drawstring and sew up the sides with an invisible seam. What you need: 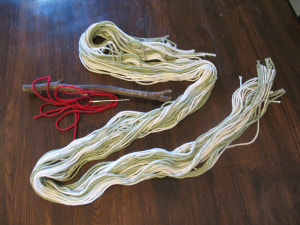 Yarn, notched stick, extra yarn and large needle I used strings that were about 30 inches (80 cm) long. Tie them together in a knot midway along the length. Use the contrasting color of string and large needle to organize these threads, dividing them into bunches of four: 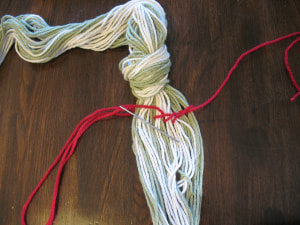 organize the warp The red yarn goes around each bunch of four threads. The bunch of yarn is attached to the notched stick by the red yarn. The stick will help to hold the yarn bunch. 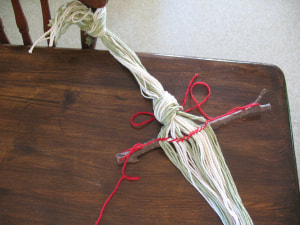 Set up is ready for weaving Attach the whole affair to a fixed point. In the picture above, I attached the yarn bunch to a chair across the corner of my work table. Now pick up two threads from each bunch of four. 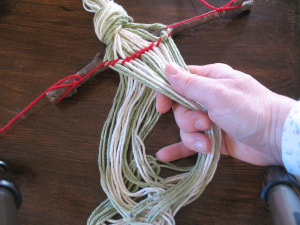 Two threads from each bunch held in the hand Begin spranging. 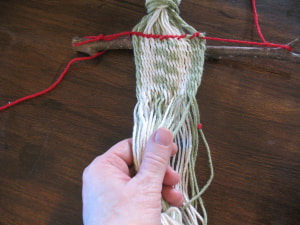 The bag begins After weaving about 8 inches (20 cm) I figured this part was long enough. I now returned to the initial shed at the stick. 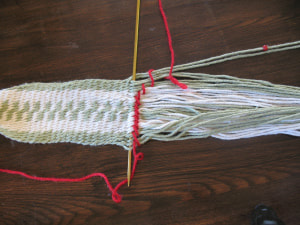 Return to the initial shed I removed the stick, and slipped a knitting needle into the first row. I am thinking that I should have put a ‘safety cord’ in the first shed to facilitate this a bit. This spot will be the very bottom of the bag. I’ve spranged one side of the bag, and will now sprang up the other side. 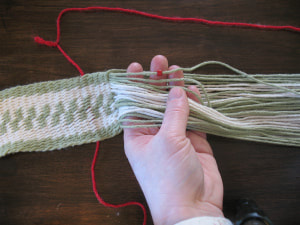 The spranging continues I left the red yarn in marking the place where I turned around. It marks the place of the bottom of the bag. I work in this direction, the piece grows in length. I continue to sprang until the red yarn is at the halfway point: 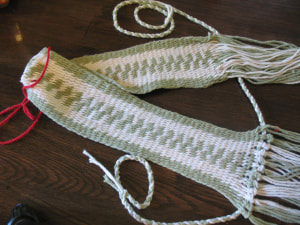 The piece is long enough for my bag I tied the warp strings in groups of four, catching the draw-string cord. The sides are sewn up, if you’re careful, it can be an invisible seam. 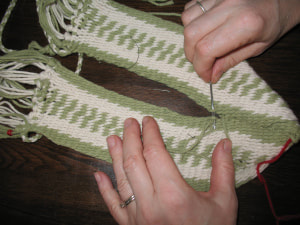 sewing up the sides The pros and cons of a sprang frame.
The frame hold the threads firmly in order. It also catches the ‘false weave’ the reverse of the work. The cloth grows at a rate twice as fast. The frame can be difficult to put in your backpack for you to take and work on it anywhere. The no-frame technique requires only a stick and a fixed point attachment site. It can be rolled up and mashed in a backpack, taken out anywhere to keep your hands busy. The novice is nervous that the threads will get out of order. With a little bit of practice, you learn to keep your eye on the previous row. An elder said, “Listen to the threads, they will tell you where they want to go. (The student said, “The threads speak a foreign language.”) Another trade-off is that the free ends do not collect the reverse work. You un-do the ‘false weave’ as a tangle near the cut ends. It’s a bit slower, but if the idea is to have a project that fills up your ‘lost time’ you are wanting a project that is not completed too quickly, right? How long does it take? That depends on how fat the yarn, how long the strands, how big a bag you’re wanting. I’ve completed a small bag in under an hour’s time.
0 Comments
Your comment will be posted after it is approved.
Leave a Reply. |
Categories
All
Archives
May 2023
Categories
All
|
 RSS Feed