|
So here I am in Ontario.
My husband is attending conferences, so I’ve tagged along. Having met up with Virginia Barter at the Rupertsland Colloquium earlier in the month, she invited me to Métis events in her neighborhood. Saturday we went together to Peterborough, Trent University. We participated in a celebration of Métis Culture, music, dance and history. I learned some jigging from Yvonne Chartrand, and also had the honor of meeting members of the Métis Councils from Peterborough and Oshawa-Durham. On Sunday, I was invited to a community picnic at Lambdon House. I got to talking with people and missed the walking tour of the Umber. Maybe next time, I’d love to check out this little bit of Nature in the midst of the Big City. Virginia then took me on to the Black Creek Pioneer Village. They seem eager to have my book for their giftshop. That’s great. Then somehow someone mentioned that they’re hosting the Toronto Spiders and the Back-to-Back Wool Challenge. Now that’s something! I participated in the Back-to-Back several times in Manitoba. I hear these Toronto gals are really fast, and, yes, I did get to see them. And yes, they’re mighty fast knitters. How fast are they? What was their time this year (or did they finish, why did they have to quit)? Nope, I will not divulge. You’ll have to wait for the Official Report from Wendy Dennis Down Under. Mum’s the word on my end for now.
0 Comments
I’ve been doing some research. Frances Densmore, writing in the book Chippewa Customs, describes the work of a woman creating a sprang sash, working around stakes in the ground. I followed her directions and found the technique to work quite well. I created a bag, photographing the process. OK, now I’m going to retract a bit. Technically this is NOT sprang, as you get but one row of cloth for every row worked. The technique to be described is what I’m now calling ‘unsprung sprang’, that is, the simple interlinking technique. Interlinking is a stepping stone to sprang. True sprang uses the tangled mass, trapping it at the bottom of a frame … nevertheless, the following is as accurate as I can make out to the technique described by Densmore and her observations of the Ojibwa in the early 1900s. This is the bag I made. 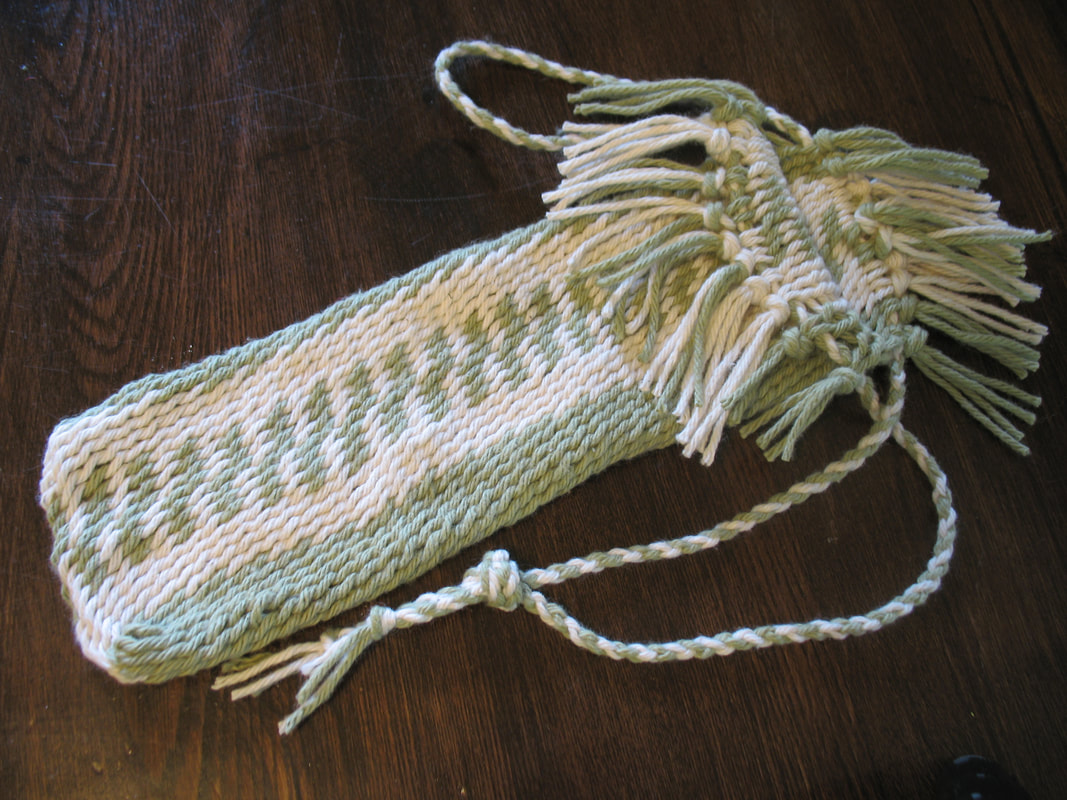 Bag created without the use of a frame The bag is worked in a long skinny rectangle. Starting at the bottom of the bag, you sprang towards the string ends, then return to the bottom and sprang in the other direction, up the other side of the bag. Finally you attach the drawstring and sew up the sides with an invisible seam. What you need: 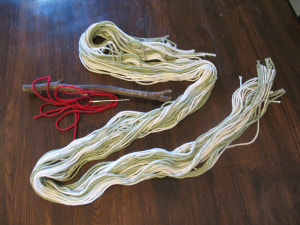 Yarn, notched stick, extra yarn and large needle I used strings that were about 30 inches (80 cm) long. Tie them together in a knot midway along the length. Use the contrasting color of string and large needle to organize these threads, dividing them into bunches of four: 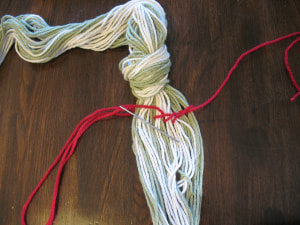 organize the warp The red yarn goes around each bunch of four threads. The bunch of yarn is attached to the notched stick by the red yarn. The stick will help to hold the yarn bunch. 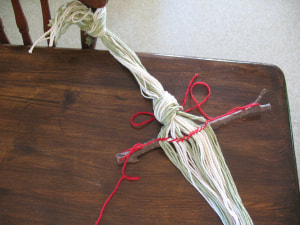 Set up is ready for weaving Attach the whole affair to a fixed point. In the picture above, I attached the yarn bunch to a chair across the corner of my work table. Now pick up two threads from each bunch of four. 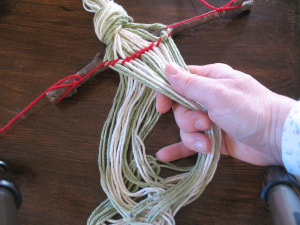 Two threads from each bunch held in the hand Begin spranging. 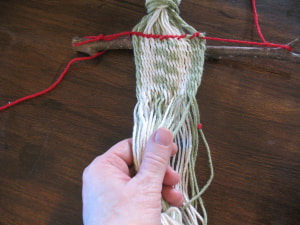 The bag begins After weaving about 8 inches (20 cm) I figured this part was long enough. I now returned to the initial shed at the stick. 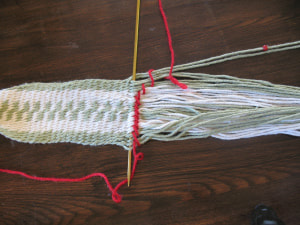 Return to the initial shed I removed the stick, and slipped a knitting needle into the first row. I am thinking that I should have put a ‘safety cord’ in the first shed to facilitate this a bit. This spot will be the very bottom of the bag. I’ve spranged one side of the bag, and will now sprang up the other side. 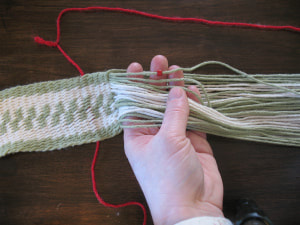 The spranging continues I left the red yarn in marking the place where I turned around. It marks the place of the bottom of the bag. I work in this direction, the piece grows in length. I continue to sprang until the red yarn is at the halfway point: 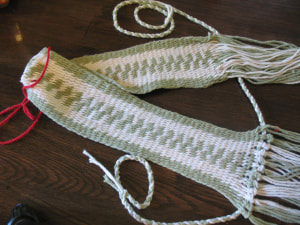 The piece is long enough for my bag I tied the warp strings in groups of four, catching the draw-string cord. The sides are sewn up, if you’re careful, it can be an invisible seam. 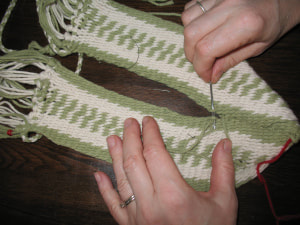 sewing up the sides The pros and cons of a sprang frame.
The frame hold the threads firmly in order. It also catches the ‘false weave’ the reverse of the work. The cloth grows at a rate twice as fast. The frame can be difficult to put in your backpack for you to take and work on it anywhere. The no-frame technique requires only a stick and a fixed point attachment site. It can be rolled up and mashed in a backpack, taken out anywhere to keep your hands busy. The novice is nervous that the threads will get out of order. With a little bit of practice, you learn to keep your eye on the previous row. An elder said, “Listen to the threads, they will tell you where they want to go. (The student said, “The threads speak a foreign language.”) Another trade-off is that the free ends do not collect the reverse work. You un-do the ‘false weave’ as a tangle near the cut ends. It’s a bit slower, but if the idea is to have a project that fills up your ‘lost time’ you are wanting a project that is not completed too quickly, right? How long does it take? That depends on how fat the yarn, how long the strands, how big a bag you’re wanting. I’ve completed a small bag in under an hour’s time. 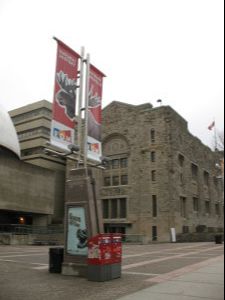 Royal Ontario Museum, South Entrance Tuesday, April 21 I was privileged to examine sashes in the collection of the Royal Ontario Museum. In all I looked at nine fingerwoven sashes and two sprang sashes. Amazing pieces all. How to put into words all the things I saw is a challenge right now. I will make this information available to you eventually. Among the details viewed are the recovery from the situation where the center of the arrow wanders off to one side, recovering from weaving too far, short rows near the central arrow, and interesting plaiting technique linking the fringes and preventing them from tangling, evidence of splicing in new threads, and another detail that created an interesting ridge at the change-of-weft. All this is inspiring me to write up a set of ‘problems and solutions’, expanding on the ‘trouble shooting’ section in my book.
Eagerly awaiting the photos taken by the curators. The word to fingerweavers of the world is not to sweat when mistakes happen. There is clear evidence that this even happens to the experts. Many thanks to Karla, Christine, and Anu for their patience and support. So, April 20, here I am in Toronto. 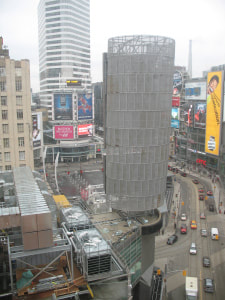 My view of Toronto I was scheduled to examine sashes at the Canadian Textile Museum at 11. This gave me time after breakfast to check out Romni Wools … yes, there is a reason that Ontario weavers and fiber artists rave about this store. What an amazing collection of yarn!
Yes, I did move on the the Textile Museum. Roxanne had three splendid fingerwoven sashes out for my examination. All three were in the classic arrow-and-lightning pattern. One particularly captivated my interest. The weaver must have had a rough time. It looks to me like there may be evidence of a number of problems my students face … and some clever solutions. -losing the shed -weaving too far -checkerboardingOK, in the category of losing the shed. I recommend the use of a ‘safety belt’ to tie off one group of threads whenever you pause in your work to keep the upper and lower threads separate. The error I saw on this sash entailed two different spots where a whole row (or significant portion thereof) exhibited an awful disorganization in the threads. I am thinking that this weaver lost the shed, and instead of meticulously re-establishing the shed, this clever weaver just buffaloed on, and you don’t much notice until you look closely. Second problem, weaving too far. In the arrow-and-lightning pattern, weft-to-warp changes are supposed to happen at regular intervals. It looks to me like the weaver of this sash occasionally went too far with a weft. When this happens to me, I work backwards, unweaving as I go across the row to the spot where the change is supposed to happen. The clever weaver here did not work backwards, but rather just pulled the weft between the shed back to the right place, and dragged the proper color on over. With the next row, yes there were three threads in the shed … maybe this needs a diagram. It’s a clever solution to a common problem. The third anomaly in the sash was the presence of short rows. In knitting, particularly at the neck of a sweater, a person sometimes works only part way across, not using all the stitches before turning. This causes the work to grow a bit more in a selected spot. In this sash, I saw evidence of short rows at the outside color zones for the first half of the sash, and near the central arrow in the second half of the sash. Now, I’m not sure about these short rows at the outside edges. I have seen it before, and my theory is that the weaver felt that the thread in the outer color zones was perhaps a bit thinner than that in the central arrowhead and center color zones. This might be the way to make up for this difference in thread size. As I say, I have seen this in other sashes. Where it is present it is not always consistently done throughout the full sash. The sashes seem to lay quite flat, equally in the areas with the short rows and in the areas without. Anyhow, the feature of this sash that I think might be of interest to weavers was the use of short rows in the second half of the sash … in the lightnings immediately to the side of the arrowhead. I am thinking that this technique could help those weavers who are chronically plagued by checkerboarding. Extra rows, extending from the center and weaving through only the first two or three lightnings increases the length, relieves the puckering and eliminates the checkerboarding caused by too much tension on the center threads…this is my theory to explain the odd presence of this feature of the sash. After lunch I headed out to Peterborough by Greyhound. I had a lovely chat with Beth, Ipie and Jeremy, about sash weaving and sash wearing, and speculation concerning the origin of this special design. Then the real treat, a quick tour of the Canadian Canoe Museum. Any of you who read this and who are in the area, go visit the Canadian Canoe Museum and the Canadian Textile Museum. Both definitely worth the trip! Work is progressing on that replica of Elzéar Goulet’s sash. After matching up the colors in January, respinning the yarn all February, I started weaving in March. Elzéar’s sash was very loosely woven, only 6 wefts per inch in a very fine wool. My theory was that this could be produced using the false weave, creating two sashes at once. I calculated 13 feet to produce the 10 foot sash. Twice this, 26 feet of warp, was tied between two pillars in the Atrium of the St Boniface General Hospital where I work. The original sash has some fill-in at the top of the sash, to mitigate the pointiness at the upper border (I sometimes call this the fish-tail effect).  Flattened upper edge of sash Note the ‘short rows’ that make the first green lightnings start much lower than the first blue lightning. So I did this bit of weaving before taking the warp to the Atrium, tieing off each row carefully. Installed in the Atrium, I attempted to shove each false row twenty feet down the warp. I have to confess failure. A certain amount of mixing up of threads happened in transit from my warping mill to the Atrium site, what with the slight elasticity of the threads and small differences in lengths between individual threads, and perhaps insufficient tension on the whole, it took me over an hour to clear the first shed. I worked on it all afternoon, figuring that once I got it all lined up it would start working more smoothly. I then realized that as I cleared the shed, the threads were jangling around behind me. I am thinking that a team of several people working on this, one shoving the shed, and two others, stationed on either side of the first person, assisting, could do the job. But this would seem to defeat the purpose. This would be much less efficient than weaving two sashes. In the end, I cut the 26 ft warp in half, and now am weaving two sashes, one tight and the other loose. 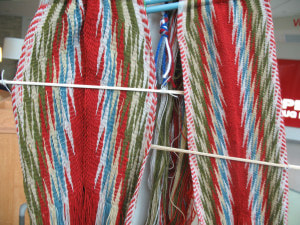 Now, I’m not yet ready to totally abandon the theory of the false-weave sash. I’m rethinking this. I figure I’d need several things:
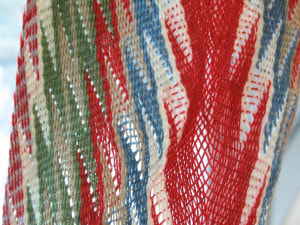
-measure out the warp IN THE SAME SITE as I will weave, no releasing the tension, folding it up and transporting -much more tension on the warp -lots of warp sizing -extra personnel to keep the threads from jumping around -shorter lengths for experimentation (indeed I have been successful shoving the false weave 4 feet, why not 20???). My next experiment will attempt to shove the false weave 10 feet. The fingerweaving method tends to create a tangle of threads at the lower margins of the work. This is commonly called the ‘false weave’, and a person can spend many hours per sash periodically untangling this mass. Occasionaly people have said to me, “Too bad you can’t use that somehow.” I have spent some time thinking about this. My work with sprang teaches me that it is possible. Indeed, sprang was done alongside fingerweaving in certain parts of Quebec in the 18oo’s. Whenever I travel anymore I try to scout out as many examples of sashes as possible along the way. I’ve met with some success requesting permission to examine sashes and record data. Over the past few years I have come upon some spectacular fingerwoven sashes, and five very loosely woven ones. The loose ones intrigue me. How does a person weave that loosely and at the same time keep it even. I have some experience dealing with the ‘false weave’, creating ‘art pieces’ which incorporating it as part of the work. More recently I have conducted experiments, working with the false weave. Working on a 12 ft sash, I sat myself on a high chair and pushed the false weave as far down, close to the floor as possible. Using this method I’ve been able to pack as many as five repeat patterns before untangling. It seems that, if you start out with the threads knotted together to keep them even, that a mirror image of the sash pattern is created. a mirror image pattern can be seen in the falseweave At one point I took my weaving to the Manitoba Museum and compared the false weave with a loosely woven sash there. They matched up quite nicely. Travelling last Summer, I examined sashes in Edmonton, Alberta, and found three that my data would declare to be in the loosely woven category: fine thread comparable to 2/8 worsted wool, and fewer than 7 threads per inch lengthwise. The sash of a local hero, Elzéar Goulet, is preserved in the Musée de St Boniface Museum, a few blocks from my home. It is an example of such a loosely woven sash. There is interest in a reproduction of the Goulet sash, and I am intrigued to explore a technique that would yield such a loose weave. Last Fall, I made a successful proposal to the Manitoba Arts Council for a Craft Grant. Subsequent to receiving approval I have proceeded to match yarn and dyestuffs to the original. Last week I made up a sample to verify my success at matching the colors. The curator snapped a photo of my sample alongside the original. sash color comparison You will notice that my sample, the one on the left, is wider than the original. The next step is for me to re-spin the yarn, eliminating its ‘fuzziness’ and compacting it down. My calculations indicate that this final step will allow me to make a very close copy of the original. The respinning will occupy me (along with a few other projects, like the local Winter carnival, Festival du Voyageur) for the month of February. In early March I will measure out an extra long warp. I will then set myself to weaving a sash. The false weave I will push, row by row, to the far end of the warp. If all goes as expected, I will weave two sashes at once, one a nice tightly woven sash, and one the falseweave, packed into a replica of the Elzéar Goulet sash. I’ll keep you posted. 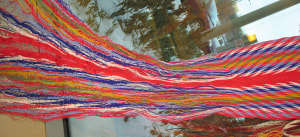 a mirror image pattern can be seen in the falseweave 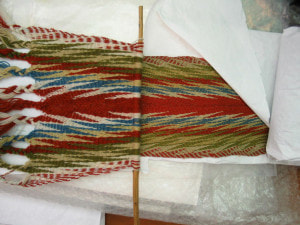 I attended the North American Voyageur Council Fall Gathering last weekend, Nov 6-9, at Ft William, in Thunder Bay, Ontario. Had a lovely time. Gave a fingerweaving workshop. Once again, folks who long ago decided they can’t fingerweave, just plain didn’t have me for a teacher. 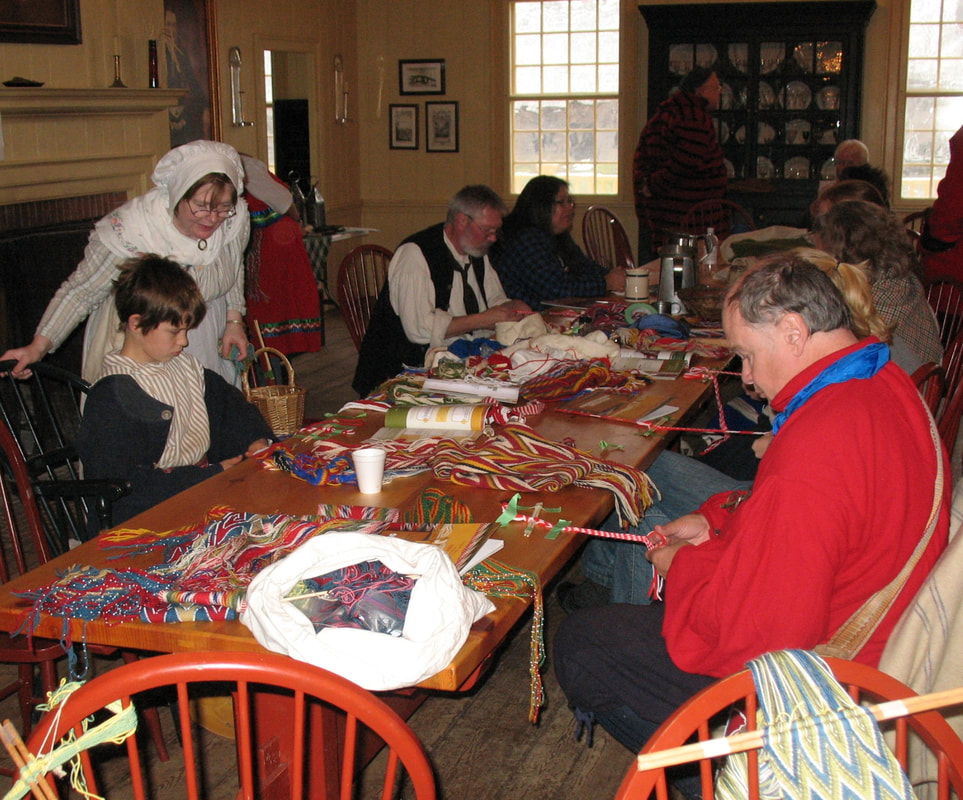 Fingerweaving workshop for young and old at the NAVC Fall Gathering Some of the sessions were held in Grand Portage, in northern Minnesota. I had the opportunity to see my sashes on the mannequins. 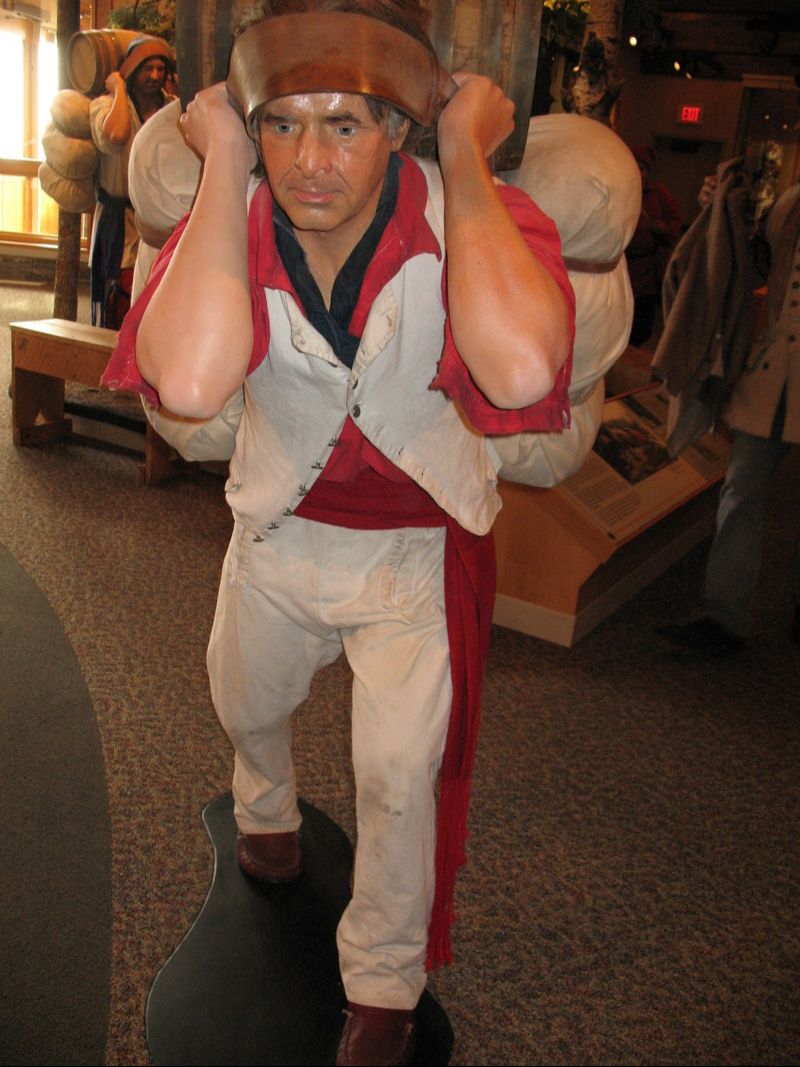 Mannequin in the Grand Portage display, wearing a CarolJames sash I also had the opportunity to examine 3 very old sashes, made in the style of ceinture fleche in the 1800’s. I’ll add their statistics to my collection.
Well, I finished that Assomption swatch, 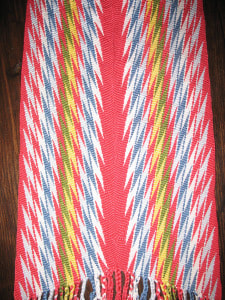 and did another one of a related pattern. Both Manitoba Museum and Musée de St-Boniface have sashes that are very loosely woven, in the Assomption (arrowhead and lightning) pattern. 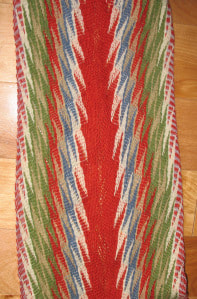
The sash I wove last year has been framed beautifully and installed in the hallway of the St Boniface General Hospital. Included inside the frame is a plaque describing the project “Fragile threads when combined become very strong cloth, thus the sash symbolizes the uniqueness of the individual and the value of teamwork.”
I’m putting together my presentation for the Centre for Rupertsland Colloquium in Rocky Mountain House next week, May 14-16. I will present the paper I wrote for the Museum of the Fur Trade Quarterly, Spring 2007, that is, how to distinguish fingerwoven from loomwoven. And I’ll get to see the mountains again. The end of June I’m planning on attending the Handweavers Guild of America’s Convergence 2008 in Florida. I’m looking forward to learning lots of new techniques. |
Categories
All
Archives
May 2023
Categories
All
|
 RSS Feed