|
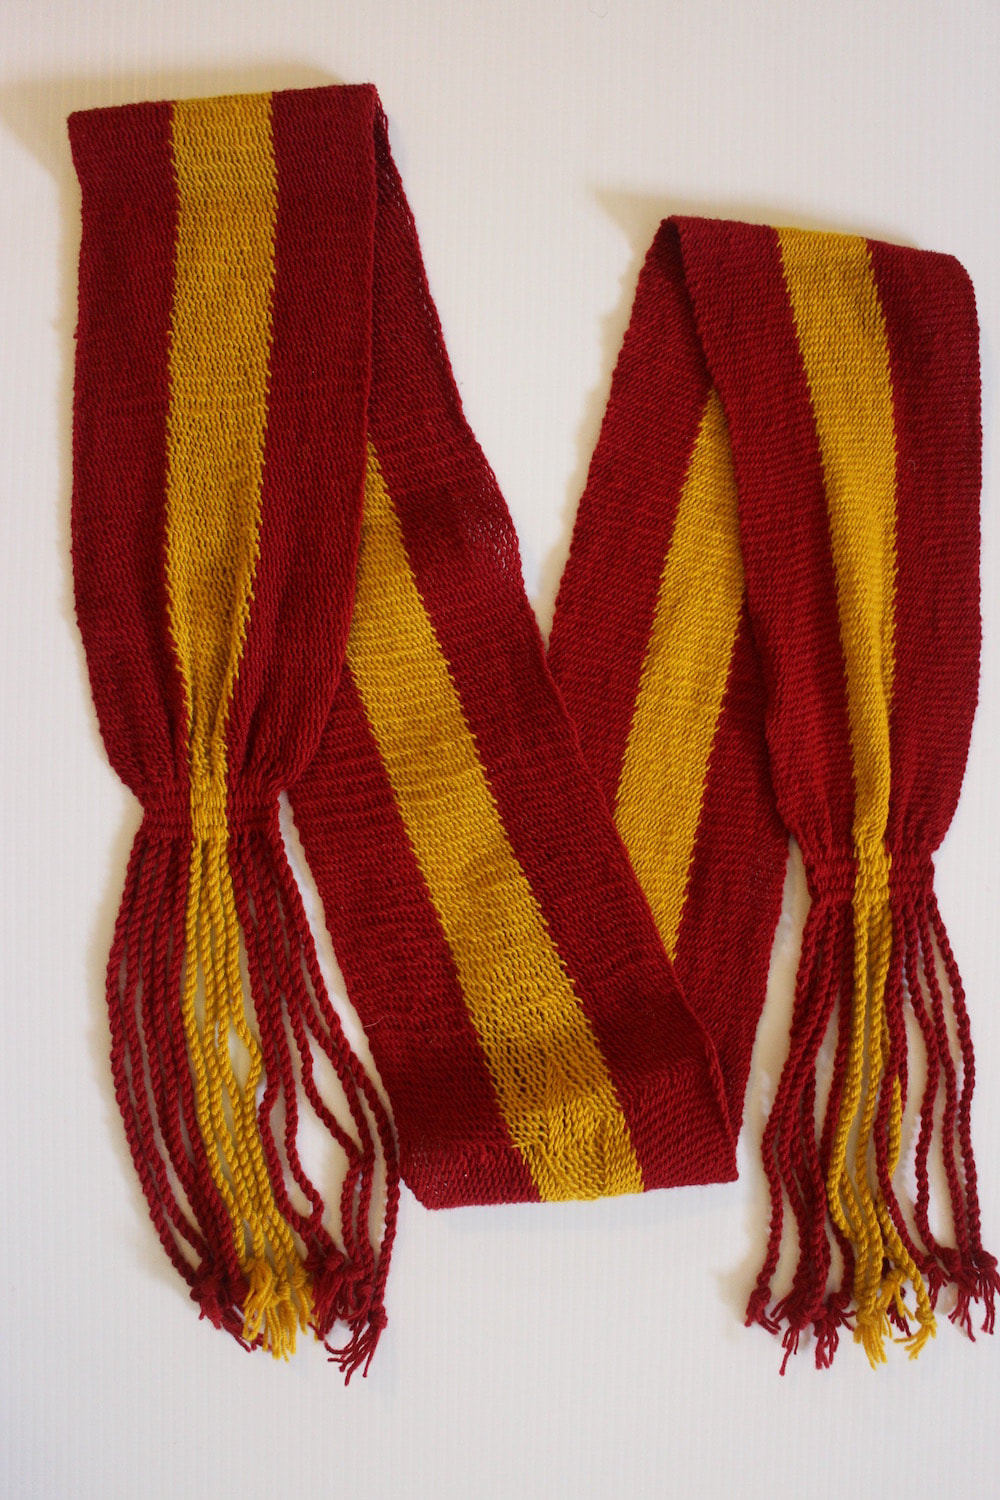
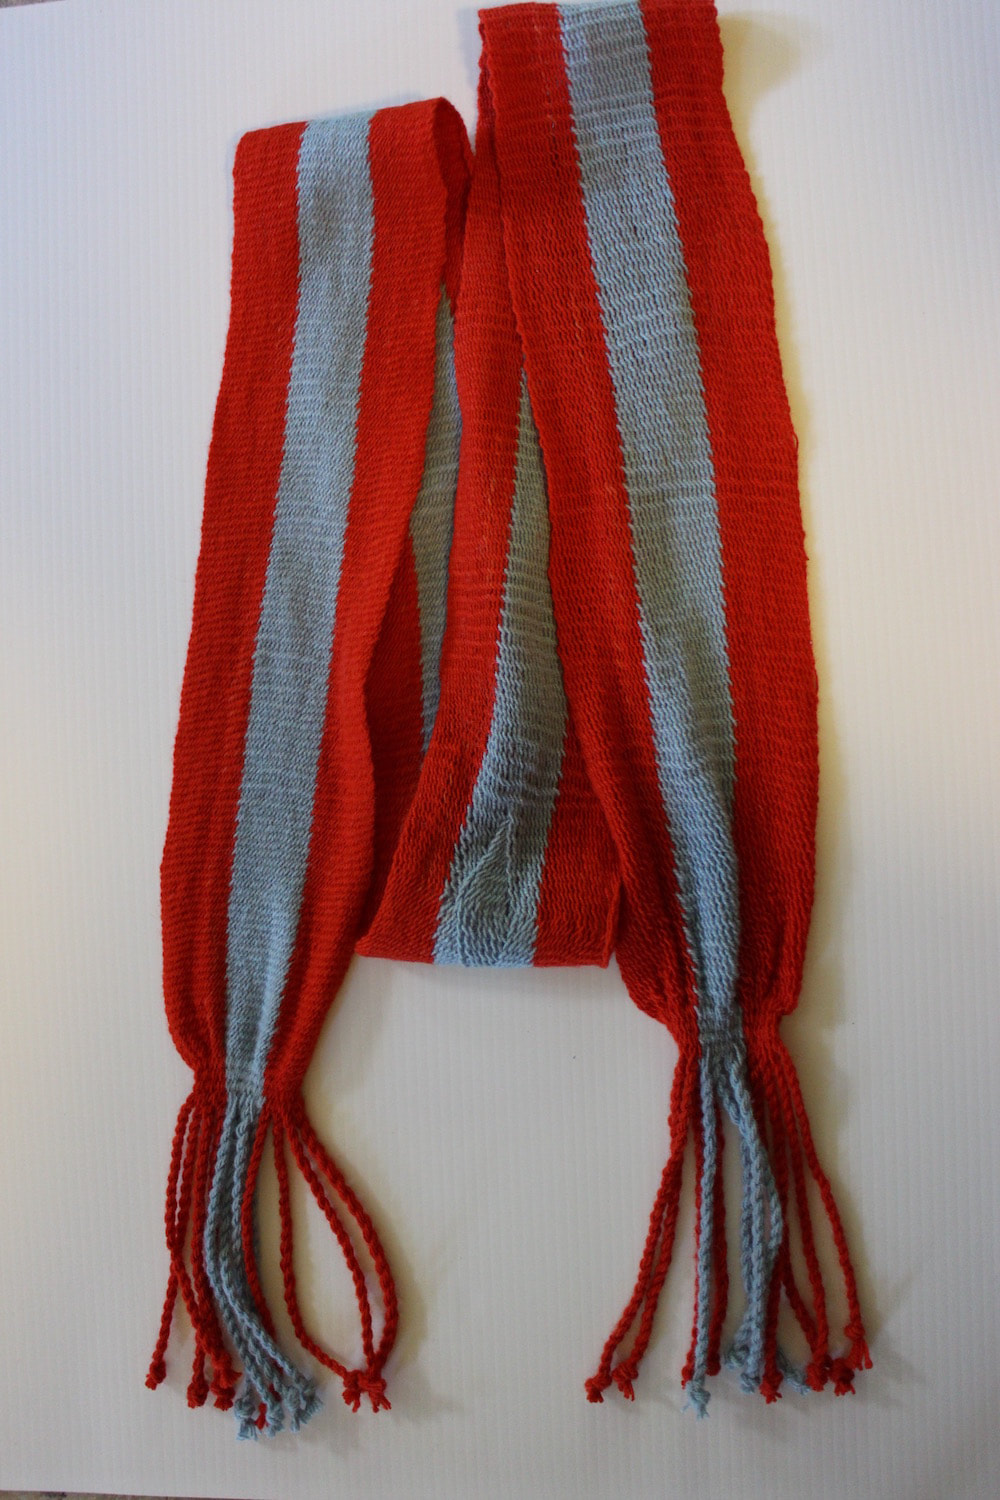
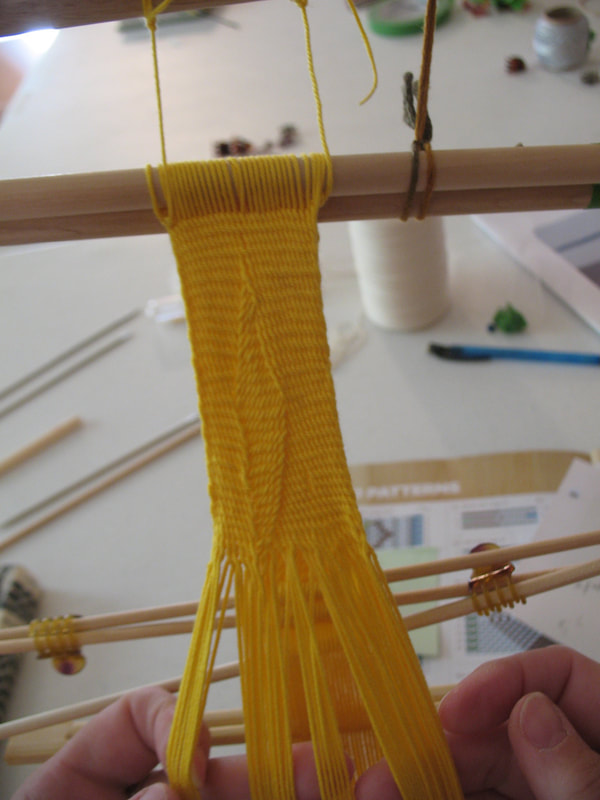
January was spent in creating two replica sashes for the Norwegian Armed Forces Museum. 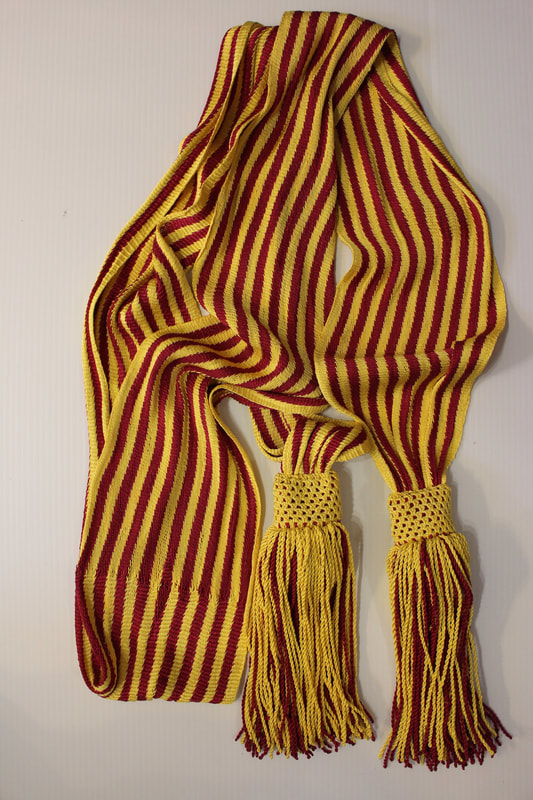 Red and yellow striped silk sash The sashes needed to be a tight weave. I found this was possible only with a loose warp, pushing each row firmly into the previous. Kind of tricky, the secret is to prevent loosening with the next row’s construction. Also tricky was the construction of the tassels, which are made separately, not continuous with the warp threads of the sash. They are a passementerie technique, a narrow band woven, and a supplementary weft that overshoots, and turns back on itself. Also in the deal, I offered to make matching shako cords. 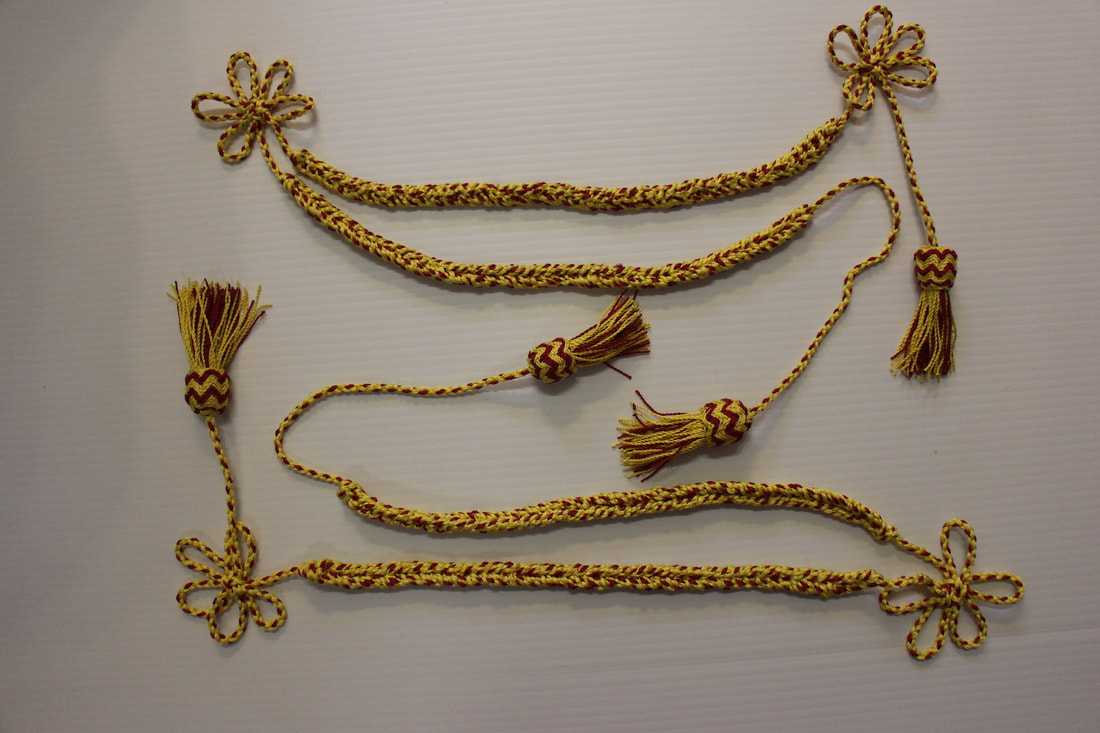 Silk cord for 1814 Norwegian officer’s shako The cord is a round 4-strand braid. The fleurettes are ‘plum blossom knots’ that I learned at the DongLim Museum in Seoul, Korea. The fringes are made in the same way as the fringes on the sash. I was very glad to have met up with Joy Boutrup last fall, and her suggestion to purchase Tom Hall’s book on Turks Head Knots. The pineapple knot was the thing to cover the woven band that organising the fringes.
Two sashes and two shako fringes, that’s pretty much my output for the New Year so far.
0 Comments
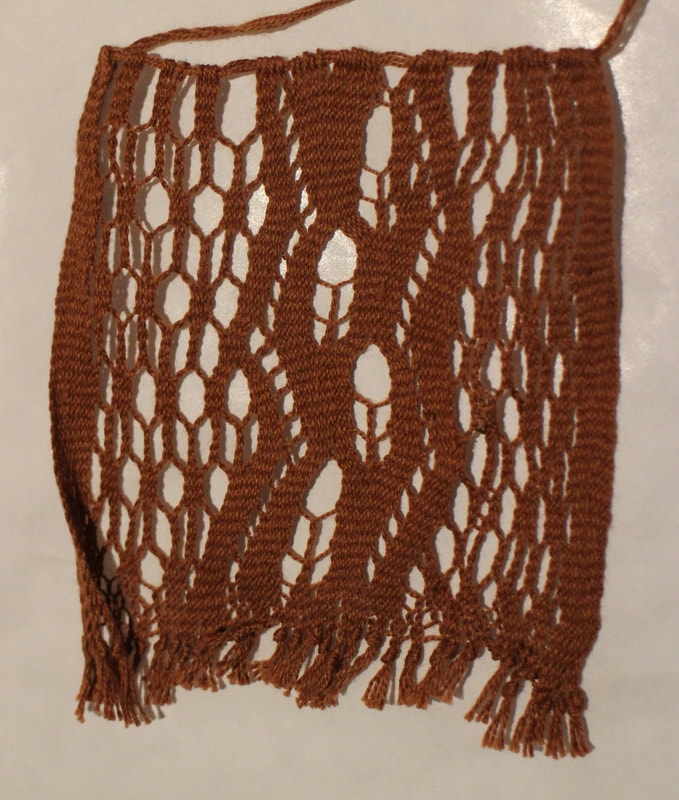
I’ve been looking at sprang lace in European collections. The Petrie Museum in London had a spectacular bonnet. Today I was at the Royal Museum of History and Art in Brussels.  The Royal Museum of Art and History in Brussels I was honoured to be permitted to examine a collection of sprang samples made between 1798 and 1830, now in the care of this museum. What can I say, these pieces are spectacular! Created using a very fine thread, the patterns are exquisite. I’ve been working to map out the patterns I see, and then creating a small sample, just to be sure I’ve got the mapping correct.
I think I’m in heaven. The next day I was allowed a visit to the Musee Royal de lArmée et d’Histoire Militaire. They have a spectacular collection of military sashes. 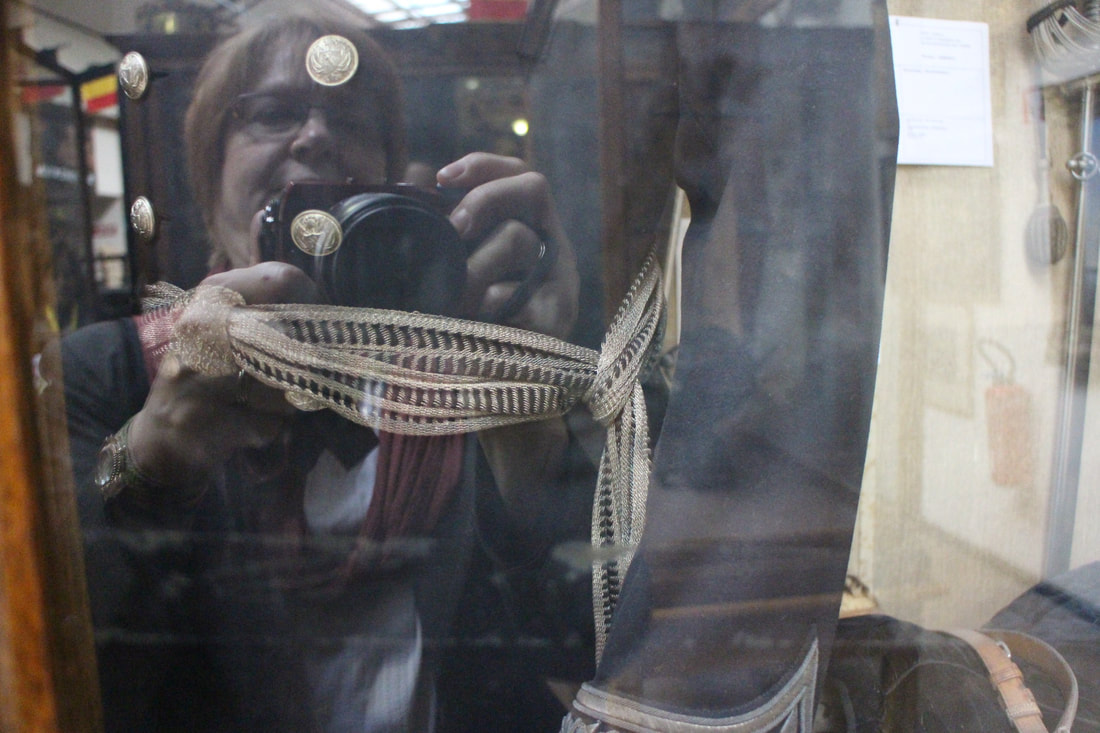 Taking photos of sashes at the military museum. I was also privileged with a visit to sashes in the storage area. It seems that Belgian soldiers wore sprang sashes until the World War I. Some are all S, some all Z. Many bear evidence of both S and Z twist in the sash, small knots on either side of the meeting place between S and Z. OK, so they did not do the bead thing that I do, removing the edge thread. I stand corrected.Many thanks to Dr Marguerite Coppens, Else Bogaerts, Frieda Sorber, and Katia Johansen for making these visits possible for me.
Looking through my stash for something else, I came upon a ball of fine singles handspun wool. Just the thing for a Bronze Age – inspired cap. Examining photos I took last Summer of items in collections in Copenhagen, many appeared to be constructed of a very tightly spun singles. Now, I have a theory. A very tightly spun singles might be just the thing for sprang. The amount of twist you add (or remove in the mirror-half) is insignificant with respect the the amount of twist-per-inch in the yarn. It has been my experience that, if I leave a ball of singles set for a year or more, that yarn is no longer fit for plying. It has lost much of it’s need to be plied … and is just fine to use ‘as is’. When I came upon that ball of my attempt at fine spinning, forgotten for over two years, I was delighted, just the thing to explore making a cap. Working with this ball of singles, I realized that my spinning was indeed rather inferior in quality. It was inconsistent in diameter and amount of twist. I held my breath that the thread would hold, no breaks while ‘spranging’. Indeed my yarn did hold. Some of the caps exhibited ‘interlinking’ stitches. Other caps, those that looked much more dense, were constructed with an mix of ‘interlinking’ and ‘interlacing’ stitch. I opted to explore the latter. 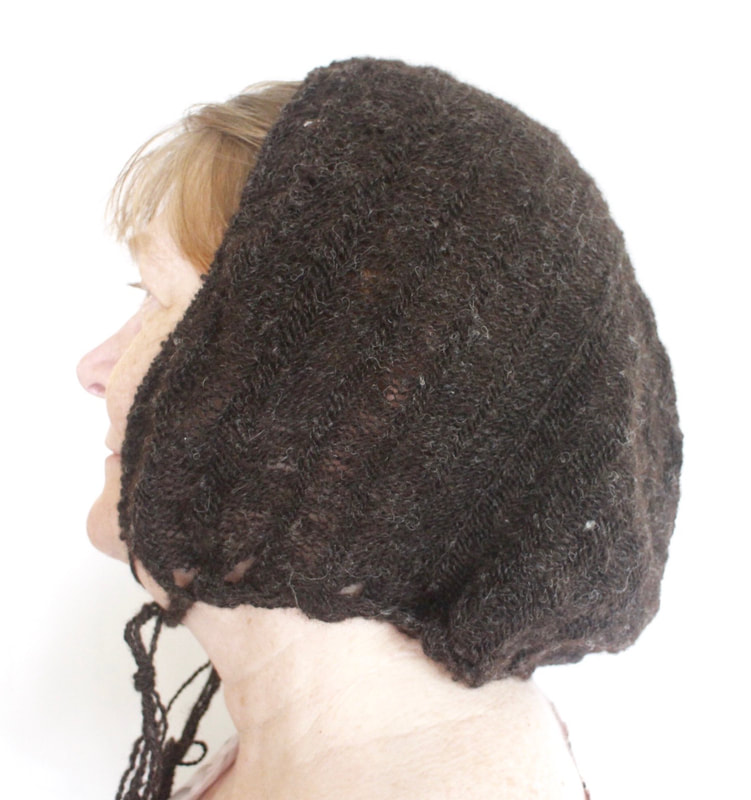 Here is the wool sprang cap. The finished cap had much diminished tendency to curl. The cap laid flatter than caps I have made using commercial sock yarn.
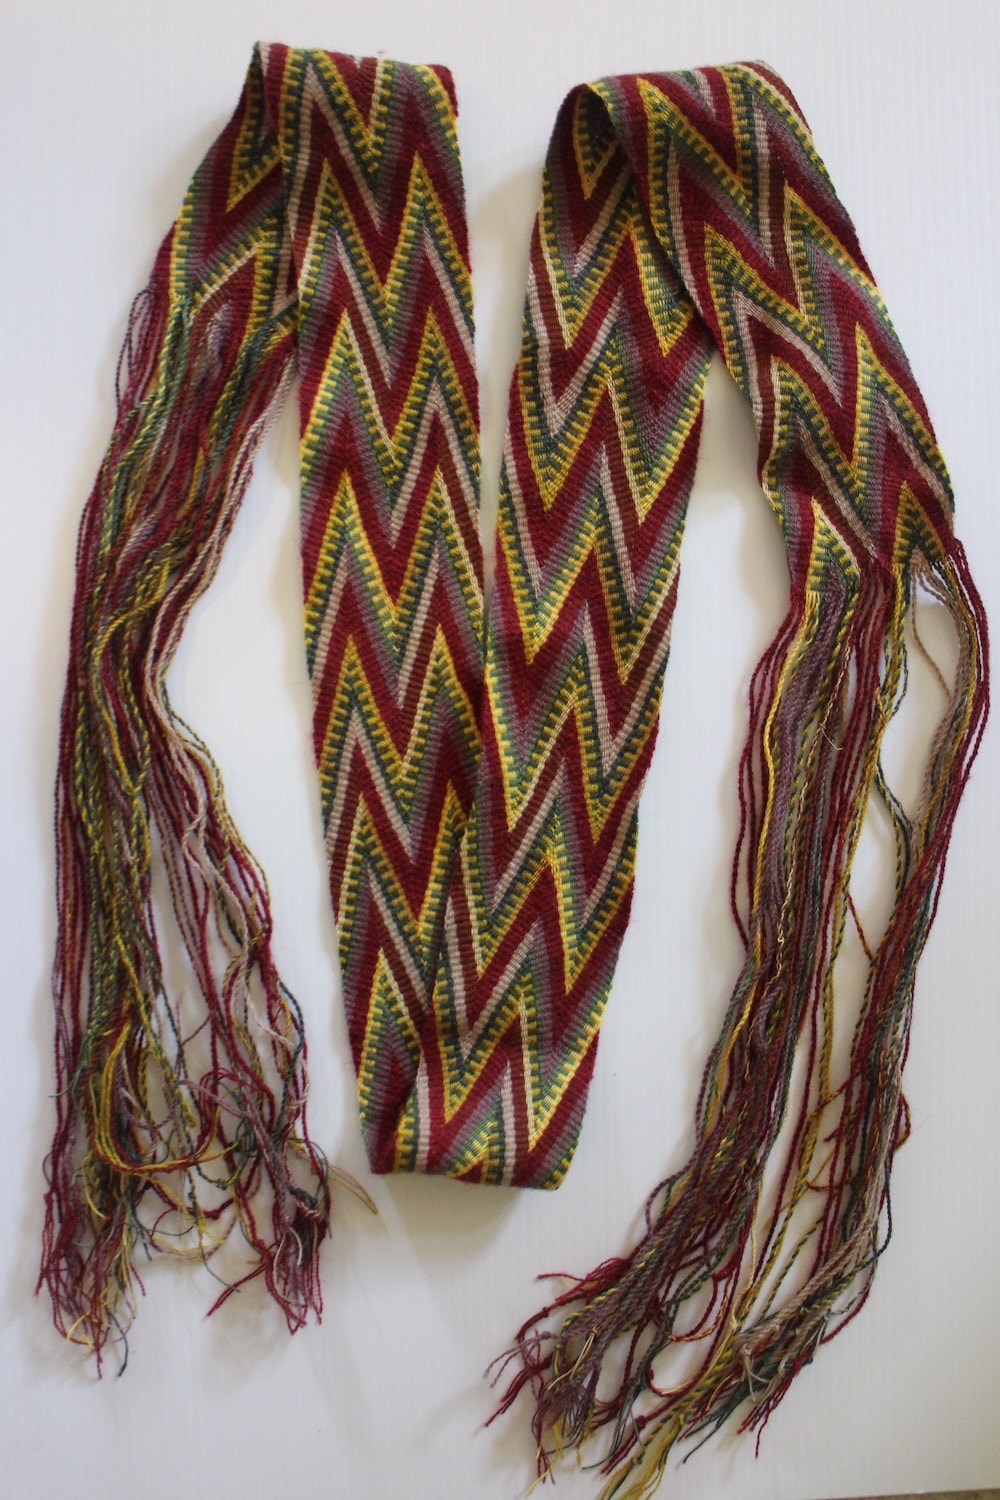
Once again, hand spun yarn can be superior to commercial yarn. I’ve created a number of military sashes this summer.
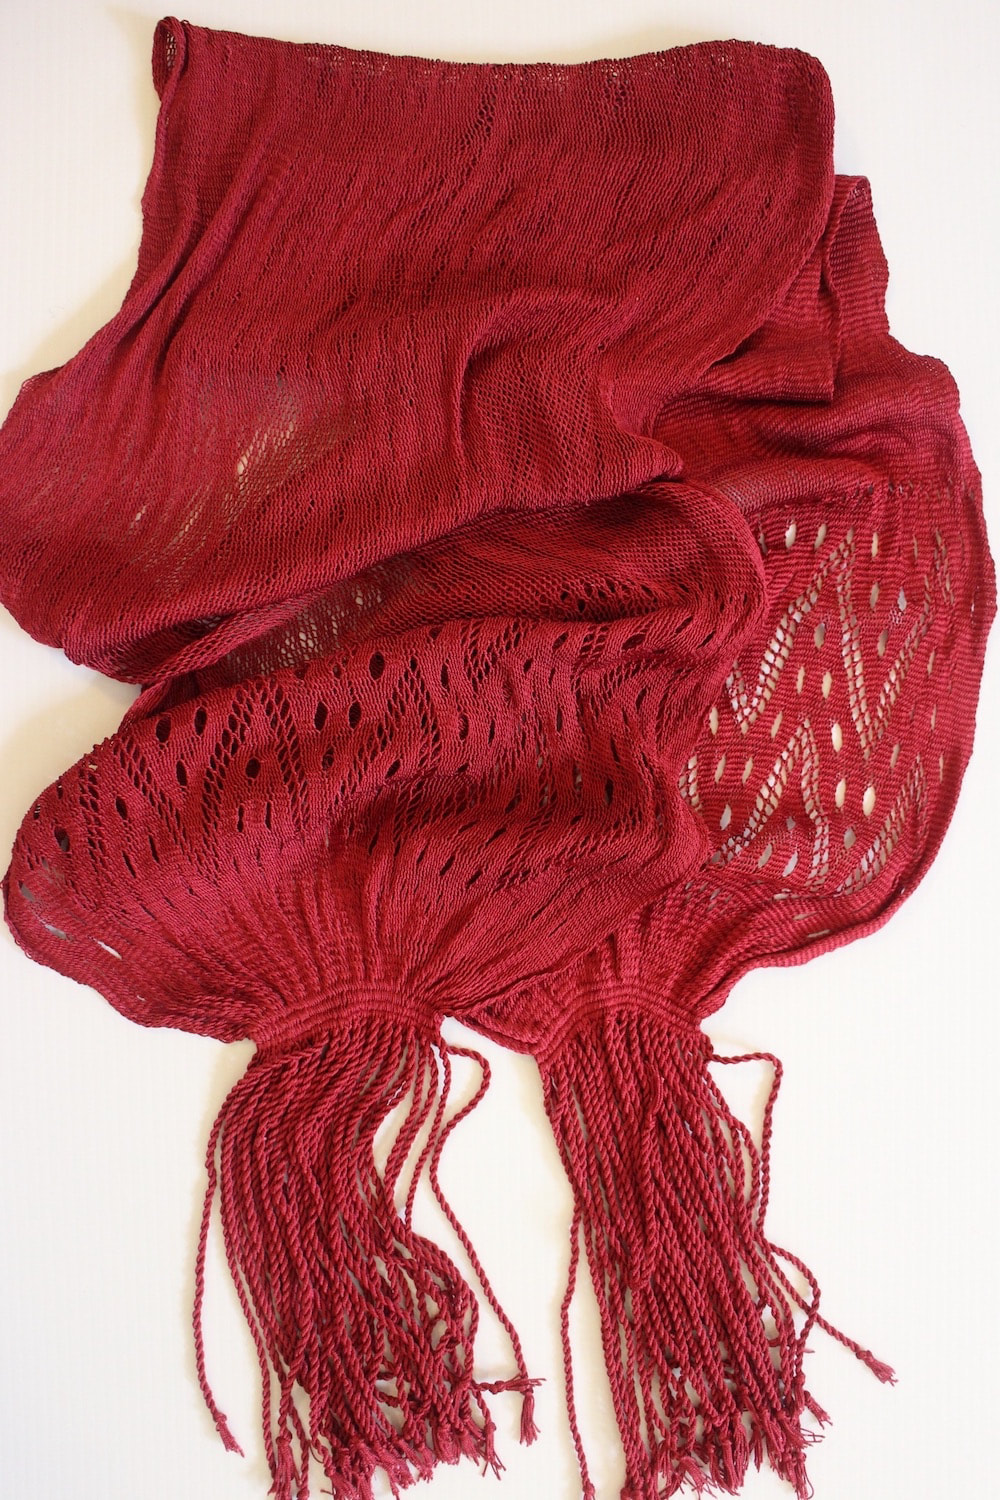
The sashes with the colored stripe are wool NCO (non-commissioned officer) sashes, and were typical in the British army in the 1700s and into the early 1800s. The solid colored red sash is silk officer’s sash.
And in between, I’ve created several of these coin purses.  Miser’s purse, an authentic way to keep your coins, Medieval style Made of silk cord, they are modelled after the image in Downer’s book Nelson’s Purse, and hold quite a lot of coin.
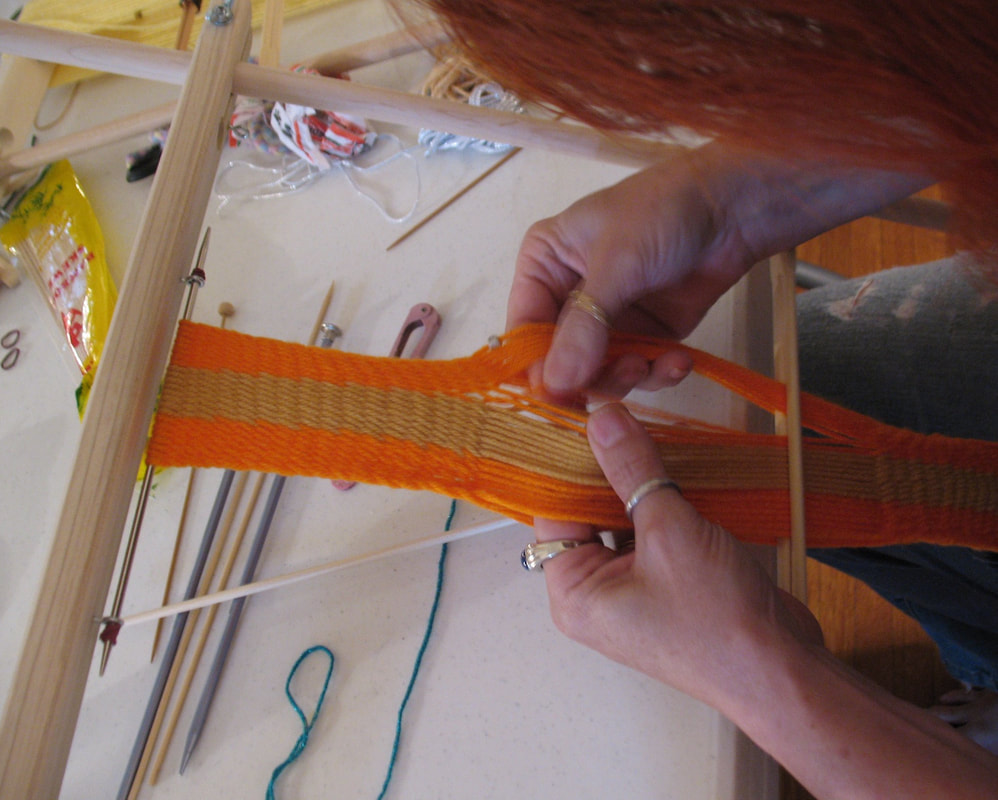
This sash is certainly teaching me alot. It has been my custom in sprang to work several rows, placing sticks in each the shed, completing several rows before getting up and moving all those sheds, one after another, into the mirror-image position. This sash, as with many historic sashes from the 1700s, was created using more than one very fine thread. I’ve got multiple strands. Just like embroidery floss that comes in 6 strands, that’s how these sashes are made: multiple strands, unplied. Now the problem happens when I am not 100% accurate, and wrongly group a thread. When I go to push it into the mirror-image section, that mis-grouping causes a snag. Mostly I notice that it’s really hard pushing, check the culprit thread, and find the mistake. Sometimes, however, it’s only in examining the fresh row on the mirror image. 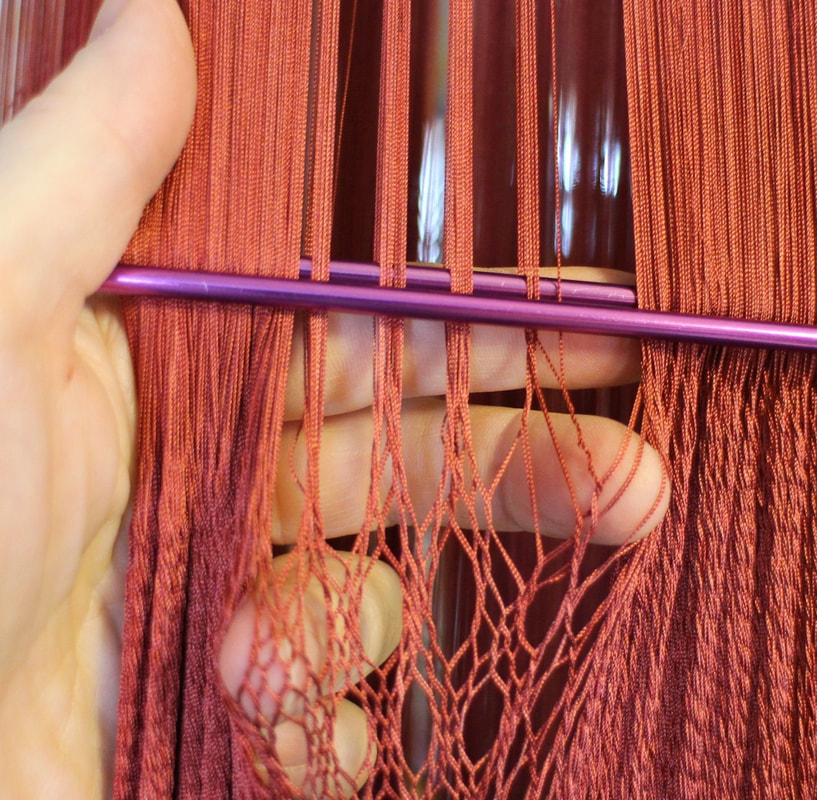 Thread grouping error The error shows up as an imperfection in the mirror image. I am finding that it’s best to catch these errors right away, like, catching it as soon as it happens. I’ve given up on this multi-row efficiency. I stand up after each row, move the row, and check. It seems the only way to assure all is well. Another issue has developed concerning thread tension. My initial warp was not 100% even, and I had to deal with that. Things have been quite smooth since …. until lately. I’ve noticed that there is another couple of threads loose lately, causing troubles. I’ve identified them as the threads at the very edge. This happens every time, indeed makes sense. The edge thread, the thread involved in that three-thread edge stitch on the plait row, makes only half the number of rotations as all the other threads. Uptake is less for this thread. I’ve resolved the issue with this thread being longer. 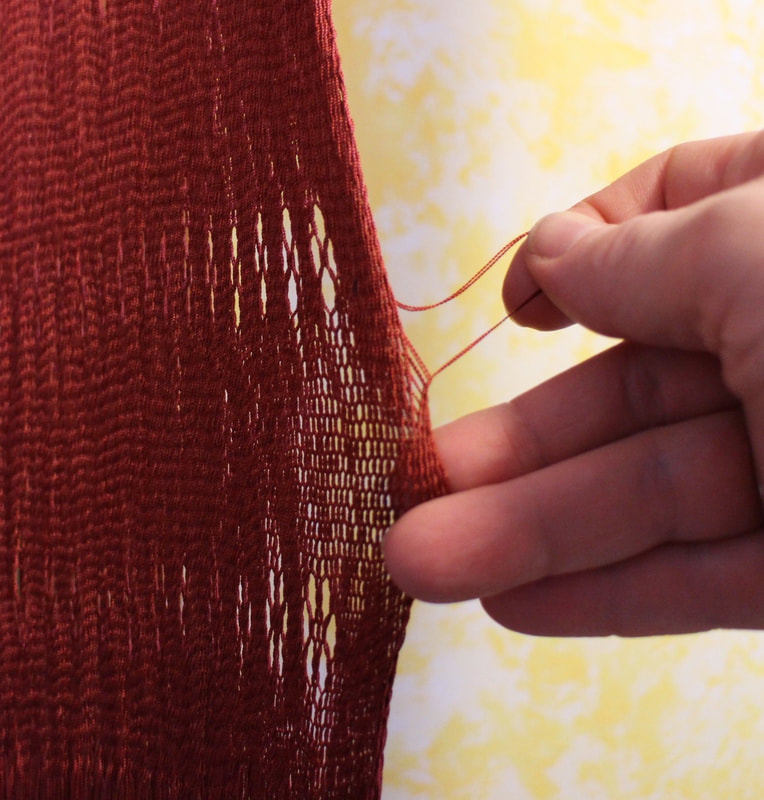 I pulled that extra thread up, leaving a loop off the edge of the cloth. I will try to remember to pull on that loop thread before the final finishing, completely erasing all evidence of this problem.
While on the subject of yarn uptake, with this very fine silk I’m noting an uptake of one inch per foot. When I work on wool sashes with a much thicker yarn, the uptake can be around 3-4 inches per foot. I am finding that numbers are my friends. The only way to prevent mistakes is to count stitches, and re-count after every row of work. 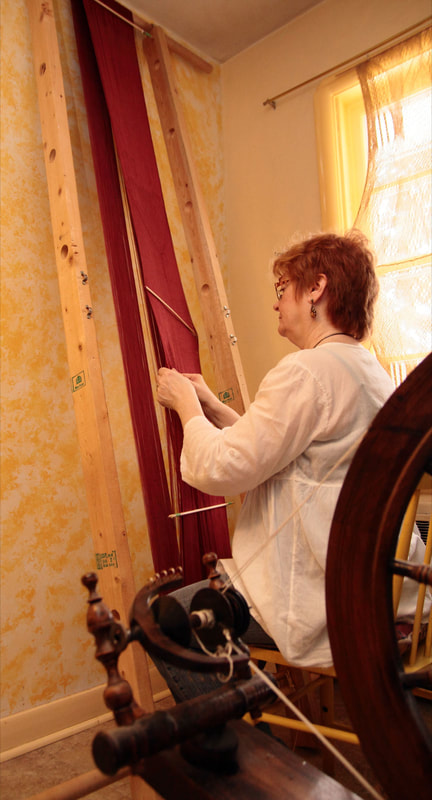 Photo by Chris Black Now, generally, when I get to working, my mind sometimes drifts. Counting more than, say, 20, I am never 100% confident that my count is Really correct. I experimented with a couple of things to help me keep track of threads. I thought about placing ‘marker beads’. This would mean sliding on the required number of beads ahead of time, sliding them along as I measured out, and leaving a bead in place at the appropriate place. The problem I anticipated was that any knot or slub on the thread would mean that the rest of the beads could not pass. I opted for placing little ‘marker threads’ every 100 threads. We re-counted at each 100, to make sure this marker was accurately placed, and to be keeping accurate account of the number of warp threads.
As soon as I began to ‘sprang’, however those markers proved impractical. They got tangled, and created tangles. So, I’m relying on counting and looking, checking each row twice. Breaking down the pattern into smaller pieces helps. Indeed, most of the patterns on this replica sash do that. And let me stress again, keeping the threads well separated goes a long way toward error-prevention, as well as making it possible to push each work around to the other side. Work on the sash replica continues. The length of cloth is now such that I’m ‘over the top’. 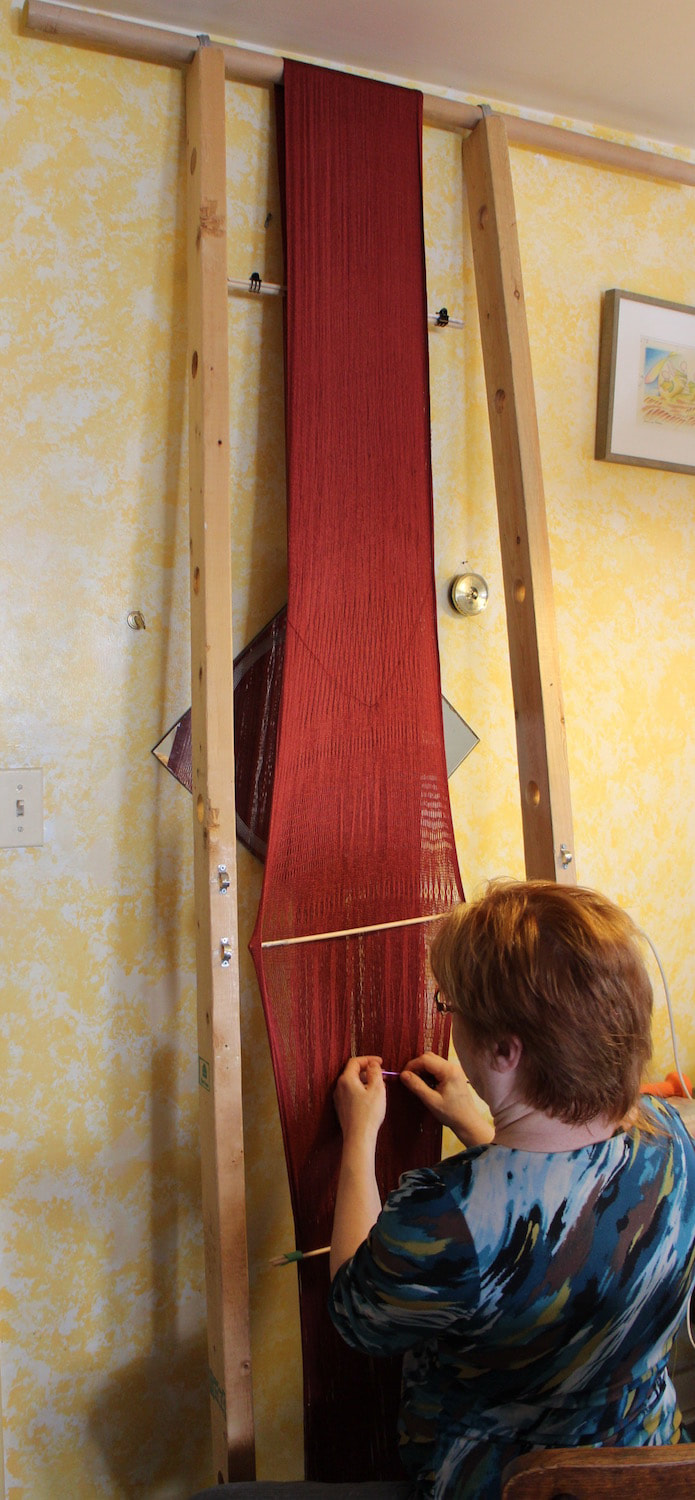 The cloth is now long enough to extend over the top. The first few feet of the sash were worked on the ‘front’ of the frame. Each time I worked a row, the new shed was pushed down, around the bottom, up the back of the frame, and finally over the top. Each time a ‘Z’ row was completed, an ‘S’ row was added above.
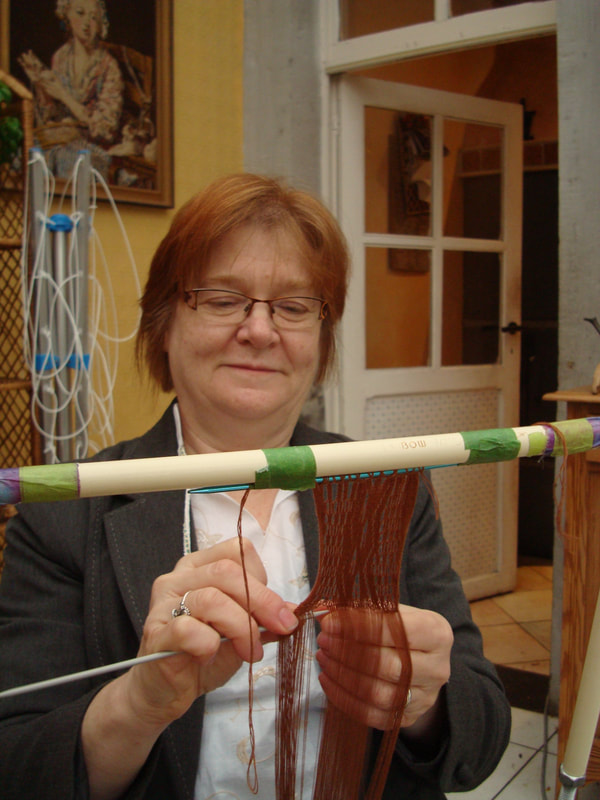
I’ve arrived at the point where I now sit and work with the ‘Z’ row at a comfortable height and the most recent ‘S’ row is on the ‘back’ side of the frame. The ‘S’ portion seems to need a bit of encouragement to compact together. Early on I found that a heavy knitting needle in the last row, clasped to another needle for security, was the right thing to press each row against the previous. It also served as ‘safety’ line, should (horror of horror) I loose my working shed. Now that I’m over the top, the heavy knitting needle works at cross purposes. A few rows past the top of the frame, I noted that the needles were weighting downward and away from the cloth. At this point I switched to wooden sticks. The sticks are lighter than the metal knitting needles and not particularly well finished, so they ‘grab’ to the threads in the last shed, don’t fall down. Circular warp sprang requires a very even warp. Slight variations in tension while setting up results in slight differences in length. This warp is 15 ft long, and took almost six hours to set up. Slight variations occurred. We did take a couple of breaks for tea. I also noted weaknesses in the yarn, and some small knots. If there had to be knots in the warp, I wanted them to be all lined up in a place where the warp would be separated into the two fringes. Perhaps the pause to deal with these flaws also introduced small variations in tension and length. At any rate, after the first few rows, I KNEW that some threads were longer than others, and these were causing all kinds of trouble. In desperation, I went through the warp, and pulled the longer of these to the center. This resulted in what looked like a mess.  Evening out the length left arge loops at the center of the weaving. Most every circular warp of any length that I have worked has had this issue to some degree (mostly a much lesser degree). In my experience this always evens out over the length of the cloth. Indeed, over the next few rows, the loops diminished, and the unevenness worked itself out. 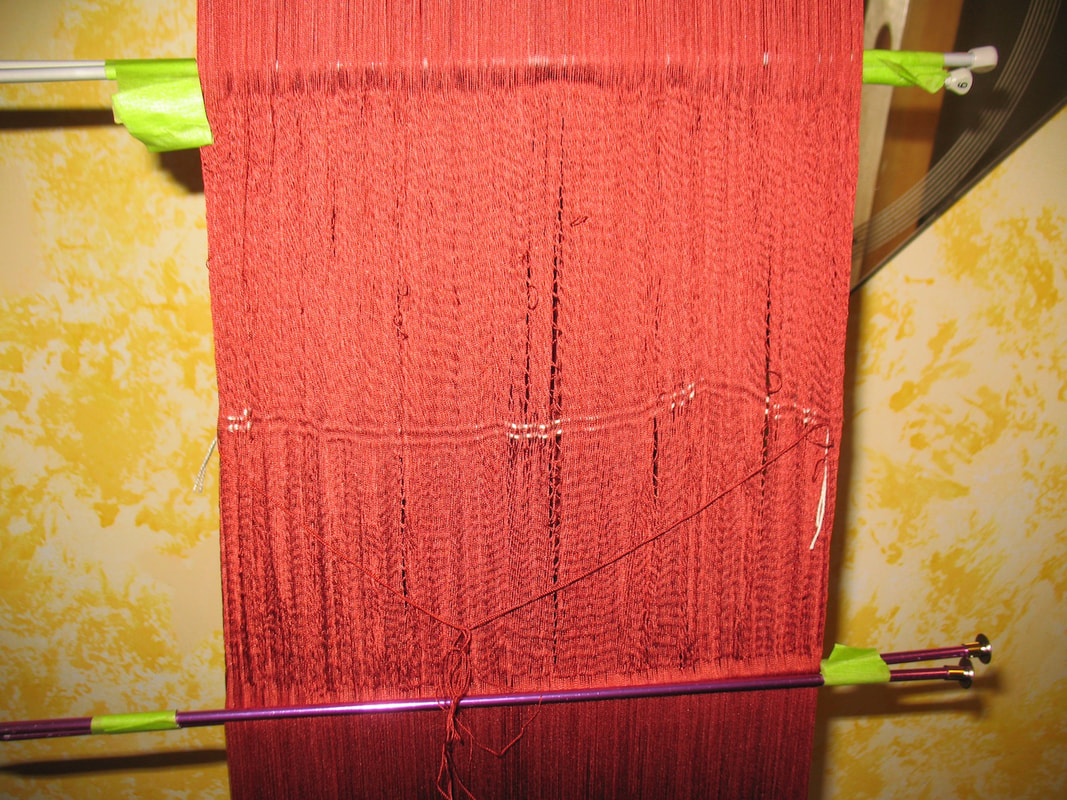 Several rows later, the imperfections loops are smaller. Working several hours a day, after ten days, I’ve got 5.5 inches of work done, resulting in 11 inches of cloth. The unevenness in the warp has completely resolved. 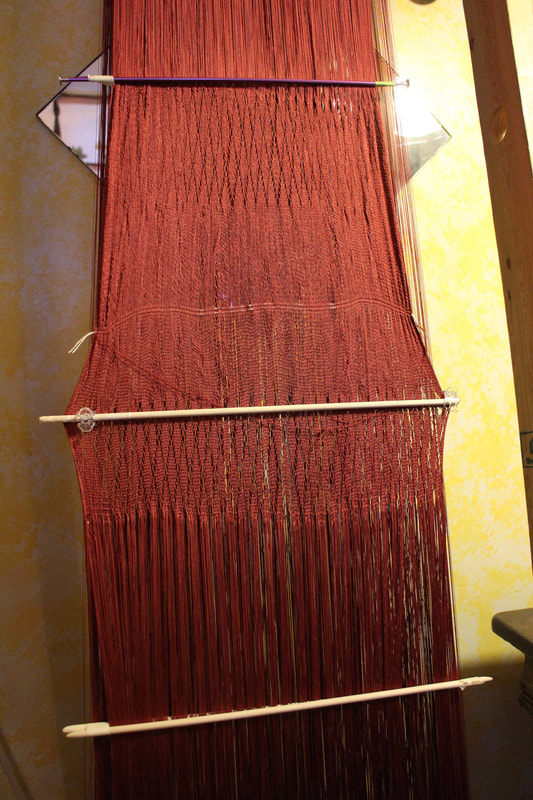 You would not guess the problems I had a few inches ago. I’ve begun work on that replica sash. 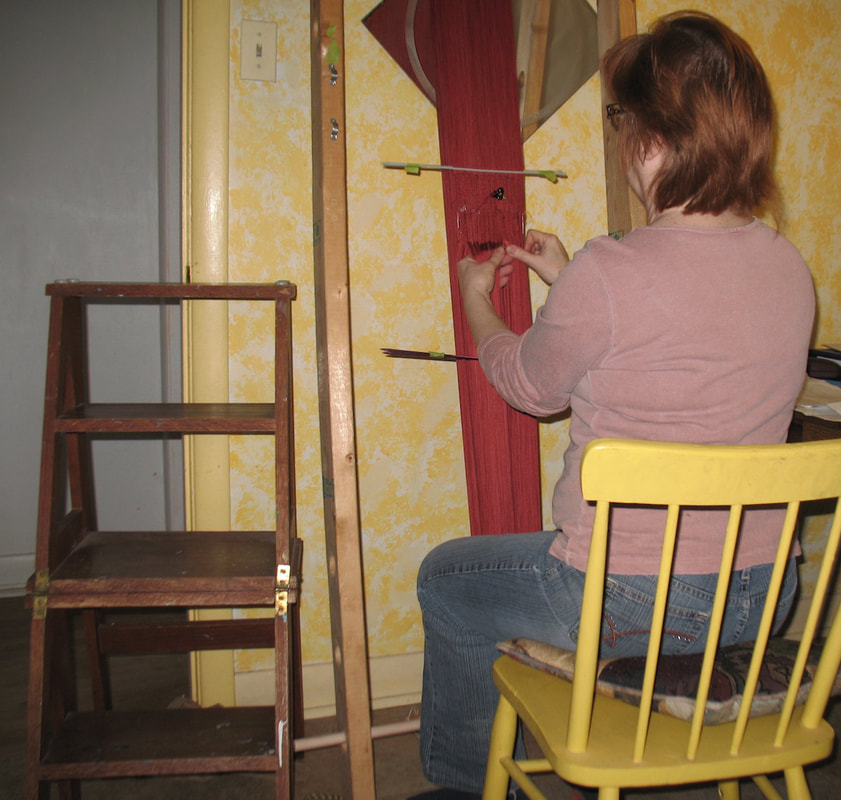 Work happens on the warp and frame that I set up last week. The first row was very slow, took over an hour. Then there was the challenge to move the work around the frame and back to the starting place. Note that stepladder beside me. I thought the warp had been set up with even tension throughout. Think again! Guess it’s nearly impossible to maintain exactly the same tension for almost six hours. Very slight differences in tension mean different lengths of thread within the warp. Different lengths in the warp cause no end of trouble in pushing the work around.
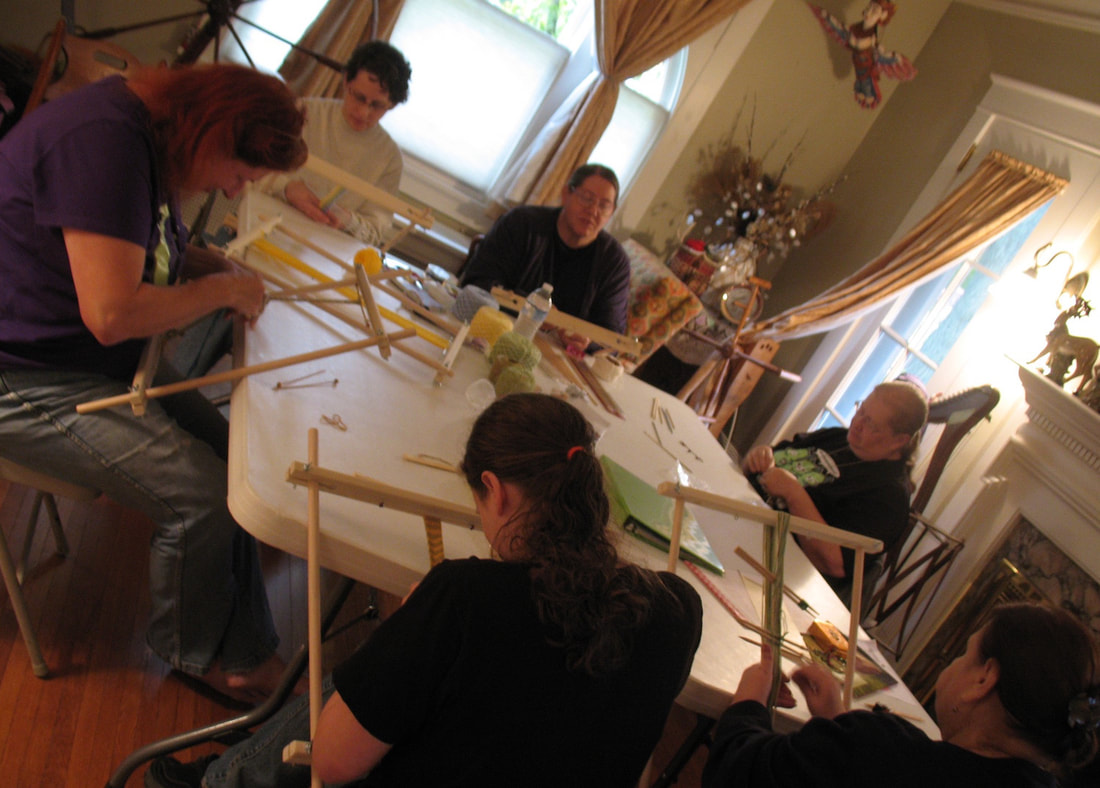
And yet, this is to be expected. I have not yet worked a long sprang piece that has not had this trouble. The first several rows, the first foot, are always difficult. Eventually the warp evens out, and it goes more smoothly. As they say in German, “aller Anfang ist schwer,” beginnings are always difficult. Looking for smoother weaving ahead. The North Shore Weavers and Prairie Weavers Guild near Chicago had invited me to visit and present sprang. I gave two workshops while in Downers Grove, in the Chicago area.
On to Marion, Indiana, where I attended Mississinewa 1812. Sprang instruction was high on the bill. 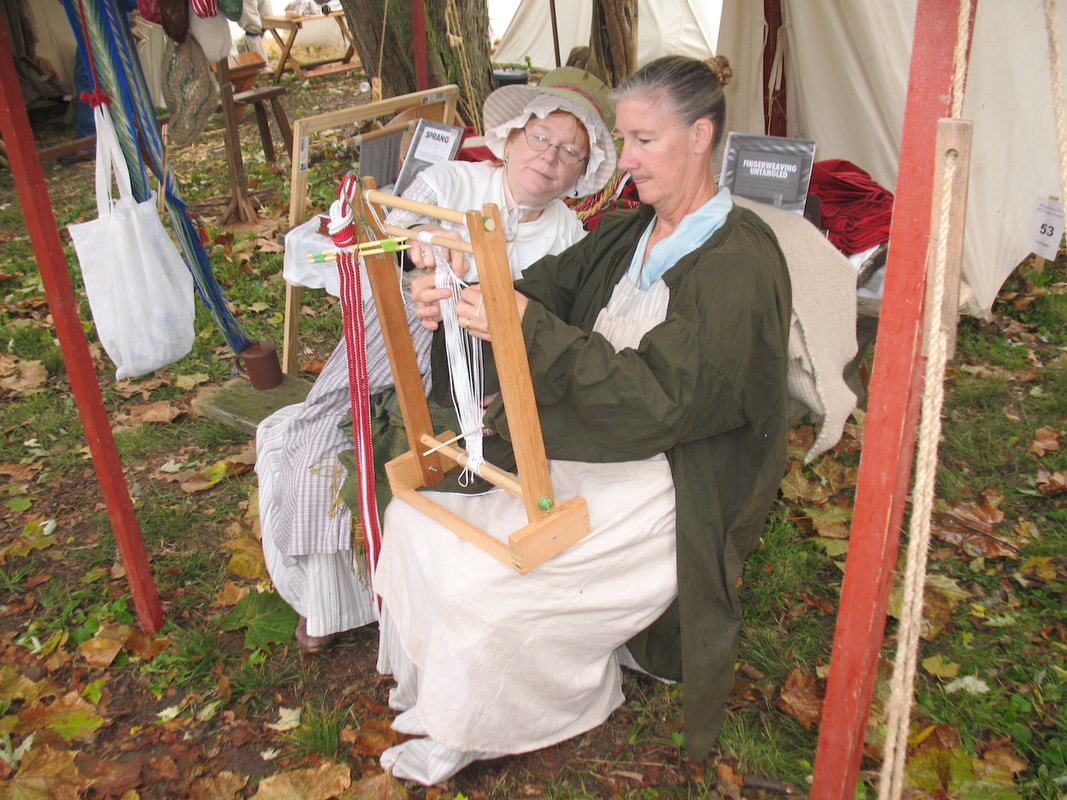 Sharing the finer details of sprang work with a fellow participant. Then on to Ohio, the Cuyahoga weavers invited me for a workshop.
Meantime, taking inspiration from a pair I saw last Summer, I set out to create sprang mittens.  Mittens started out as a figure-8 warp, two mittens made at the same time. The wrist was worked in interlinking. I doubled up the threads so the fabric would be narrower at the wrist. For the hand I switched to an interlacing technique. This means wider, a bit less elasticity, and a denser fabric. Listening to my daughter’s advice, I used a serger and a strip of woven tape to finish off. 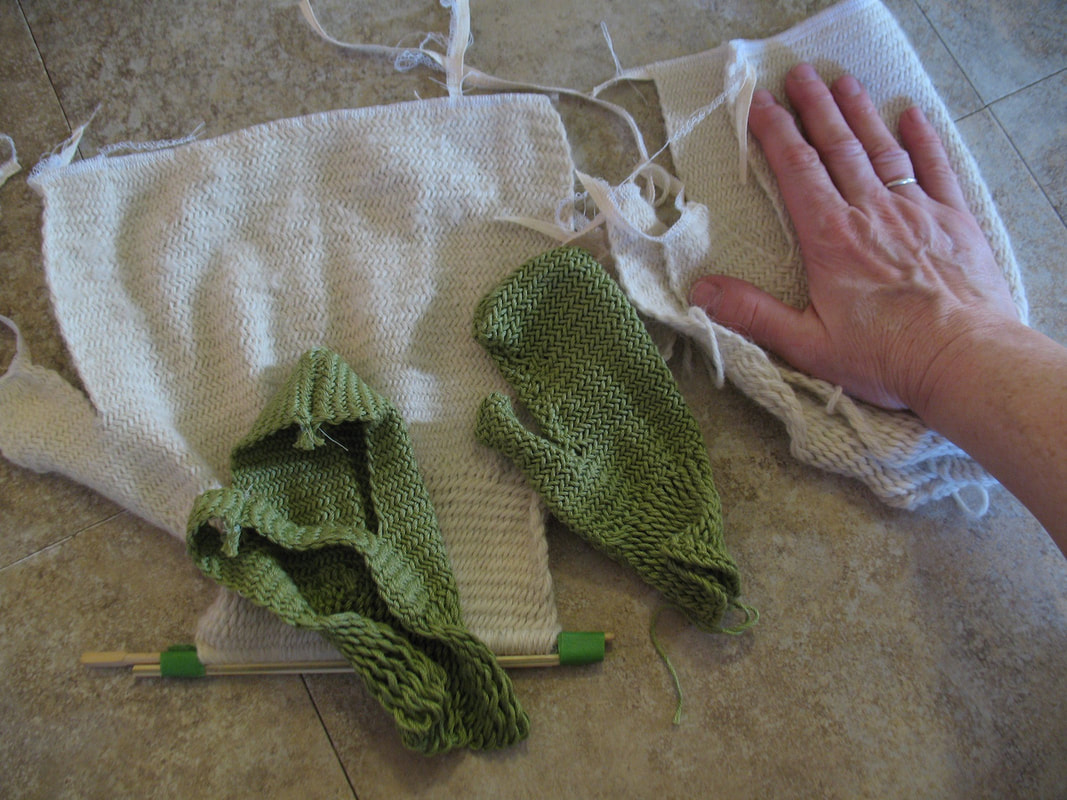 It’s a bit of a Goldilocks thing. The first pair (in green cotton) was too small. The second one, white, done in alpaca, was too large. The next one will be just right.
Just last week I was in northern Alberta. I taught fingerweaving in a couple of local schools, and presented a fingerweaving workshop for adults at the Fairview Arts Center. Check out the article reported in the Fairview Post: http://www.fairviewpost.com/2012/11/06/finger-weaver-shares-skills |
Categories
All
Archives
May 2023
Categories
All
|
 RSS Feed