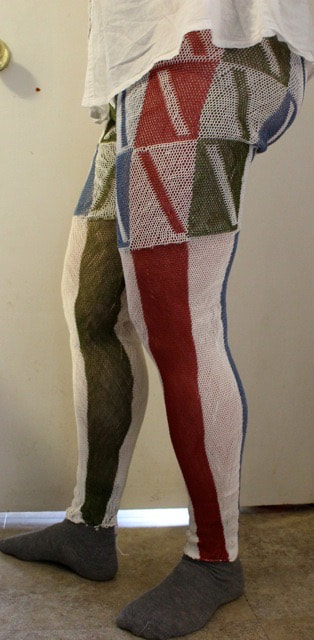
 The finished second pair of sprang pants! This is how I did it. Inspired by the work of Dagmar Drinkler, I made a pair of sprang pants. Difficulties encountered had me reflecting on how I could do things differently, and this meant making a second pair of pants. The difficulties centered around three major problems: 1) My technique in adding those extra threads at the thigh left me with quite a sniggle-heap on the first pair. I was sure I could manage that addition better. 2) The crotch needed shaping. I had the opportunity to meet Dagmar Drinkler in person and the crotch shaping was one of the points I wanted to discuss with her. She said that she did not do any special shaping for the crotch of the pants she made for the mannequins, left them open a bit at the meeting point . I decided that, despite the amazing stretch that is natural to interlinking sprang, I did need to do some shaping for the pants to fit my shape. 3) I was unsatisfied with the waistband on the first pair, knew I could do better All this in mind, I set up a new warp. Reading in Peter Collingwood’s Techniques of Sprang, I found the perfect way to set up my warp.
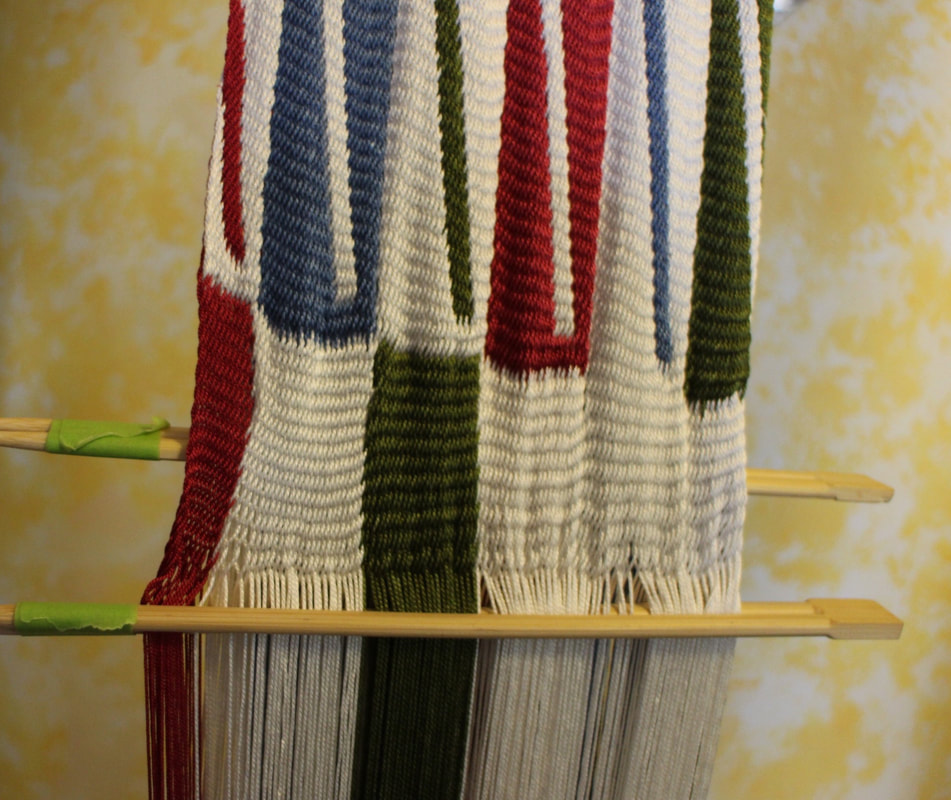
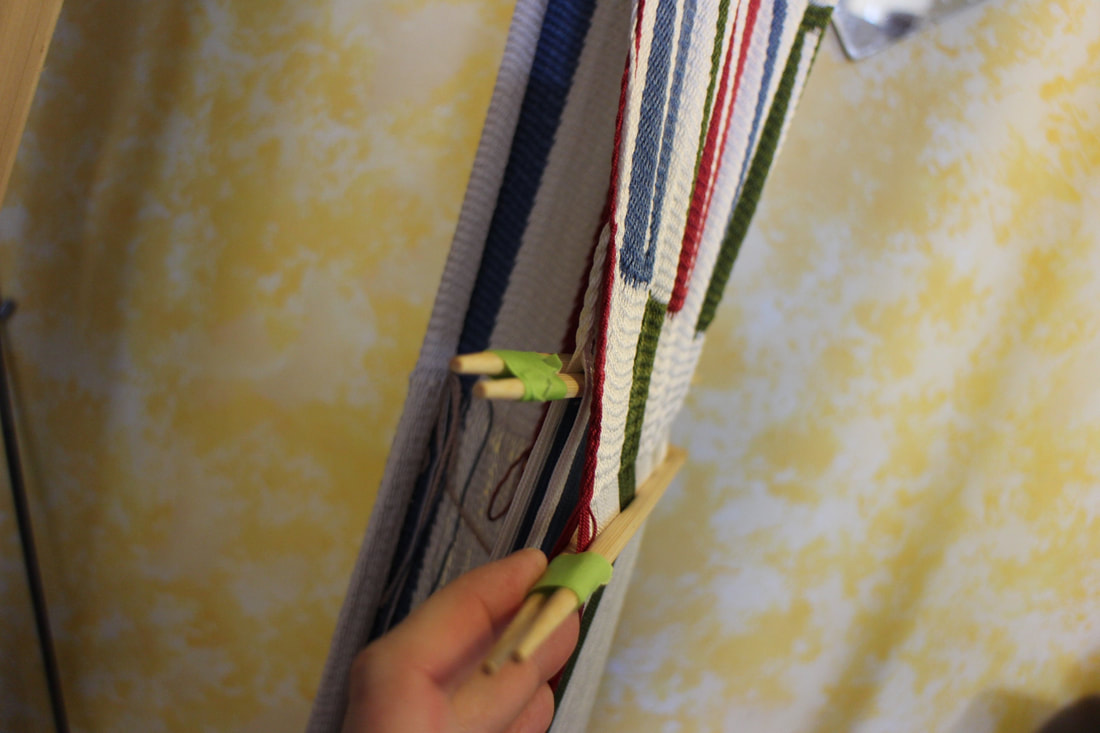
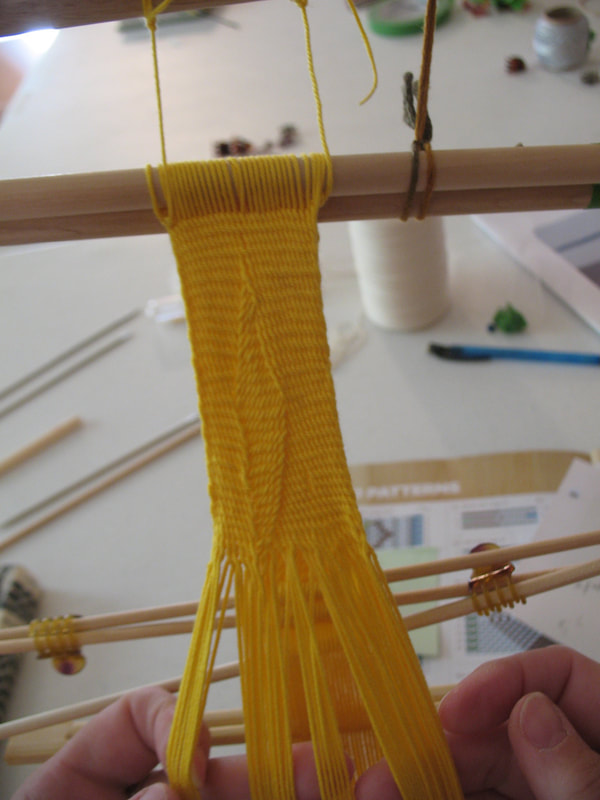
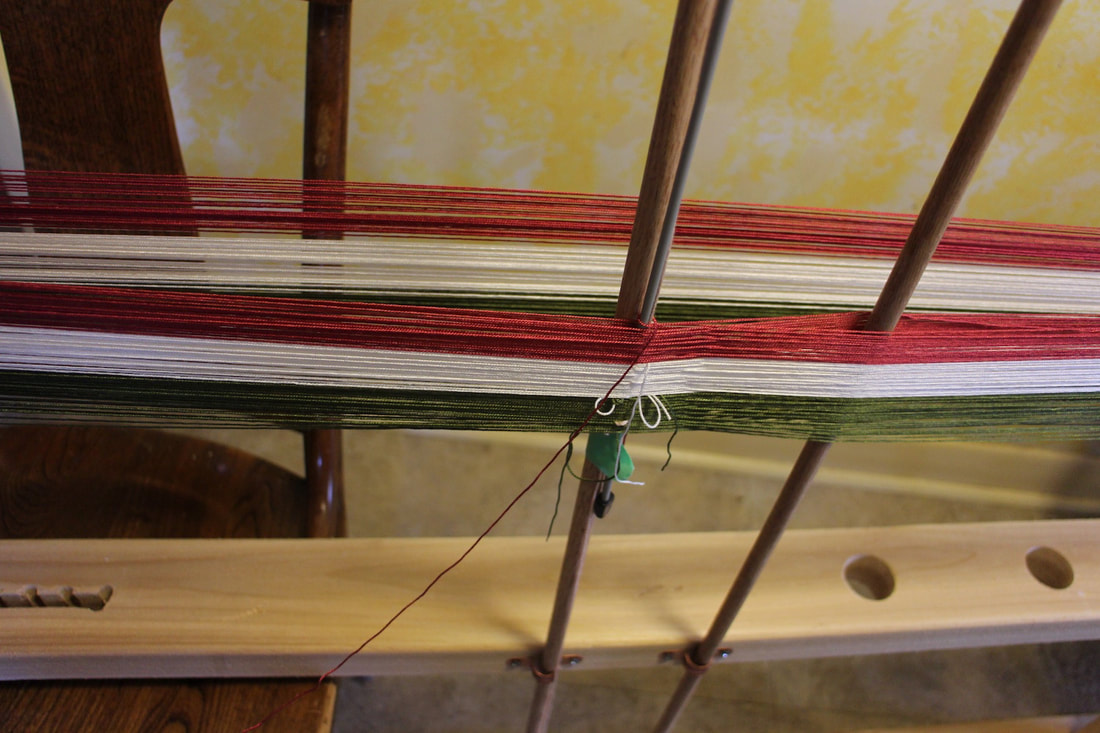 Close up of the two ends of the warp. The meeting of the two ends of the warp happens around that knitting needle, taped to the dowel on the left. This is what I used for the dowel in the middle of Peter Collingwood’s design. The dowel on the right creates a shed for my first row. 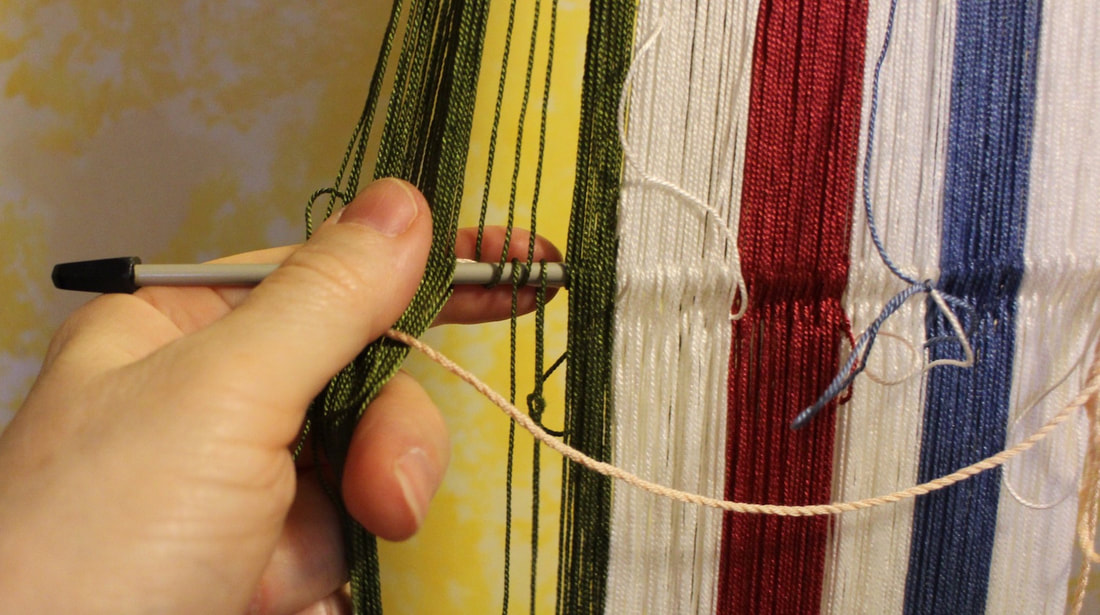 Checking the cross, I detected an error. Horrors! One thread had gone across the meeting point, instead of around and doubling back. Rather than unwind and re-do this, I added another thread. I then clipped the place of the error and tied two knots. This short-cut worked just fine. Work progressed on the warp nicely. The first few rows formed the ankles, and work progressed up the calf of the pants towards the knee. At about mid-thigh, I measured out another warp of threads exactly the same length of the as the yet-unsprung-warp. 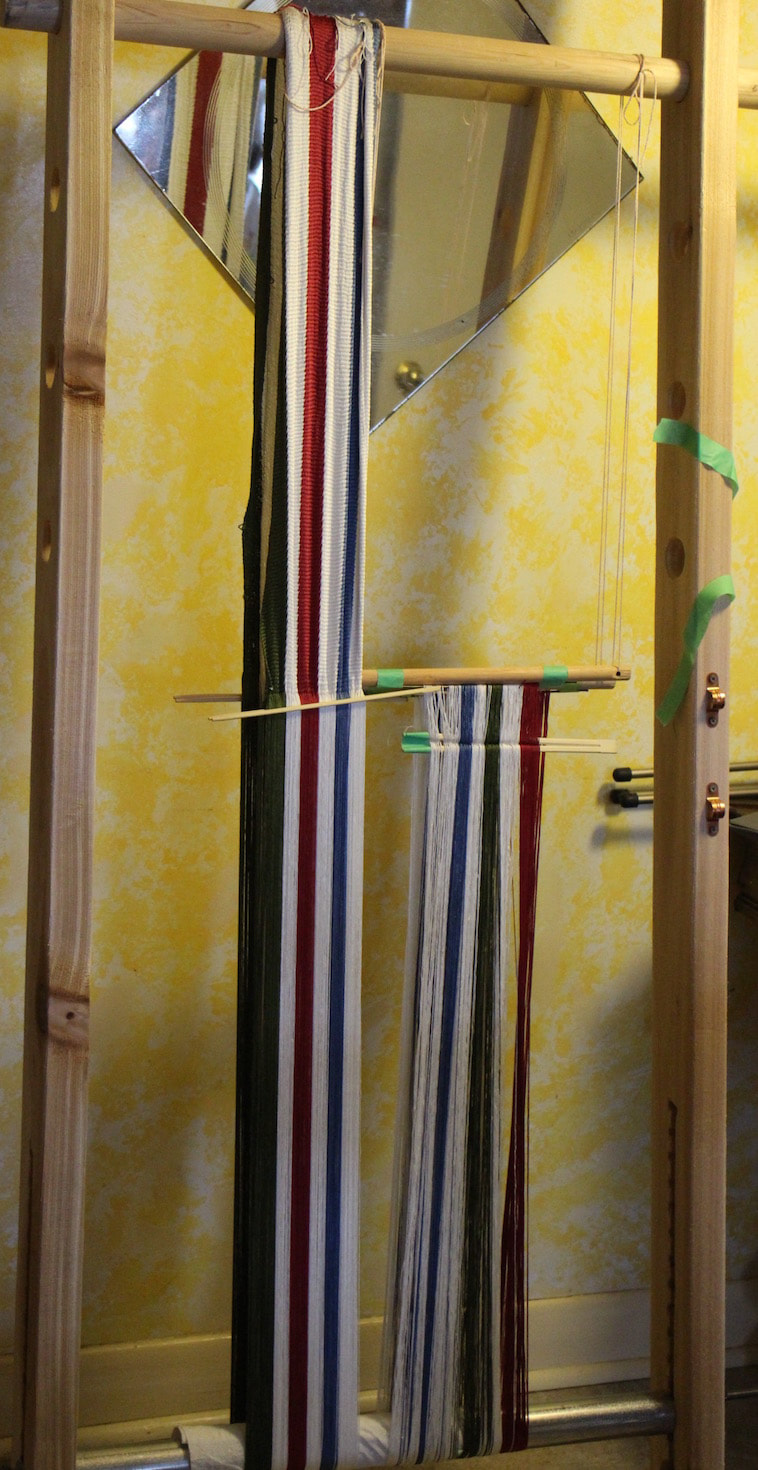 Adding threads at the mid-thigh line I found it was important that this new warp has its own independent suspension system. I’m not always successful at creating a perfectly even warp. This always causes me a bit of trouble over the first few inches of sprang work, until the un-evenness works itself out. This was the case again here. There was a slight unevenness between the two warps, as well as within the new warp. A very tight tension on the new warp when pushing the Z work to the S place helped. It was a couple of inches of work before things settled in. The two warps had been placed one on top of the other, and worked as double-cloth (Collingwood 167-173).
The double layer of threads opens the opportunity to a wide variety of color designs. It also allows the piece to widen … a good idea for people whose thighs have a greater circumference than the ankles. You’d think that the double layer, one sitting on top of the other, that there would not be much difference in the width of the cloth, but my experience has it that this addition does widen the cloth considerably, especially when the threads are held together and worked in the same shed. 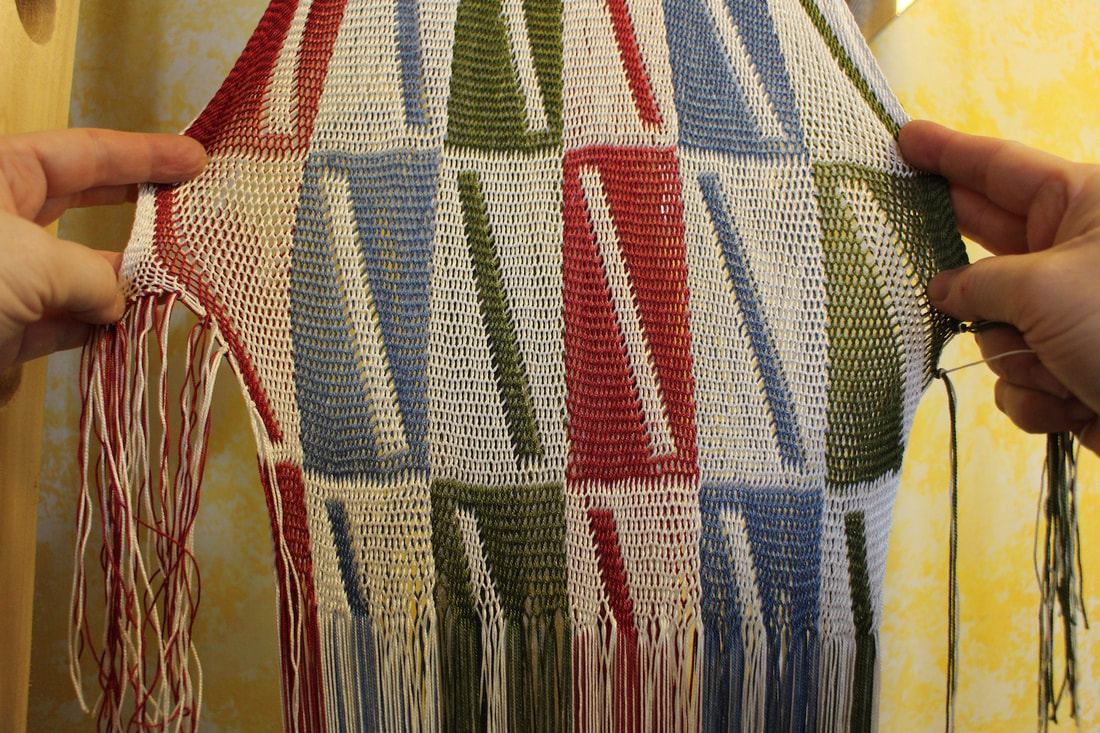 To shape the crotch I tied off warp threads on either edge of the warp. Rather than cutting a finished rectangle of sprang, I dipped into my knitting experience, and decided to create exactly the shape I needed for the pants. I tied off threads to form that shape. How many threads did I tie off? Well, I guessed, based on my sewing experience, trying for the shape in a pair of stretch pants. Threads were cut, and then tied at both S and Z pieces. Getting to the waistline area, I worked to make the back of the pants a bit longer than the front of the pants.
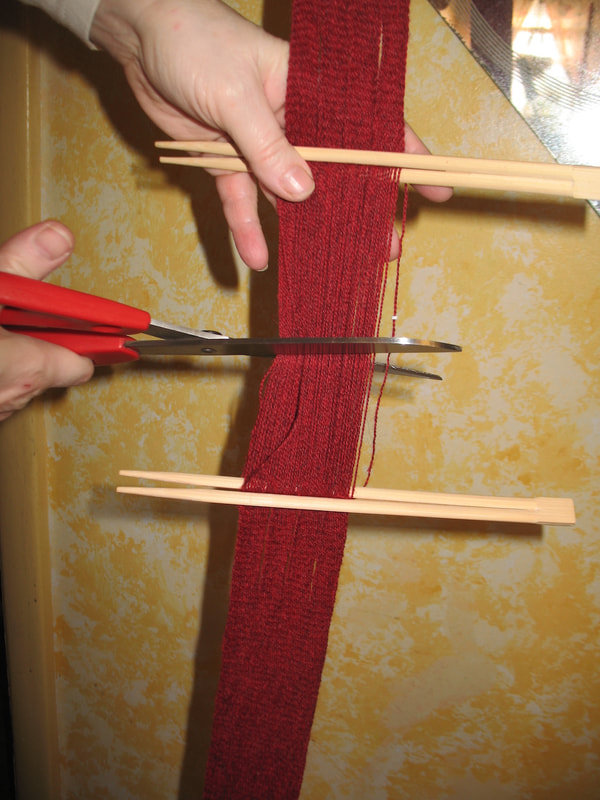
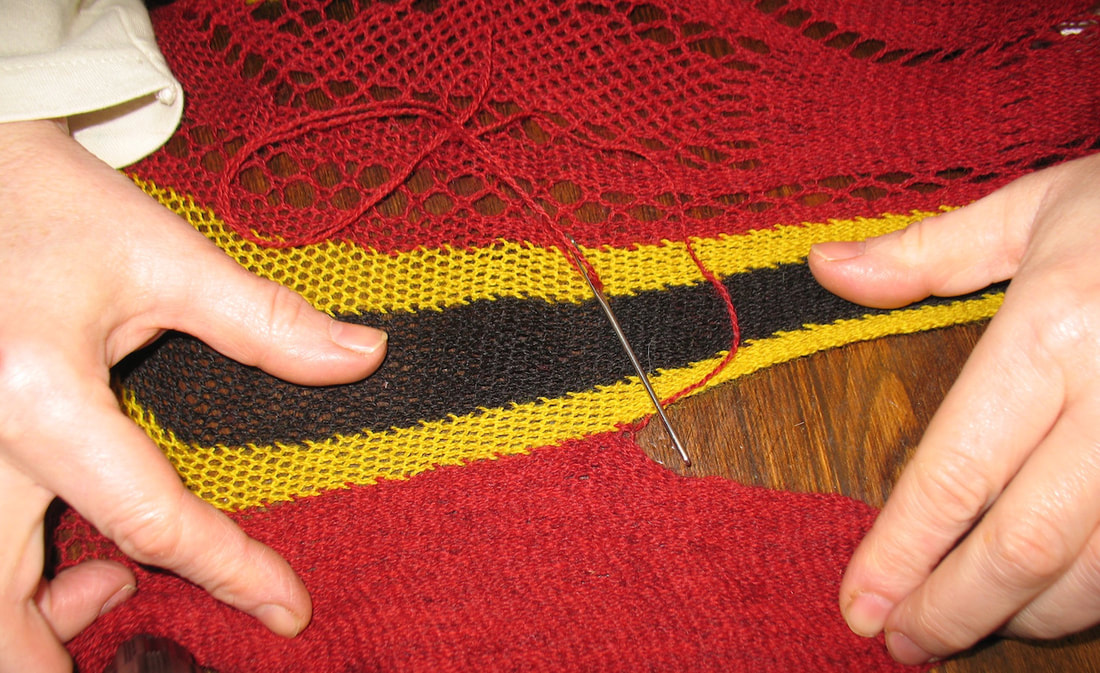
This would allow me to form a waistband casing. The knots could be located on the inside of the waistband. 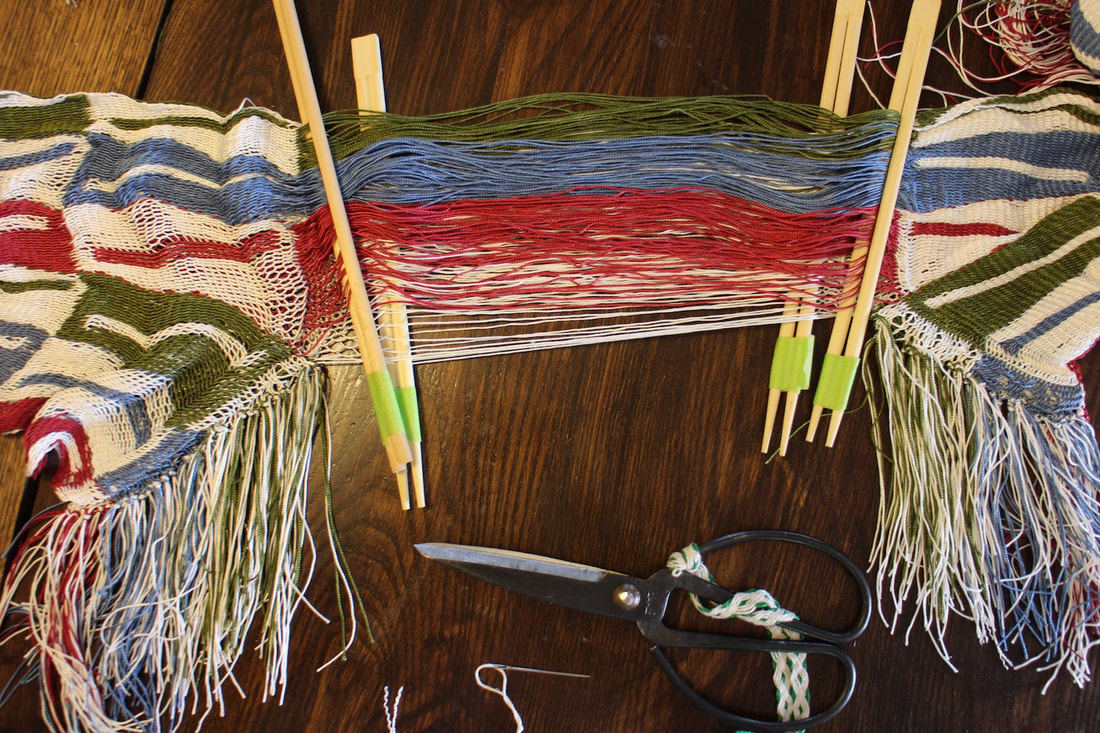 Time to separate the legs of the pants at the waistline. Threads were cut a couple at a time, and immediately tied off on right leg and then on left leg, closing in the waistband casing. Now it was time to go back to the very first rows, and pull out the thread that joined the two pieces there. This became the ankles. 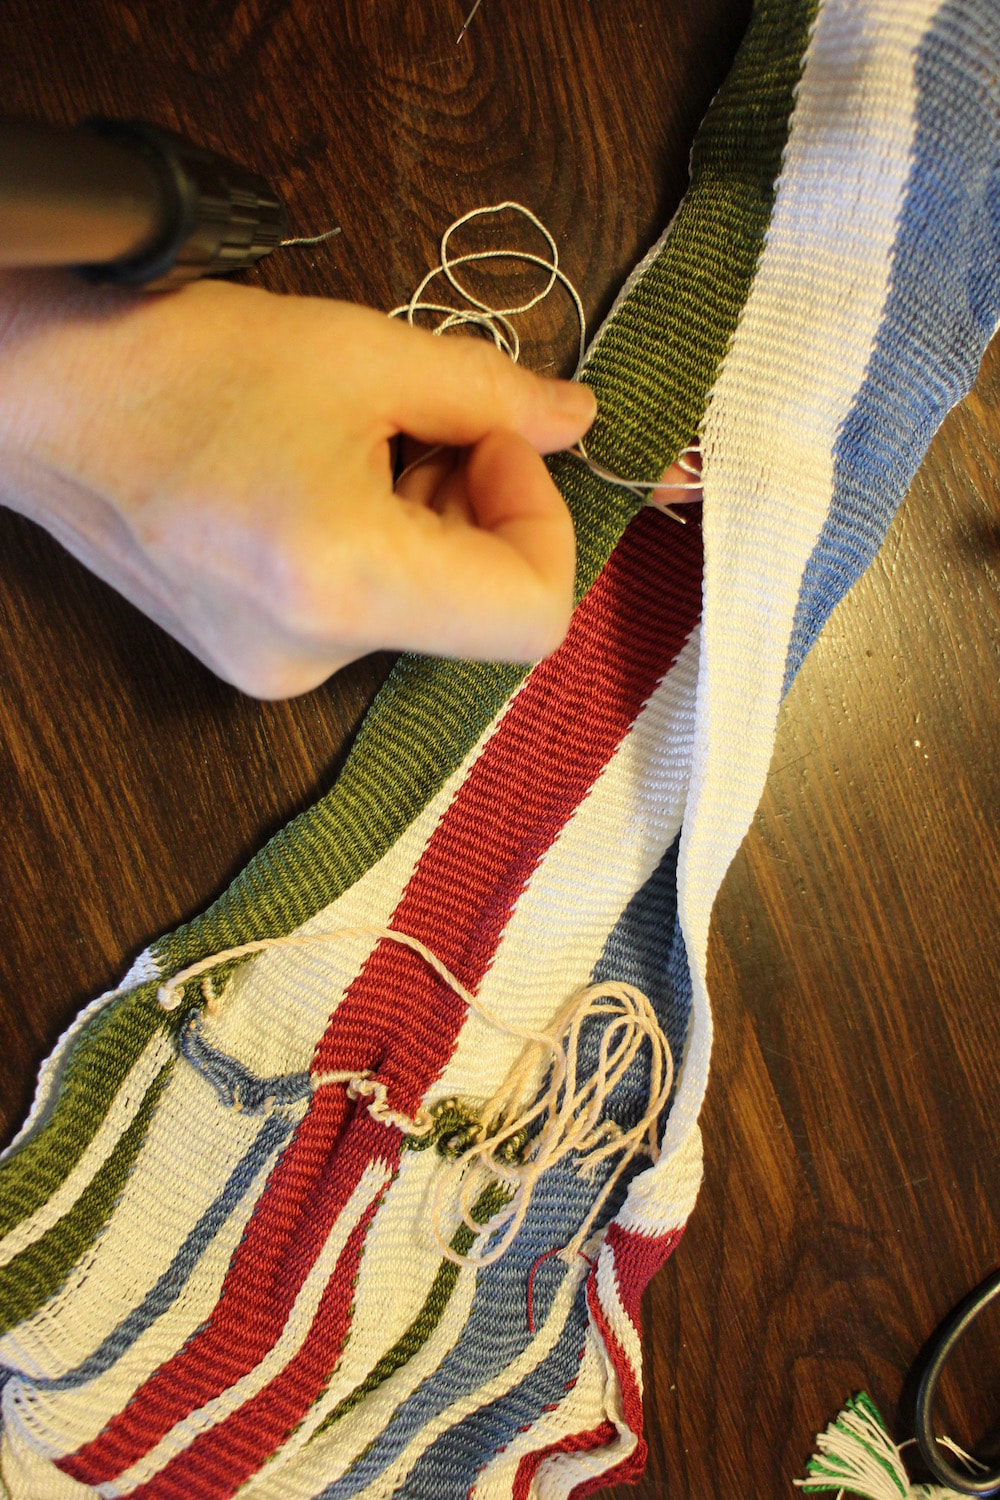 Sewing up the inside seam on the leg. In interlinking sprang, if you are careful to keep the edge thread at the edge, you can create an invisible seam. Imitate the interlinking stitch with your sewingup thread. I sewed the pants from ankle to crotch. 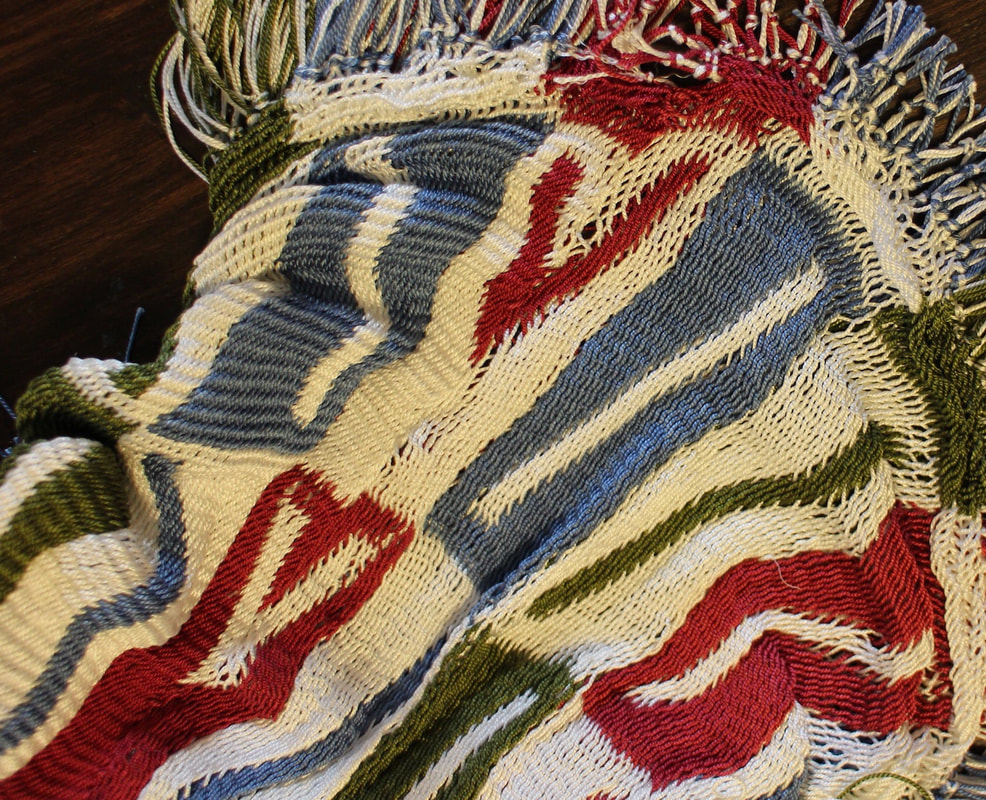 The seam at the front of the pants imitated the interlinking stitch. Sewing the crotch required a bit of creativity, keeping the knots to the inside, and trying to imitate the interlinking stitch on the outside … but then, I’m hoping people will not be looking at my crotch too closely.  The finished second pair of sprang pants!
0 Comments
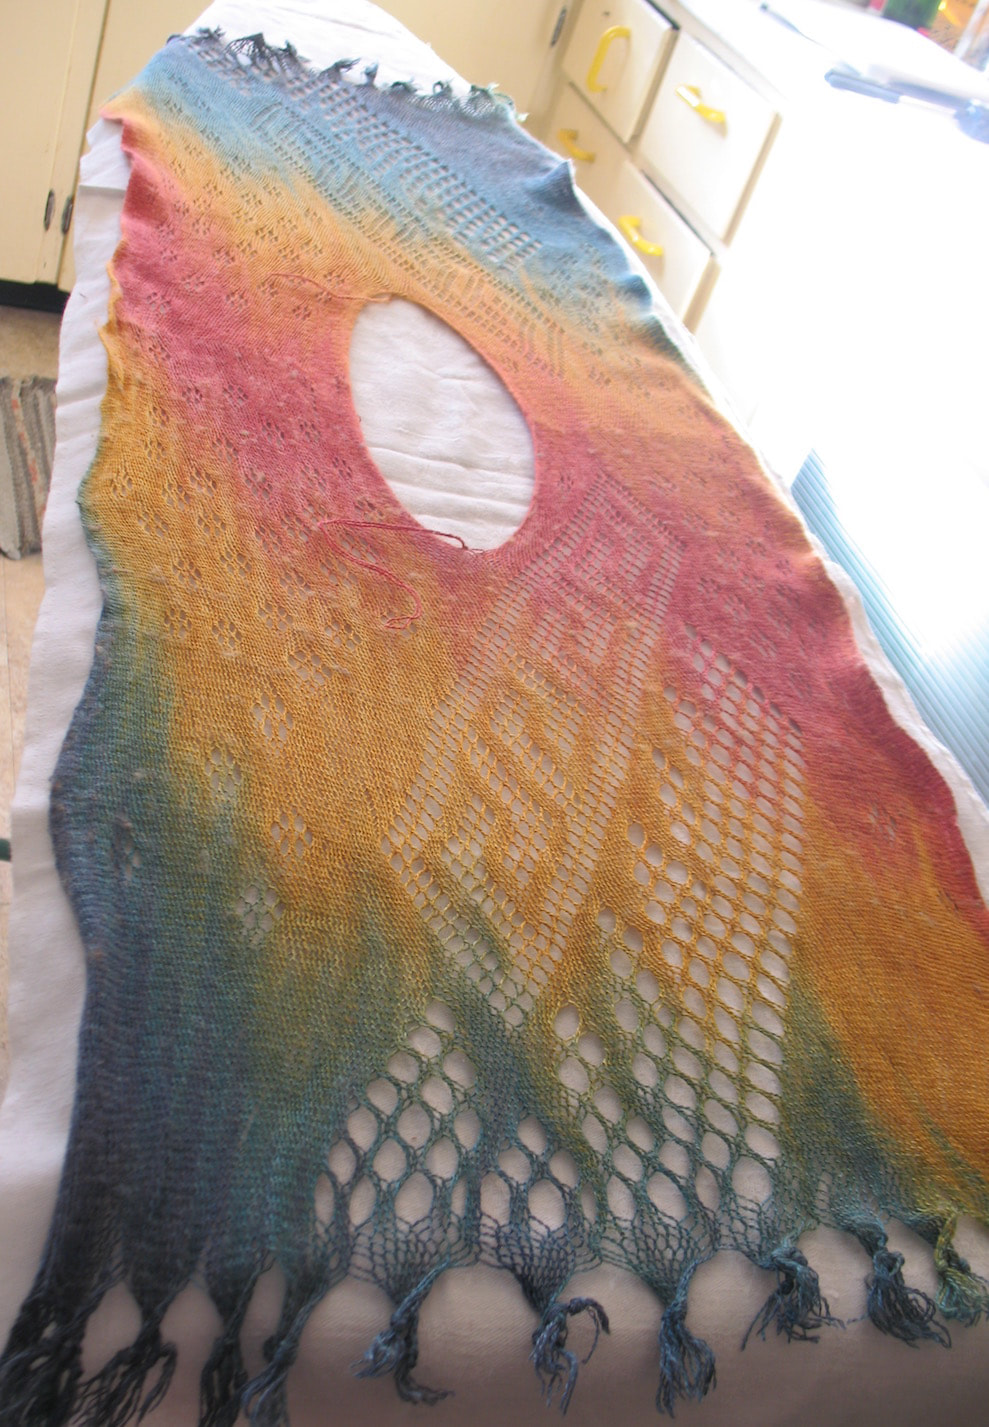
Last October I had the opportunity to visit the Cleveland Art Museum. They were just about to open an exhibit of ancient Andes Wari art. My weaver friends urged me to enter a proposal for the Tunic Project. Now, according to Mary Frame, sprang was known to pre-Columbian people in what is now Bolivia. I entered a proposal for a sprang tunic with a design inspired by the face-fret patterns in the Cleveland Art Museum exhibit. Initially I ordered some baby alpaca and silk yarn from KnitPicks. I set up my tunic and started work. The yarn was quite soft and fuzzy. After struggling for a couple of inches and plenty of warp sizing (a whole can of spray starch) I decided to abandon this warp, set it aside for now, and turn to a tried-and-true worsted: Bockens Mobelatta. 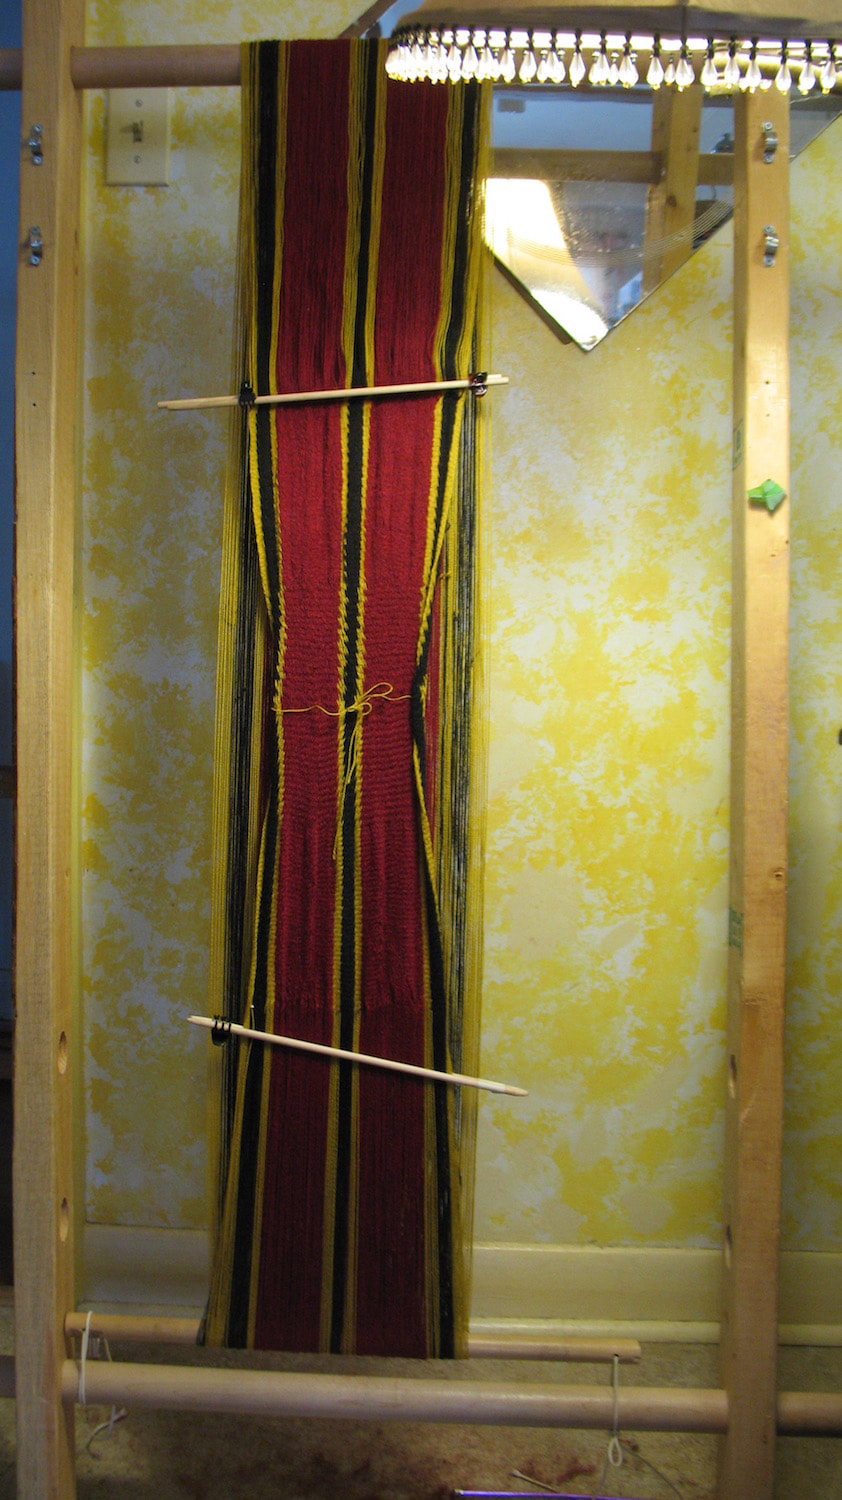 Red, gold and black warp I submitted a proposal for a sprang tunic. This is a circular warp. I figure I am working from the neck down. When the cloth is finished, I will open up a slit at the center for the neck hole. 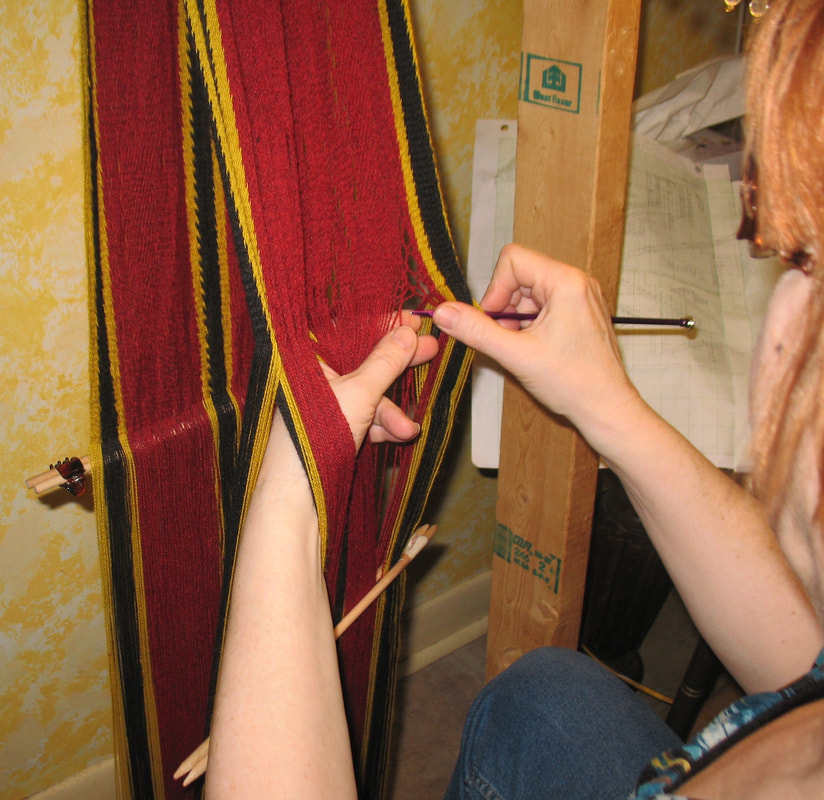 Working a Wari pattern into the tunic The tunic needs to be finished before Christmas, to get it to Cleveland by early January. The weaving on the circular warp completed, I cut it apart at the knees. 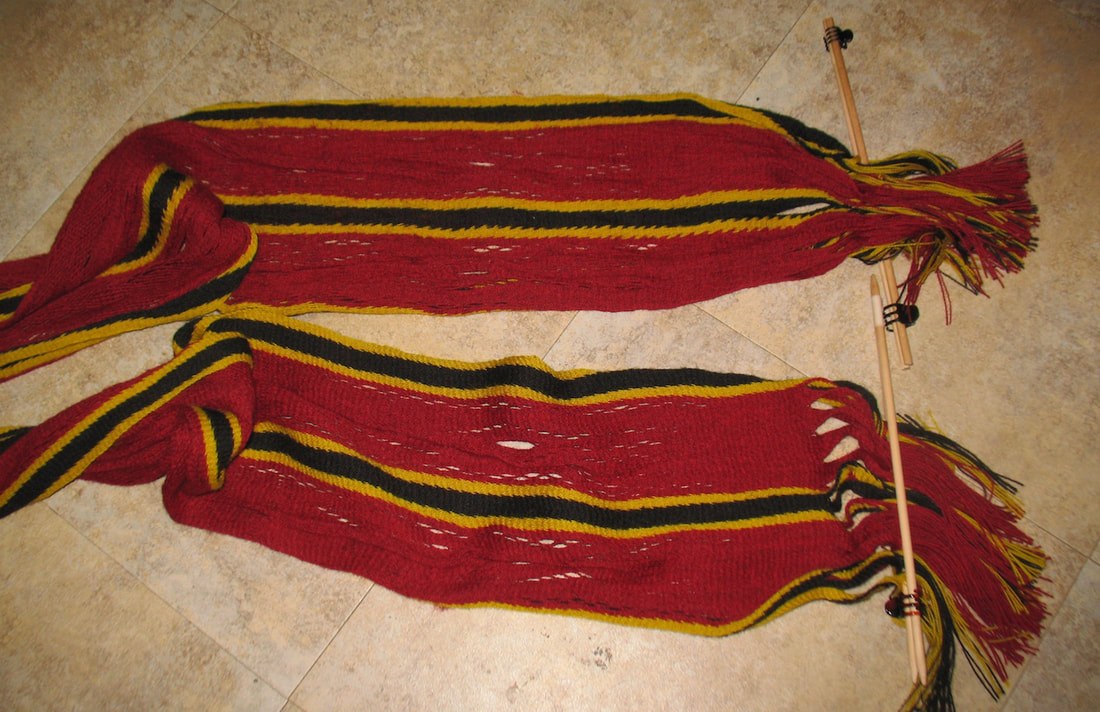 Circular warp complete, I cut it apart into a long rectangle. I tied the loose ends into fringes. The whole thing curled quite badly (as to be expected) Blocking is required for sprang garments. This means a soak and then squeeze out in a towel. 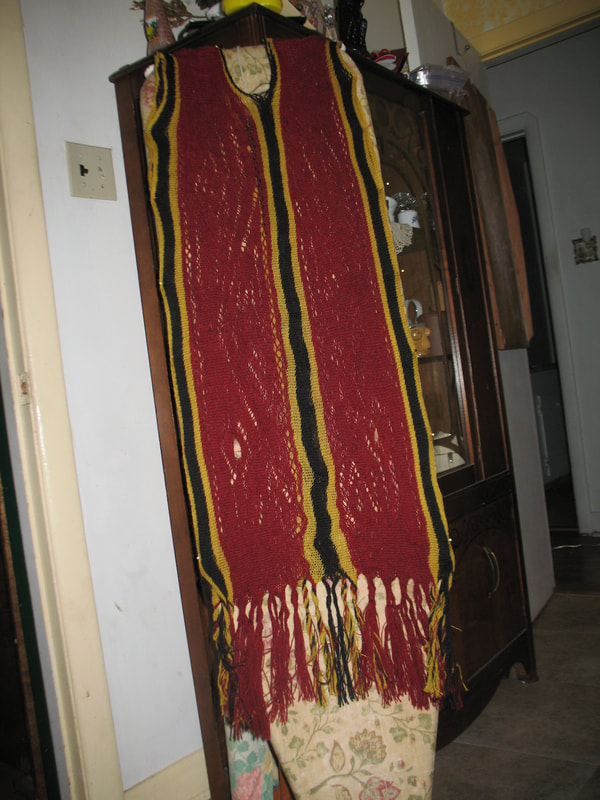 The piece was washed, and pinned to my ironing board to block it flat. The tunic seemed to need side panels. This will ease the closure under the arms, attaching front to back. I set up a figure-8 warp.
Big news! My ‘tunic’ took second prize at the Cleveland Museum of Art. It will be on display in their atrium starting January 15. 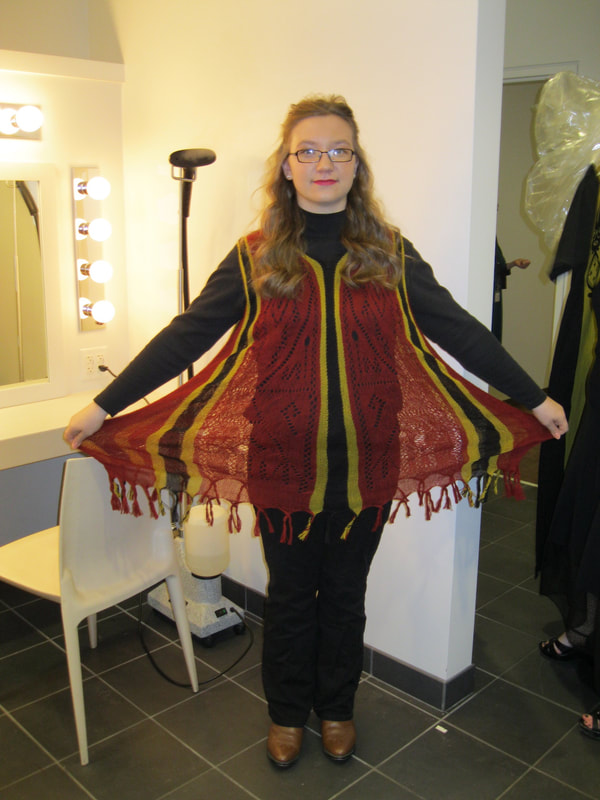 The Tunic, in the dressing room backstage at the musuem. A big Thank You to Haley for the great job modelling!
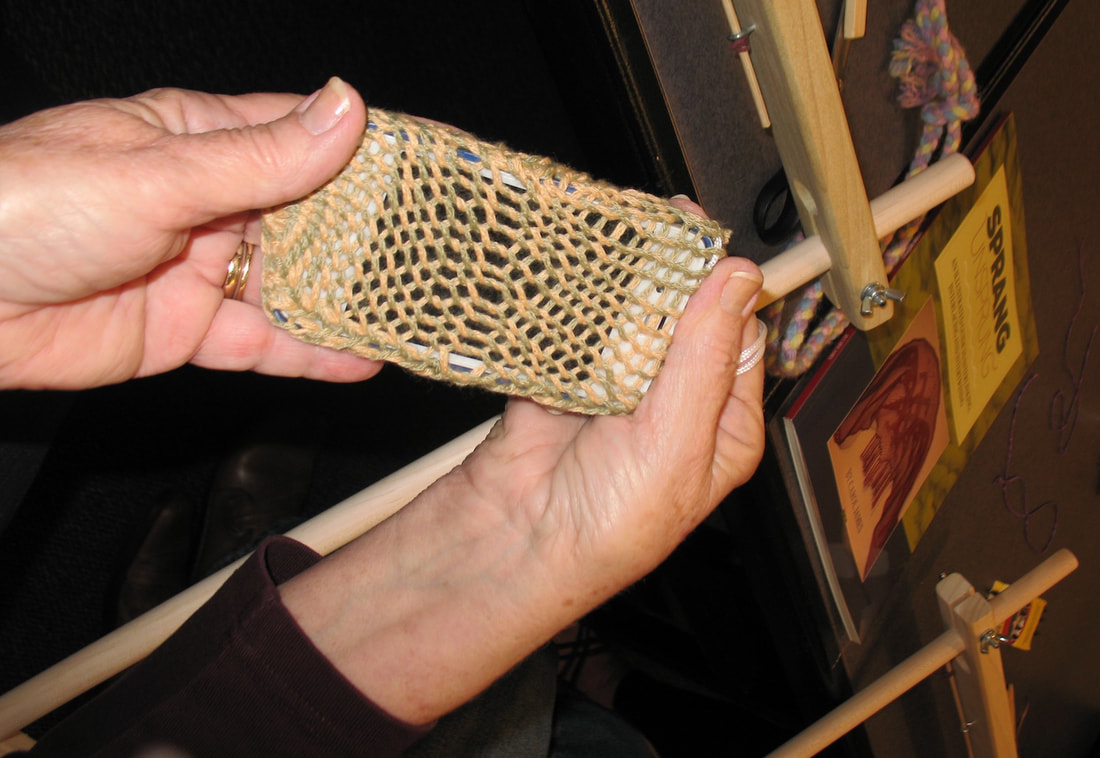
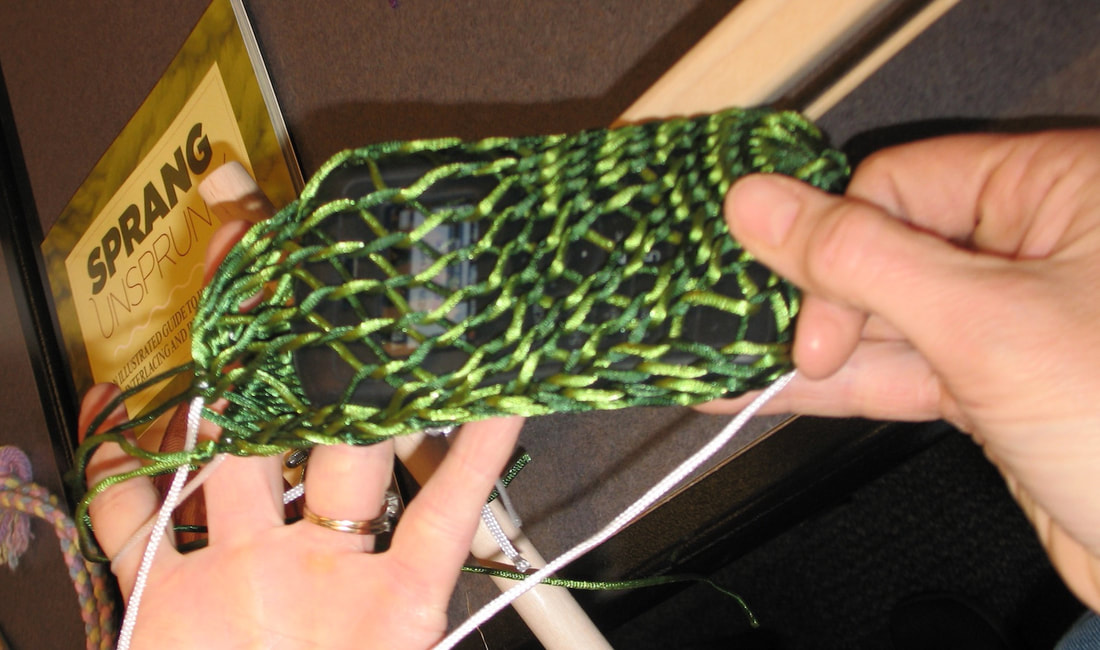
See a video that features some of the ‘making of’ at https://www.youtube.com/watch?time_continue=6&v=xDPPLzRKR_Q The North Shore Weavers and Prairie Weavers Guild near Chicago had invited me to visit and present sprang. I gave two workshops while in Downers Grove, in the Chicago area.
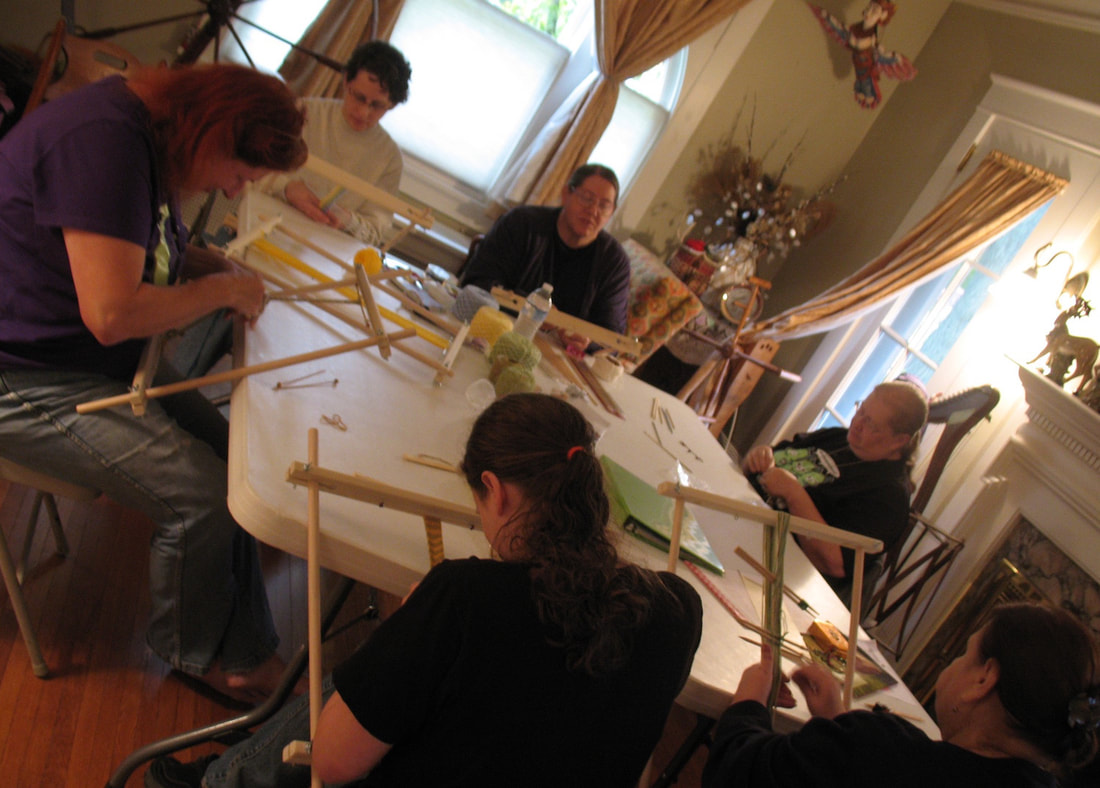
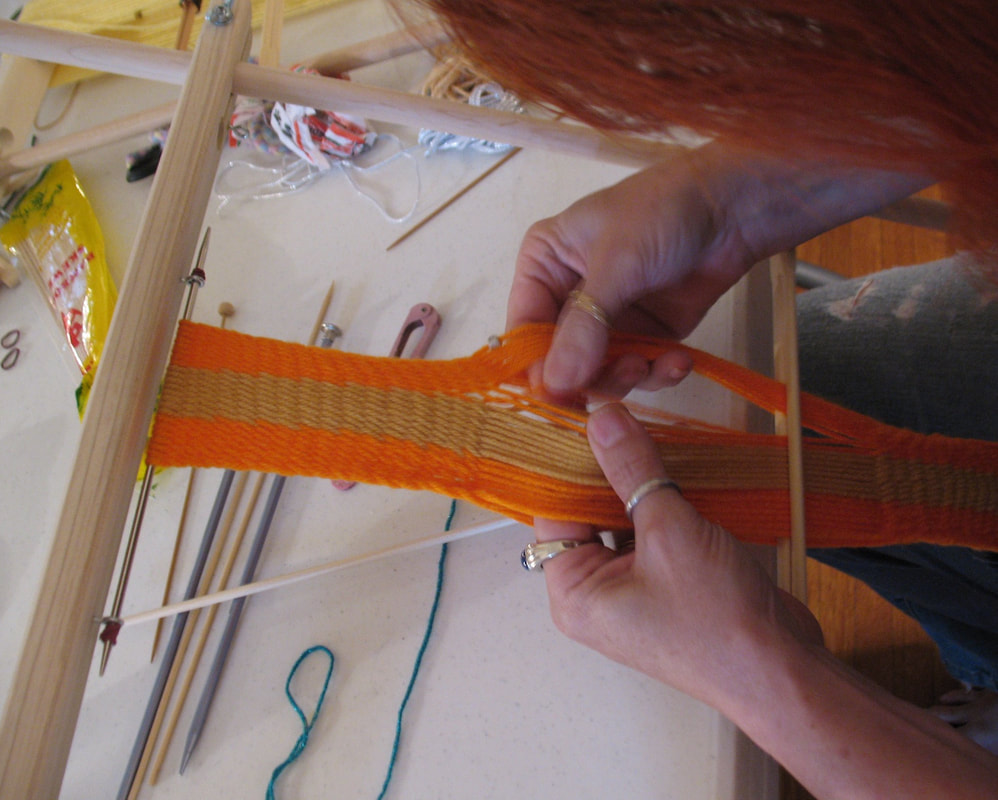
On to Marion, Indiana, where I attended Mississinewa 1812. Sprang instruction was high on the bill. 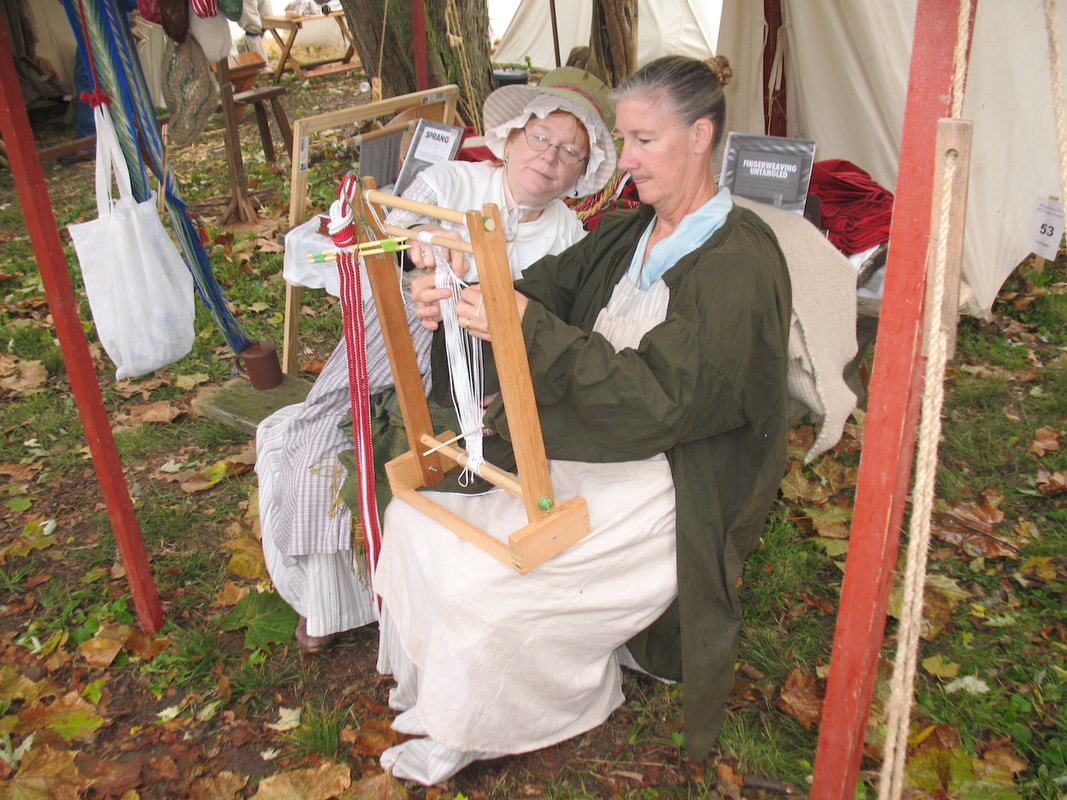 Sharing the finer details of sprang work with a fellow participant. Then on to Ohio, the Cuyahoga weavers invited me for a workshop.
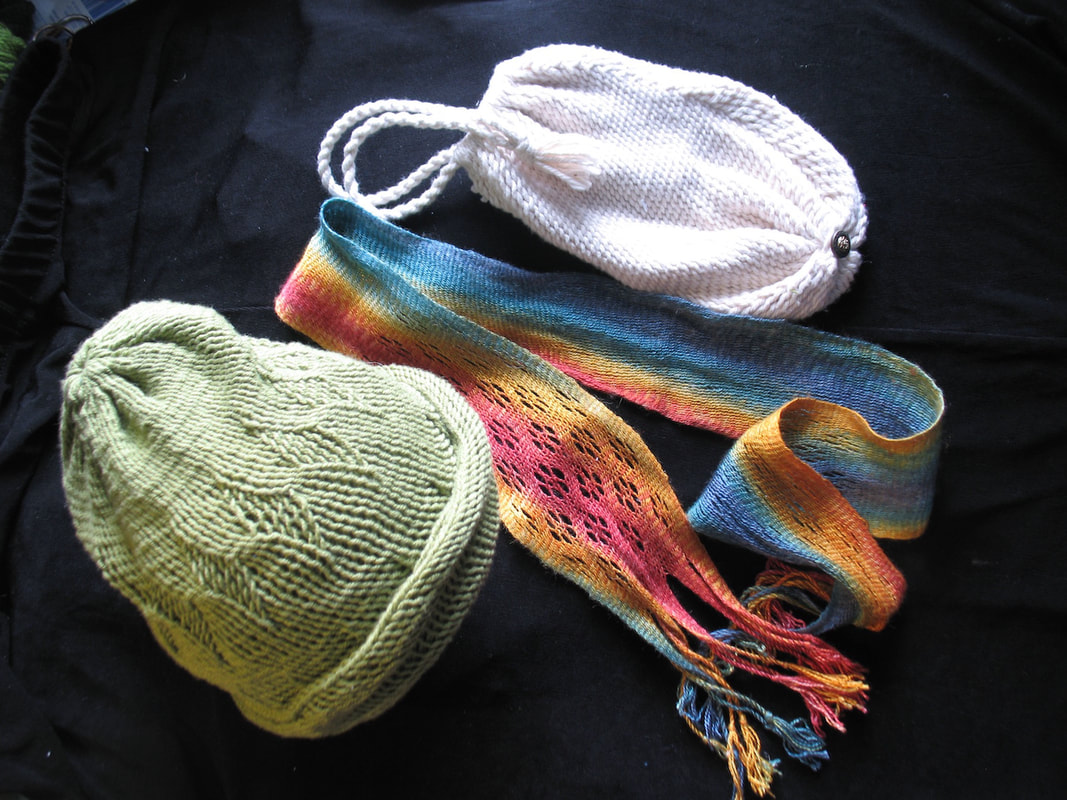
Meantime, taking inspiration from a pair I saw last Summer, I set out to create sprang mittens.  Mittens started out as a figure-8 warp, two mittens made at the same time. The wrist was worked in interlinking. I doubled up the threads so the fabric would be narrower at the wrist. For the hand I switched to an interlacing technique. This means wider, a bit less elasticity, and a denser fabric. Listening to my daughter’s advice, I used a serger and a strip of woven tape to finish off. 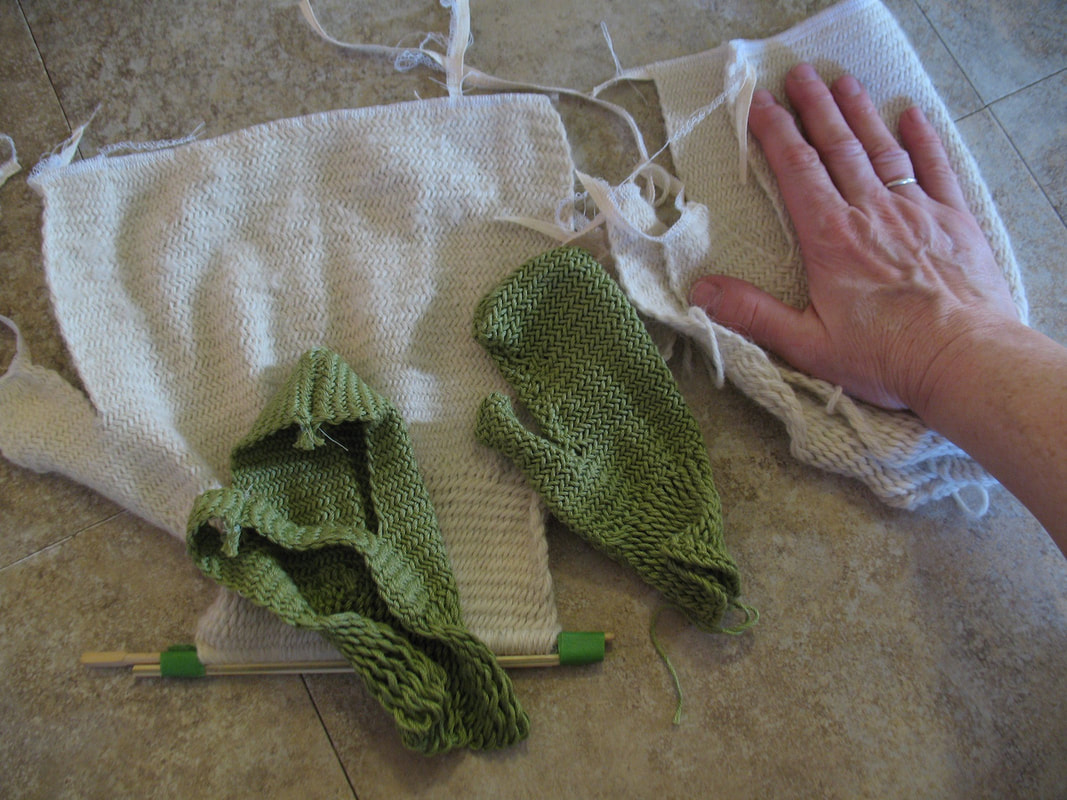 It’s a bit of a Goldilocks thing. The first pair (in green cotton) was too small. The second one, white, done in alpaca, was too large. The next one will be just right.
Just last week I was in northern Alberta. I taught fingerweaving in a couple of local schools, and presented a fingerweaving workshop for adults at the Fairview Arts Center. Check out the article reported in the Fairview Post: http://www.fairviewpost.com/2012/11/06/finger-weaver-shares-skills I’ve heard of pieces of sprang cloth that start out as warp set between two pieces of tablet weaving, and wanted to try it myself. I started two pieces of tablet weaving and then solicited help from a friend. We sat at my table and each of us worked on one of the bits of tablet weaving. As we worked we passes another weft, a plum-colored silk, back and forth across the five-and-a-half feet that separated us. 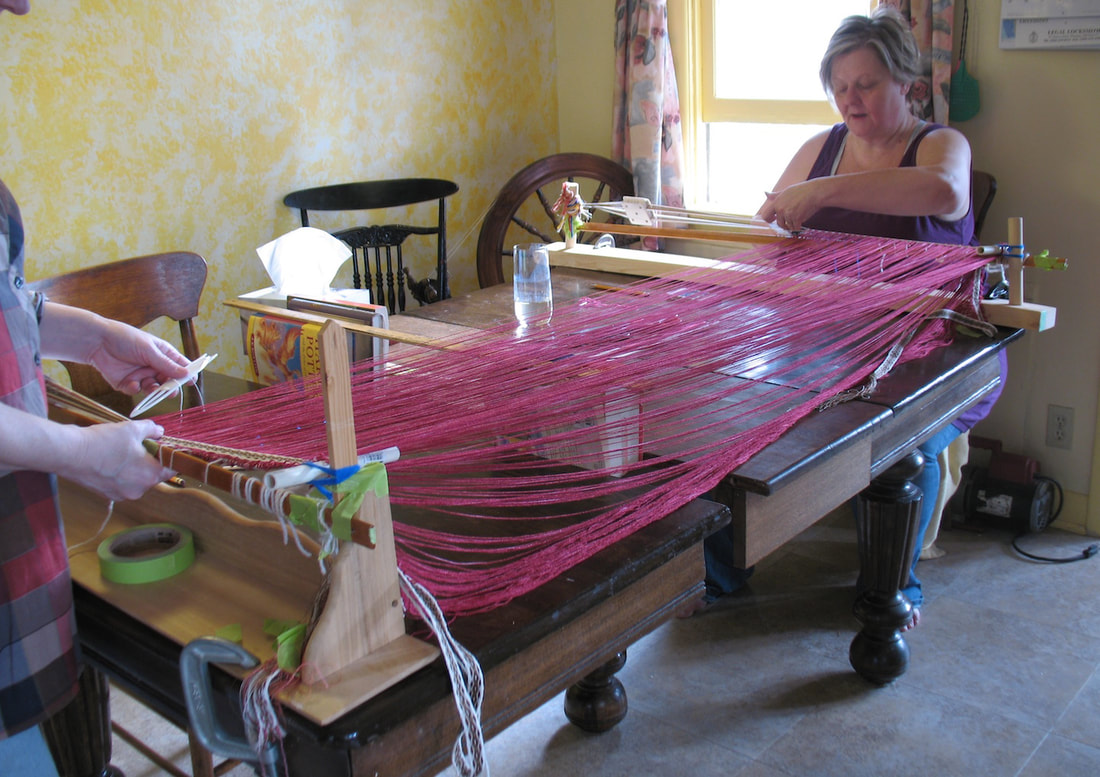 tablet weaving holds the warp for sprang Keeping the tension even on the plum colored warp was a bit of a trick. We tried several things. What seemed to work best was a combination of supporting the threads in the middle, and attaching a rod (knitting needle) on the outside edge of the tablet weaving to hold the plum colored threads evenly. Here’s the tablet weaving up close: 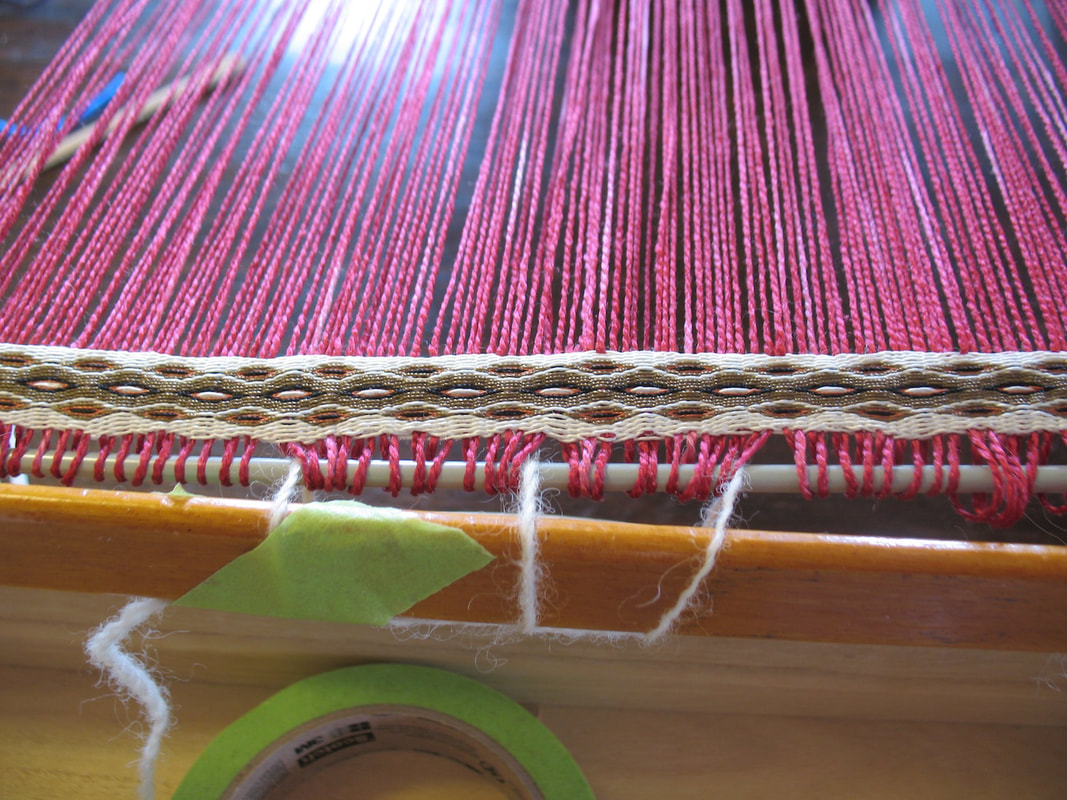 tablet woven edge for sprang The tablet weaving completed, I hung it on my sprang frame and ‘spranged’ it. Yes, it was a bit of a reach at first. I worked each row in sections, and used a long dowel to hold each row. Each row was then shifted down towards the lower tablet-woven band.  weaving the tabletwoven warp Now I’ll have to get someone to photograph me in my new sprang shirt! 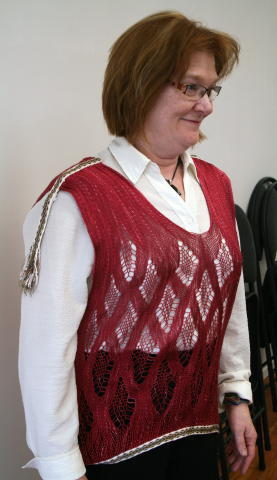 A moment of weakness in a local yarn shop had me purchasing a skein of lace weight silk&baby camel. Marrakesh is the name on the skein, Swiss Mountain Silk. I’ve made it up into two of scarfs for exhibit purposes.
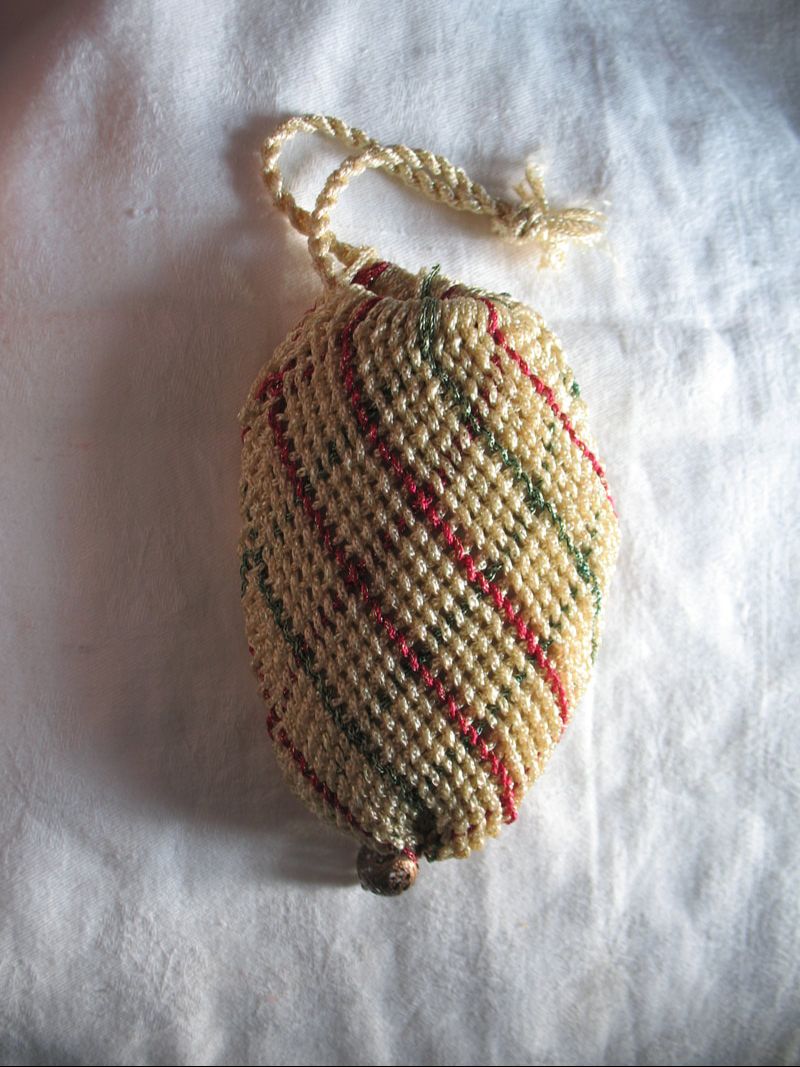
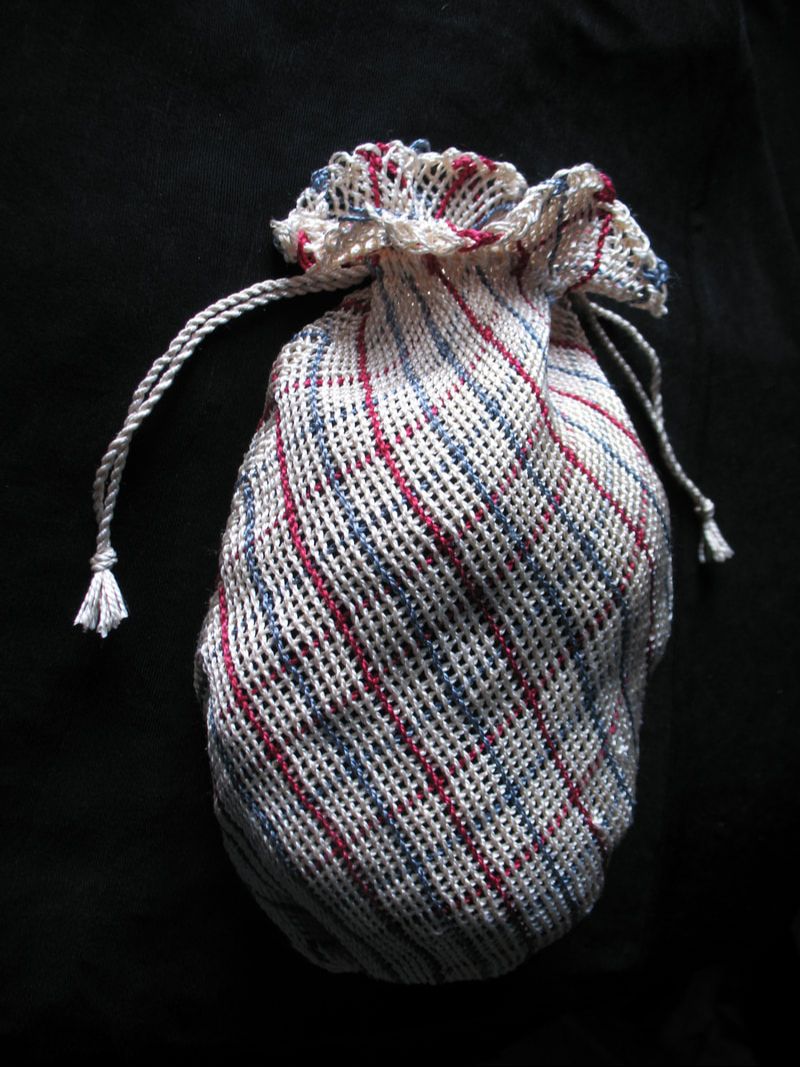
Been working on a variety of projects. Made a couple of variations of an intertwined bag.
Now these bags are sprang bags. They come from a figure-8 warp, the join line is the bottom of the bag. They were worked in intertwining rather than interlinking. Not as stretchy as interlinking but attractive in their own way. Also made a couple more hats. Here are two hats, one has twice the number of threads. One is sort of a hair net, the other, is much more like a tam, both made from the same skein of red sock yarn. 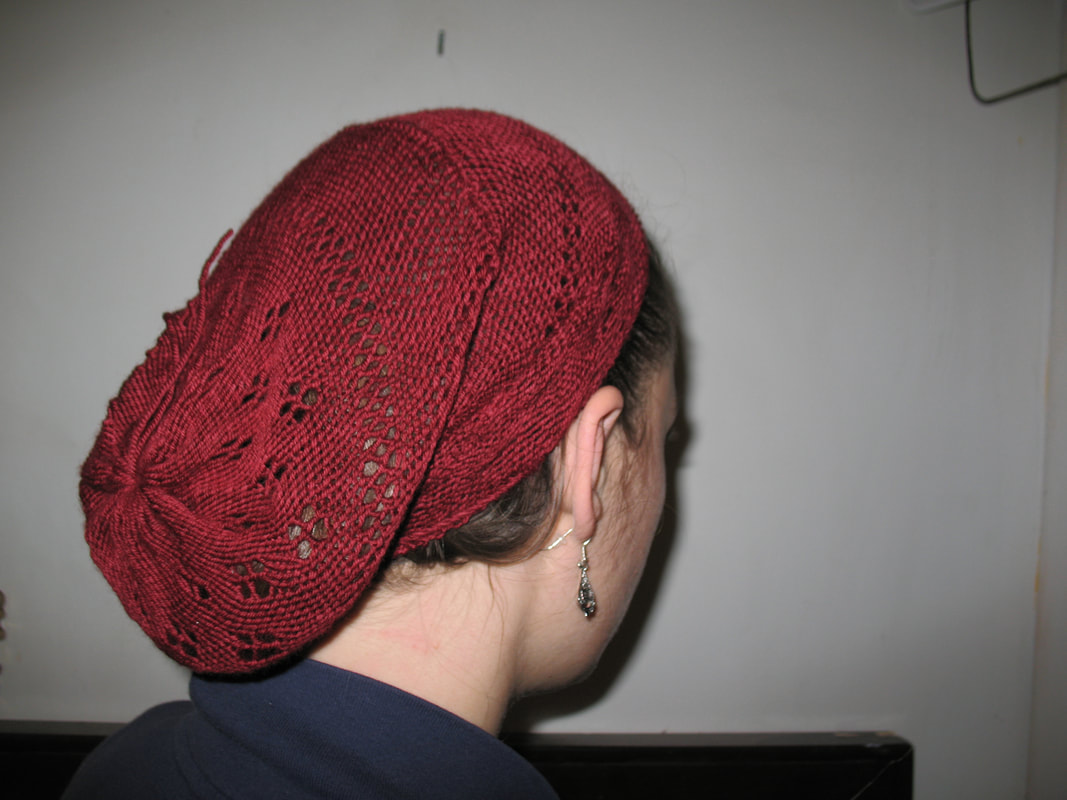 The second hat, using more threads Now, freshly ‘spranged’ they always curl up funny. Do not let this discourage you. Blocking is easily done, and remedies the curling when you’ve used natural fibers. 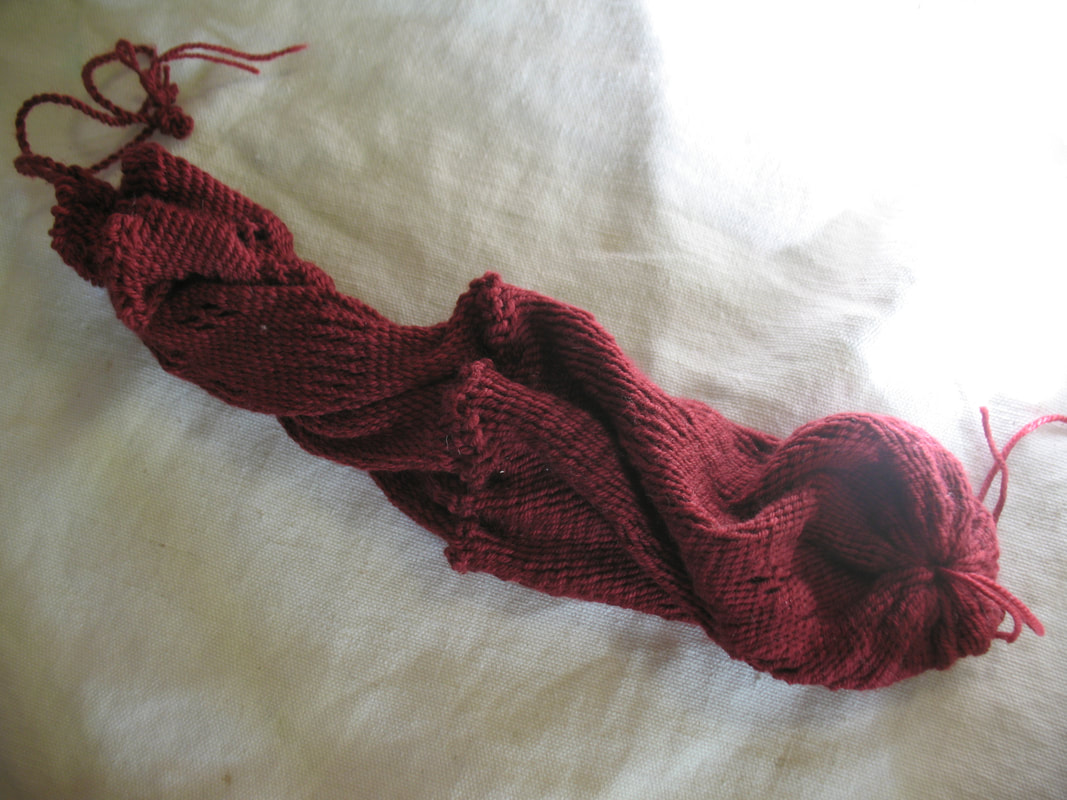 Fresh sprang always wants to curl. This is remedied by blocking. I soaked the hat, and then stretched it around a kitchen bowl. 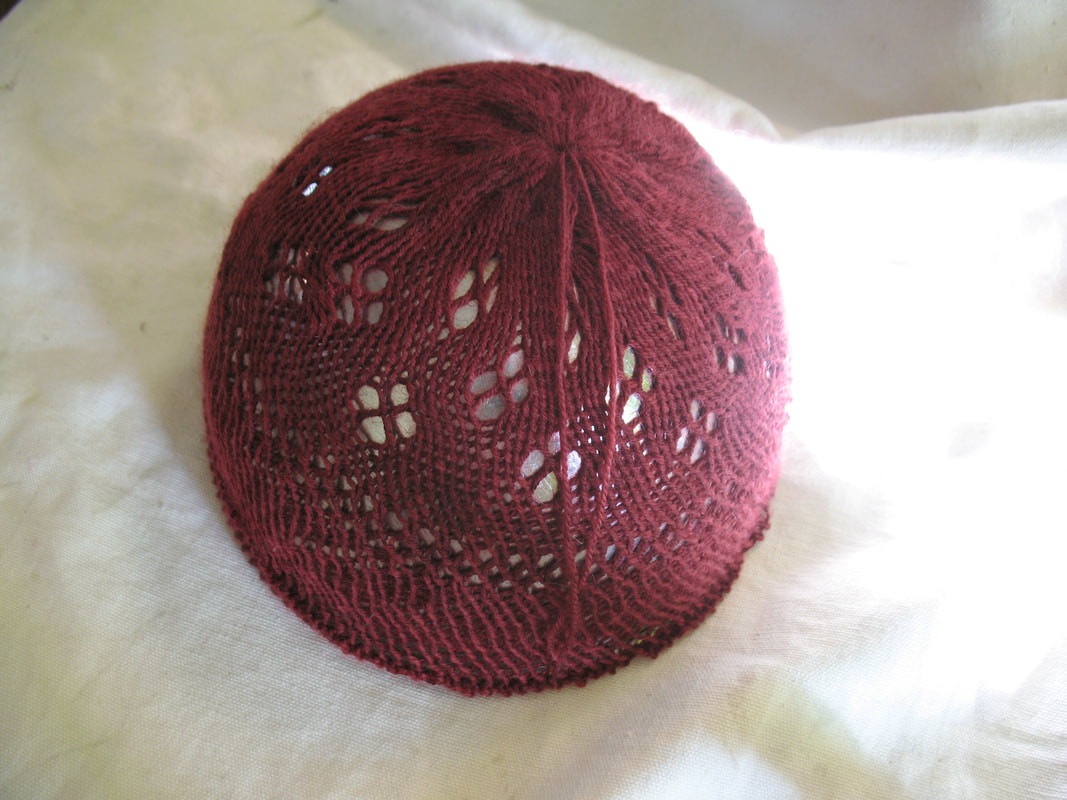 Red hat being blocked around a bowl Working on some items to display in a local yarn store, using yarn from their shelves. I am reminded of another reason I love sprang. When I knit with a rainbow skein, the colors tend to muddle if I’m not careful. With circular warp sprang, the colors are as lovely in the finished article as they were in the skein. 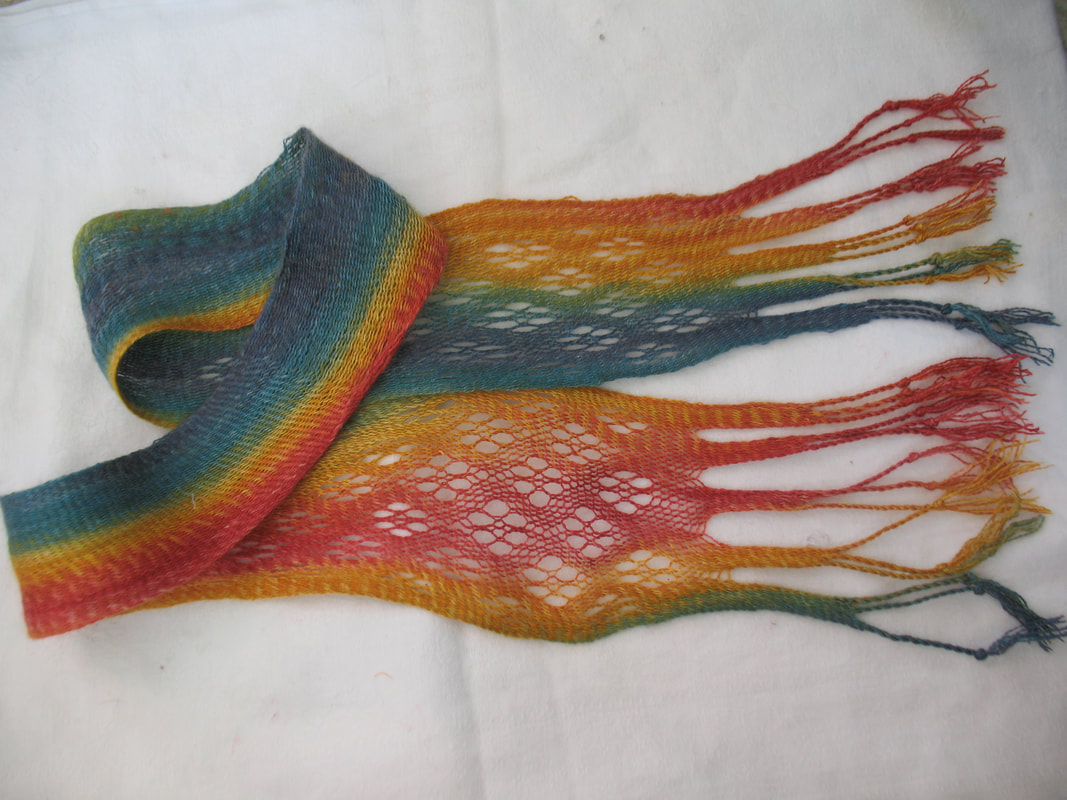 Rainbow skein makes a lovely scarf It’s minus 14 outside today, and there’s a fresh blanket of snow. Time for serious winter clothes. I set me a figure-8 warp, 30 inches long (70cm) and wove until it met at the middle. OK, I added some S and Z design to keep things interesting. 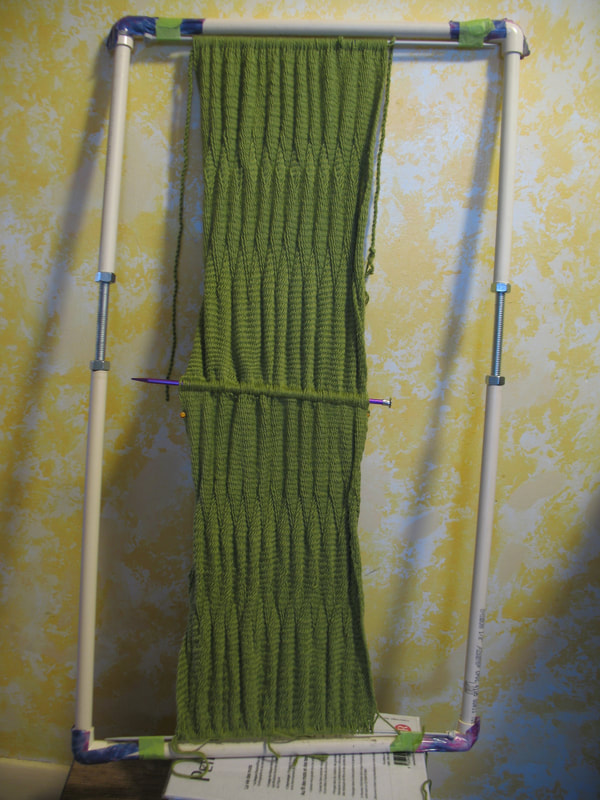 Figure-8 warp sprang I chained across the meeting line. 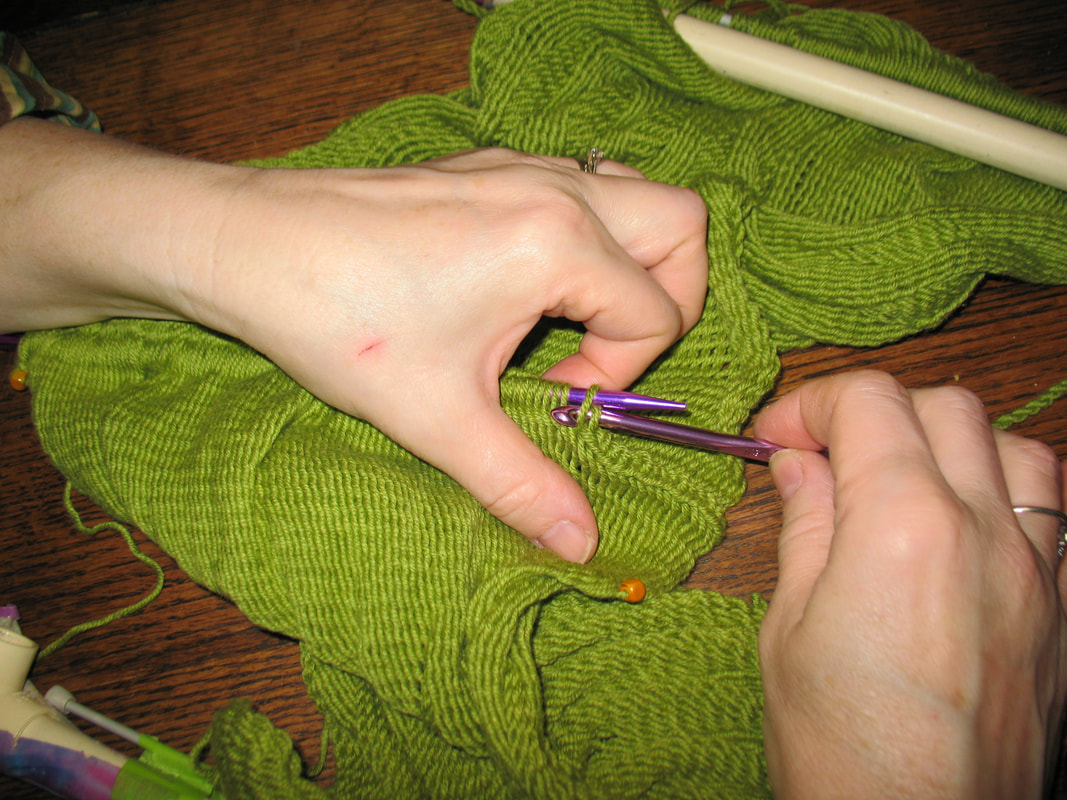 chaining across the center join line The loop ends were gathered together, and I sewed the whole thing into a long tube or football shape. 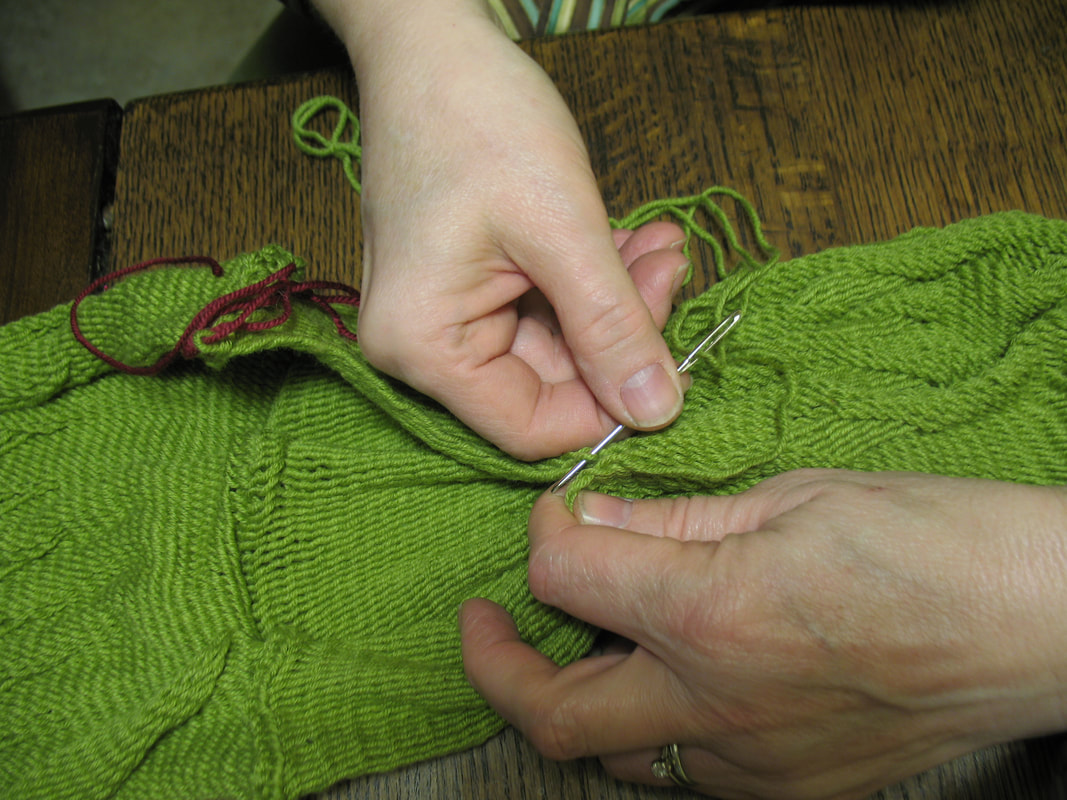 Sewing up the side Check to prevent the needle from snagging the back side of the hat One end of the ‘football’ was tucked into the other end. 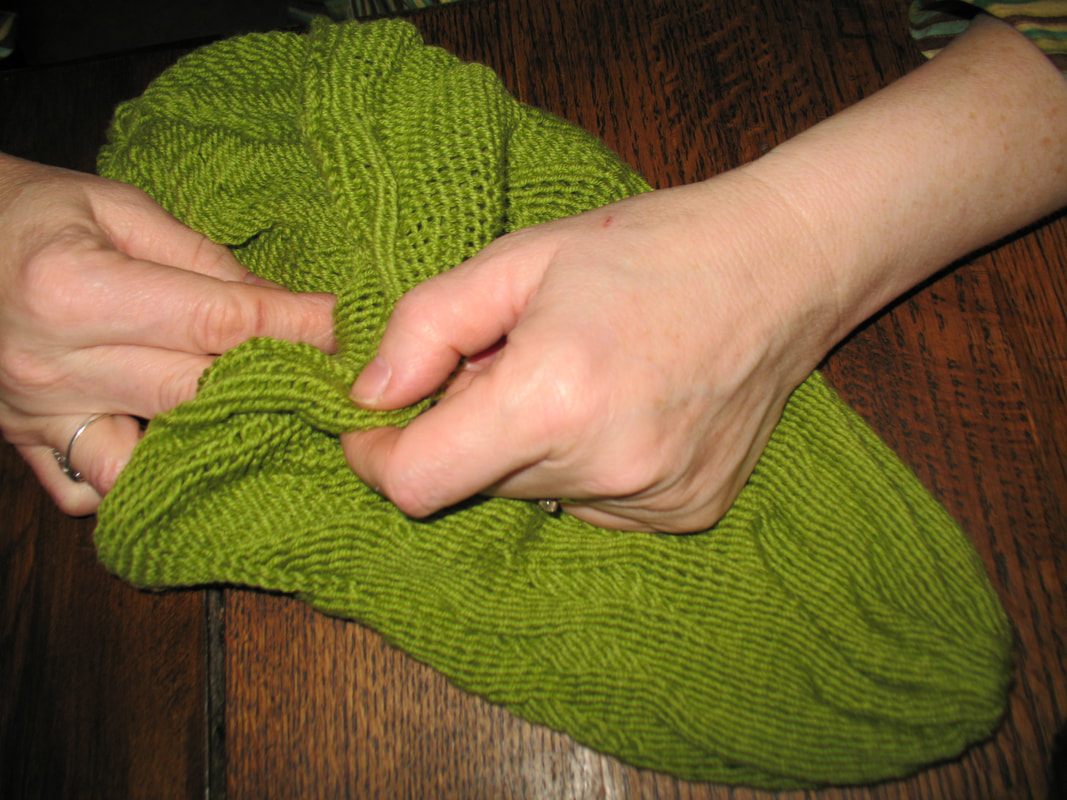 Tuck one end into the other to form a really warm, double-walled hat The finished hat!  Double-walled sprang hat The Rheault Farm in Fargo was the site of the Fargo Fiber Festival. Amazing demonstrations of diverse fiber techniques, spinning, knitting, quilting, embroidery, stumpwork, tatting, felting, kumihimo, basketry, on and on. I brought my fingerweaving and sprang.
A great idea for using up all those extra quilt tops. I’ve set up another pair of sprang socks. This time I want the socks to be long enough to be ‘knee socks’. Here is my inkle loom where I set up the warp. 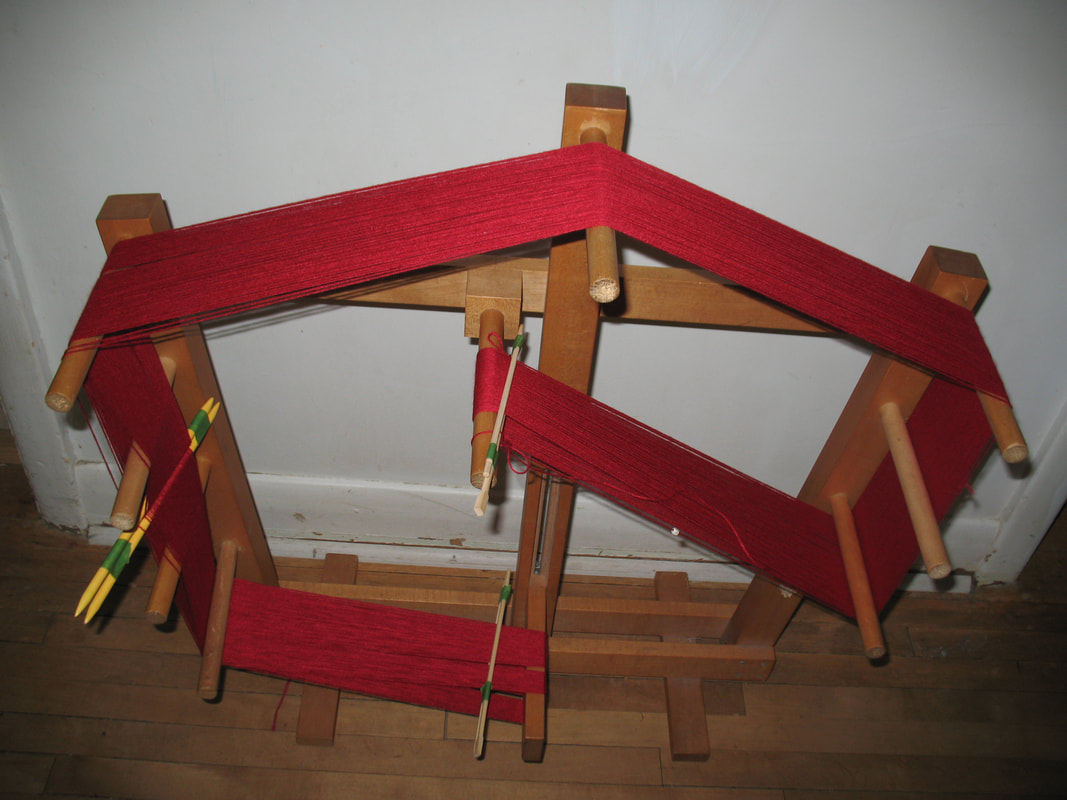 Extra long warp for a pair of knee socks I wove the feet all in one evening. More as the socks progress.
Last week I made a pair of sprang socks in a single afternoon … see my last entry. The socks were made, two at the same time, without a frame, hooking my warp up on my kitchen door. I used an interlinking stitch, with the looser interlacing stitch at the heel. This gave me a sock that bent around the heel area, but the heel looked rather open, vulnerable to wear. I speculated about darning in the open spaces. That’s what I did, using the same thread. Here’s the photo: 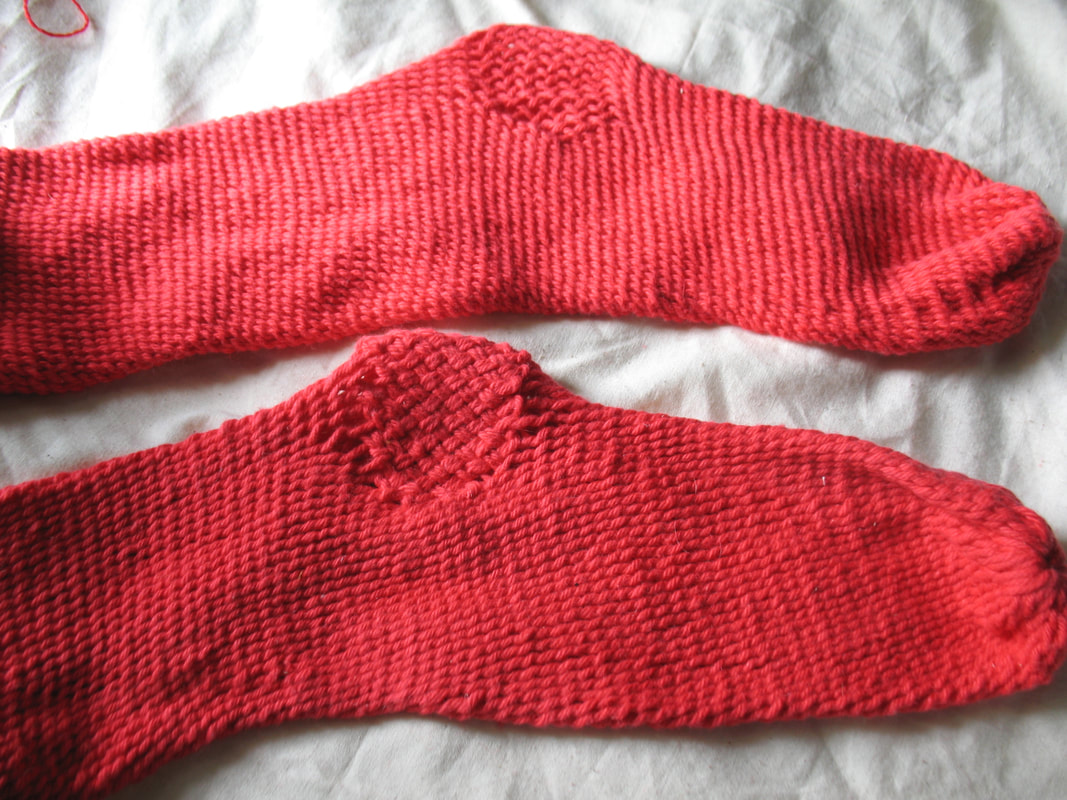 Reinforced heel on a sprang sock I’m a bit concerned that the reinforcement has caused extra stress just above and below the heel patch. Hmmm, maybe I should use a finer thread for the reinforcement.
I still prefer the ‘short row heel’ that I discussed earlier. My book is progressing. I’m hoping to have galleys by the end of the week. |
Categories
All
Archives
May 2023
Categories
All
|


 RSS Feed