|
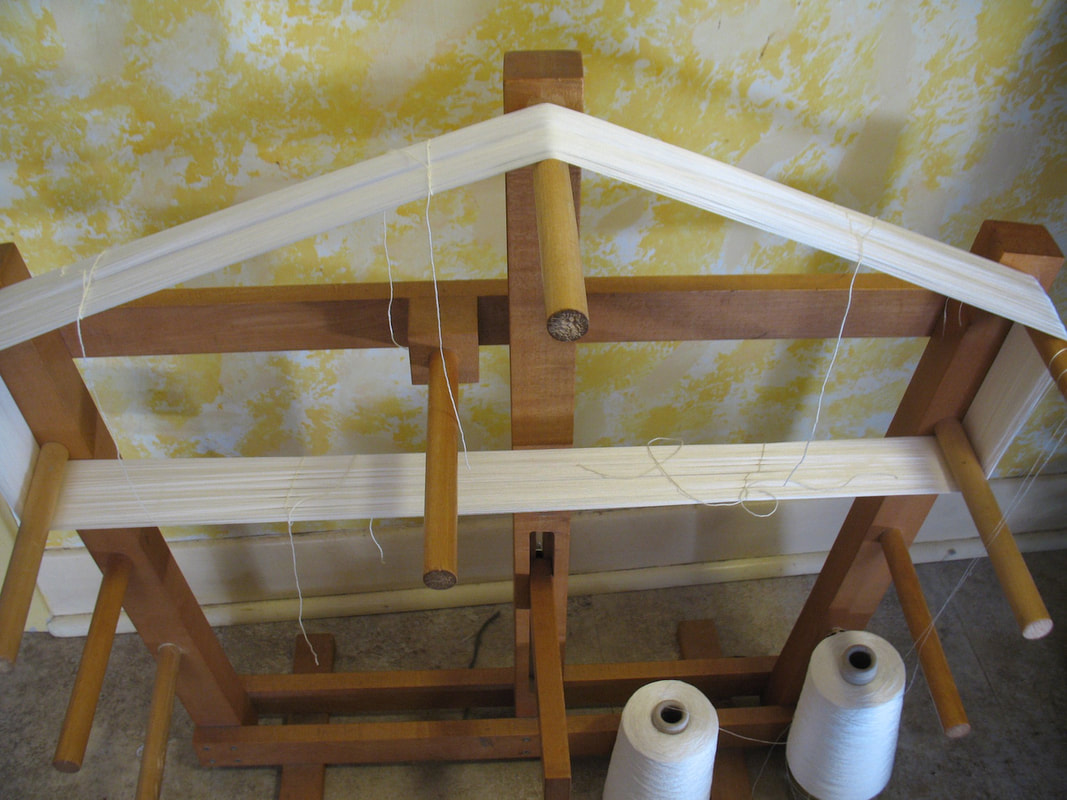
Work on the sash replica continues. The length of cloth is now such that I’m ‘over the top’. 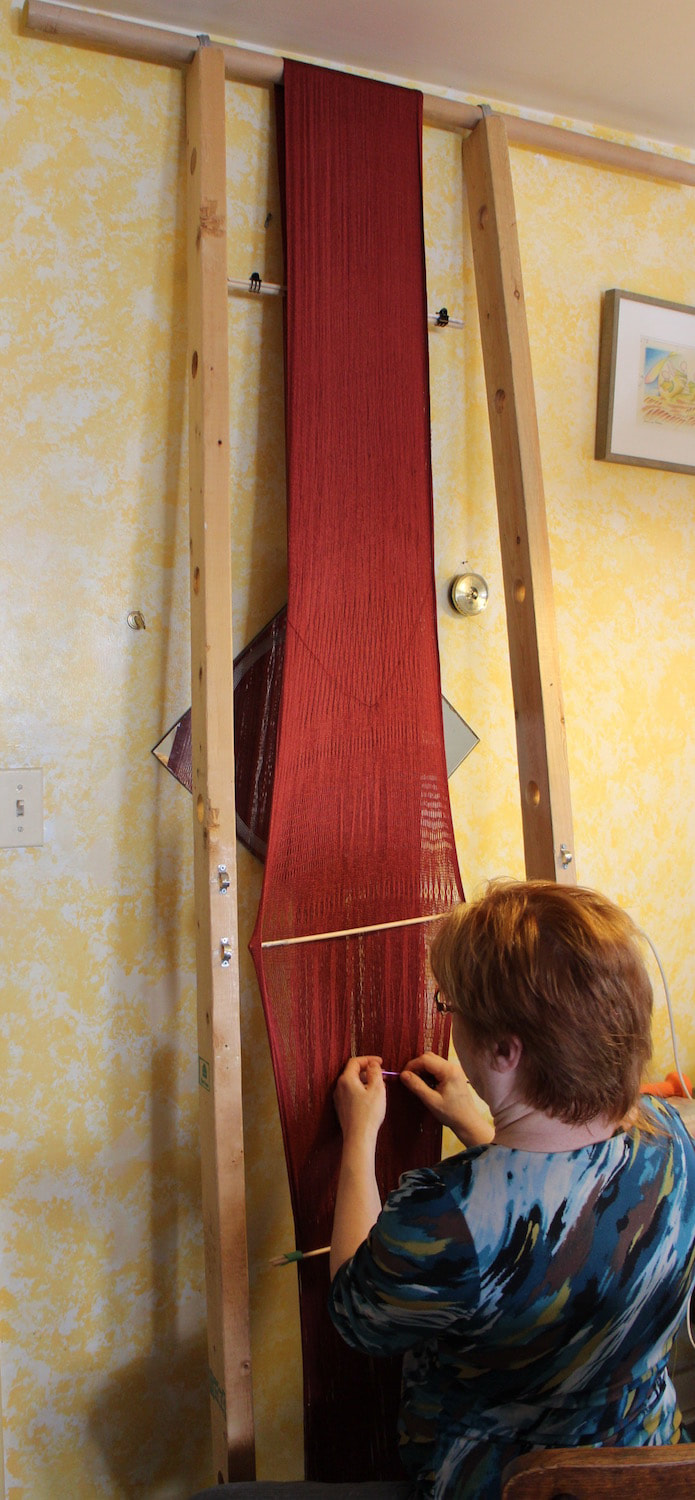 The cloth is now long enough to extend over the top. The first few feet of the sash were worked on the ‘front’ of the frame. Each time I worked a row, the new shed was pushed down, around the bottom, up the back of the frame, and finally over the top. Each time a ‘Z’ row was completed, an ‘S’ row was added above.
I’ve arrived at the point where I now sit and work with the ‘Z’ row at a comfortable height and the most recent ‘S’ row is on the ‘back’ side of the frame. The ‘S’ portion seems to need a bit of encouragement to compact together. Early on I found that a heavy knitting needle in the last row, clasped to another needle for security, was the right thing to press each row against the previous. It also served as ‘safety’ line, should (horror of horror) I loose my working shed. Now that I’m over the top, the heavy knitting needle works at cross purposes. A few rows past the top of the frame, I noted that the needles were weighting downward and away from the cloth. At this point I switched to wooden sticks. The sticks are lighter than the metal knitting needles and not particularly well finished, so they ‘grab’ to the threads in the last shed, don’t fall down.
0 Comments
Tension in sprang is always a question. How tight should I keep my warp? Too tight and it is hard to get your hands in there to work, and strings break. Too loose and it becomes impossible to move the row just worked to the mirror image portion of the cloth. I am finding that tension also plays a role in the ‘rows per inch’ of the finished cloth. Oddly enough, a very tight tension prevents a tightly packed cloth. High tension will ‘loosen’ the cloth as you weave the next row.
Preparation work for this massive replica project included the creation of samples, using the threads that seemed right for the project. Those samples were narrower and much shorter than the finished product. Finishing the samples, and comparing them to measurements of the original sash I was concerned. The number of rows per inch was much higher in the samples than in the larger sash. Now that I am working with a 15 ft warp, I find that high tension is mandatory. It is my only hope for keeping the threads in order, and pushing the work around to the mirror-image side. Interestingly, without working at it, the number of rows-per-inch seems to be coming out just exactly right. The amount of tension required to manage such a long warp is exactly the amount of tension to give me the right rows-per-inch. It’s looser than my sample pieces, but correct for my measurements. Go figure! Circular warp sprang requires a very even warp. Slight variations in tension while setting up results in slight differences in length. This warp is 15 ft long, and took almost six hours to set up. Slight variations occurred. We did take a couple of breaks for tea. I also noted weaknesses in the yarn, and some small knots. If there had to be knots in the warp, I wanted them to be all lined up in a place where the warp would be separated into the two fringes. Perhaps the pause to deal with these flaws also introduced small variations in tension and length. At any rate, after the first few rows, I KNEW that some threads were longer than others, and these were causing all kinds of trouble. In desperation, I went through the warp, and pulled the longer of these to the center. This resulted in what looked like a mess.  Evening out the length left arge loops at the center of the weaving. Most every circular warp of any length that I have worked has had this issue to some degree (mostly a much lesser degree). In my experience this always evens out over the length of the cloth. Indeed, over the next few rows, the loops diminished, and the unevenness worked itself out. 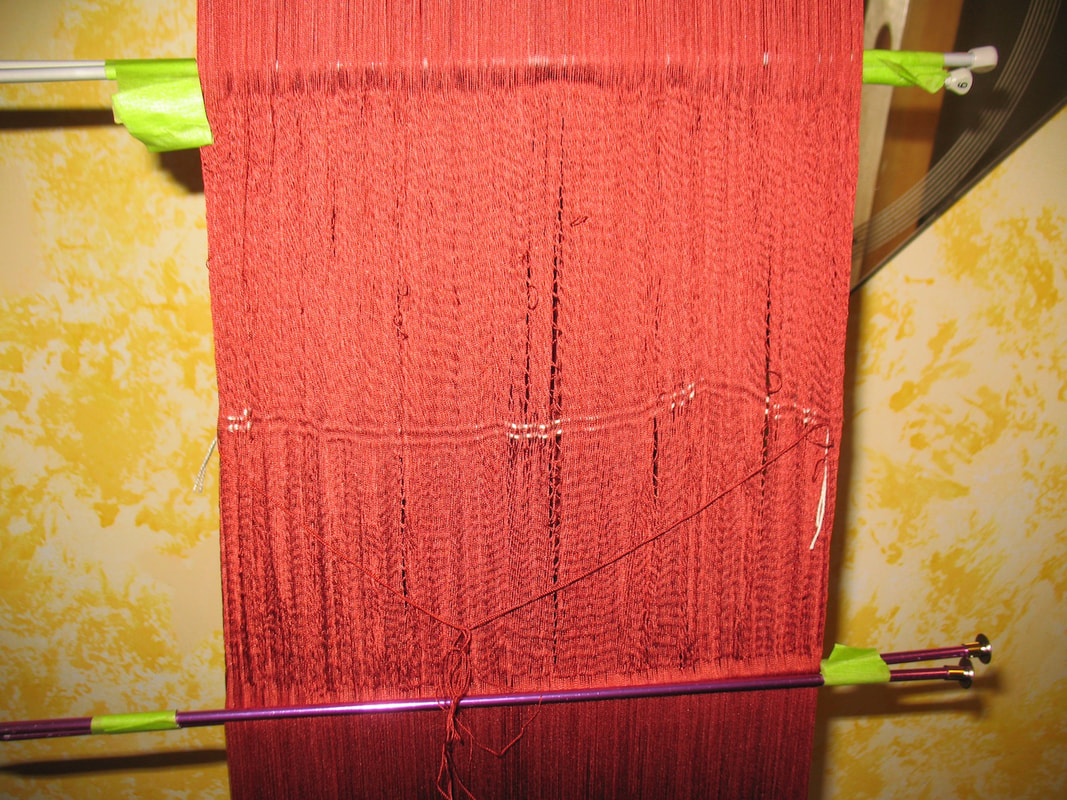 Several rows later, the imperfections loops are smaller. Working several hours a day, after ten days, I’ve got 5.5 inches of work done, resulting in 11 inches of cloth. The unevenness in the warp has completely resolved. 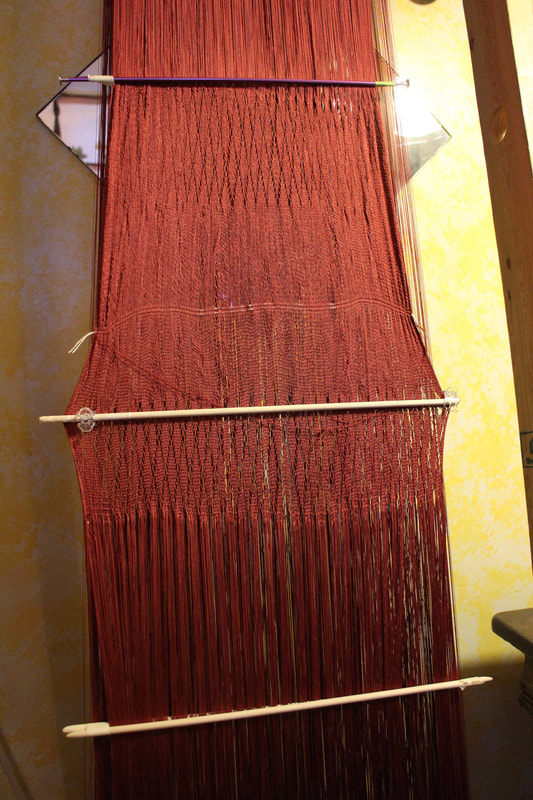 You would not guess the problems I had a few inches ago. I’ve begun work on that replica sash. 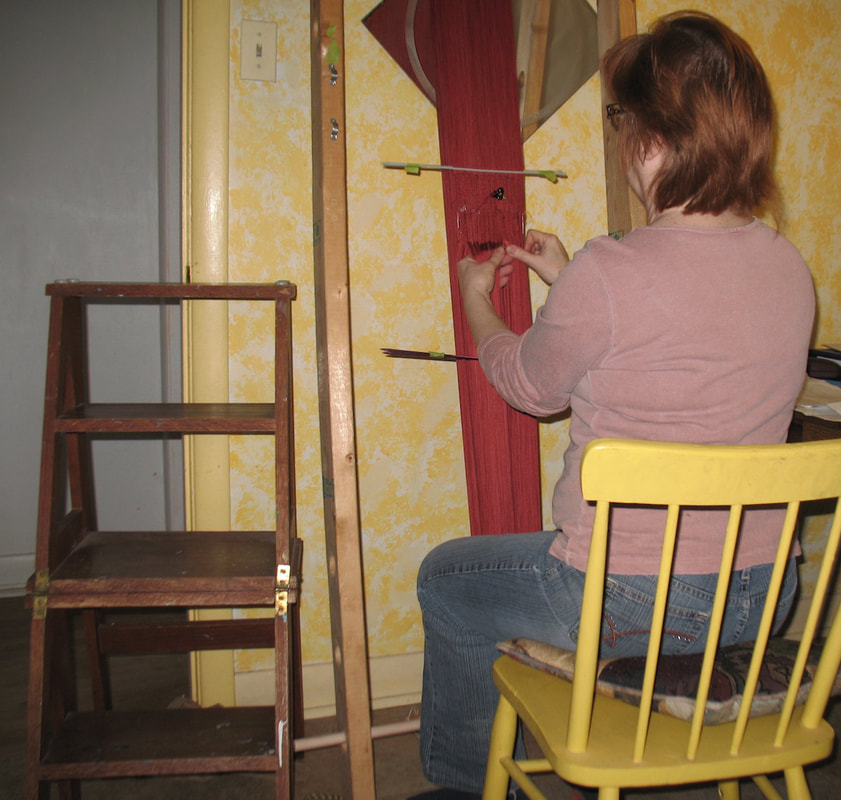 Work happens on the warp and frame that I set up last week. The first row was very slow, took over an hour. Then there was the challenge to move the work around the frame and back to the starting place. Note that stepladder beside me. I thought the warp had been set up with even tension throughout. Think again! Guess it’s nearly impossible to maintain exactly the same tension for almost six hours. Very slight differences in tension mean different lengths of thread within the warp. Different lengths in the warp cause no end of trouble in pushing the work around.
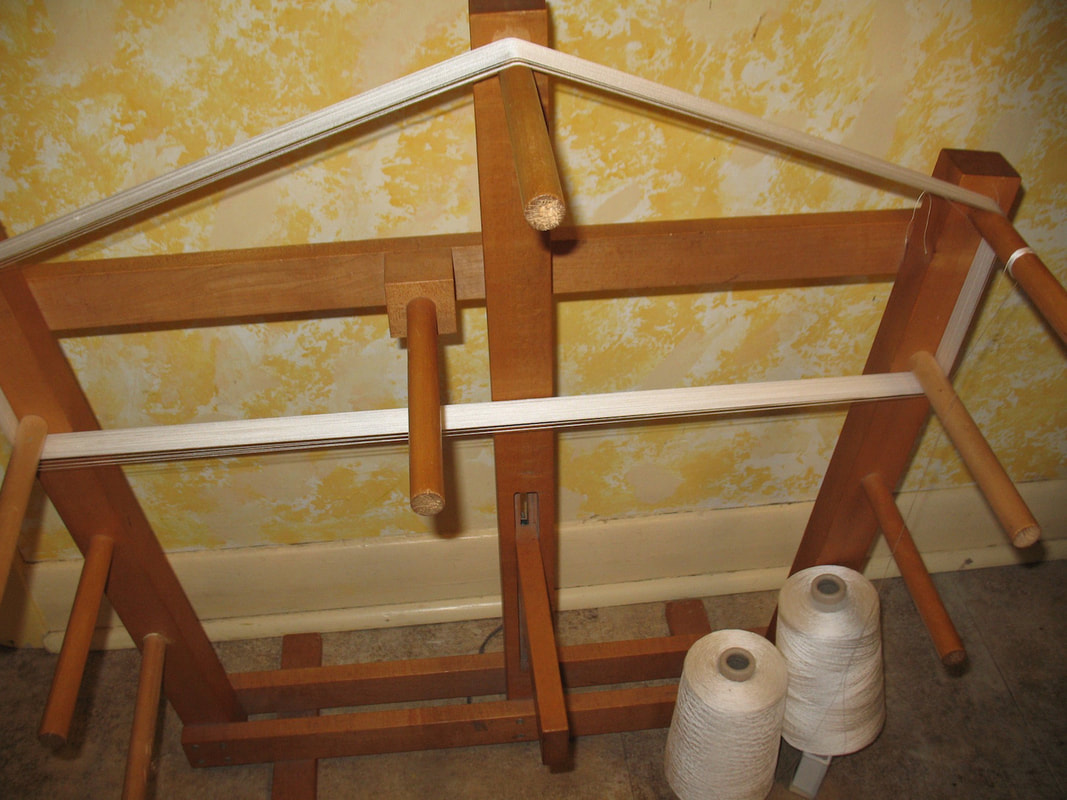
And yet, this is to be expected. I have not yet worked a long sprang piece that has not had this trouble. The first several rows, the first foot, are always difficult. Eventually the warp evens out, and it goes more smoothly. As they say in German, “aller Anfang ist schwer,” beginnings are always difficult. Looking for smoother weaving ahead. Warping Day. The silk is now the right color, or as close as I can get. Still tied in sections to prevent tangling in the dyepot, I’m leaving those ties to try to avoid troubles un-reeling. 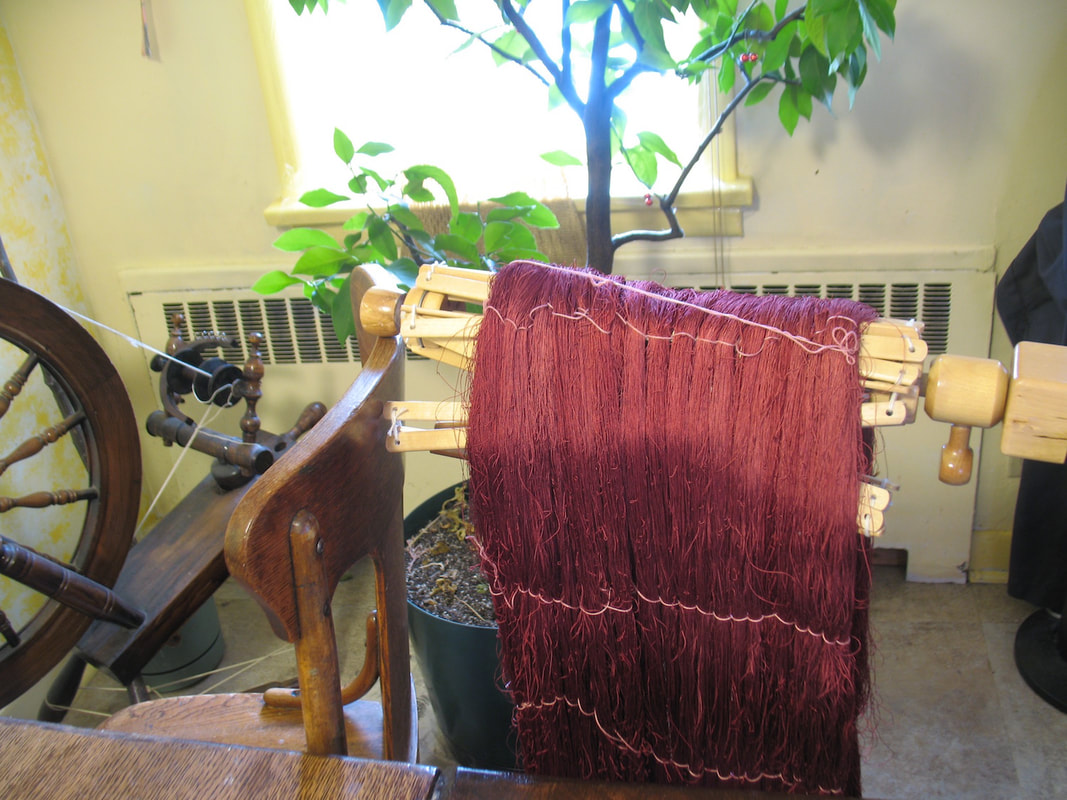 The skein hanging on my umbrella swift, ready to set on the frame. Here you see the sprang frame. It consists of two 2x4s, one on the floor, and one on the seat of chairs. There are convenient holes drilled every foot or so. Holding the 2x4s together are 1.5 inch dowels at either end. Small pipe straps hold finer dowels for the cross. To make it easier to see the cross, we placed my cutting mat behind the cross. 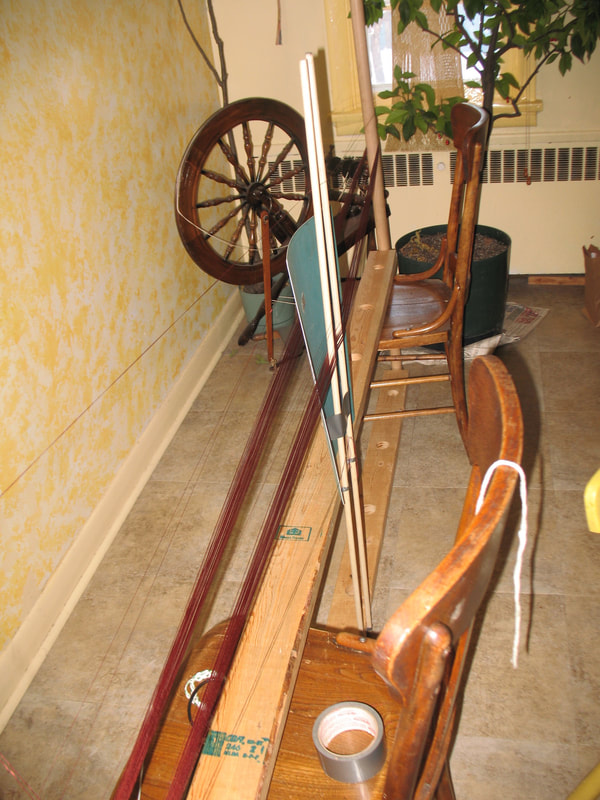 My heavy-duty frame Usually I set up the sprang frame by myself. In honor of the size of this warp and the fine thread, this time it is a three-person job. 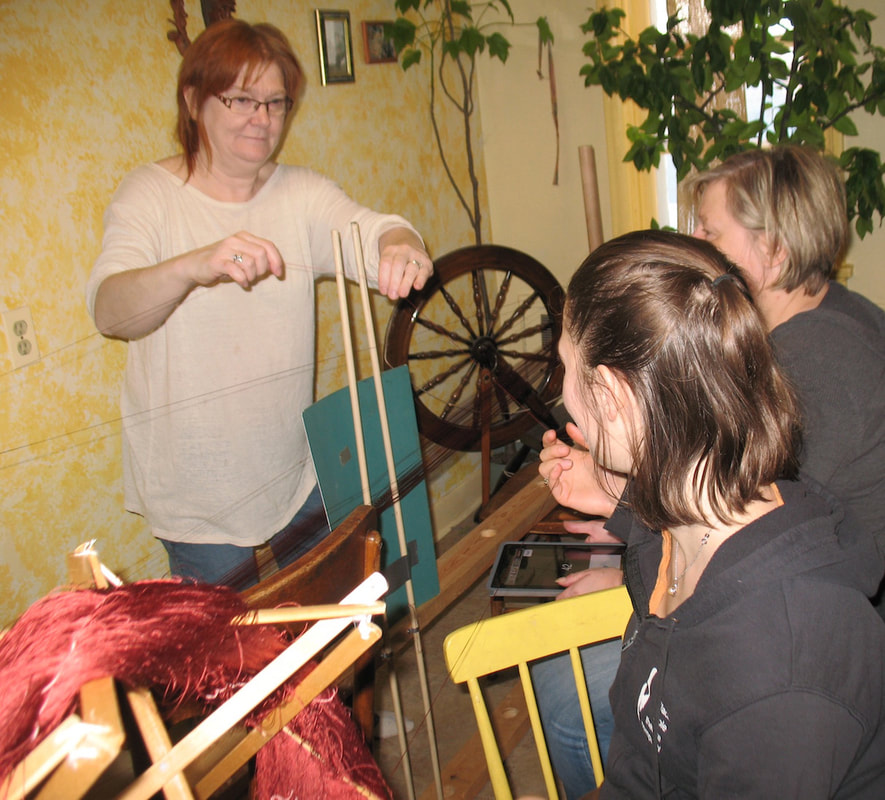 The three-person job One person manipulates the umbrella swift, preventing tangling at that end, another winds the thread around the sprang frame. The third person keeps track of the cross, makes sure it is laid in correctly. This third person also keeps track of the number of warp threads, lets me know when we’re done. 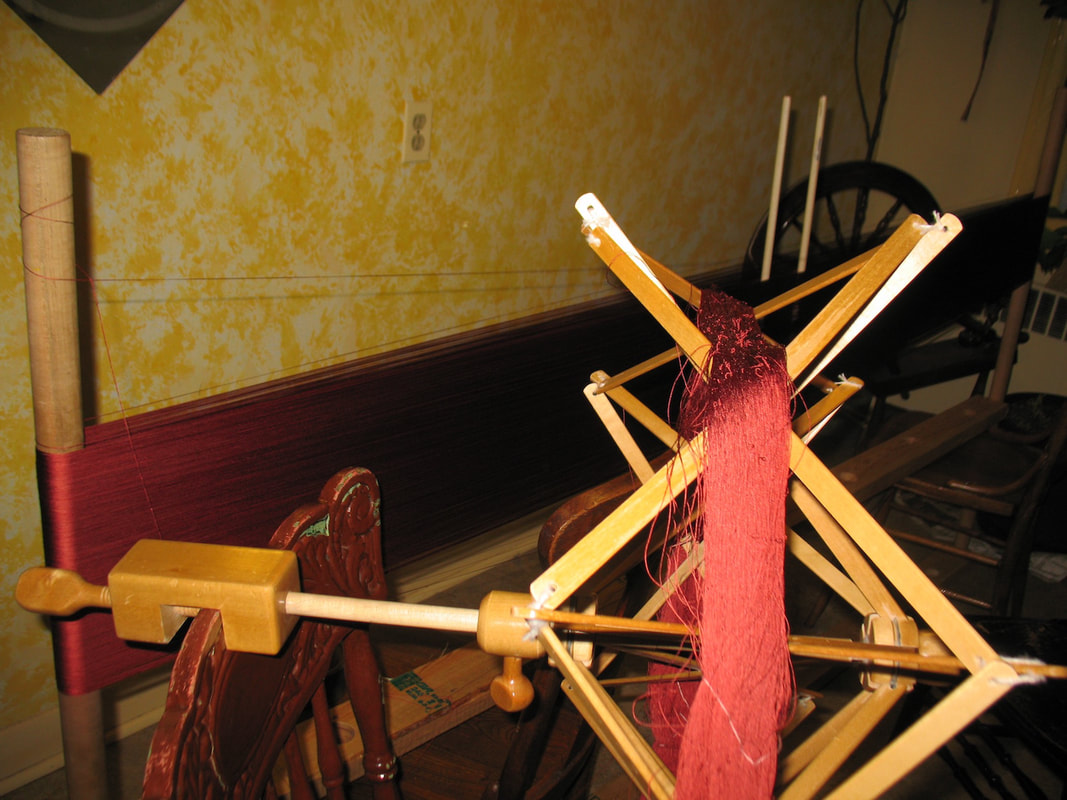 Getting there It required six hours to set up the warp. Whew! Glad that part is done. The 2×4 that was on the floor gets placed on top, and then the frame is turned and lifted. 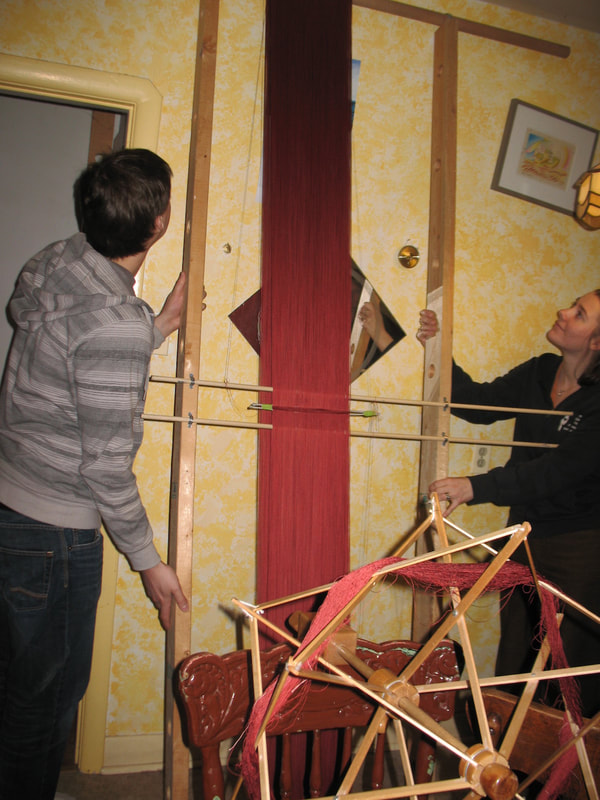 The frame set into position for work. Enough work for one day.
Remember that sash I was privileged to view at George Washington’s Mount Vernon last September?  Carol at George Washinton’s Mount Vernon, examining the Braddock Sash. Well, thanks to funding from the Winnipeg Arts Council, and the superbe cooperation of the Mount Vernon curatorial staff, and silk from Treenway’s, I’m ready to get started on a replica. The first step is to dye the silk to the right color. It came to me on cones. I am using an inkle loom as a frame to wind my skeins for dying.
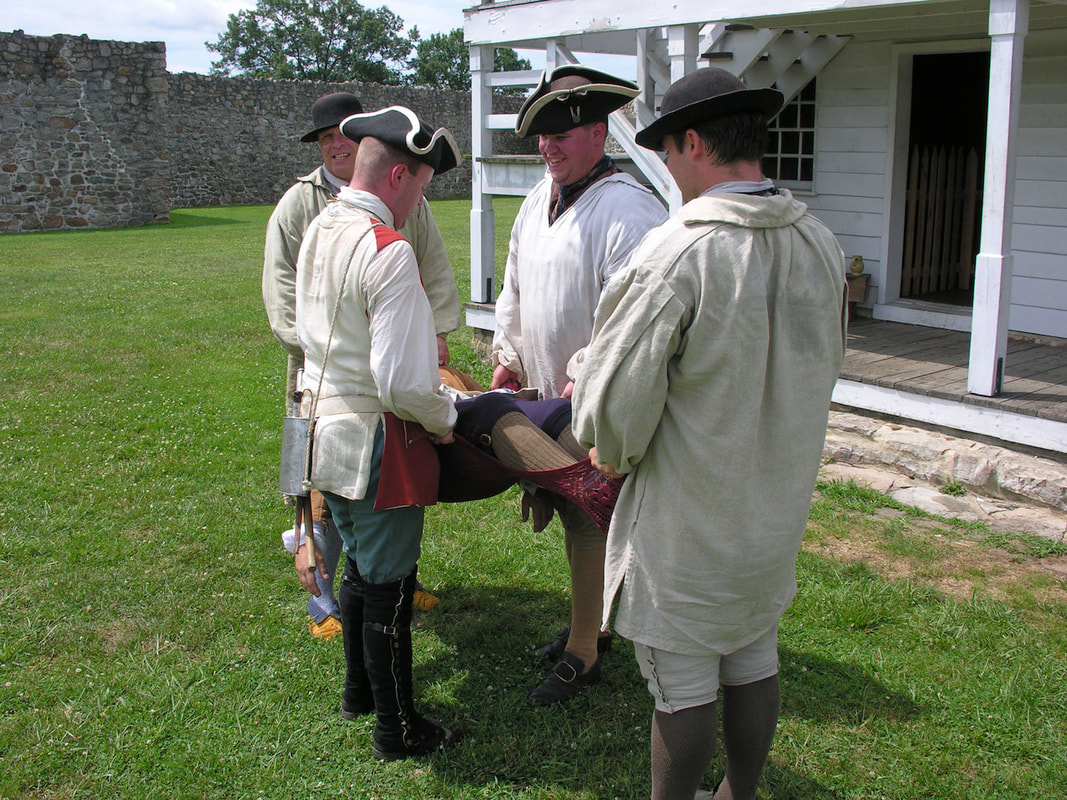
Silk needs to be thoroughly wet before dying. Here it goes into an enamel pot for 24 hours. 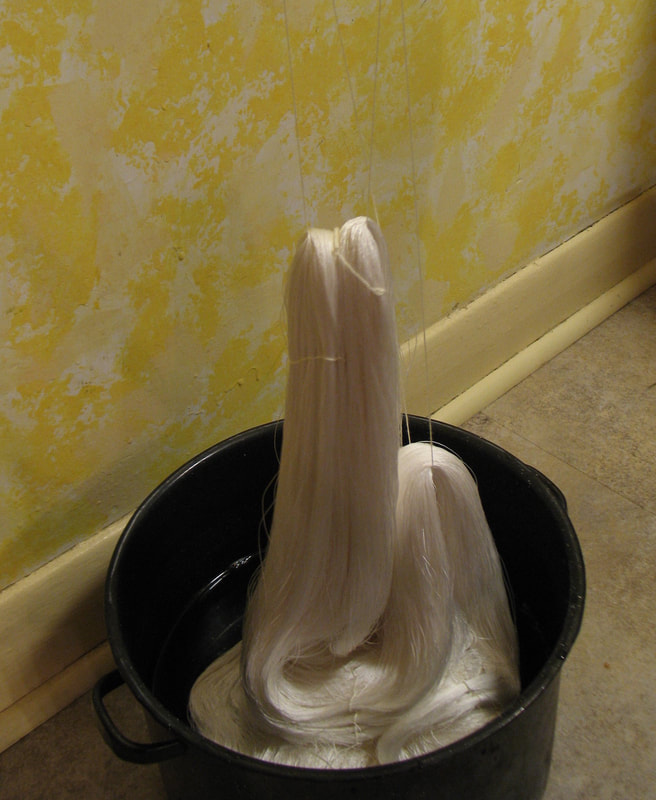 Into the pot to soak awhile. I attended the Textile Society of America Symposium Sept 19-22 in Washington, DC. The title was ‘Textiles and Politics’. Papers were presented on all manner of topics, textile work and the economy, textile work in emerging economies, dyestuffs, self-expression. My paper was on the subject of sprang and military sashes. I met textile experts from around the world. While in the DC area I had arranged to visit George Washington’s Mount Vernon. Staff there allowed me to inspect the Braddock Sash. Of note, the beginning- and end-threads of the circular warp were tied to a neighboring thread at the middle meeting line, just like Peter Collingwood suggests (Techniques of Sprang, pg 259-261). And here I’ve been advocating that you remove that edge thread. 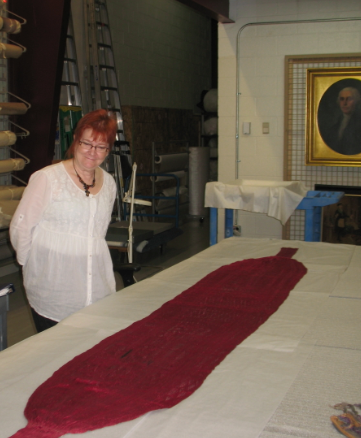 Carol at George Washinton’s Mount Vernon, examining the Braddock Sash. I made a silk sprang sash earlier this year for a military re-enactor. Officer of higher ranks had sashes were made of silk, a very strong fiber. Now there are stories out there about people being carried on sashes. It seems that a person injured on the field could be carried back to camp on the sash. A client earlier this year requested a sash wide enough and long enough to try this out. So I made this sash, and then encouraged him to try it out, and send me photos. I even promised to replace the sash, should it not hold up to the claim. He has now sent me photos of the event:
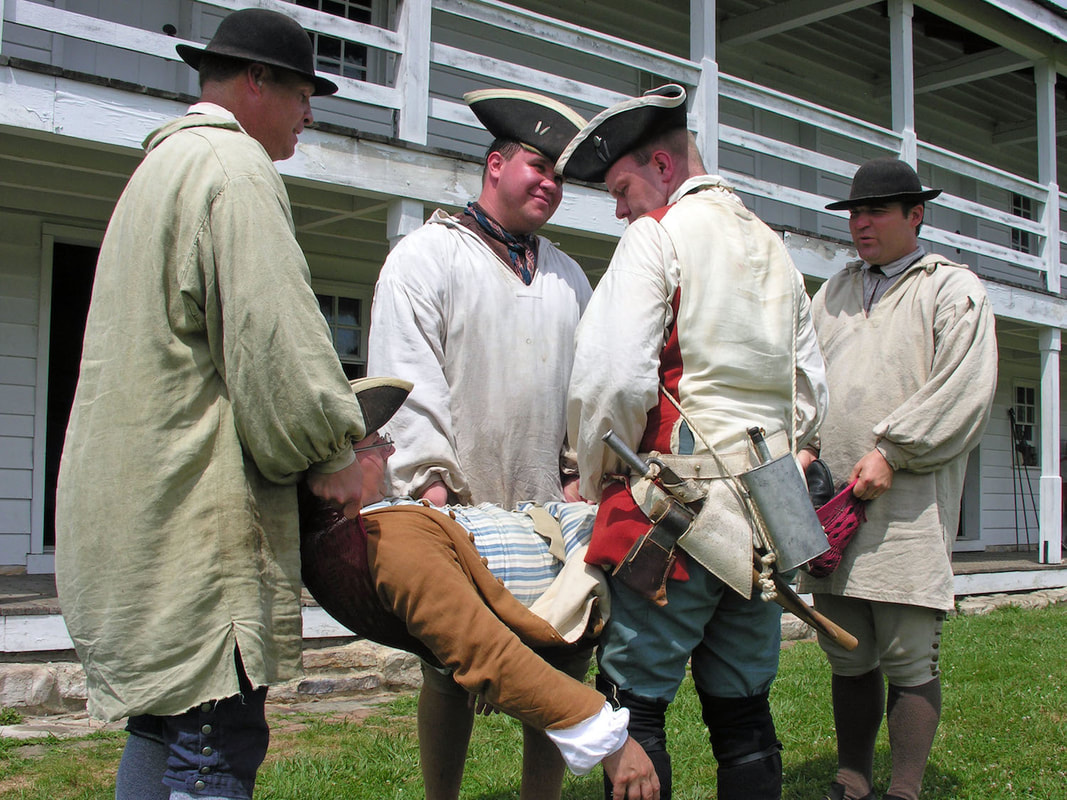 The people at head and foot bear most of the weight. The people on the sides keep the sash stretched laterally. I think I’d recommend another two people to distribute the weight a bit more. I was assured that the sash was not at all damaged by this test. The sash was seven feet long, and eight inches wide lying on the ground. When the sash was stretched laterally to support the full width of the body, it shortened a bit. I was told that another two feet of length (and probably a bit more width) would be desireable. I hear that the Braddock sash is 24 inches wide and 12 feet long, a very nice size for a litter.
The delivery man from Friesens Printing phoned this morning. My books were ready for delivery! 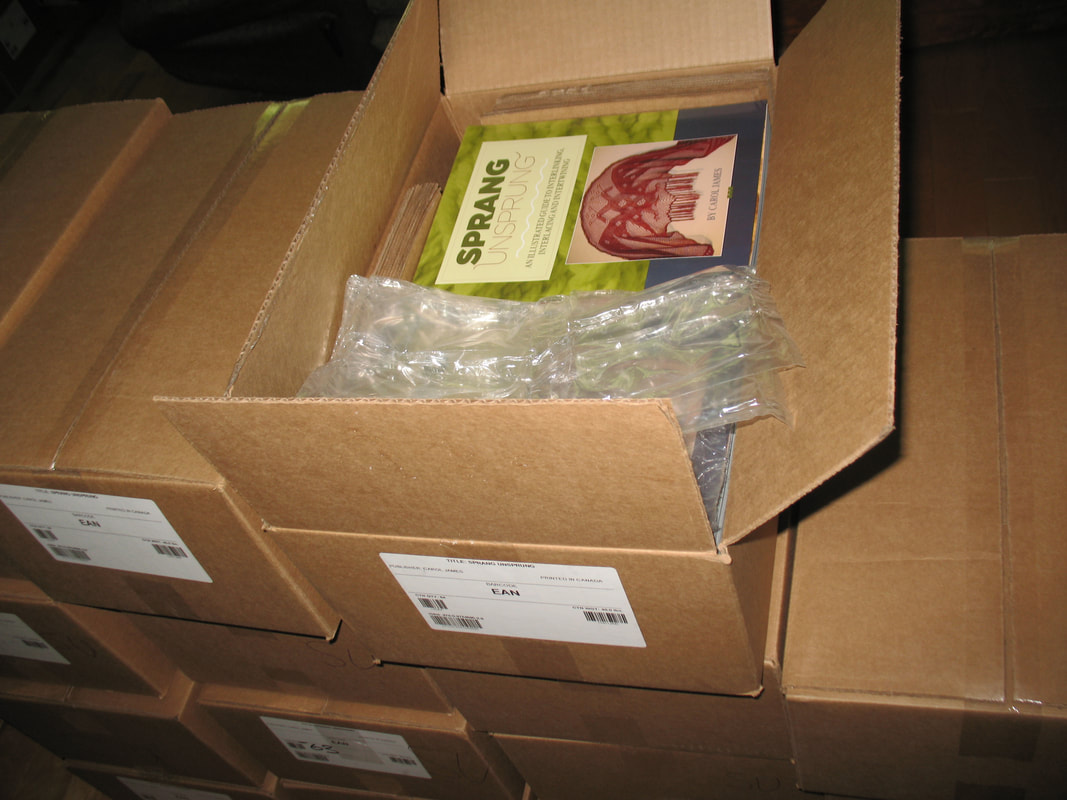 Boxes of books, Sprang Unsprung Luckily I had help to assist in moving 2000 books from the truck to my living room. 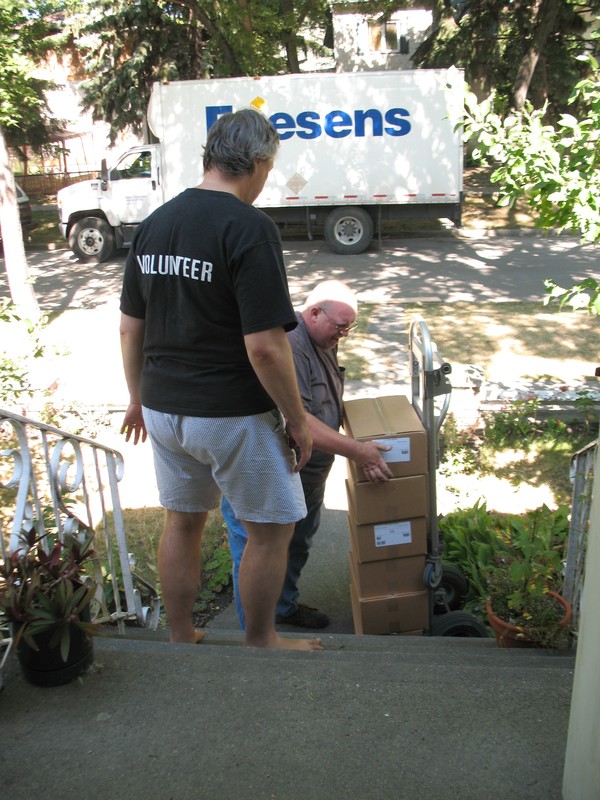 Delivery of boxes of books This afternoon I’ll be busy taking packages to the post office, all you who pre-ordered! Keeping my fingers crossed that you’ll like what you see in Sprang Unsprung. I should add some photos from my adventures in Grand Portage, Minnesota. We were greeted by a rainbow as we set up camp. 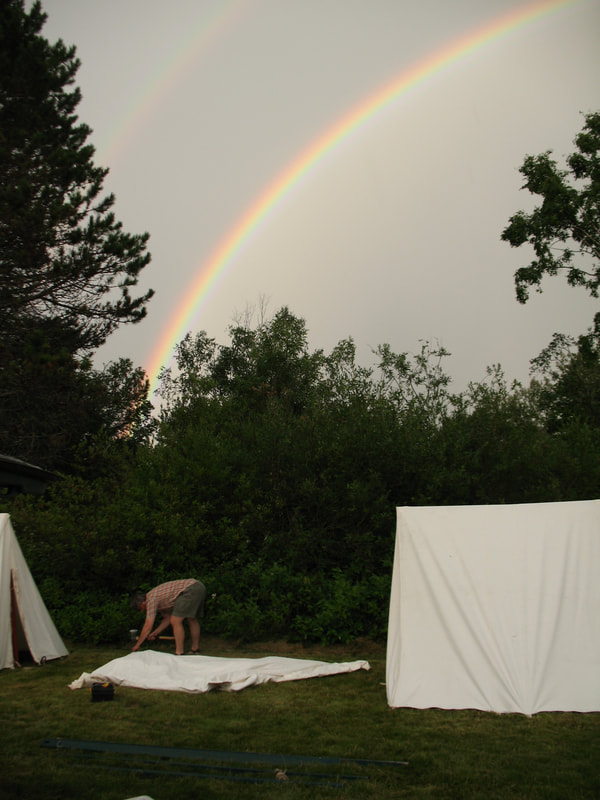 Setting up camp under the rainbow I was impressed by the number of people wearing fingerwoven sashes. Michelle Delorme was proud to show me the sash made by her Québec mentor. 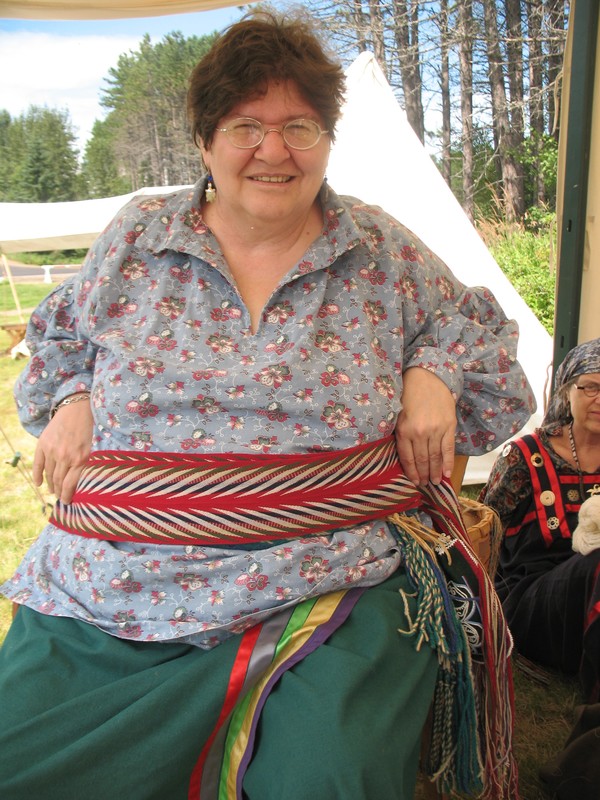 Michelle and her mentor's sash I always learn new things. Another participant showed me her method for securing the weaving while riding in a car. She uses a pillow. 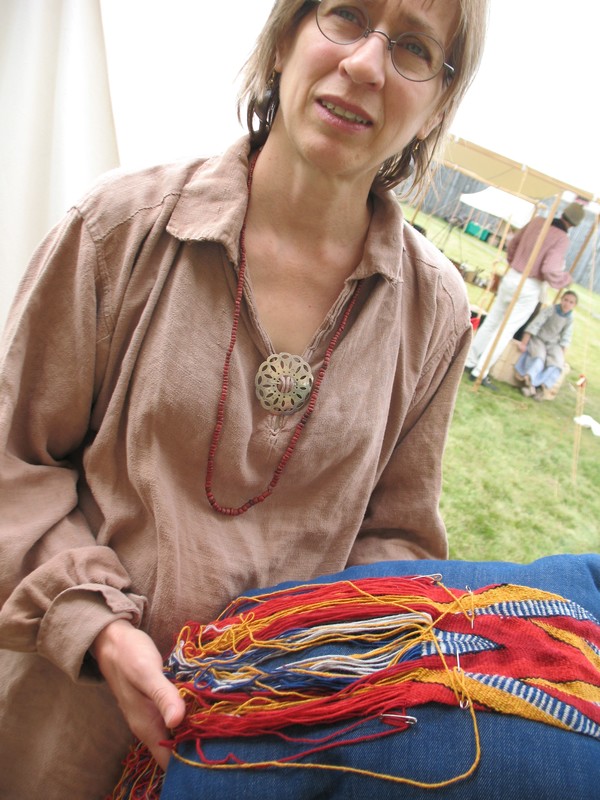 She secures her weaving to a pillow Her weaving was very nice and tight. Kudos. Amazing stories of how sashes call out to people to become weavers. And they have been able to create amazing pieces. 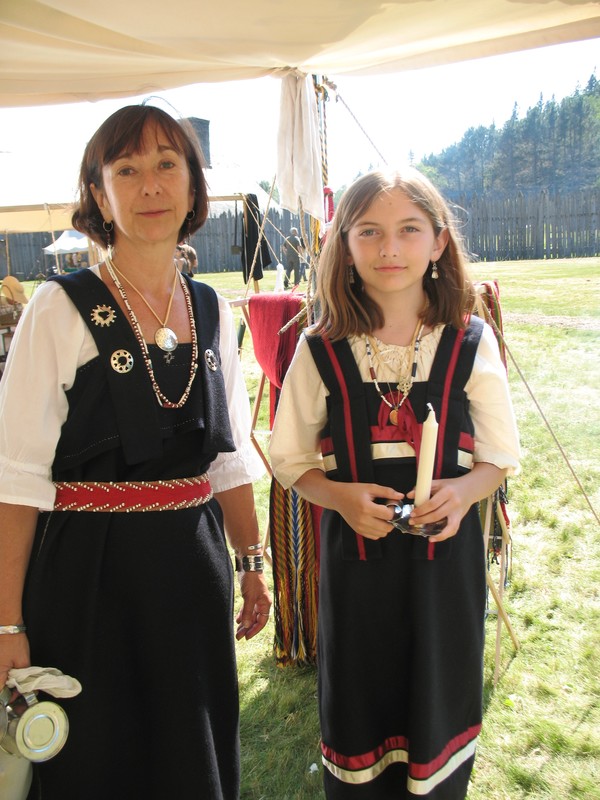 Beautiful beaded arrow sash She told me the story of the first time she saw a fingerwoven sash, how it moved her, how fingerweaving has helped her re-connect with her French Quebecois heritage. There were lots of other activities, lacross and twoball 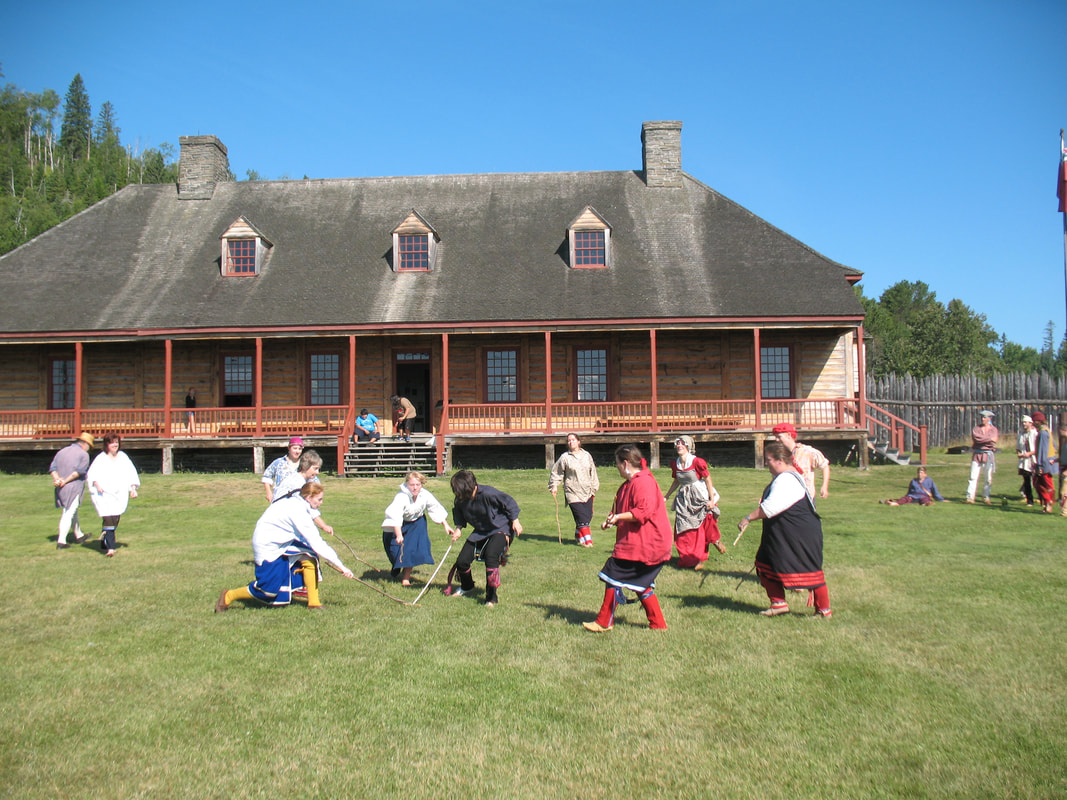 Games at Grand Portage The setting was really beautiful. I did take an evening to do a bit of hiking. The view was spectacular.  view of the Grand Portage National Monument from the top of the nearby hiking trail. Back home, back at work, I’ve set to re-creating those little coin purses, such as the one found among Lord Nelsons things, and featured on the front cover of the book by Martyn Downer: 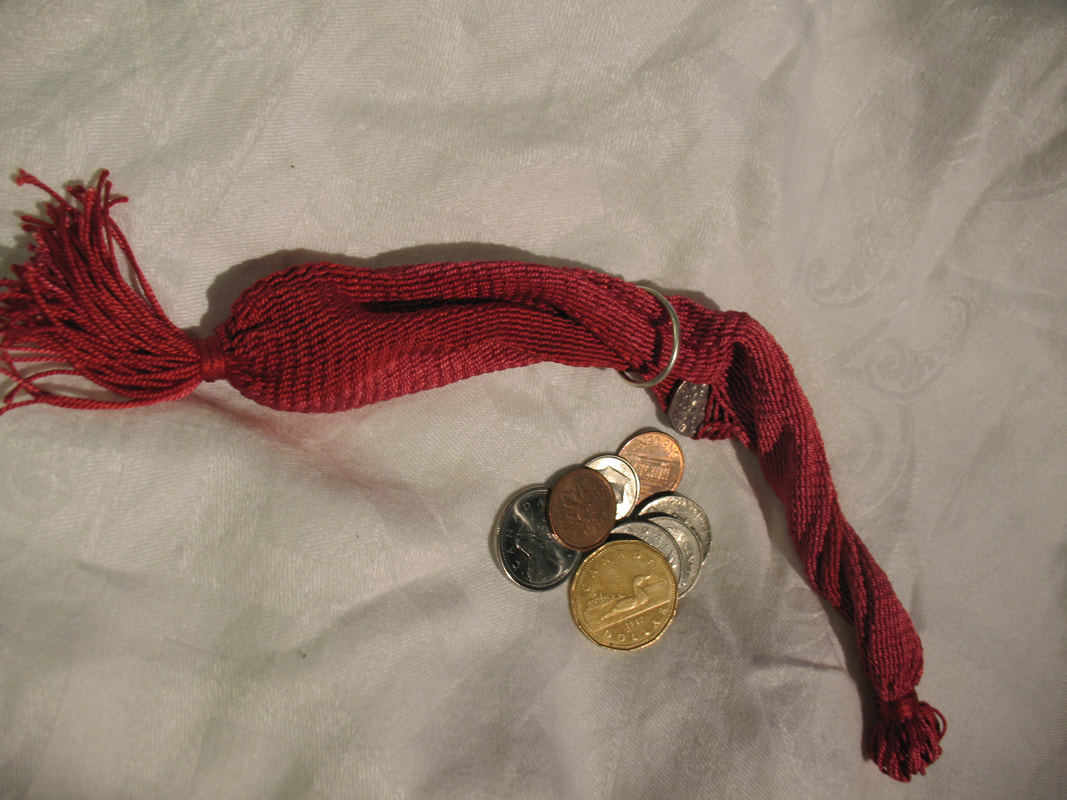 sprang coin purse And for the ladies, pockets. This one is based on an image I found on-line from the Williamsburg site. 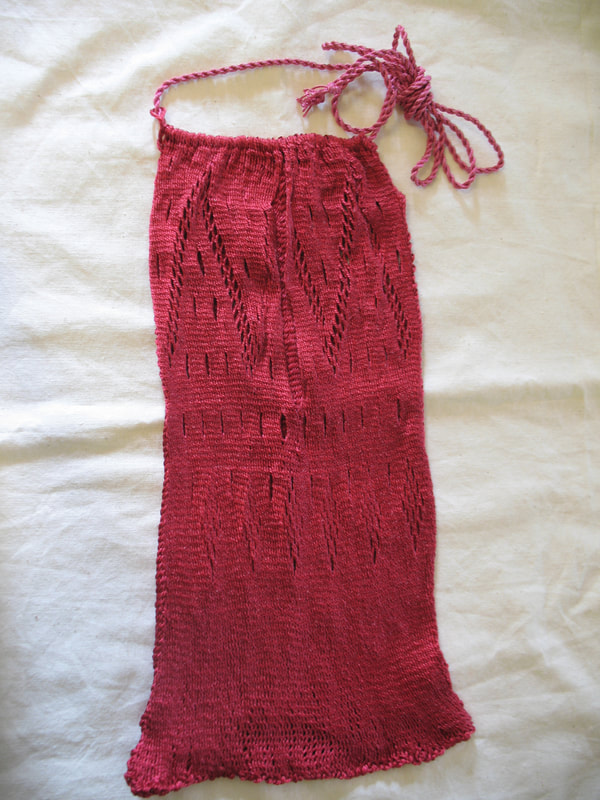 Silk sprang pocket I’ve been researching sprang, looking for evidence of this textile technique in North America. Archaeologists at the Manitoba Museum tipped me off to an experimental archaeologist in Minnesota. 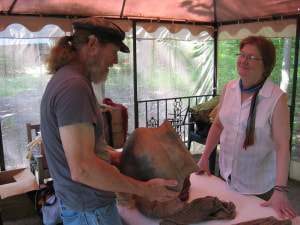 Large, thin walled replica vessels are made by Grant Goltz. Grant Goltz has successfully recreated pottery using native clay. Normally the clay found across the American mid-west cannot be formed into the thin-walled large pots commonly found at sites of human habitation excavated by archaeologists. Mr Goltz, lead by the textile imprints in the pots, creates sprang bags, and then forms the pot inside the sprang bag. The bag supports the clay when wet and permits the creation of thin-walled vessels. The results are very accurate replicas of pots excavated from 900 year old sites. Bags made as a rectangle, folded in half will not work to re-create these artifacts. The markings on the pottery clearly indicate ‘decreases’, fewer threads at the bottom of the pot than at the rim. He told me that he initially tried to form the bag working from the rim down, tying knots as he removed threads. This did not yield satisfactory results. When he got the bright idea to work from the bottom up, he discovered that this method allowed him to create pots with markings identical to the pots from the dig sites. 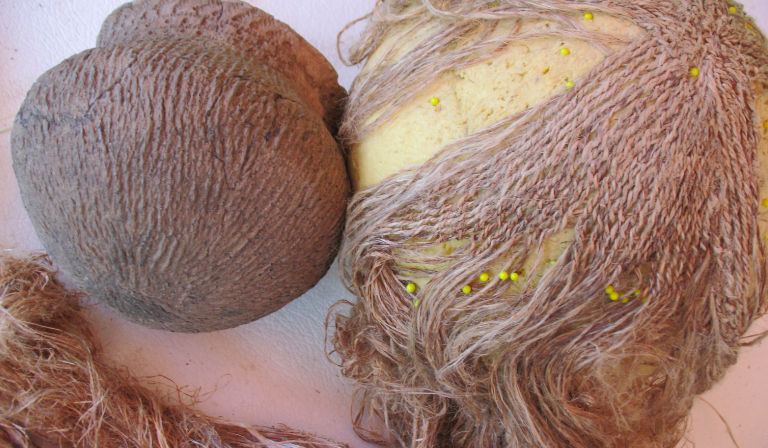 Pot on the left, and bag under construction on the right Now, I find this exciting for a couple of reasons. It is another piece of evidence suggesting that North American people were creating textile bags 1000 years ago. It suggests that one textile technique used could have been sprang. I love the fact that it is a loom-less version of sprang. I’m really wanting to re-popularize sprang. Mostly the instructions for sprang start with the description of the loom or frame required. I’m wanting to find the ‘no-tools’ method, get people hooked with the technique, and then they will be motivated to fork out for the frame.
|
Categories
All
Archives
May 2023
Categories
All
|

 RSS Feed