|
Inspired by sprang egg covers made by Sylva Cekalova, I blew out a couple of eggs, and made some sprang covers. Guess we're having omelet for supper. 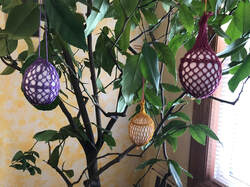 I've been experimenting. The first one I started with a 6 inch warp (the red one) ... too long. The yellow one was next, at 5 inches initial warp length, also too long. The 3rd one (lavender) started as a 4 inch warp .. and that was the right length. I used a 2/8 silk, and set up 30 loops (60 threads). It took about 45 minutes per egg, warping, working, and finishing.
1 Comment
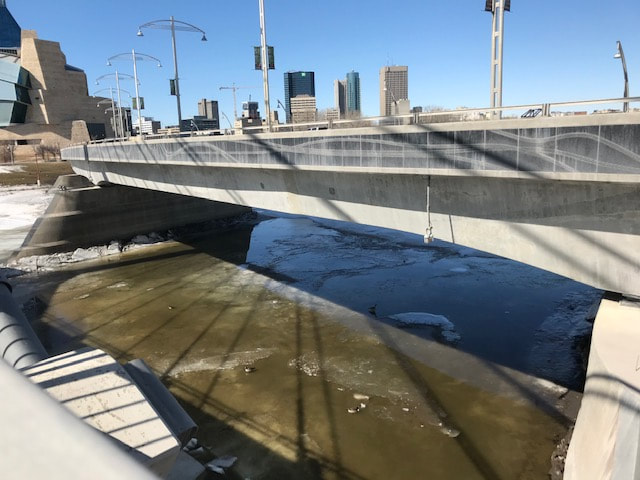
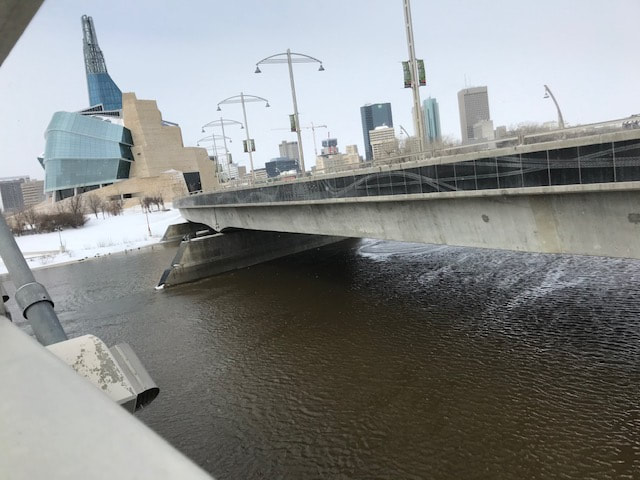
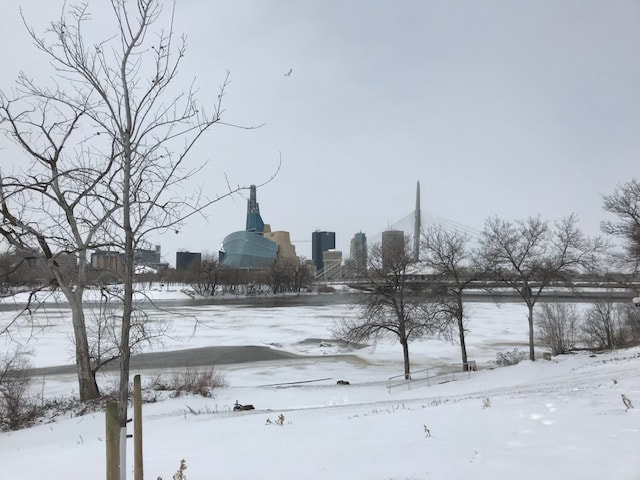 It's April, and the snow was almost all melted last week ... and then we got some 20cm (8 inches) of snow. Back to winter time. And at the same time the river is rising.
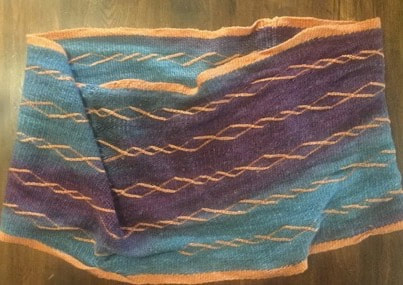
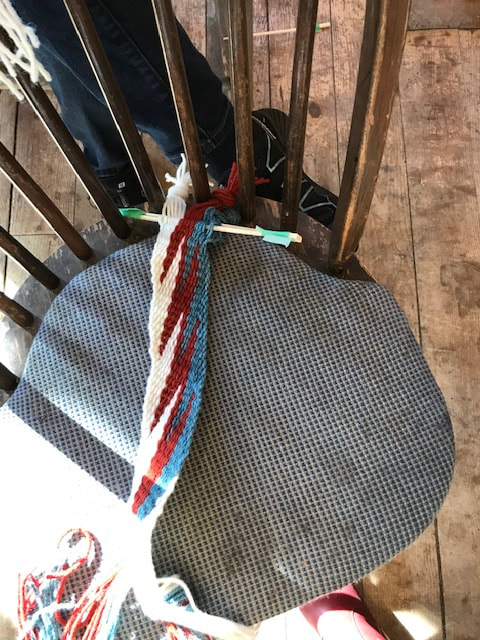
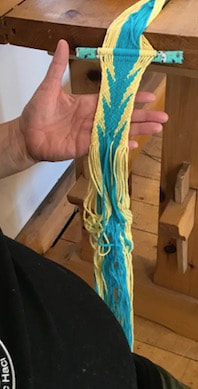
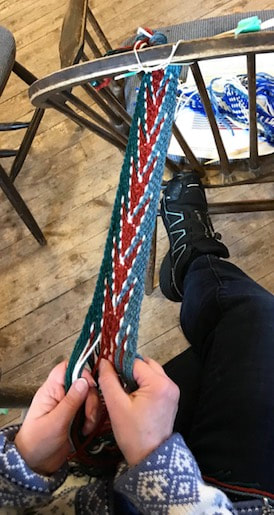
 Someone sent me a photo of a Ukranian Sash. Olena Orenchak expressed interest in learning to make this pattern, and I took it as a challenge. So ... I found me some yarn in the colors red, blue, yellow, and green. It looks to me like a combination of S and Z ... two rows of S and one of Z. In sprang that means that the other side of the sash will have two rows of Z and one of S.
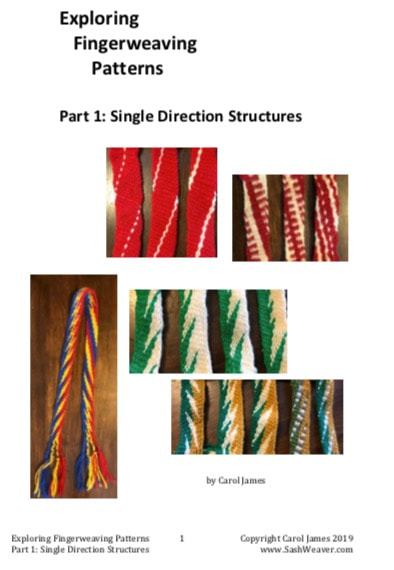
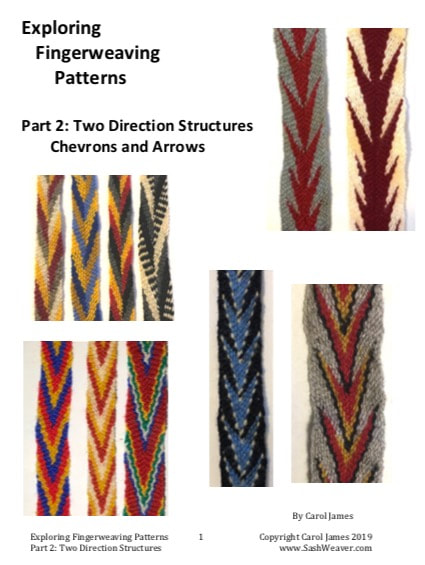
So many places closed, so many events cancelled, I feel like I'm in isolation. OK, so I'll try to make productive use of this time. For a long time now I've been working on a document detailing fingerweaving pattern variations. I've set out by putting the patterns into categories: single direction patterns (diagonal stripe, sawtooth etc), two directions (chevrons and arrows), and then another category of arrow-and-lightning, and arrow-and-flame.
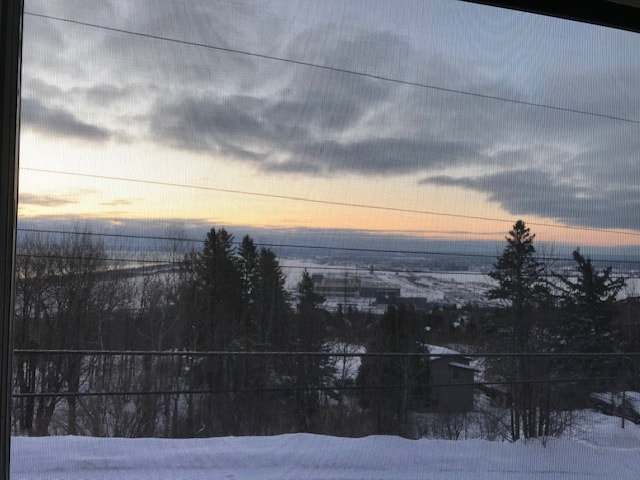
The documents cover a variety of variations. The point is to encourage and support exploration. The big question is, "When is it ready?" At what point do I consider it finished? I've been looking through them again, and think it's about time to post them. There is always the outside chance there are critical errors ... 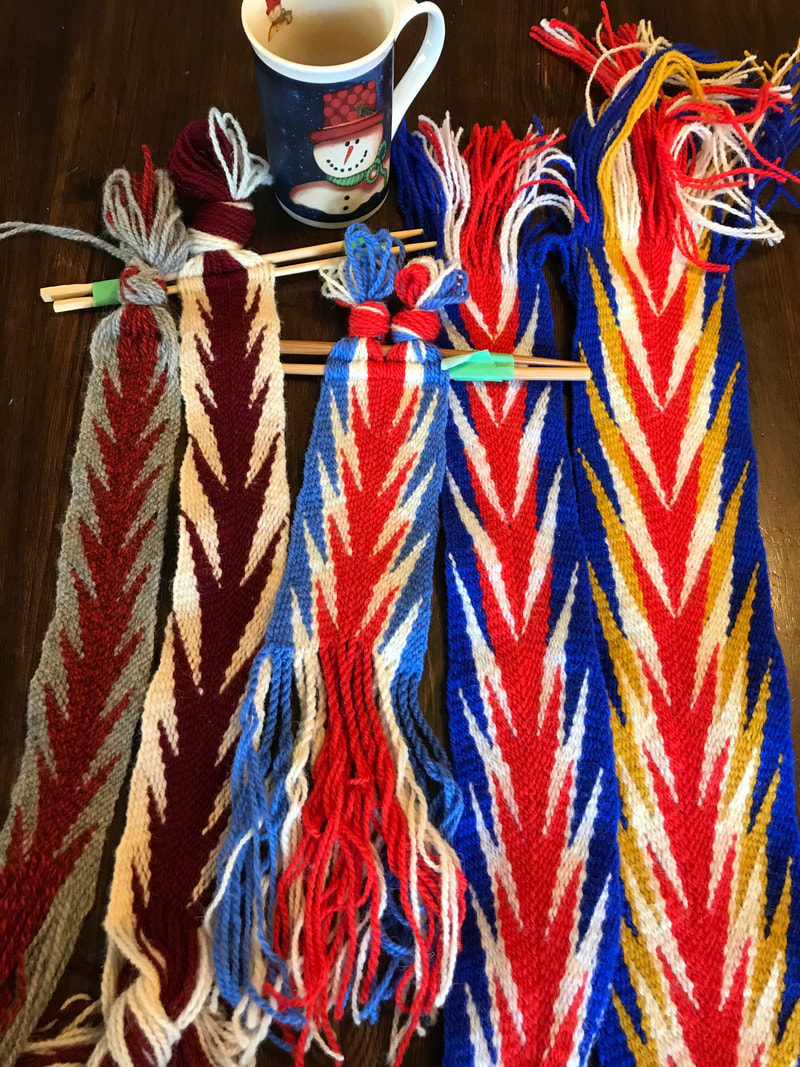 Theme and variations, arrowhead, lightning, flame 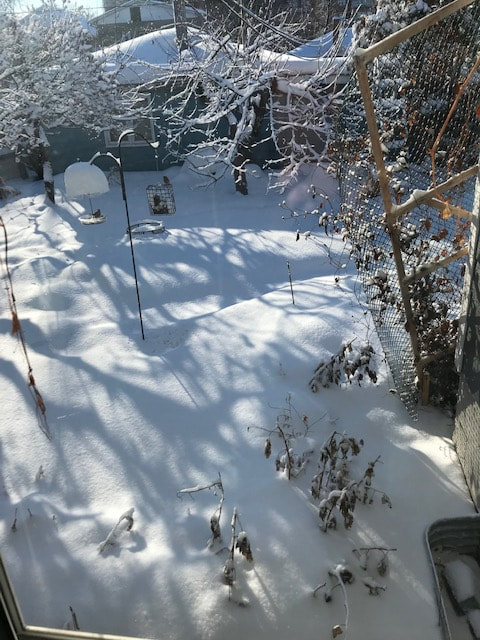 March in Winnipeg. This is the view out my window. More snow last night, but sunny this morning.
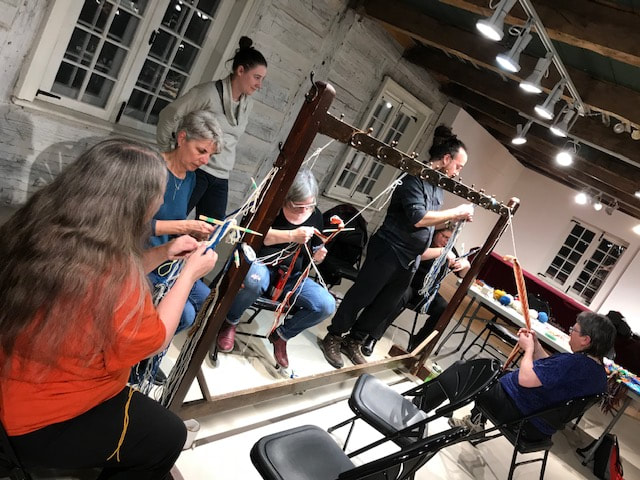
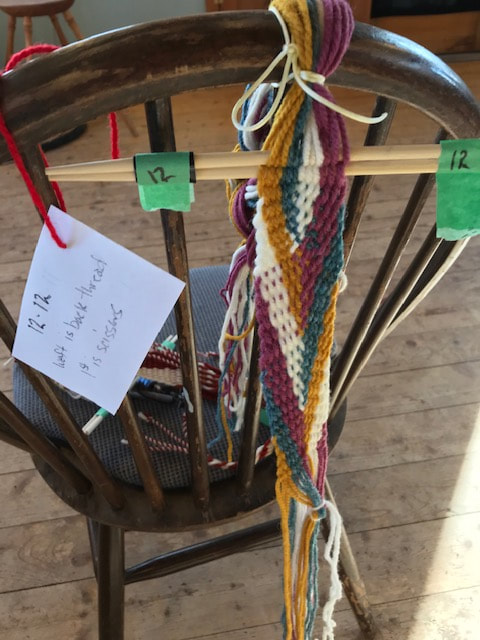
Inside it's warm. I'm teaching a Tuesday evening class of fingerweaving at the St Boniface Museum, and a Saturday class of sprang at the C2 Centre for Craft. Thanks to the St Bonface Museum, and to the Manitoba Craft Museum and Library for hosting ... and kudos to the students, all who are doing very well, making good progress. 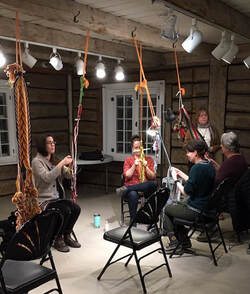 A big Thanks to the St Boniface Museum for installing hooks in the beams on the ceiling of this room. The Fingerweaving Support Group is now sorely tempted to forgo the access to beer at the food court that is TheForks Commons, and move the weekly meet up site across the river to the St Boniface Museum.
For those of you in Western Canada, or NorthWest USA, the Maiwa School of Textiles will host two sprang classes, the first runs April 15-16 focusing on an introduction to sprang ... no experience necessary. Immediately following that there is an intermediate sprang class scheduled for April 17 - 19. The intermediate sprang class will examine topics such as twining patterns, circular warp, lace, and more. For more information visit the Maiwa School of Textiles Website
https://www.schooloftextiles.com/2020-spring/introduction-to-sprang https://www.schooloftextiles.com/2020-spring/intermediate-sprang I understand that there are still a few spots available. 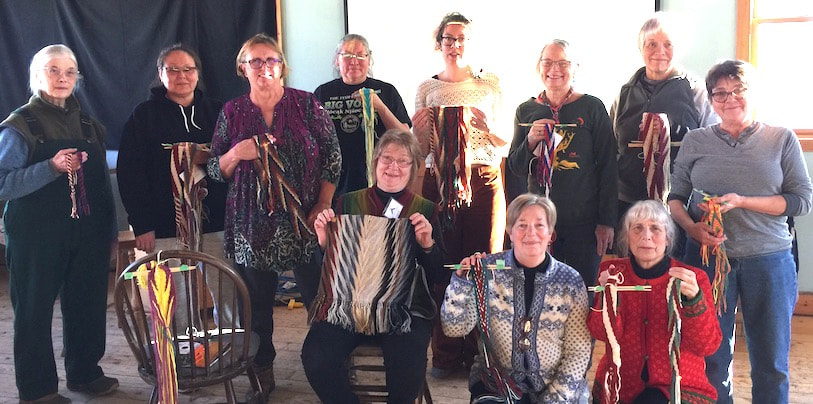 Back in Winnipeg after teaching fingerweaving at the North House Folkschool. Now is the time to sign up for the next fingerweaving class. No previous weaving experience necessary. Class will be held at the St Boniface Museum, 494 Tache Ave, in Winnipeg, Six Tuesday evenings, 6 - 8PM. For more information go to http://www.spranglady.com/register.html
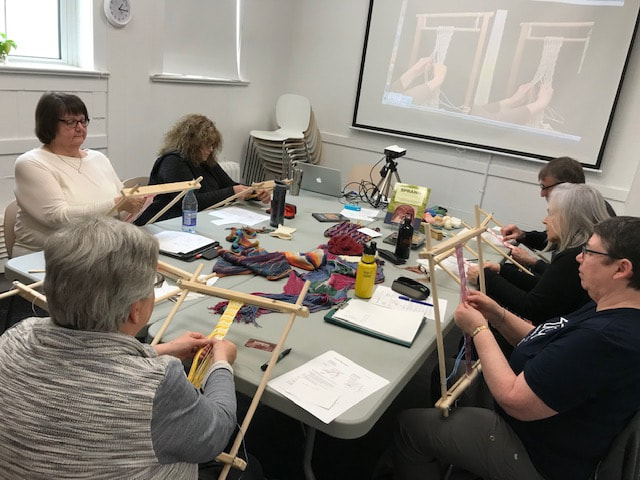
 I'm in Minnesota, teaching classes. The Duluth Art Institute hosted a sprang class, attended by several members of the local handweavers guild. 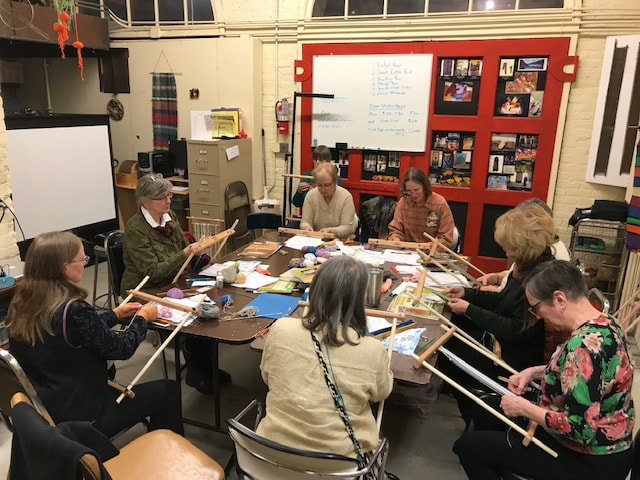 Sprang class started on Friday evening, and worked all day Saturday, and then again Sunday morning. Participants had practice with the basic stitch, as well as some variations. Everyone was able to practice setting up, working the piece, and several different finishing techniques. It was a superbe group of students. Thanks so much to Michelle, Louise, and Lynnea, for all the work they did to organize the event. It warms my heart to hear that this group plans to now form a "sprang study group", to maintain skills learned, and to help each other in further explorations of the technique. I'll be happy to skype in occasionally.  I then went down the road to Grand Marais, Minnesota, to teach at the North House Folk School during their Fiber Week. There were ten people in my fingerweaving class. We started at the beginning, and are progressed through diverse motifs. Another terrific group of students.
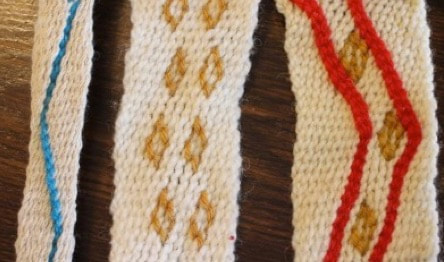
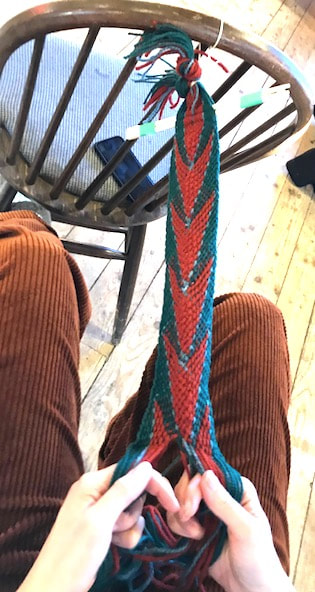
The third day I presented the theory of arrowheads ...
... and several lovely arrowheads were made. 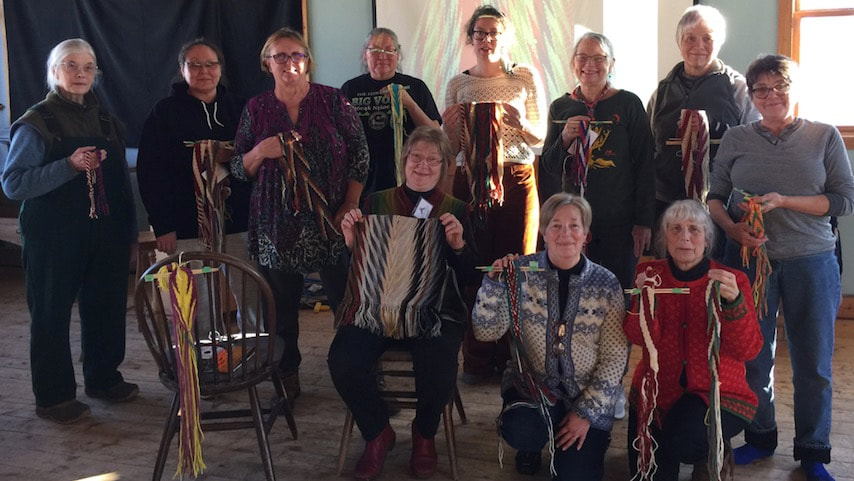 Photo at the end of the 3-day class. Most students completed several straps, in a variety of designs. Congratulations to the new finger weavers. Many thanks to Jessa, Ben, and the rest of the North House team for organizing this event.
The Winnipeg group that is the Norwood Naughty Knitters is hosting their annual event called Frolic with Fiber. Participating in the event, I'm offering a class on the subject of interlacing. It's one of the techniques used in some fingerweaving, It's also a stitch used in sprang. If you're interested, check out https://www.facebook.com/groups/158092544265553/events/
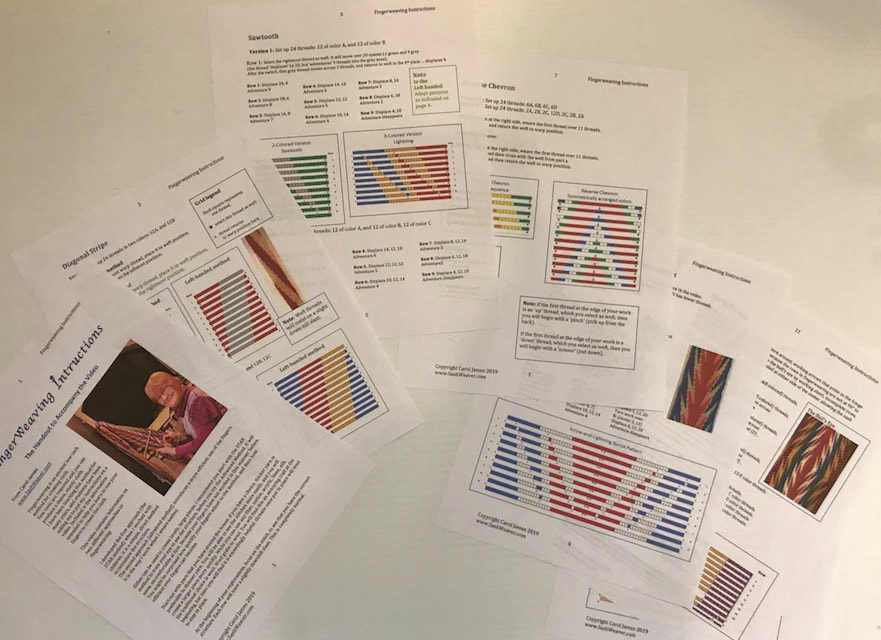
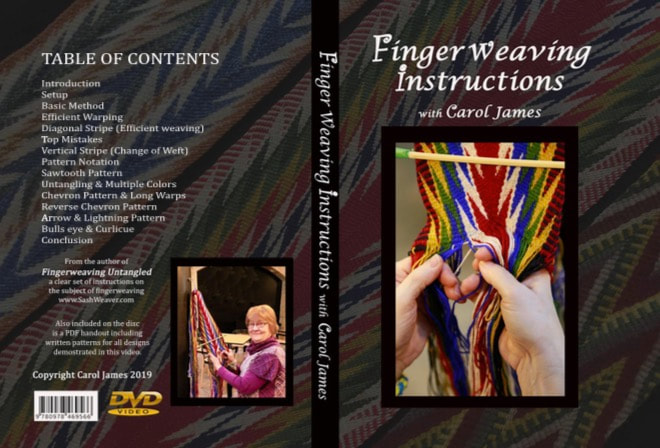
Rainer says the video is now live on Taprootvideo.com. Watch the preview at https://www.taprootvideo.com/preview_class.jsf?iid=7&cid=3 Check out the PDF handout that accompanies the video. The handout gives you a pretty good idea of the content. For instructions on how to actually do the fingerweaving, how to use the patterns in the handout .... you'll have to watch the video.
Instructions begin at a no-experience-necessary level. Make a friendship bracelet, and twist the fringes to finish. Projects are ordered stepwise, from simple to more complex, and are sufficiently interesting to keep expert weavers occupied. As in the book Fingerweaving Untangled, you get help with tips to check your work, how to identify "irregularities" (aka mistakes), what to do about them, how to avoid them in the future. Make bags, belts, and scarves without a loom!
The announcement is that live-streaming is available starting now. For those with slow internet, or who would just prefer the DVD, well, they are making them as I type this, but the process is rather slow. The hard-copy DVDs will not be available until late January ... I am taking pre-orders. |
Categories
All
Archives
May 2023
Categories
All
|

 RSS Feed