|
Some weavers have asked about the bulls eye. Perhaps a bit more information is required. Personally I do not start out with a bulls eye. (It was a local weavers group who insisted that the ‘right way’ to weave was to begin with a bulls eye.) I have been making my way through museum collections, looking for old sashes which include a bulls eye. They seem to be quite rare. The only one I have found had the bulls eye done similar to the image attached, in two steps, not four as in the book. Here’s what I would do: Begin the sash just like regular. Weave the first half of the sash (several patterns anyhow, enough to know how much of a ‘fishtail’ (down slanting weft) you sash wants. At this point it is safe to go back to the starting place, and create enough of a bulls eye to bring the work to a similar ‘fishtail’ shape. 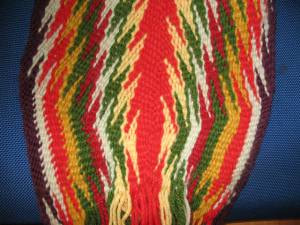 Bulls eye, corrects for the descending weftline Now, the perfectionists will note the smooth join on the right and the jaggedy join on the left and they will want to fix this. Two solutions, actually:
1. Arrange for an odd number of threads in the central arrow area. 2. Arrange the threads so that the center two threads are either both ‘up’ or both ‘down’. Either choice will mean that on one side you will ‘change to the front’ and and on the other you will ‘change to the back’. Hope this information is helpful.
0 Comments
I have been noticing a small spot of color in the ‘wrong’ place in sashes, and have finally put two and two together to see a rather elegant solution to a common problem: The arrow and lightning pattern requires the weaver to count and regularly change the weft across the face of the sash. A common error is a mis-counting, or just plain forgetting to change the weft. 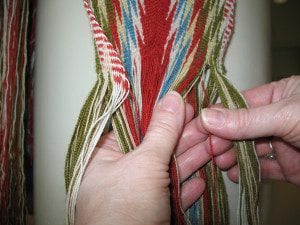 weaving too far Here I notice I’ve woven too far. I am wanting to have a green thread to switch with the pale colored thread. The red should have been switched away 12 threads back. I could un-weave these last 12 threads … or … 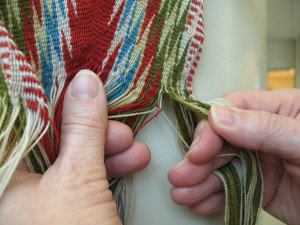 the beginning of the 'weaving too far' solution Change of weft, red for pale, and then bring that red thread back to where it belongs. 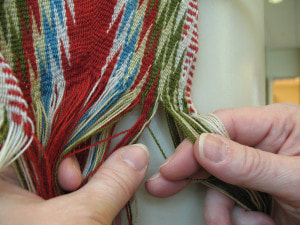 Red and green threads trade places The red and green threads have traded places, and you may now resume weaving as if nothing has happened. 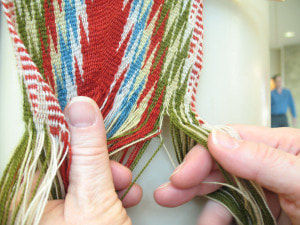 Green now changes weft for pale You now have a green thread for the change of weft with the pale thread. Carry on weaving normally. Note that you will have to be vigilant on the very next row: 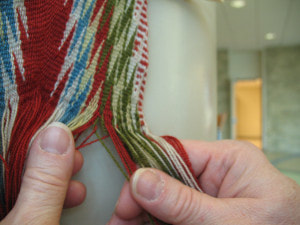 Pay close attention on the next row Make sure that the red thread is back in place for the next row. It may have drifted back toward the green thread that replaced it.
The only telltale of this misadventure will be a tiny red ‘blip’ seen in between the green and pale lightnings, and very slight extra thickness where three threads passed as weft instead of only one. If this red blip bothers you, then repeat it two more times. According to accepted theory, when something happens three times in a row, then it’s a design element. Tell people you did it on purpose … make it into a signature. So, I finished up my travels, and am wanting to share with you some of the insights gained. Examining sashes closely, human error is in evidence. What I am wanting to disseminate is a sense of hope: very skilled weavers of the past have done this before me. Because errors are in evidence in museum sashes, and indeed rather clever corrective measures were taken to get the pattern back on track, why should I hold myself up to a standard higher than ‘museum quality’? A very common error is in evidence when the center of the arrow wanders off to one side. This is not always the sign of a real problem. 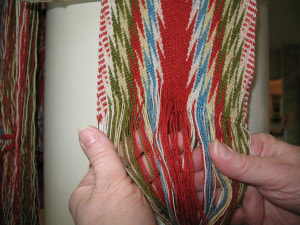 center wanders off, but this is not a problem This weaver worked on one side of the sash forgetting to turn the work over. One side of the arrow grew ahead of the other. Note the start of a new row of lightnings on the right and not on the left. This is not really a problem. The weaver must only turn the work over and work on the shorter side for a few rows to bring things back into order. A more serious problem is afoot when the lightnings on both sides of the arrow attest that the weaver has indeed been working both sides equally. 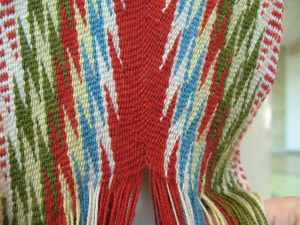 center wandered off to the right, a more serious problem In this image the center has wandered to the right, but the lightnings on both sides of the arrow are at the same stage of development, two rows left to go before ‘adventure disappears’. Many weavers have experienced this would-be-disaster. Often as not it has been building up over many rows, even over several pattern repeats. No, you do not have to rip back 30 rows to make this right. Here’s a simple solution, seen in many an historic sash: 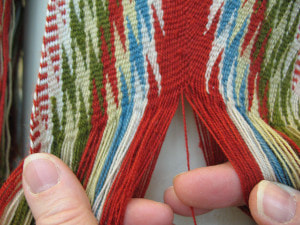 a quick, easy, and historically accurate solution The next time you are ready to start a new patternrepeat, count the threads in the central arrow. Find the very center by counting. Start your weaving by selecting your weft here. Count threads at the center for the next few rows to be sure of your choice of weft until you’ve re-established your center. 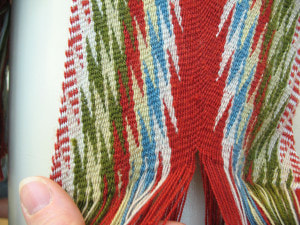 The center back on track again Say to yourself, “I am human. To err is human, to forgive myself is divine.”
Once again I’ve been invited to give fingerweaving demonstrations at two pavilions in the Winnipeg festival, Folklorama. Printed in the local newspaper, the Winnipeg Free Press, reporting on the Pavilion Canadien-français: “CULTURAL HIGH POINT: Sashmaker Carol James and her student show how a ceinture fléchée is made with intricate finger-weaving.” On display at Folklorama you can see the 8 sash samples, made over the past Winter, sponsored by Manitoba Heritage, the St. Boniface General Hospital, and Manitoba Artists in Healthcare.  Fingerweaving demonstration at the Pavilion Canadien-Français Next week I’ll be at the Métis Pavilion. Aug 18-22 I’ll be giving a workshop at Ft Edmonton in Edmonton, Alberta. The BBC is preparing a series on the history of Canada, its history, indigenous cultures and history. Ray Mears is a bushcraft specialist and woodsman. The BBC will be filming an interview with me in early September, Ray Mears learning about fingerweaving. Meantime, I’m working on some sprang neckscarfs. 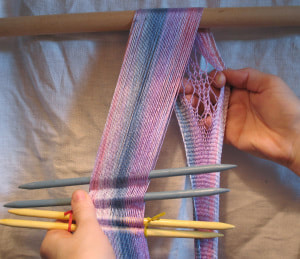 work to create a scarf, the technique is called sprang, the material is hand dyed, reeled silk Had a lovely time at Lower Ft Garry last weekend. Perfect weather, sunny, not too hot. Met lots of interesting folks coming to the book launch, and found it most entertaining to watch the items for the Antique Road Show file past. No, I didn’t bring my camera. Forgot it at home. No photos of the event, but I did snap a pic this morning. I’ve just finished up weaving a whack of sashes, gave them a hot wash to pre-shrink them down to proper size. Those of you who’ve made special orders and are awaiting shipment may recognize one of those here hung up to dry: 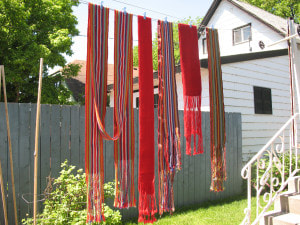 I’m also thinking that some of you may be wanting washing advice. Here it is:
Hand wash in warm water. Your sash has already been exposed to a hot water wash and should not shrink with further washings. To be safe, however, use water no hotter than you’d like for a bath. Detergent suggestions: Use a product such as Zero or Woolite, or a Shampoo followed by conditioner, or a shampoo with conditioner More detailed instructions: Fill the washing machine with enough room-temperature water to cover the sash(es). Add detergent (Zero or shampoo) Agitate a bit to distribute the soap. Add the sashes. LEAVE THE LID OF THE MACHINE OPEN DO NOT ALLOW THE MACHINE TO AGITATE Leave the sashes to soak a while (20 min should suffice) Turn the dial of the washing machine to ‘Spin’ (now closing the lid of the machine) to remove the water. Turn the dial of the machine to allow rinse water to enter. Turn the dial of the machine to remove water again. Repeat until all soap is removed. Hang to dry. The fringes may become a bit tangled by this washing process. Generally this problem is easily resolved by extracting the fringes one by one from the tangle. |
Categories
All
Archives
May 2023
Categories
All
|
 RSS Feed